Basic 4ply Shortie Socks – free pattern
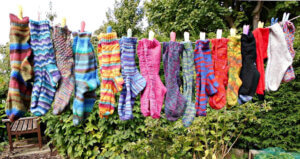
Are you someone who likes your socks to be just a little bit shorter? There are all kinds of reasons why you might like the cuffs of your socks to be at your ankles rather than higher up your leg, and I’ve been asked many times over the years about whether it’s possible to shorten the Basic 4ply Socks pattern to make shortie socks.
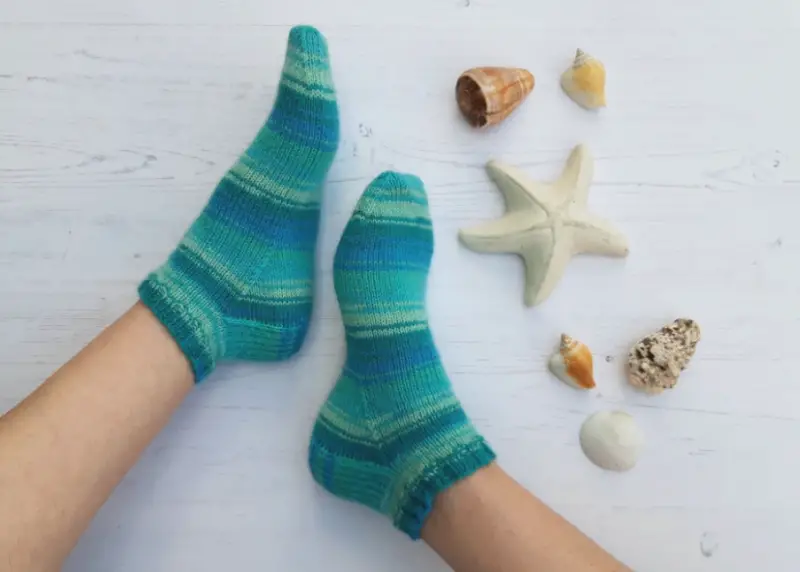
The answer is, of course, yes – all you have to do is start the heel straight after the cuff, but I thought it was about time that I wrote this up as a proper pattern so that you can print it off and keep it with your others!
It was whilst I was writing it up that I started to think about the cuff, as there are as many choices for that as there are days in the week – and more! – so I decided to include a few options that you can use or customise for your own short socks.
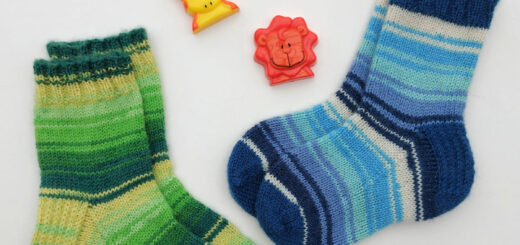
There’s the cuff and short leg … I’ve based this pattern on 8 rows of cuff which is about ¾in; 2cm and then you can add as much leg to it as you like. This version has a cuff then a short leg …
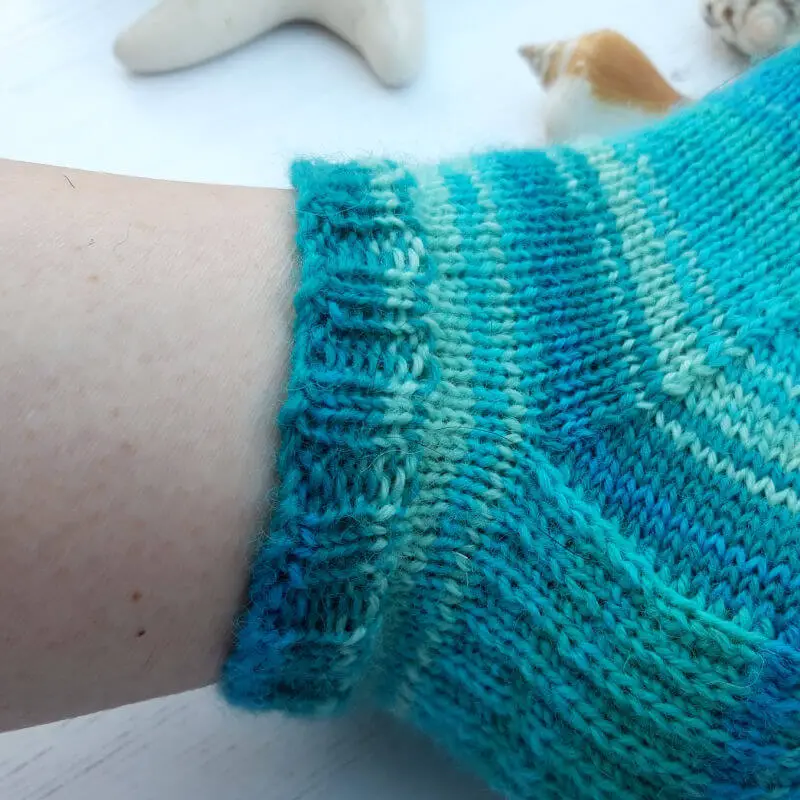
Cuff straight into the heel – these are ideal for trainer socks when you don’t want to show much sock above your shoe …
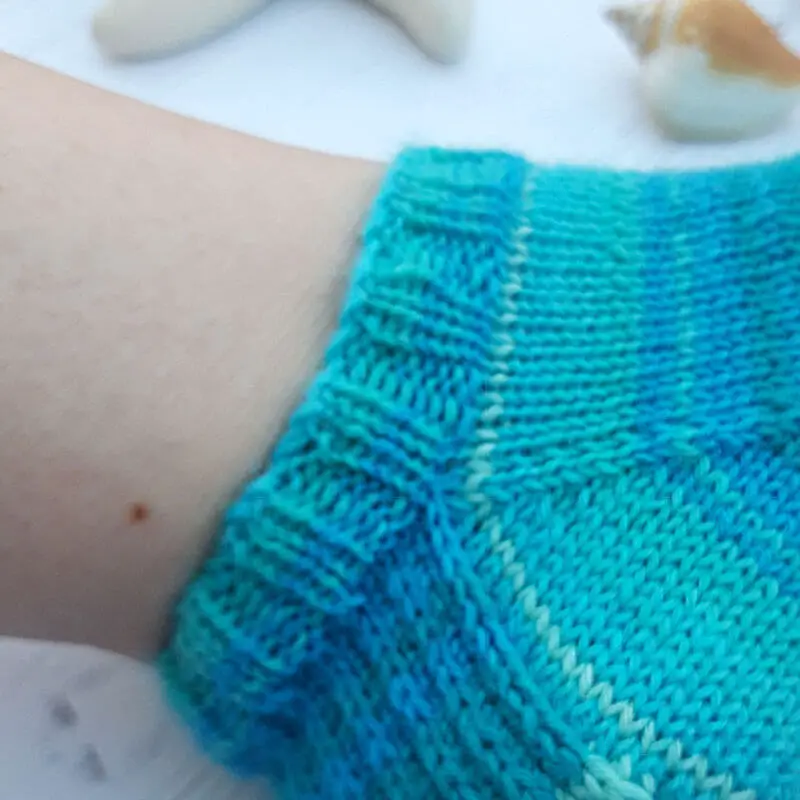
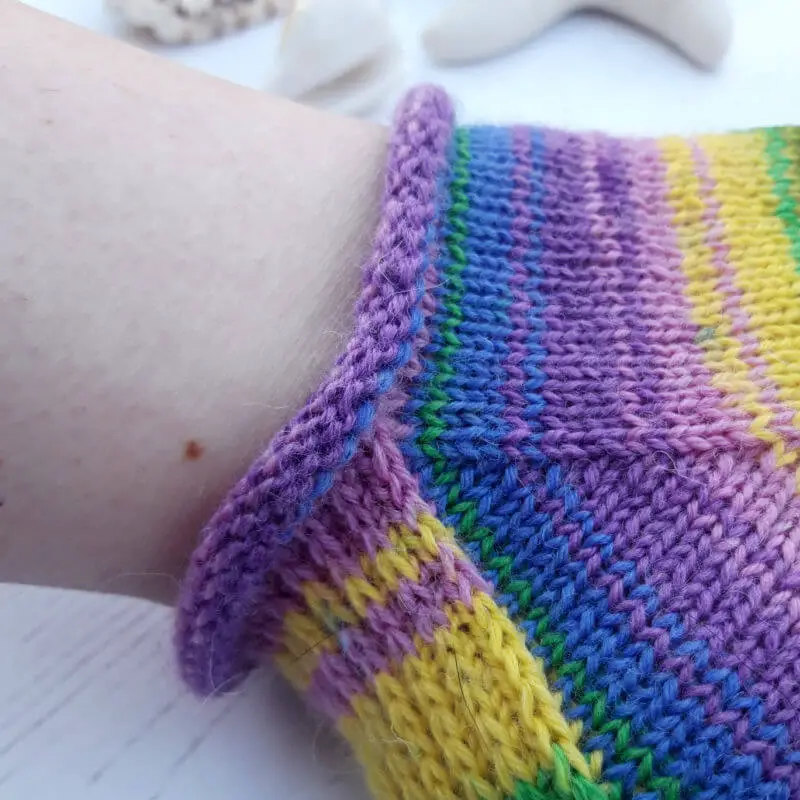
A rolled cuff which again makes a good trainer sock as there’s not much to show, but it’s also really good if you can’t wear anything tight around your ankles. There’s the option to work a small rib after the rolled cuff if you want to do that – it can be quite useful if you think that the cuff will be a bit loose otherwise (and definitely something to do if you want to use this option on your longer socks otherwise they will keep falling down!)
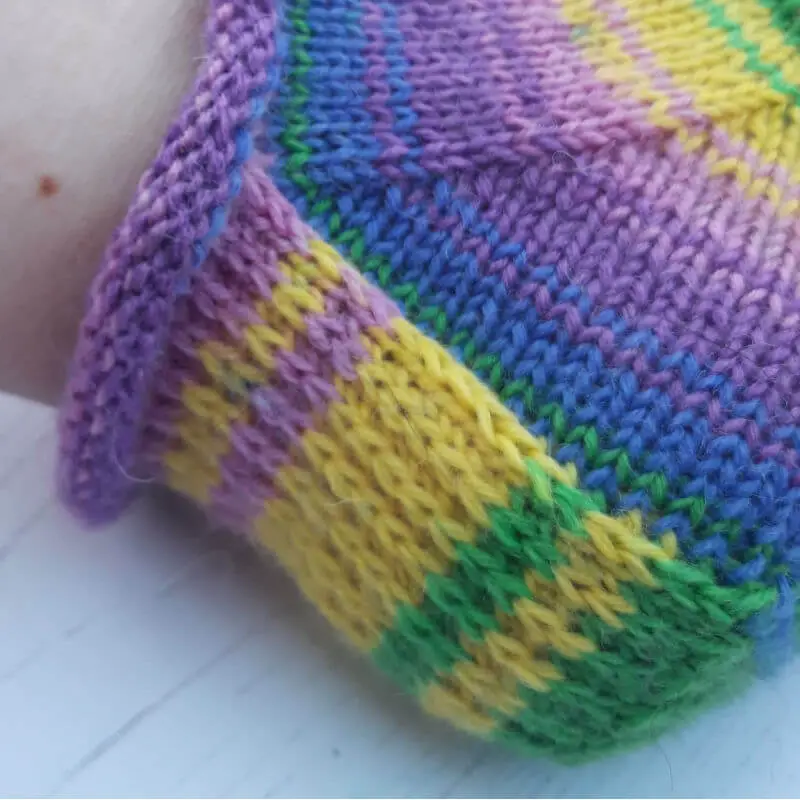
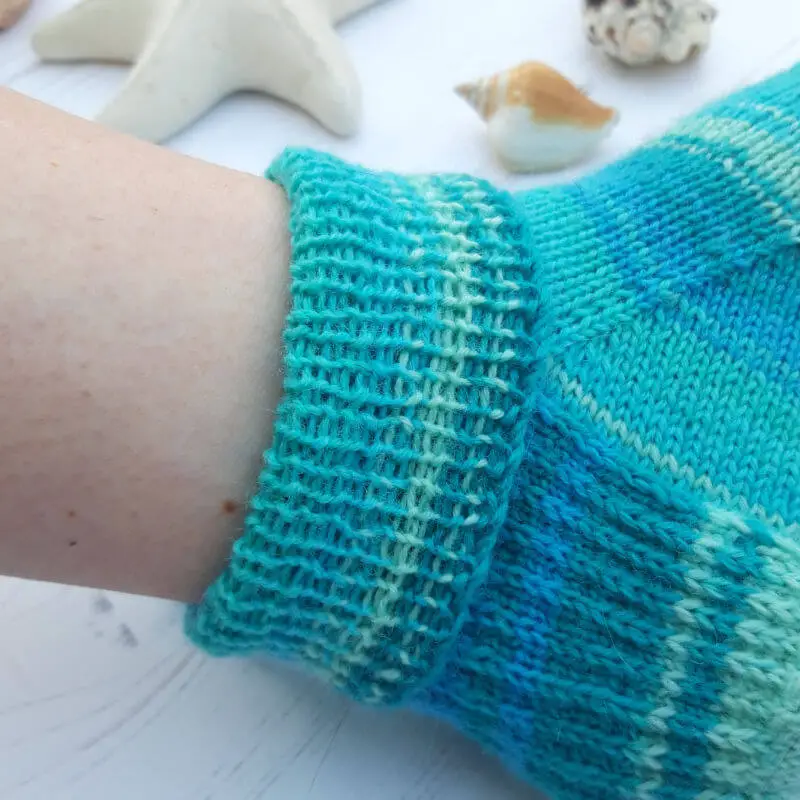
A folded cuff – these always make me think of school socks but there’s something quite nice about a bigger cuff around your ankle!
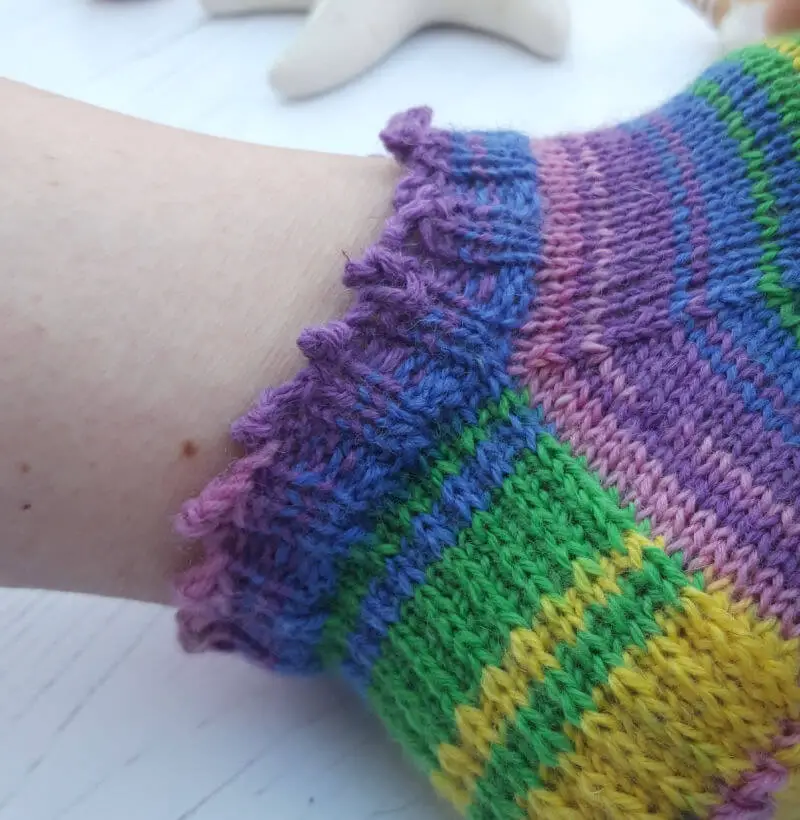
A picot cuff – a pretty option which elevates your short socks from the norm!
So there you are! Five options to get you started, and I am sure that once you get going, you’ll find the cuff that suits you perfectly!
In terms of how much yarn these socks take, the answer is “not as much as a long pair” but of course it will depend on the size of the foot you’re knitting for as to exactly how much that is. Some people can get two pairs of shortie socks out of one 100g ball, others can get one large pair and one short, others can only get one and then they have leftovers. There’s no reason why you can’t use contrast heels and toes if you think you’re going to run out of yarn, and these socks are ideal for making scrappy stripe socks from leftovers. No sock yarn needs to be wasted here! ?
Now, before we get started, let’s take a moment to talk about tension and sizing. Because this sock is based on the Sockalong sock, that means I’ve only given one size because I want you to be able to adjust this for any foot that you choose to knit for. I know that means doing some working out rather than just following all the sizes for a pattern, but on a plain sock like this one it’s not difficult to do and it gives you so many more options than just the sizes written on a pattern. In fact, if anything it will be easier to get to grips with the Sock Stitch Calculation for this sock because you’ve only got one measurement to think about around the ball of your foot, and there’s no worry that you’ll end up with baggy legs! I promise, once you understand why you cast on the number of stitches that you do, you will really elevate your sock knitting skills!
The Sock Stitch Calculation is part of the Sockalong tension tutorial – there’s a written tutorial (including how to work out knitted tension in the round) and there’s a video to go with it too, which you might find more helpful if the thought of doing any maths sends you into a tailspin. I’m no maths genius and I can do this, which means that you can too – and besides, it’s Knitting Maths and that’s completely different to anything you did at school! ? Click this link here to jump straight to the Sock Stitch Calculation.
Are you ready to get started? I’ve written the pattern for you below, and you can also download a PDF copy of the pattern here.
Basic 4ply Shortie Socks
The Basic Shortie socks are constructed as top down socks with a heel flap and gusset. The heel is knitted in heel stitch which creates a durable, cushioned heel. This pattern can be used on its own or in conjunction with the Winwick Mum Sockalong tutorials which are available for free here.
Size
To fit ball of foot circumference 8in; 20cm – see below for advice to adjust for any size of foot
Tension
30 stitches to 4in; 10cm in stocking stitch (worked in the round) on 2.5mm needles (or size required for tension)
Yarn
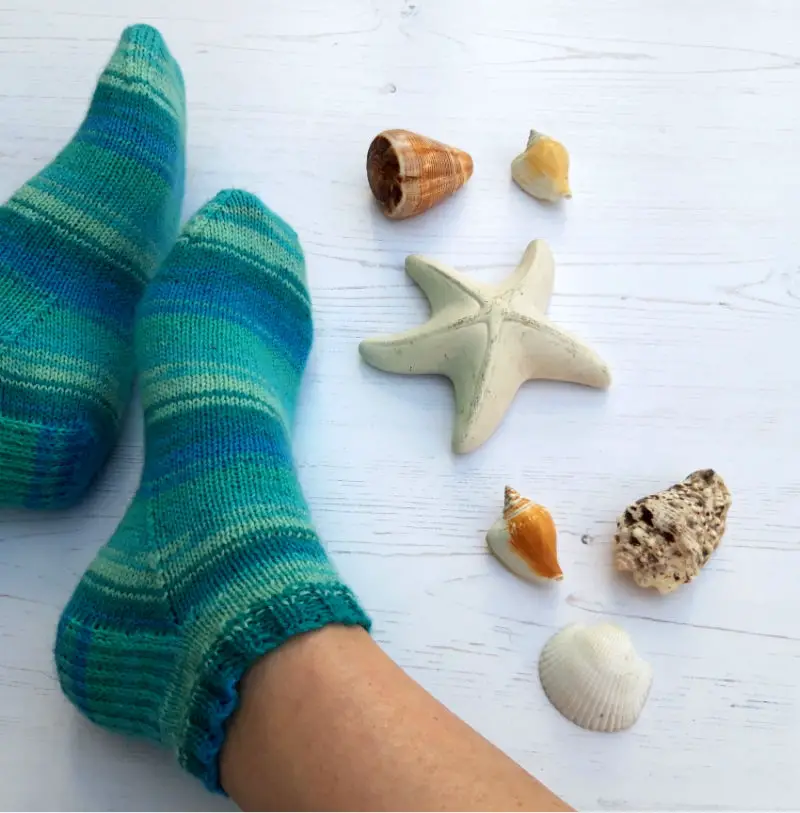
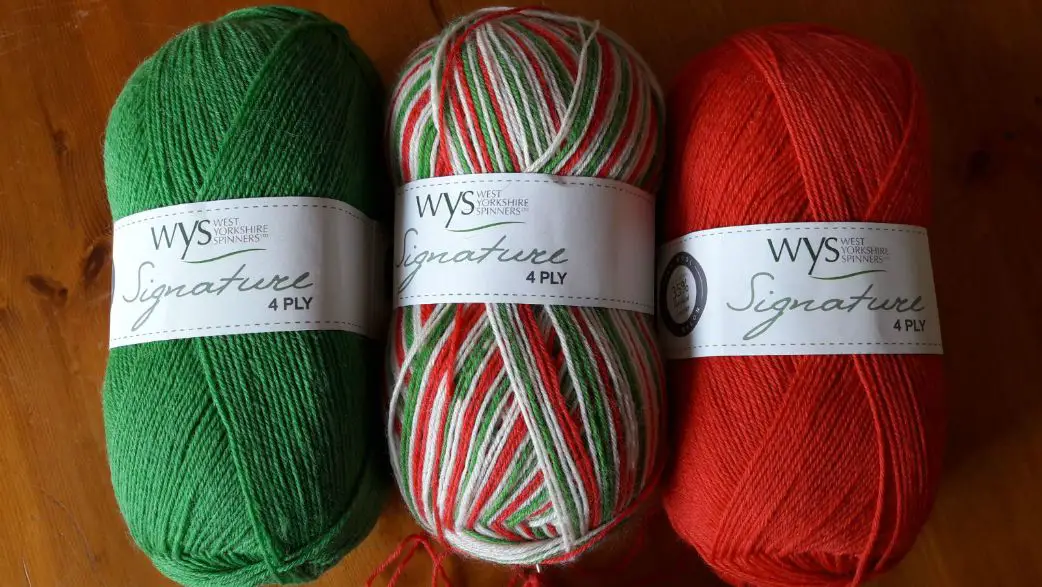
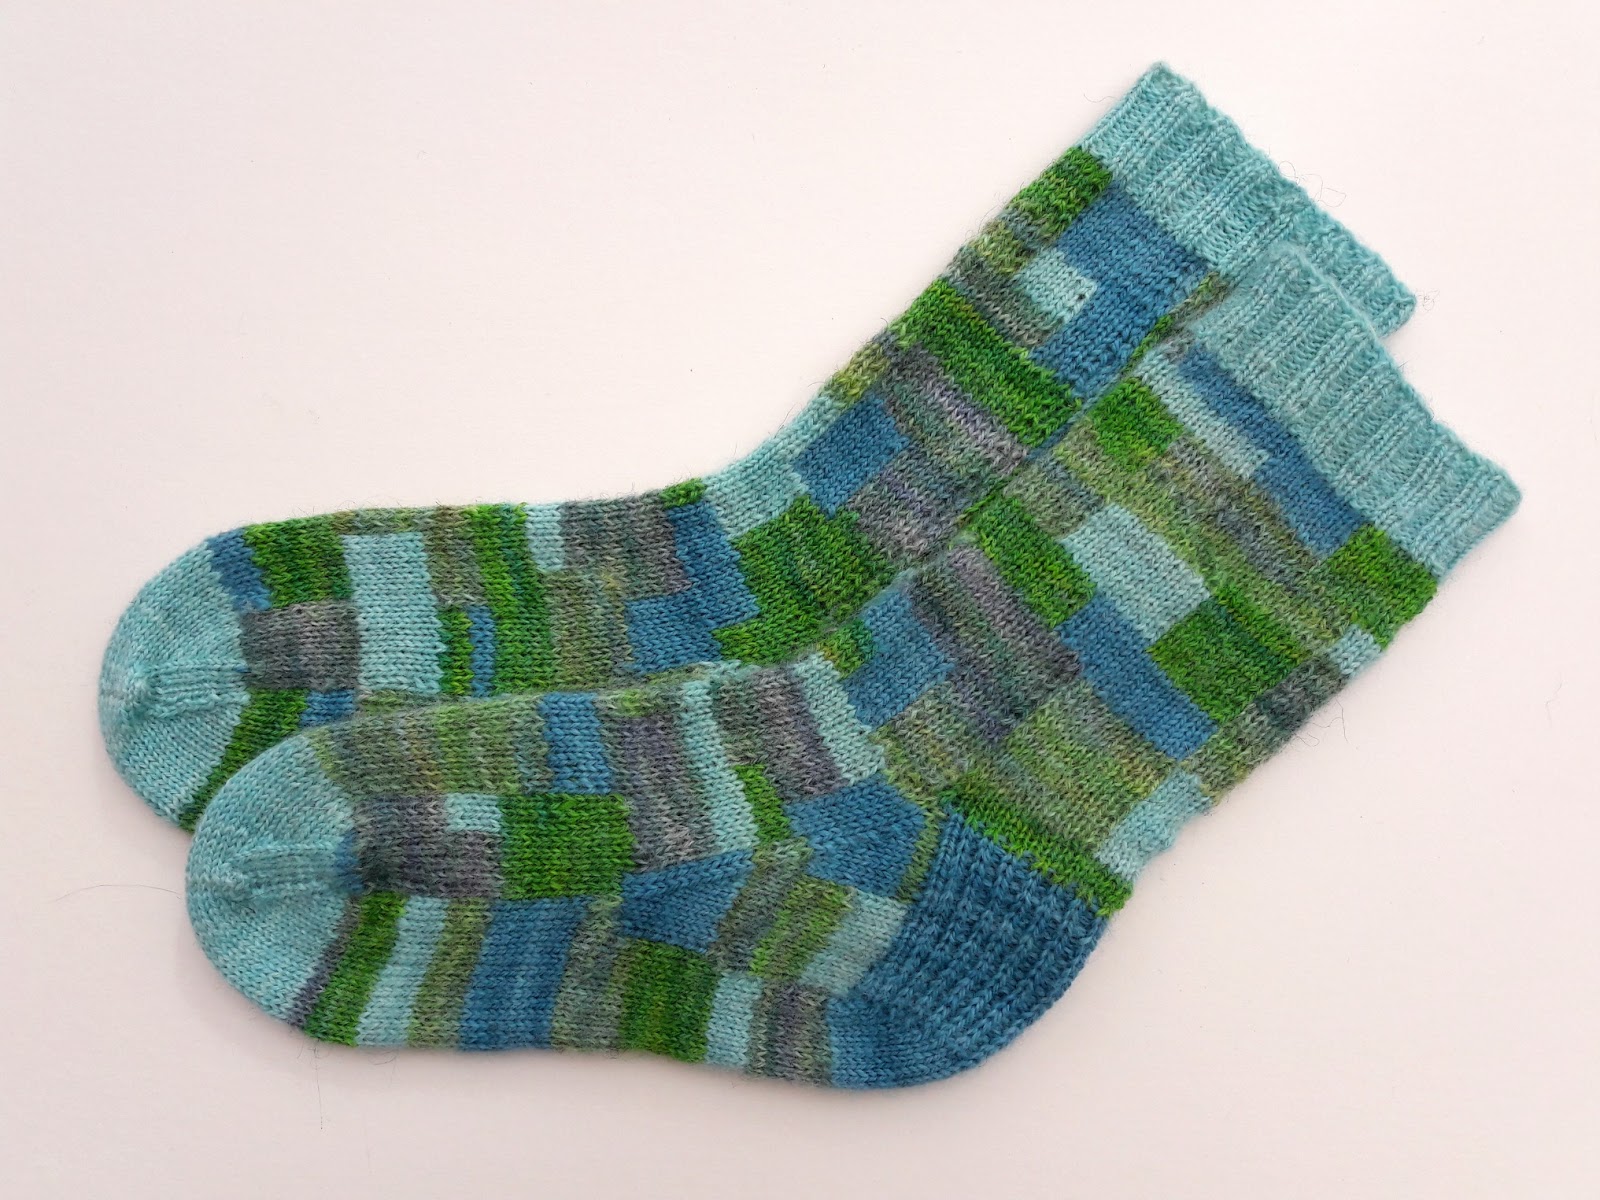
1 x 100g (or 2 x 50g) 4ply yarn – I used West Yorkshire Spinners Signature 4ply yarn in Seascape (873) and Wildflower (872). This pattern is also perfect for leftover yarn as you probably won’t need the whole 100g
Materials
2.5mm needles – short circular needle, DPNs (double pointed needles) or 80cm circular for magic loop
1 x 100g ball of 4ply sock yarn (or 2 x 50g depending on brand)
1 set DPNs size 3.0mm (optional for a looser cuff)
1 set DPNs size 2.5mm (not required for magic loop)
Stitch holder (optional)
Stitch markers
Wool needle
Abbreviations
K Knit
K2tog Knit two stitches together
P Purl
Sl 1 Slip 1 stitch purlwise holding yarn to the back of your work
SSK Slip the first stitch on the left hand needle knitwise onto the right hand needle, slip the second stitch on the left hand needle purlwise onto the right hand needle, slip both stitches back onto the left hand needle and knit together through back loop
St(s) Stitch(es)
( ) Repeat instructions inside brackets
How to adjust the size for this sock
There is only one size given for this pattern but you can use this as a guide for any other size. Hand knitted socks are measured by width and not length, which is easily adjusted, so to get the perfect fit for the person you are knitting for, it is best to measure their feet first and use the Sock Stitch Calculation to find out the right number to cast on. It’s very easy to do, and once you have the numbers, you can use them for any pair of socks in the same weight of yarn. The Sock Stitch Calculation, along with a tension tutorial and a video to help can be found here.
Pattern notes
It is often easier to cast on using DPNs before changing to the short circular needle. If you want to use magic loop you will be able to cast on with the larger circular needle if you prefer to do so, but remember not to pull your cast on stitches too tight. If you use DPNs, you might find it easiest to cast on and work 2 rows before dividing the stitches across the needles.
How to use this pattern
Choose your cuff from the options below then work the remainder of the sock as given further down the pattern. Don’t forget that you can alter the number of rounds of cuff if you want to do that to suit your socks.
Cuff 1 (Rib cuff, plain leg)

Cast on 60 sts using 3.0mm needle. The pattern has been written for a cast on with straight needles; if you wish to join into the round straight away, work row 1 twice and omit row 2.
Row 1: (K2, P2), repeat to end, turn.
Row 2: (K2, P2), repeat to end, turn.
Change to a 2.5mm short circular needle, magic loop or divide the stitches across DPNs and join into a circle, place marker. You will sew up the small gap where you knitted the first two rows later.
Continue in K2, P2 rib for 6 more rounds, then work 8 rounds in knit.
Work heel flap, gusset, foot and toes as per instructions given below.
Cuff 2 (Rib cuff straight into heel)

Cast on 60 sts using 3.0mm needle. The pattern has been written for a cast on with straight needles; if you wish to join into the round straight away, work row 1 twice and omit row 2.
Row 1: (K2, P2), repeat to end, turn.
Row 2: (K2, P2), repeat to end, turn.
Change to a 2.5mm short circular needle, magic loop or divide the stitches across DPNs and join into a circle, place marker. You will sew up the small gap where you knitted the first two rows later.
Continue in K2, P2 rib for 6 more rounds.
Work heel flap, gusset, foot and toes as per instructions given below.
Cuff 3 (rolled cuff)
Cast on 60 sts using 3.0mm needle. The pattern has been written for a cast on with straight needles; if you wish to join into the round straight away, work row 1 twice and omit row 2.
Row 1: Knit to end, turn.
Row 2: Purl to end, turn.
Change to a 2.5mm short circular needle, magic loop or divide the stitches across DPNs and join into a circle, place marker. You will sew up the small gap where you knitted the first two rows later.
Work 6 more rounds in knit, then start heel. Alternatively, work 4-8 rounds of (K2, P2) rib if you would like a longer leg.
Work heel flap, gusset, foot and toes as per instructions given below.
Cuff 4 (folded cuff)
 Cast on 60 sts using 3.0mm needle. The pattern has been written for a cast on with straight needles; if you wish to join into the round straight away, work row 1 twice and omit row 2.
Row 1: (K1, P1) to end, turn.
Row 2: (K1, P1) to end, turn.
Change to a 2.5mm short circular needle, magic loop or divide the stitches across DPNs and join into a circle, place marker. You will sew up the small gap where you knitted the first two rows later.
Work 30 more rounds in K1, P1 rib, then start heel. Alternatively, work 4-8 rounds of knit if you would like a longer leg.
Work heel flap, gusset, foot and toes as per instructions given below.
Cuff 5 (Picot edge)

Row 1: Cast on 5 sts using 3.0mm double pointed needles. Cast off last 2 sts on left hand needle, then slip the remaining stitch back onto your left hand needle. Repeat these instructions until you reach the required number of stitches, bearing in mind that you will need to cast on 1 extra st at the end to make it an even number.
Work heel straight away or work 8 rounds in K2, P2 rib before starting heel flap.
Work heel flap, gusset, foot and toes as per instructions given below.
Heel Flap
Change to 2.5mm DPNs if you are using a small circular. You are going to create the heel flap from half the number of stitches that you cast on, so if you have cast on more or less than 60 stitches, remember to adjust the number of stitches when you start the heel flap.
Row 1: K2, (Sl 1, K1) until you have 30 stitches on your needle, turn.
Row 2: Sl1, P to end, turn.
Row 3: (Sl 1, K1) to end, turn.
Repeat rows 2 and 3 until heel measures approximately 2in; 5cm, finishing on row 3. If you want to make the heel flap longer, continue knitting rows 2 and 3 until you reach the desired length – to make sure that the heel flap is long enough, measure it against your foot from your ankle bone to the floor.

Turn heel
*For a larger or smaller sock, you will need to alter the number of purl stitches in the first row of the heel (marked in bold below), increasing by 1 stitch for each block of 4 stitches extra that you cast on, or decreasing by 1 st for each block of 4 sts less than 60 sts. For example, if you cast on 64 stitches, your first row would be Sl1, P17, P2tog, P1, turn*
Row 1: Sl1, P16, P2tog, P1, turn.
Row 2: Sl1, K5, SSK, K1, turn.
Row 3: Sl1, P6, P2tog, P1, turn.
Row 4: Sl1, K7, SSK, K1, turn.
Continue in this way, adding one stitch between slip stitch and SSK or P2tog on each row (ie, Row 5: Sl 1, P8, P2tog, P1, turn; Row 6: Sl 1, K9, SSK, K1, turn, etc) until all of the heel stitches are used. Depending on how many stitches are in your heel flap, you may find that the K1 and P1 stitch is not required at the end of the last two rows.
Knit across heel stitches if required to bring you to the left hand side of the heel flap (with the outside of the flap facing you) ready to pick up 1 st for every 2 rows of heel flap knitted. Remember that if you made the heel flap bigger, you will need to pick up more stitches. Once you have picked up the stitches, place marker. Knit across the top of the foot stitches, place marker, then pick up 1 st for every 2 rows of heel flap knitted up the other side of the heel. Knit across the top of the heel and then shape gusset as follows.
Note: If you are using DPNs and/or have placed your stitches on a stitch holder, you can arrange the needles as follows: Needle 1 for stitches across heel, Needle 2 for picked-up stitches down side of foot, Needle 3 for stitches across top of foot (knit stitches off stitch holder if required), Needle 4 for picked-up stitches on other side of foot. You may find that stitch markers are not required at first.
Shape gusset
Round 1: K to 3 sts before the marker, K2tog, K1, slip marker, knit to next marker, slip marker, K1, SSK, K to marker.
Round 2: Slip marker, knit to next marker, slip marker, knit to 3 sts before marker.
Round 3: K2tog, K1, slip marker, knit to next marker, slip marker, K1, SSK, K to marker.
Repeat rounds 2 and 3 to shape the gusset. Continue in this way, decreasing by two stitches at the gusset on every other round until there are 60 stitches on the needle.
Once you have 60 stitches again, you can remove the marker at the SSK decrease if you want to but keep the other one in to indicate the start of your round. Continue to knit each round until you reach approximately 2in; 5cm before the desired length ready to start the toes. Don’t be afraid to try your sock on before decreasing for the toes!
Toes
At some point whilst decreasing for the toes, if you are using a small circular you may need to change back to DPNs or use the magic loop method as the number of stitches becomes too small for the circular. It’s up to you when you choose to do that, and how you distribute the stitches across the needles; just keep following the pattern as set below. Create the toes as follows:
Round 1: K1, SSK, K24 sts, K2tog, K1, place marker (if required), K1, SSK, K24 sts, K2tog, K1. (56 sts)
Round 2: Knit one round, slipping markers as you come to them.
Round 3: K1, SSK, K to 3 sts before marker, K2tog, K1, slip marker, K1, SSK, K to 3 sts before marker, K2tog, K1. (52 sts)
Repeat rounds 2 and 3 until you have 28 stitches left and divide these between two needles so that front and back of socks match.
Graft toes using Kitchener stitch, weave in all ends and sew up the small gap at the cuff where you cast on.
Make a second sock, and you’re all ready to go! I hope you enjoy knitting your Shortie Socks! I have listed the pattern on Ravelry for those who are able to still use it (there have been accessibility issues recently) and want to link it in their projects; if you are able to share your photos on social media, I would love to see them – the hashtag for this pair is #WinwickMumSocks.
This pattern is free on this blog and will always remain so, but if you have enjoyed using it and would like to buy me a brew, it will be much appreciated! You can find the donation button in the sidebar on the left hand side. Thank you! xx
This pattern copyright © 2020 Winwick Mum. All rights reserved.
Not to be included in any collection or used for profit without written consent of Winwick Mum.
This pattern is based on my Basic 4ply Socks pattern, which means that you can find photo and video help in the Winwick Mum Sockalong tutorials. You can find out more here:
If you can already knit socks but would like to stay in touch, click the link below to join the Winwick Mum mailing list to hear about the latest blog posts, pattern updates, tutorials and more … but no spam, I promise!







Thank you for the pattern.
You're very welcome! 🙂
love the look of the picot edge
I think that one has been the favourite so far! 🙂
Fabulous pattern once again Christine, thanks so much. You're too good to us really. Stay safe. xxx
You're very welcome – and I love to share! 🙂 xx
I am so happy you have offered a shorty sock pattern. I look forward to using the picot cuff. I also love the blue sock yarn you designed in the shorty pattern. It is a perfect match. I have a ball of it and now know what I will use it for.
Thank you so much Christine, fab pattern, i've been looking for a good trainer sock pattern 🙂
I knit my first pair of socks ever for my husband in February before COVID hit us here in Canada. They were too big 🙁
Nevertheless, my youngest adult son admired them so much that I decided to make a pair of socks for him. He only wears short socks so I modified your sock pattern to make a pair of short socks for him. I finished them in March when we were locked down in Canada and I couldn't see him for months. By the time I was finally able to socially distance visit with him we were into our hottest summer ever. We have had more than 30 days over 30C — we usually average 15 days over 30C. I tucked the wool socks away and I will give them to him for Christmas.
By the way, I made his socks with cuff 2. I think my next pair of socks will be short socks with a picot cuff for me!
Thank you, Christine! I'm not sure if I will be knitting it, but I sure learned a lot reading it!
Thank you for the pattern. Your knitting is absolutely beautiful.
Thank you! xx
have already modified your sock along tutorial for the basic sock for my eldest who wanted short socks, i prefer long socks myself, i stuffed up a little on the sizing, they fit her okay but just a tad loose, think because i like using Ann Budd's idea to knit the leg on a size bigger needle (i love circulars, cast straight on & away i go!) even when i make different patterns i tend to always refer back to your tutorials when i get stuck; love how simple you keep it.
thank you for sharing your wonderful sock knowledge with all of us
stay safe in these trying times
Hello Christine,
I've knitted several pairs of your basic 4-ply sock pattern and am now tackling a pair of shortie socks. I'm on the heel flap and notice that the instructions seem to differ between the online and PDF versions. The online version is like the basic 4-ply pattern and the PDF has more slip stitches. I'm fine with either, but thought you might like to know.
I love your patterns and have learned so many new knitting skills by knitting socks.
Thank you! x
Thank you very much for spotting it! I could say that I was trying to keep you on your toes, but it's entirely my typo as I have merged two heel flap versions together on the PDF 🙄 I've fixed it now if you need a new version xx
Ah, thank you. You should definitely say you were trying to keep us on our toes 😂🤣
I'm loving the shortie socks pattern – I plan to make at least one pair of each version! xx
Ooh fabulous – and yes, of course it was a deliberate mistake to check people were awake 🤣 xx
Hi lovely Christine, I think your Cuff 1 pic on the PDF shorties pattern, should actually be the Cuff 2 picture. Cuff 1 on the PDF goes straight into heel. Cuff 2 is the 8 rounds in knit after the cuff. The pics need to be swapped around. Either that, or it's wonky because I am upside down in Oz??? 🙂
Hi Avie, thank you – you are absolutely right and it's entirely my typo and nothing at all to do with you being in Australia! Fixed now … this PDF has had it's fair share of hiccups! Thanks again for spotting it! xx
Hello, I'm pretty new to socks, I did the heel flap to 35 rows. After my turn heel, I had 18 stitches left on that needle. I am wondering how many stitches I need to pick up on the gusset? Would it be 12 on each side?
Hi Ashley, you'll pick up 1 stitch for every 2 rows knitted – so basically that means you pick up the large slipped stitch that runs down each side of the heel flap. I can usually pick up 19 stitches, including an extra one in the gap between the heel flap and the top of the foot stitches. Just make sure you pick up every big loop and you should be fine 🙂
Thank you so much! That really helps!
Can I get your pattern for your basic 4 ply sock. Thank you very much. 😍
Hello! Yes, you can find it with the Sockalong tutorials here 🙂 xx
have you any patterns done on 2needles as I have had a stroke and can’t hold multiple needles. thanks ????
Hi Karen, thanks for your message. I don’t have any patterns for two needle socks (although there are plenty on Ravelry if you can get onto the site) – but I wonder if you would be able to manage a long circular needle and use magic loop? That way, you’re only actually holding one needle with two good-sized tips, you only work the knit stitch (for the most part) as you’re knitting in the round and you can complete the whole sock on that same needle. If you have a look at my Sockalong tutorials, you’ll see they’re written for magic loop as well as DPNs and short circulars, so you could see what’s involved and whether that might work for you xx
I’m so exctited!! I’ve just started knittin gsocks and was trying to think of a way to make shorter ones!!
THank you!
Oh that’s brilliant, I’m glad you found the pattern! 🙂 xx
(Just signed up for the newsletters & Sock-along ?)looking forward to it. & I’m hoping it will help me get my ‘Mo-Jo’ back, as I’ve frogged the last 3 projects started… so frustrating!
That’s brilliant – I hope the shortie socks fly off your needles! 🙂 xx