
Swirly Slouchy Hat – free pattern
Ooh, just look at what I’ve got!
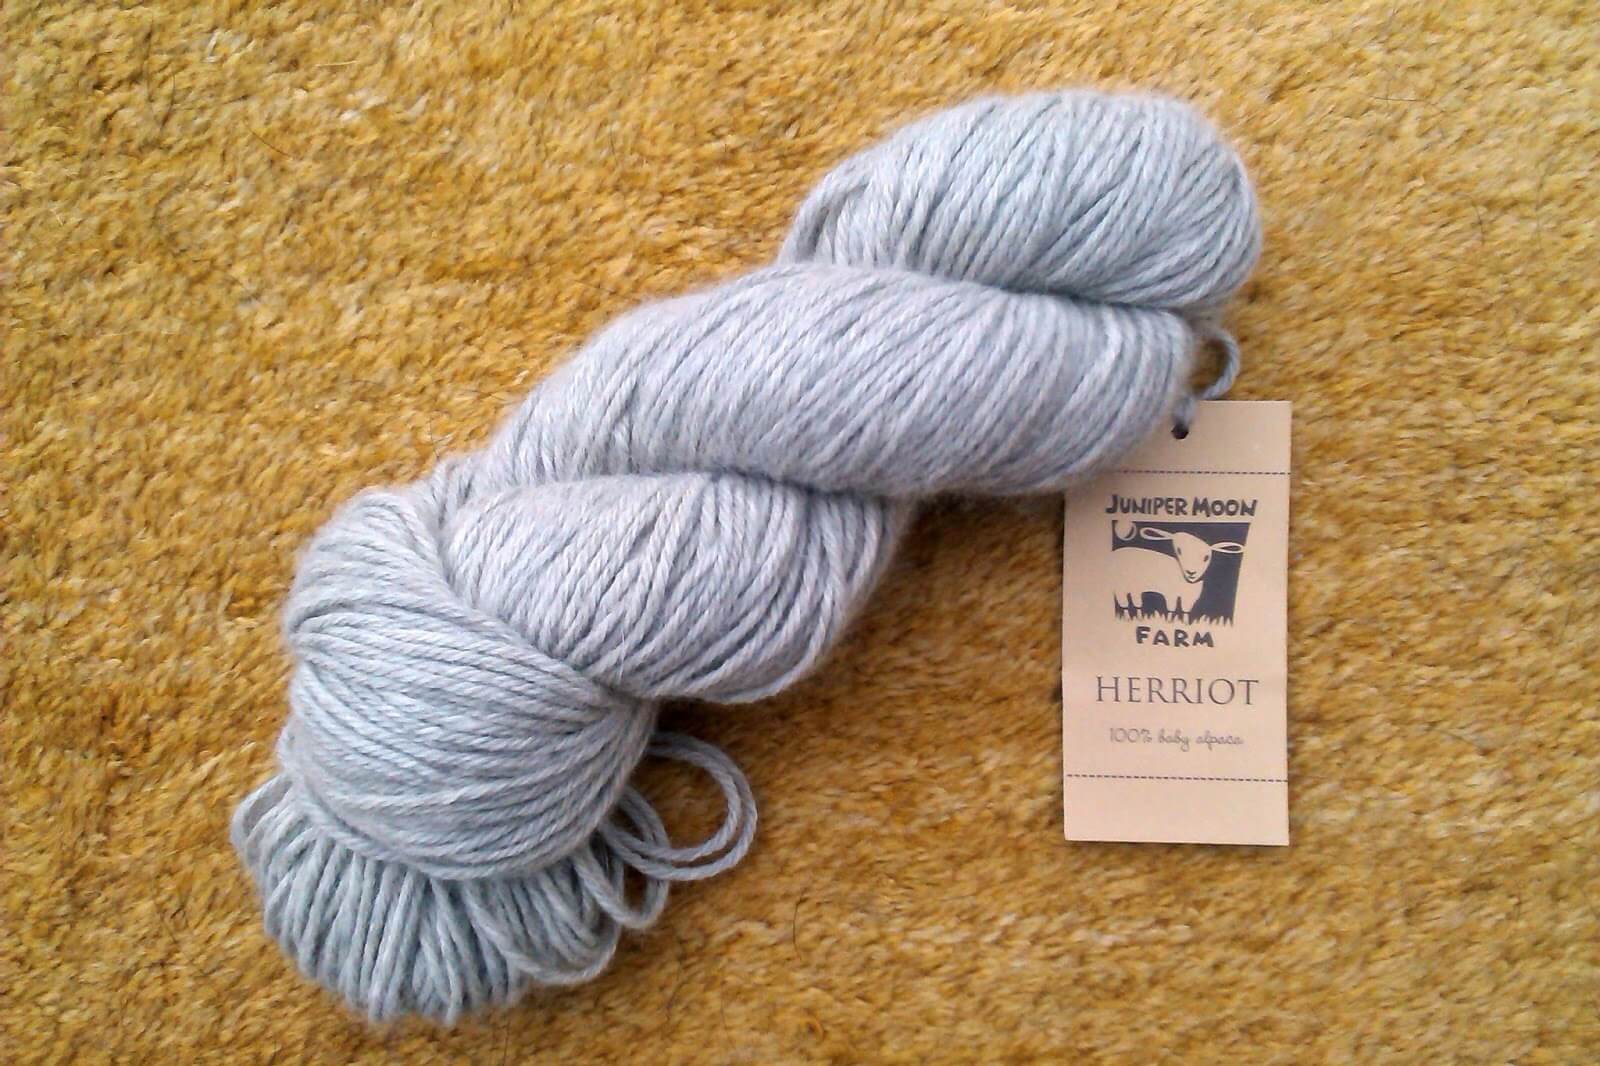
It’s a skein of the most squeezeable, squishable, strokeable, smoochable softest baby alpaca yarn I’ve ever got my hands on. In fact, I’m finding it hard to keep my hands off it so you’re lucky that you’re getting to see a picture of it at all!
It’s Juniper Moon Farm Herriot yarn and the lovely people at Black Sheep Wools gave it to me (or rather, I practically snatched it out of their hands!) so that I could have a play with it and tell you what I think. And what I think is that it’s just beautiful. And yes, it is named after a certain famous Yorkshire vet! It’s a lovely shade of pale grey (shade 9, Travertine) and as soon as I saw it, I wanted to make a hat with it. Well, after I ever got round to unwinding the skein, that is. I left it for a few days so that I could just give it a squish when I was passing.
And then the evening came when it was time to wind it into a ball. I was worried that somehow some of that lovely softness would disappear when I took the skein apart, but I needn’t have worried at all. I now had a lovely soft ball of yarn instead of a skein, so I spent a few days giving that a squish too.
Black Sheep asked me if I could make an accessory with the yarn and this fitted beautifully with my immediate thought that it would make a fabulous hat. Not just any old hat. I wanted to make a slouchy hat, one that would still feel soft and squishable even when it was keeping your ears warm on a cold day. It took a bit of working out as I’ve never created a hat without a pattern before and I had to bear in mind that alpaca yarn stretches and doesn’t spring back into shape like wool does. Having said that, it was good exercise for my brain and having to think about things a bit harder than usual never does anyone any harm.
Finally, it was time to put yarn to needles. The yarn is lovely to knit with. It doesn’t split at all and the fabric is nice and even. I would definitely consider this for a bigger project, and if they made it in sock yarn I’d be first in the queue to try it out! I found that I couldn’t get the gauge listed on the ball band (19 sts and 30 rows to 10cm) but instead my 4.5mm needles brought the gauge to 21 sts and 28 rows to 10cm. It’s a nice tension, not too tight or too loose and I’m happy with it.
I’m even happier with the hat that came off my needles. I’ve called it a Swirly Slouchy Hat because of the purl stitch swirls that go around the hat to create some texture in the yarn.
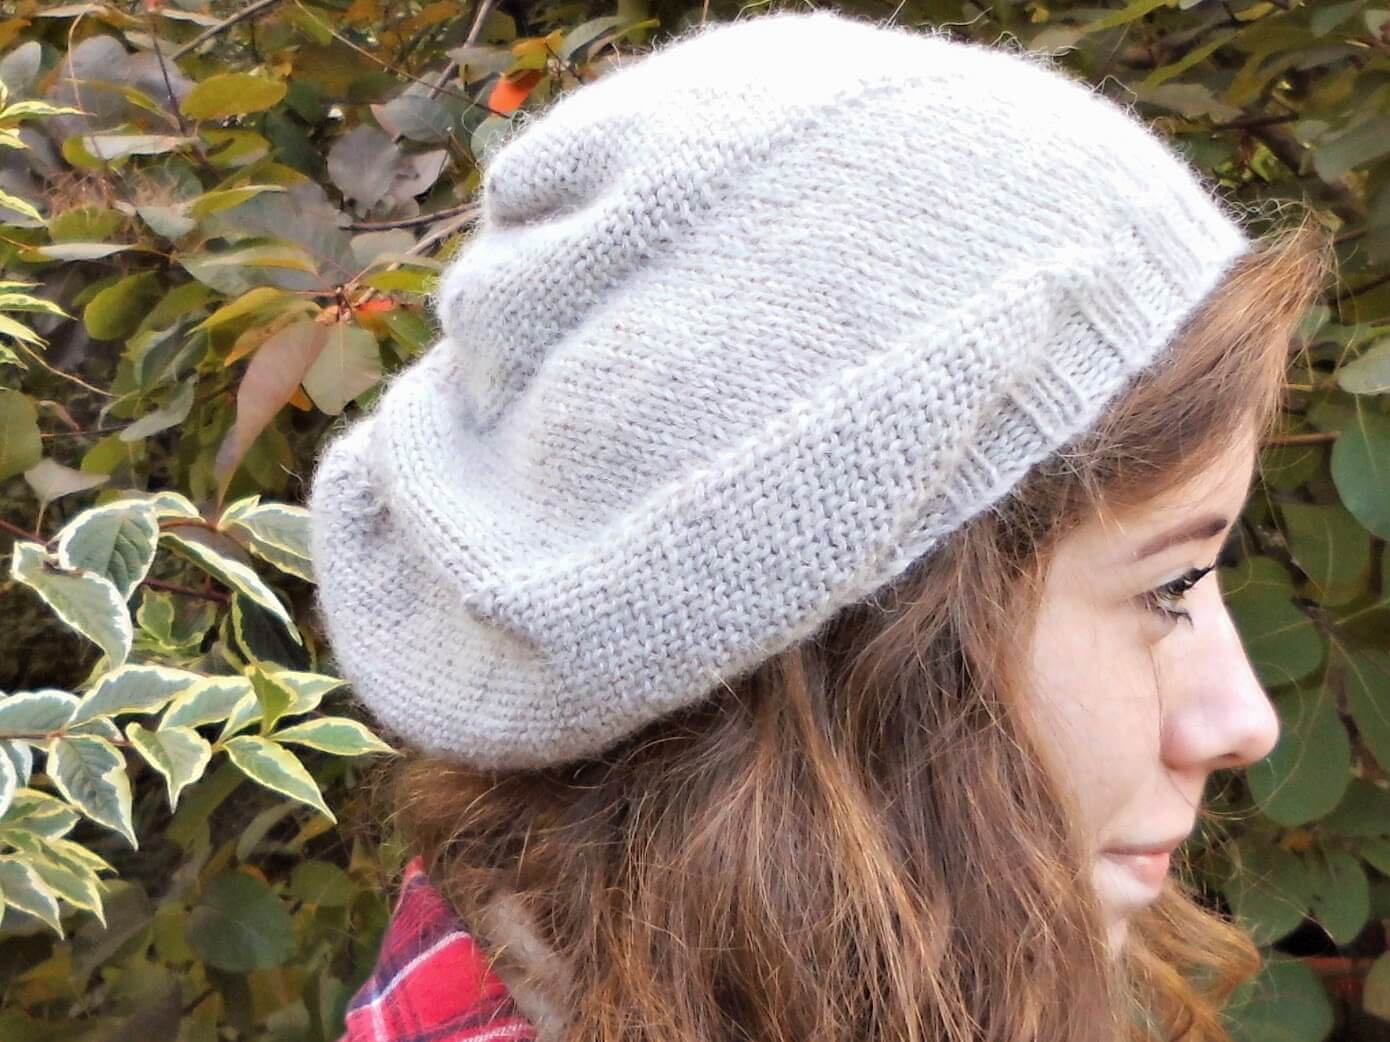
The hat is knitted in one piece on circular needles and the swirls continue through the decreases to create this effect which reminds me of a sand dollar I was given by my Canadian aunt when I was quite small.

Some people find the idea of knitting on circular needles quite daunting, but honestly, it’s not as difficult as you might imagine. In fact, knitting in the round is often easier as you don’t have to worry about turning your work and as long as you remember where you started, you’re unlikely to forget where you’re up to. It’s also easier to carry projects around with you if they’re not on straight needles as you’re less likely to poke anybody else with your elbows. I very rarely use straight needles for anything other than casting on these days as I find circulars so much more versatile, even for “regular” knitting rather than in the round.
The hat used less than one whole skein so the good news is that I have some left to squish as well, and it’s also not as expensive as it feels which is also good news for my bank account as I think I might have to buy some more of this! The yarn is available at Black Sheep Wools and they have the pattern in their free downloads as well, although they have said that I can share the pattern with you here too.
Swirly Slouchy Hat
(You can download a PDF copy of this pattern here)
Wrap up for the winter in this gorgeously soft alpaca slouchy hat with textured panels that swirl to the crown. The hat is
constructed in one piece, knitted in the round on circular needles.
Materials
1 skein of Juniper Moon Herriot yarn, shade 9
4.5mm circular needles 60cm length
3.5mm circular needles 60cm length
tapestry needle
Gauge
21 sts and 28 rows to 10cm on 4.5mm needles
Finished size
Fits head circumference 20” (remember that it will stretch!)
Abbreviations
K Knit
P Purl
M1 Pick up the loop lying between the next two stitches and knit into the back of it to make a new stitch.
SSK Slip the first stitch on the left hand needle as if to knit, slip the second stitch on the left hand needle as if to purl, transfer both stitches back to the left hand needle and knit into the back of them as if they were one stitch
Pattern
Cast on 96sts on 3.5mm needles. If you prefer to do so, cast on with straight needles then transfer the stitches to a circular for the first round. If you cast on with a circular, take care not to twist the stitches as you join the round. Place marker to indicate the beginning of the round.
Round 1: K2, P2 to end
Continue as above until 10 rows have been worked.
Increase row: *K2, M1* to end of round (144 sts)
Change to 4.5mm needle.
Round 1: *K24, P24* to end of round, slip marker.
Round 2: P1, *K24, P24* to last 23 sts, P23.
Round 3: P2, *K24, P24* to last 22 sts, P22.
Round 4: P3, *K24, P24* to last 21 sts, P21.
Continue in this way, moving the blocks of 24 sts along by 1 stitch on every round to create the swirling pattern. (Note that the last block of purl stitches of the round will always appear to have one stitch more than the other blocks but this will be rectified each time you reach that block and work 1 knit stitch into the beginning of the block.) Continue until hat measures 20cm from cast on edge, working past the stitch marker to the end of the purl section which has the extra stitch.
Decrease for crown:
Keeping pattern correct, [SSK, K to last 2 sts of section, SSK, K1] in knit sections and [P2tog, P to last 2 sts of section, P2tog, P1] in purl sections to create the crown. Work these decreases into every round until 12 sts remain.
Finishing off:
Cut yarn, leaving an end long enough to thread through the 12 remaining stitches. Pull tightly and fasten off securely.

So there it is, my first attempt at creating a hat and I’m very pleased with it, even if I say so myself! Do let me know if you make one for yourself – I’d love to see!
This pattern copyright 2014 © Winwick Mum All rights reserved.
The yarn for this project was kindly donated by Black Sheep Wools.
This pattern is free on this blog and will always remain so. If you’ve enjoyed using it and would like to support my work so I can keep blogging and designing, you can browse my shop for patterns and books or buy me a brew – both are very much appreciated. Thank you! xx


If you would like to stay in touch, click the link below to join the Winwick Mum mailing list to hear about the latest blog posts, pattern updates, tutorials and more … but no spam, I promise!


It is a lovely hat, and as you say the yarn looks so soft, you can almost feel it through the screen!
Very well done!
Lluisa xx
Thank you! It really is lovely yarn, one of the nicest I've knitted with! xx
Mmmmm! It looks lovely! A trip to Black Sheep is on my list for the gap between Christmas and New year!
You'll be spoiled for choice at Black Sheep – they've got lots of beautiful colours in the Juniper Moon Farm plus more than enough other yarns to choose from! Oh, and don't forget to pop into their cafe – their lemon cake is amazing! xx
You don't say where to change needles.
You're absolutely right – thanks for spotting that! I've updated it now. You change needles to the bigger size after the rib section, just as you would for a jumper xx
Thanks. I just kept on knitting,about half the hat til I realised. Lol,
I'm sure your hat will look brilliant anyway! xx
Can't get Black Sheep here in New Zealand (at least not that I can find!) I love the look of the hat though, and would love to knit it a bit later in the year (it's the height of summer here right now) so can you tell me what sort of ply I'm looking for?
It's a double knit yarn, Adrienne, so anything that knits to a similar gauge should be OK. I'm pretty sure that Black Sheep Wools ( blacksheepwools.com) will deliver to New Zealand, but other UK sites will as well – and this yarn is still available so if you do a Google search you might find somewhere closer to you that stocks it if you wanted to use it 🙂 xx
Hi
I’m obviously missing something drastic here.
I have cast on 94 sts and done the first row of k2 p2.
This makes the first 2 sts on row 2, p2 so not a rib pattern.
Also with 94 sts cast on when I make the sts in row 11 this makes 47 sts which does not make up to 144 sts as stated in the pattern.
I am used to reading patterns and have made several pairs of your socks but I can’t work out what I’m doing wrong.
Help!!!
Gail
Hello! This was one of the first patterns that I wrote so isn’t quite as wordy as my later ones! I have assumed that you will have used a circular needle and joined into the round after casting on, but if you wanted to use straight needles then you would slip the stitches across rather than knitting them, but if you want to work the first two rows on straight needles then it’s fine to work the stitches as they present themselves so that you can knit onto your circular needle on round 3 from the right side.
You’ve also spotted a typo, so thank you – the cast on should be 96sts and not 94 and then the increase round will work out. My apologies as you’ve got to round 11! xx