
Basic 4ply Children’s Socks – free pattern
Is there anything nicer than seeing small feet encased in woolly socks? Every time I see children in hand-knitted socks, my heart melts – after all, why should adults have all the best socks?! It’s about time there was a free pattern for children’s socks on my blog – and here it is!
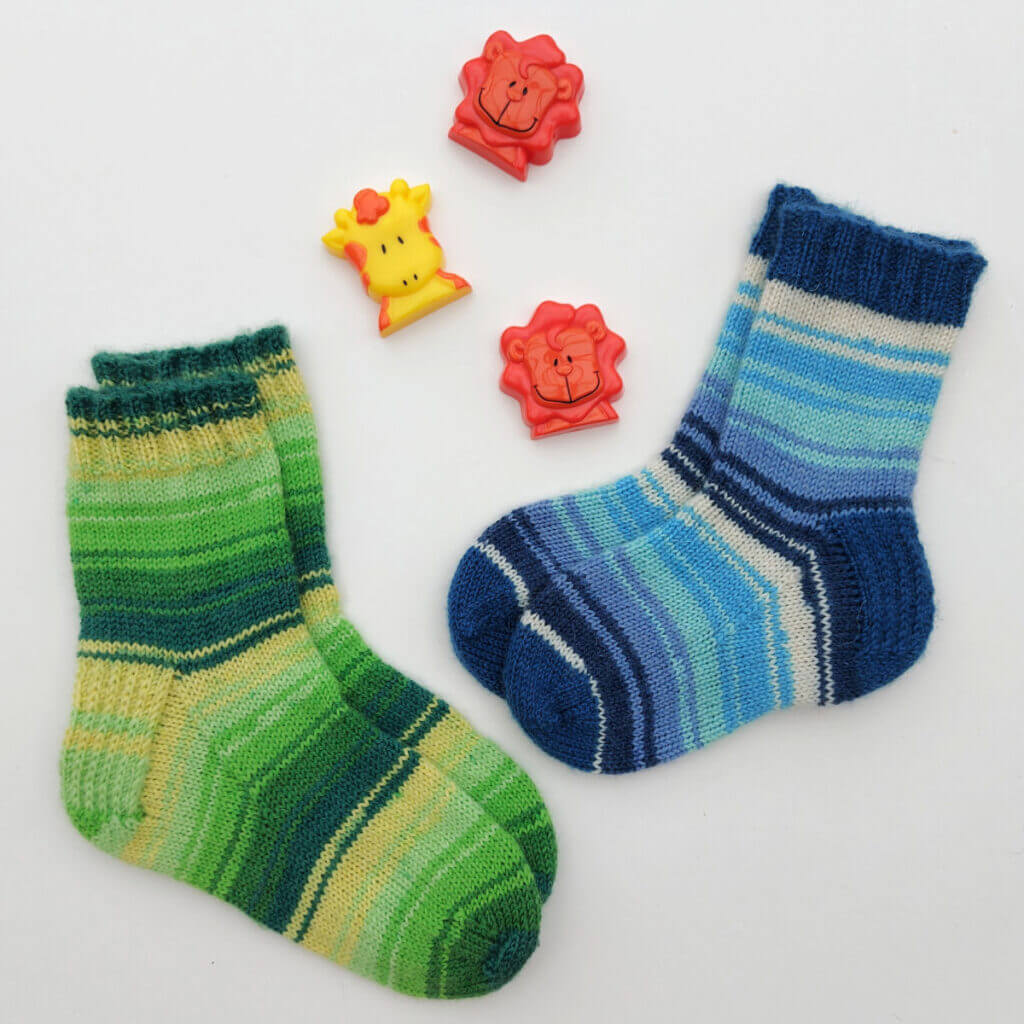
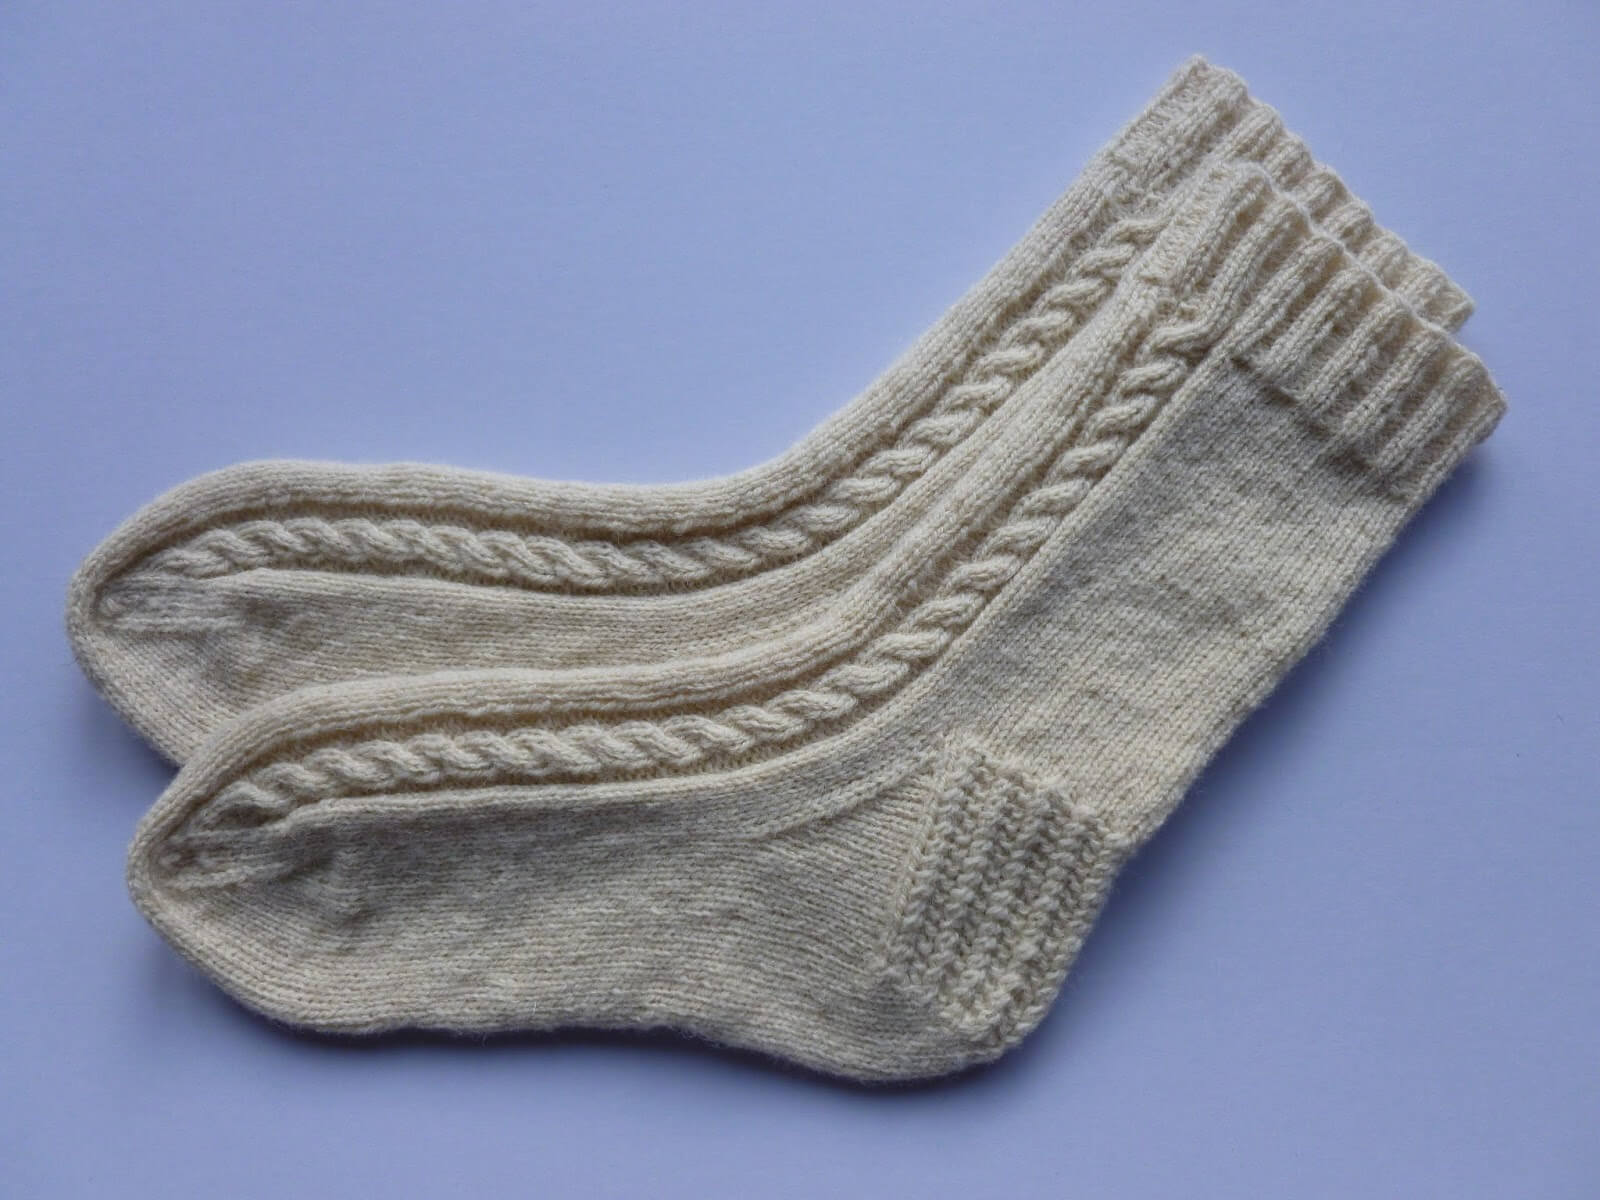
Yarn: West Yorkshire Spinners Signature 4ply in Spring Green (left); Winter Icicle with Pacific contrasts (right)
“I really want to knit socks for my … (insert small person here) … how do I adjust the Basic 4ply Socks pattern?”
I can’t tell you how many times I get asked that question – and it’s a lovely one! The Basic 4ply Socks pattern was written to help anyone knit a pair of socks and although it’s written for one size, the idea is to show that it really is very easy to make those socks bigger or smaller – and I absolutely love it when someone wants to share the sock love with someone else, no matter how big or small their feet are!
There’s no better way (in my totally biased opinion) to show someone how much you love them than by knitting them a pair of socks and what better way to use up leftovers than to make smaller versions of your own socks for the tiddlers in your life? I really love to see photos on social media where there’s a pair of little feet encased in the same yarn as bigger feet; it’s not always easy or practical to dress in the same way as your children but matching socks? Even the most self-conscious tween might be inclined to allow that one!
I’ve gradually been adding to the Basic 4ply Socks “stable” over the years – there are patterns for Basic 4ply Knee High Socks, Basic 4ply Shortie Socks (and not forgetting the Basic 6ply Socks and the Basic 8ply (DK) Socks based on the same pattern shape) and the latest addition … drum roll please … the Basic 4ply Children’s Socks!
Now that my girls have bigger feet than me, it’s been a long time since I knitted children’s socks – this was the last pair I made for my Two at a Time Socks tutorial and these particular socks were hung up on the Yarndale Sock Line and eventually went to warm some small feet at a children’s hospice in Wales.
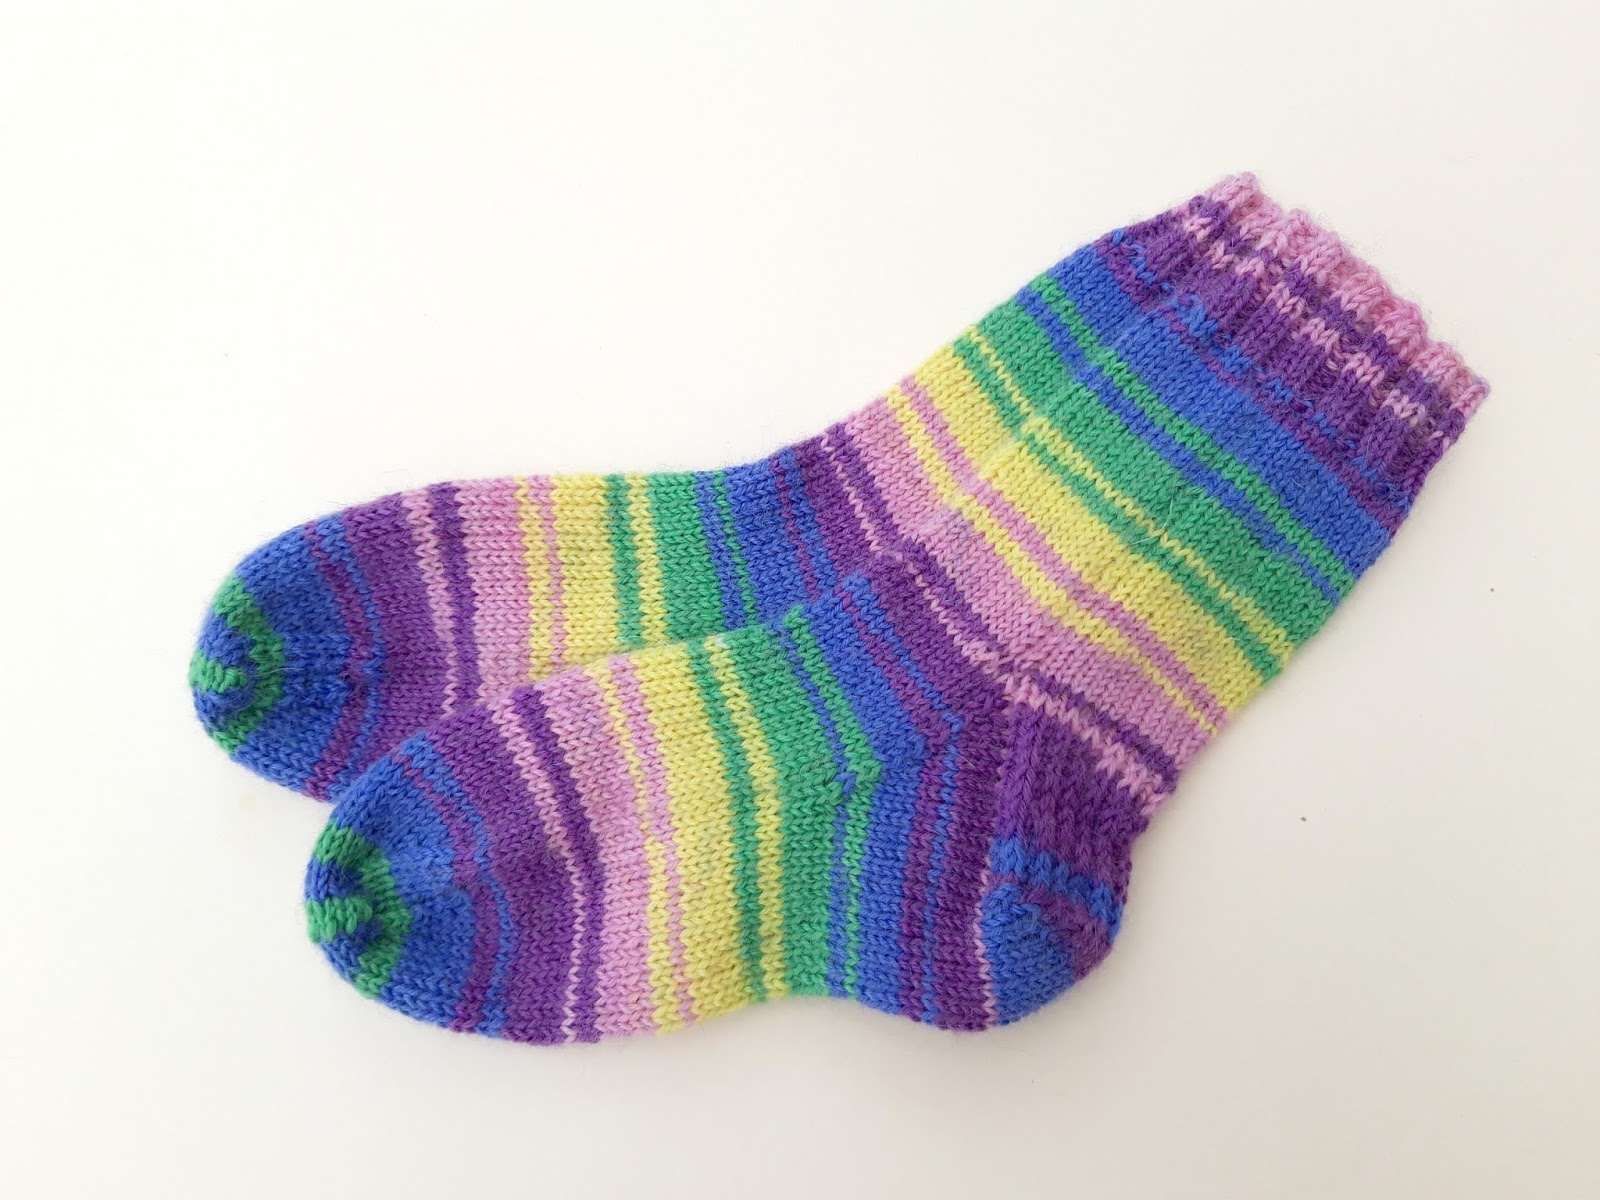
They’re knitted in West Yorkshire Spinners Signature 4ply in Winwick Mum shade Wildflower and I think they look super-cute! You can see that they look exactly the same as the Basic 4ply Socks that you might knit for yourself, but are smaller. This pair was knitted on 48sts and they really are a quick knit – although when you are working with such a small number of stitches, you do have to think about what needle you’re going to use as it can get a bit tight on a short circular if that’s your preference – this could be the perfect opportunity to practice another needle technique!
I also choose to knit children’s socks that have a definite heel in them rather than being tube socks. I didn’t like wearing those myself when I was little and always preferred to wear “proper-shaped” socks. It can feel like a thankless task if your little one grows out of socks at a great rate of knots, but it tends to be the length that changes more rapidly and not the width of the socks so it is possible to cut off the toes and add in extra length and re-knit the toes if the rest of the sock is still OK.
The reason that I decided to create this version of the Basic 4ply Socks pattern is that I know that lots of people do want to knit for small relatives in particular, and often they don’t live with the children they are knitting for. Trying to work out the size can feel like a daunting task before you’ve even started – even more so than knitting surprise socks for adults, I think – so I’ve tried to make it easier by giving some general sizes to use as a guide and you can find that at the end of the pattern section of this post. Just like the other Basic 4ply Socks patterns, this one is written for one size so that you’ve got the information, and then help is given so that you can adjust the socks for any size that you need to knit for. Don’t forget that if you’re new to socks, you can use the Winwick Mum Sockalong tutorials to help, and if you want to work contrast cuffs, heels and toes or even stripes, you might find my Contrast Cuffs, Heels and Toes tutorial useful as well.
The heels are heel flap heels created with heel stitch so that there’s that cushioned support that I love so much on the bigger-sized socks, and I’ve added in extra instructions to help if you want to create contrast heels and toes so that you can use up leftovers.
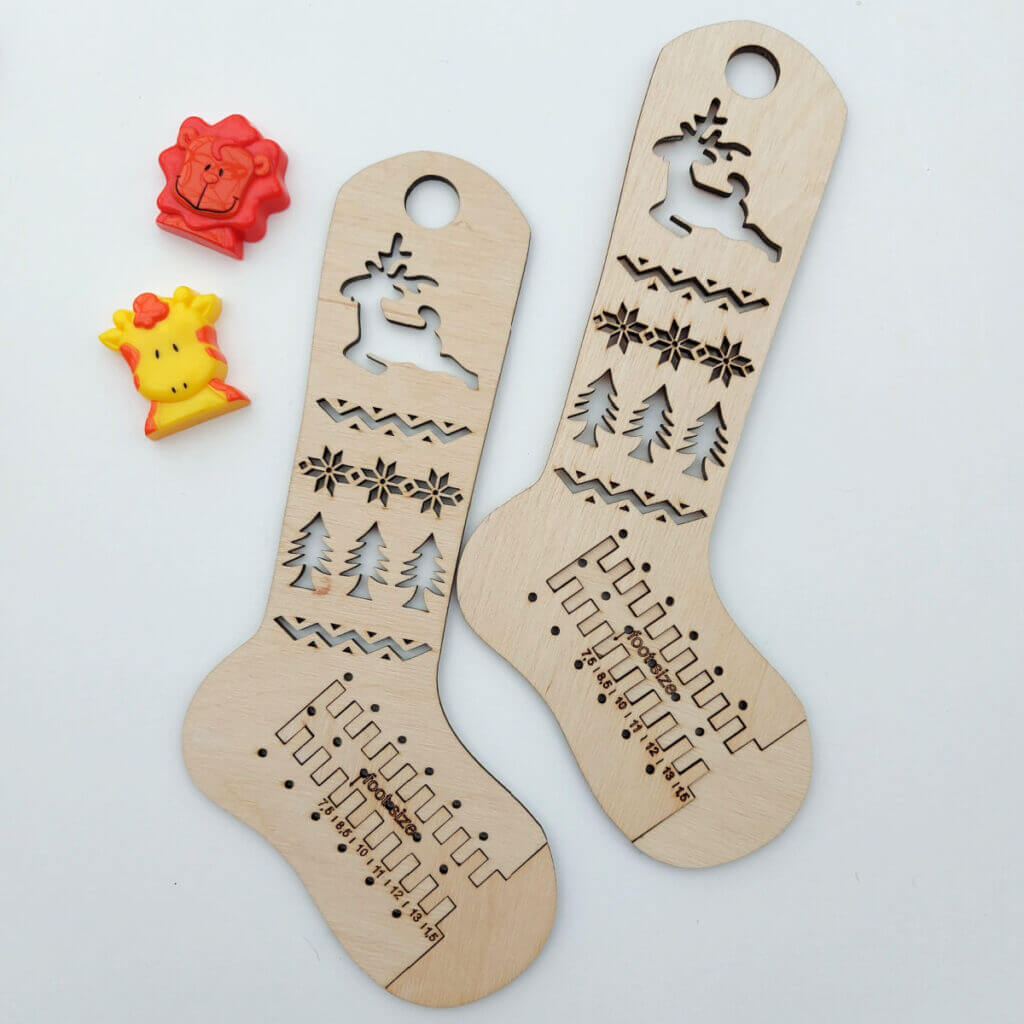
Finally, before we get started on the pattern, a quick word about blocking, which is something that you might want to do if your small socks are going to be a gift.
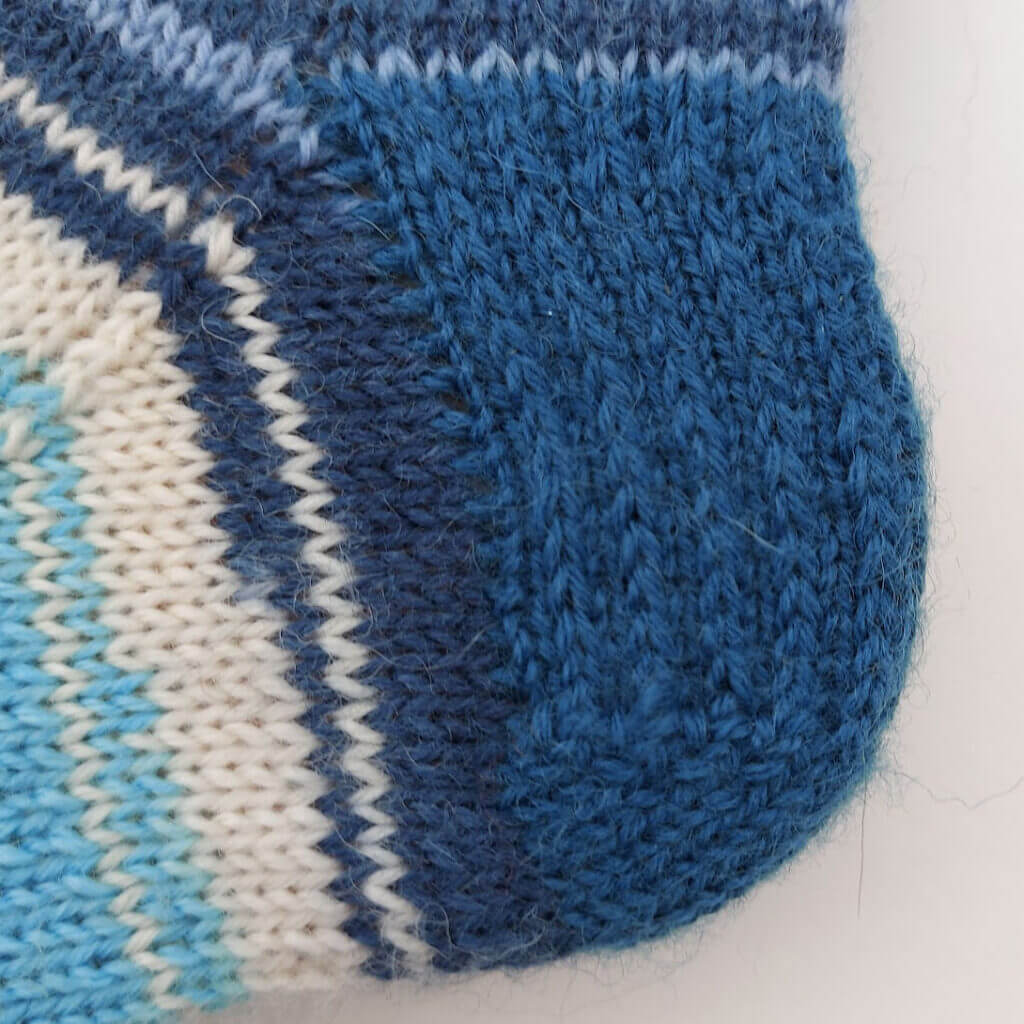
What is blocking? Well, if it’s not something that you’ve heard of done before, it’s a way of stretching your socks out so that they look more professionally finished; you’ll often read about blocking in patterns for jumpers or shawls, especially if there’s a lace pattern involved, as it helps to make sure that the stitches are even and project pieces are the right size for joining or wearing. For socks, you can use wooden or metal sock-shaped blockers (which come in various sizes) and all you need to do is soak the socks in a mild detergent solution, rinse them out and then put them over the blockers to dry.

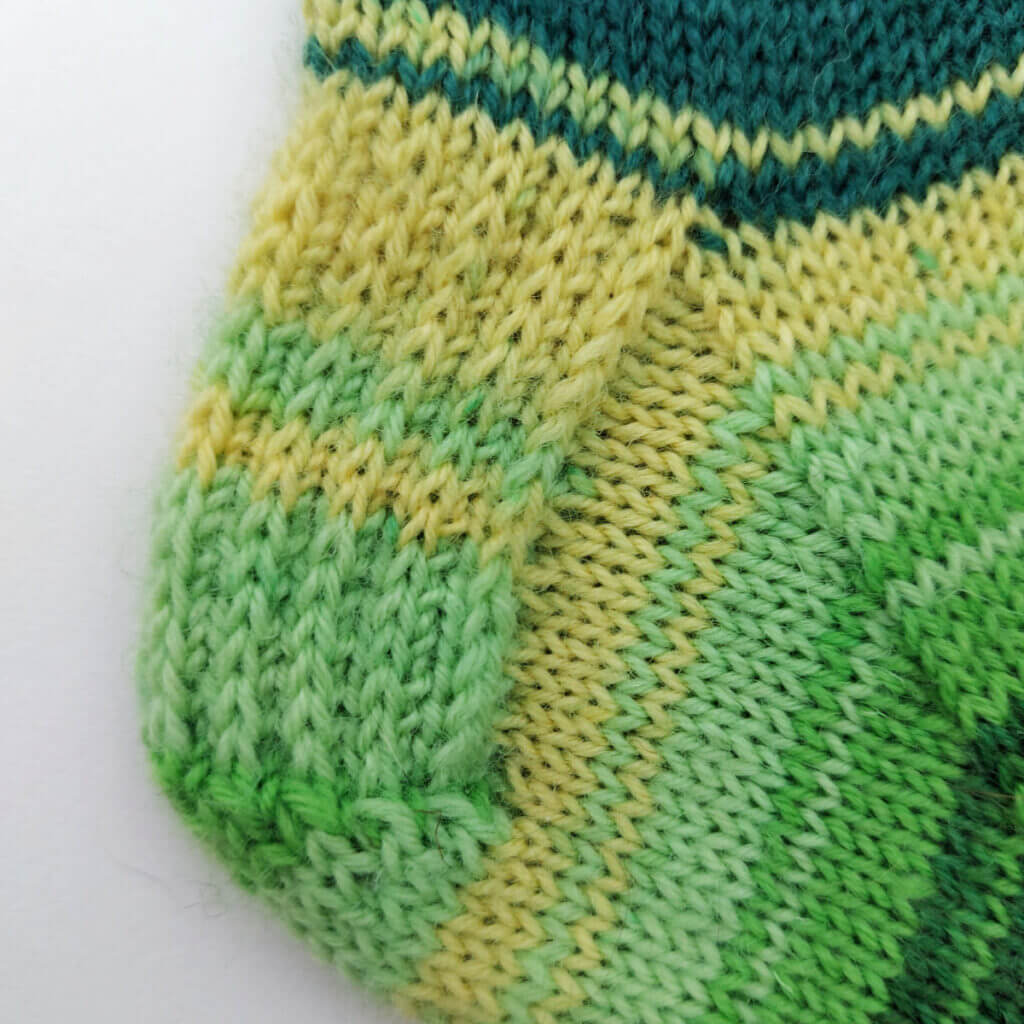
You can see how they give the toes a nice rounded shape. My blockers are wooden ones made by Victoria of D19EcoFriendlyLife and I really like her adjustable blockers (I have them in adult sizes too), but you can get them from other places too.
“Do socks need really blocking, especially if they’re going straight onto feet?”, you might ask. Strictly speaking, no, and as the blocking only lasts until the next wash, you might feel that it’s not worth the time and effort to do it – but it does look nice for photos or unwrapping!
If you don’t have blockers or don’t want to use them, you can press your socks lightly under a damp cloth and that will also give a more professional look to your finished project. That’s what I did with the Wildflower socks above – you can see how the toes look a little different as they weren’t stretched into the rounded shape as the ones on the blockers were, but they still look great!
Right then, I think that’s enough chatting about this pattern – are you ready to cast on? 🙂
Basic 4ply Children’s Socks
You can download a PDF copy of the pattern here.
Size To fit ball of foot circumference 6¼in; 16cm, and advice is given to adjust the size for any foot.
Tension 30 stitches to 4in; 10cm in stocking stitch (worked in the round) on 2.5mm needles (or size required for tension)
Yarn 1 x 100g West Yorkshire Spinners Signature 4ply (or leftovers)
Shades pictured are plain socks – Spring Green and contrast socks – Winter Icicle with Pacific contrasts
Materials
2.5mm needles – short circular needle, DPNs (double pointed needles) or 80 cm circular for magic loop
1 set DPNs size 3.0mm (optional for a looser cuff)
1 set DPNs size 2.5mm (not required for magic loop)
Stitch holder (optional)
Stitch markers
Wool needle
Abbreviations
cm(s) centimetres
in(s) inches
K Knit
K2tog Knit two stitches together
P Purl
Sl1 Slip 1 stitch purlwise holding yarn to the back of your work
SSK Slip the first stitch on the left hand needle knitwise onto the right hand needle, slip the second stitch on the left hand needle purlwise onto the right hand needle, slip both stitches back onto the left hand needle and knit together through back loop
St(s) Stitch(es)
( ) Repeat instructions inside brackets
How to adjust the size for this pattern
There is only one size given for this pattern but you can use this as a guide for any other size. Hand knitted socks are measured by width and not length, which is easily adjusted, so to get the perfect fit for the person you are knitting for, it is best to measure their feet first and use the Sock Stitch Calculation to find out the right number to cast on. It’s very easy to do, and once you have the numbers, you can use them for any pair of socks in the same weight of yarn. There is an average size guide at the end of this pattern to help you. The Sock Stitch Calculation (part of the Winwick Mum Sockalong tutorials), along with a tension tutorial and a video to help can be found here.
Pattern notes
- If you are new to sock knitting, you can find help with the basics of this pattern in the Winwick Mum Sockalong tutorials: www.winwickmum.co.uk/sockalong and a tutorial to help you work with contrast yarns is available here: Contrast Cuff, Heel and Toe Socks
- It is often easier to cast on using DPNs before changing to the short circular needle. If you want to use magic loop you will be able to cast on with the larger circular needle if you prefer to do so, but remember not to pull your cast on stitches too tight. If you use DPNs, you might find it easiest to cast on and work 2 rows before dividing the stitches across the needles.
- I have given an indication of the number of rows or rounds that I knit for my socks, but do remember that these are just a guide to give you some idea of how long you should be knitting for! It’s always best to check the measurements against your own feet, or those of the person you are knitting for.
- Children’s feet are often bigger than you might think, so don’t be surprised if you end up casting on more stitches than you expected to. They’ll always grow into them! Children usually need a heel flap of at least 2in; 5cm as well, so don’t be tempted to make the heel flap too short.
PLAIN SOCKS
PATTERN
Cuff – make both the same
Cast on 48 stitches using 3.0mm needle. The pattern has been written for a cast on with straight needles which makes it easier for you to join into the round without twisting the stitches.
Row 1: (K2, P2), repeat to end, turn.
Row 2: (K2, P2), repeat to end, turn.
Change to 2.5mm needles. At this point, change to a short circular needle, magic loop or divide the stitches across DPNs and join into a circle, place marker. You will sew up the small gap where you knitted the first two rows later.
Continue in K2, P2 rib for 10 more rounds or until desired length of rib (I knit 12 rounds of rib).
Continue to knit each round until desired length before start of heel. You won’t need the leg length to be as long as for an adult’s sock so for socks up to 56sts cast on, I would recommend between 4-4¾in; 10-12cm.
Heel Flap
Change to 2.5mm DPNs if you are using a short circular needle. You are going to create the heel flap from half the number of stitches that you cast on, so if you have cast on more or less than 48 stitches, remember to adjust the number of stitches when you start the heel flap. Knitting the first two stitches of row 1 will help to stop a hole forming at the gusset.
Row 1: K2, (Sl1, K1) until you have 24 stitches on your needle, turn.
Row 2: Sl1, P to end, turn.
Row 3: (Sl1, K1) to end, turn.
Repeat rows 2 and 3 until heel measures approximately 2in; 5cm, finishing on row 3 (for me, this is approximately 35 rows). If you want to make the heel flap longer, continue knitting rows 2 and 3 until you reach the desired length, but remember that you will need to pick up more stitches to create the gusset. You can check that the heel flap is long enough by measuring it against the child’s foot from their ankle bone to the floor.
Turn heel
*For a larger or smaller sock, you will need to alter the number of purl stitches in the first row of the heel (marked in bold below), increasing by 1 st for each block of 4 sts extra that you cast on, or decreasing by 1 st for each block of 4 sts less than 48 sts. For example, if you cast on 52 stitches, your first row would be Sl1, P14, P2tog, P1, turn*.
Row 1: Sl1, P13, P2tog, P1, turn.
Row 2: Sl1, K5, SSK, K1, turn.
Row 3: Sl1, P6, P2tog, P1, turn.
Row 4: Sl1, K7, SSK, K1, turn.
Continue in this way, adding one stitch between slip stitch and SSK or P2tog on each row (ie, Row 5: Sl1, P8, P2tog, P1; Row 6: Sl1, K9, SSK, K1, etc) until all of the heel stitches are used. Depending on how many stitches are in your heel flap, you may find that the K1 and P1 stitch is not required at the end of the last two rows.
Knit across heel stitches if required to bring you to the left hand side of the heel ready to pick up 1 st for every 2 rows of heel flap knitted. Remember that if you made the heel flap bigger, you will need to pick up more stitches. Once you have picked up the stitches, place marker to indicate new beginning of round. Knit across the top of the foot, place marker, then pick up 1 st for every 2 rows knitted up the other side of the heel. Knit across the top of the heel and then shape gusset as follows.
Note: If you are using DPNs and/or have placed your stitches on a stitch holder, you can arrange the needles as follows: Needle 1 for stitches across heel, Needle 2 for picked-up stitches down side of foot, Needle 3 for stitches across top of foot (knit stitches off stitch holder if required), Needle 4 for picked-up stitches on other side of foot. You may find that stitch markers are not required at first.
Shape gusset
Round 1: K to 3 sts before the marker, K2tog, K1, slip marker, knit to next marker, slip marker, K1, SSK, K to marker.
Round 2: Slip marker, knit to next marker, slip marker, knit to 3 sts before marker.
Round 3: K2tog, K1, slip marker, knit to next marker, slip marker, K1, SSK, K to marker.
Repeat rounds 2 and 3 to shape the gusset. Continue in this way, decreasing by two stitches at the gusset on every other round until there are 48 sts on the needle. If you want to remove the marker at the SSK decrease you can do that now, but keep the other one in to indicate the start of your round.
Once you have 48 stitches again, continue to knit each round until you reach approximately 1½ in: 4cm (2in; 5cm for 56sts) before the desired length ready to start the toes. Check the chart below for help with working out the length of your sock if you need it. If you are able to, don’t be afraid to try your sock on the child who’ll be wearing them before decreasing for the toes!
Toes
At some point whilst decreasing for the toes, if you are using a short circular needle you may need to change back to DPNs as the number of stitches becomes too small for the circular. It’s up to you when you choose to do that, and how you distribute the stitches across the needles; just keep following the pattern as set below. Create the toes as follows:
Round 1: K1, SSK, K18 sts, K2tog, K1, place marker (if required), K1, SSK, K18 sts, K2tog, K1. (44 sts)
Round 2: Knit one round, slipping markers as you come to them.
Round 3: K1, SSK, K to 3 sts before marker, K2tog, K1, slip marker, K1, SSK, K to 3 sts before marker, K2tog, K1. (40 sts)
Repeat rounds 2 and 3 until you have 24 stitches left and divide these between two needles so that front and back of socks match.
Graft toes using Kitchener stitch, weave in all ends and sew up the small gap at the cuff where you cast on.
CONTRAST CUFF, HEEL AND TOE SOCKS
PATTERN
Cuff – make both the same
Cast on 48 stitches using contrast yarn and 3.0mm needle. The pattern has been written for a cast on with straight needles which makes it easier for you to join into the round without twisting the stitches.
Row 1: (K2, P2), repeat to end, turn.
Row 2: (K2, P2), repeat to end, turn.
Change to 2.5mm needles. At this point, change to a short circular needle, magic loop or divide the stitches across DPNs and join into a circle, place marker. You will sew up the small gap where you knitted the first two rows later.
Continue in K2, P2 rib for 10 more rounds or until desired length of rib (I knit 12 rounds of rib).
Break contrast yarn and join in main colour. Continue to knit each round until desired length before start of heel. You won’t need the leg length to be as long as for an adult’s sock so for socks up to 56sts cast on, I would recommend between 4-4¾in; 10-12cm.
Heel Flap
Change to 2.5mm DPNs if you are using a short circular needle and join in contrast colour.
Do not break main colour yarn at this point. You are going to create the heel flap from half the number of stitches that you cast on, so if you have cast on more or less than 48 stitches, remember to adjust the number of stitches when you start the heel flap. Knitting the first two stitches of row 1 will help to stop a hole forming at the gusset.
Row 1: K2, (Sl1, K1) until you have 24 stitches on your needle, turn.
Row 2: Sl1, P to end, turn.
Row 3: (Sl1, K1) to end, turn.
Repeat rows 2 and 3 until heel measures approximately 2in; 5cm, finishing on row 3 (for me, this is approximately 35 rows). If you want to make the heel flap longer, continue knitting rows 2 and 3 until you reach the desired length, but remember that you will need to pick up more stitches to create the gusset. You can check that the heel flap is long enough by measuring it against the child’s foot from their ankle bone to the floor.
Turn heel
*For a larger or smaller sock, you will need to alter the number of purl stitches in the first row of the heel (marked in bold below), increasing by 1 stitch for each block of 4 stitches extra that you cast on, or decreasing by 1 st for each block of 4 sts less than 48 sts. For example, if you cast on 52 stitches, your first row would be Sl1, P14, P2tog, P1, turn*.
Row 1: Sl1, P13, P2tog, P1, turn.
Row 2: Sl1, K5, SSK, K1, turn.
Row 3: Sl1, P6, P2tog, P1, turn.
Row 4: Sl1, K7, SSK, K1, turn.
Continue in this way, adding one stitch between slip stitch and SSK or P2tog on each row (ie, Row 5: Sl1, P8, P2tog, P1; Row 6: Sl1, K9, SSK, K1, etc) until all of the heel stitches are used. Depending on how many stitches are in your heel flap, you may find that the K1 and P1 stitch is not required at the end of the last two rows.
Working the gusset with a contrast colour heel
When you get to the gusset, you’ve got a few choices over what to do with your working yarn. At the moment, the main colour is at the right hand side of your heel flap and when you start to pick up the gusset stitches you’ll need it at the left hand side. You can either:
- Leave the yarn where it is ready to pick up the second set of gusset stitches, but if you do that then the first set of picked up stitches and the top of the foot stitches will be knitted in the same colour as your heel flap until you get round to where you can pick up the main colour again. That won’t be a problem if your colours are similar, but if you’re using a completely different colour then it might look a bit odd.
- Leave the yarn where it is and pick up what would usually be the second set of stitches first – you can choose then whether you start your decreases on the SSK stitch or whether you work an entire round so that you work the decreases as per the instructions below.
- Carry the yarn across the bottom of the heel flap, weaving it in as you go so that it’s in the right place for the top of the foot stitches, but it means that you’ll need to pick up the first set of gusset stitches in the contrast yarn and again, if you’re using a completely different colour for the heel you might not want to do that.
- Cut the yarn and re-join in once you’ve completed the heel turn ready to pick up the gusset stitches so that you’re using the main yarn for all of the leg and foot sections.
However you decide to continue with your main colour yarn, the following instructions assume that you will start picking up the gusset stitches from the left hand side of the heel turn – this matches the instructions in the Sockalong tutorials so that you can follow along with those if you need to.
With your yarn at the left hand side of the heel turn, you are now ready to pick up 1 st for every 2 rows of heel flap knitted. Remember that if you made the heel flap bigger, you will need to pick up more stitches. Once you have picked up the stitches, place marker to indicate the new beginning of the round. Knit across the top of the foot, place marker, then pick up 1 st for every 2 rows knitted up the other side of the heel. Knit across the top of the heel and then shape gusset as follows.
Note: If you are using DPNs and/or have placed your stitches on a stitch holder, you can arrange the needles as follows: Needle 1 for stitches across heel, Needle 2 for picked-up stitches down side of foot, Needle 3 for stitches across top of foot (knit stitches off stitch holder if required), Needle 4 for picked-up stitches on other side of foot. You may find that stitch markers are not required at first.
Shape Gusset
Break contrast colour yarn and using main colour, work gusset as follows:
Round 1: K to 3 sts before the marker, K2tog, K1, slip marker, knit to next marker, slip marker, K1, SSK, K to marker.
Round 2: Slip marker, knit to next marker, slip marker, knit to 3 sts before marker.
Round 3: K2tog, K1, slip marker, knit to next marker, slip marker, K1, SSK, K to marker.
Repeat rounds 2 and 3 to shape the gusset. Continue in this way, decreasing by two stitches at the gusset on every other round until there are 48 sts on the needle. If you want to remove the marker at the SSK decrease you can do that now, but keep the other one in to indicate the start of your round.
Once you have 48 stitches again, continue to knit each round until you reach approximately 1½ in: 4cm (2in; 5cm for 56sts) before the desired length ready to start the toes. Check the chart below for help with working out the length of your sock if you need it. If you are able to, don’t be afraid to try your sock on the child who’ll be wearing them before decreasing for the toes!
Toes
Note: At some point whilst decreasing for the toes, if you are using a short circular needle you may need to change back to DPNs as the number of stitches becomes too small for the circular. It’s up to you when you choose to do that, and how you distribute the stitches across the needles; just keep following the pattern as set below. Create the toes as follows:
Round 1: K1, SSK, K18 sts, K2tog, K1, place marker (if required), K1, SSK, K18 sts, K2tog, K1. (44 sts)
Round 2: Knit one round, slipping markers as you come to them.
Round 3: K1, SSK, K to 3 sts before marker, K2tog, K1, slip marker, K1, SSK, K to 3 sts before marker, K2tog, K1. (40 sts)
Repeat rounds 2 and 3 until you have 24 stitches left and divide these between two needles so that front and back of socks match.
Graft toes using Kitchener stitch, weave in all ends and sew up the small gap at the cuff where you cast on.
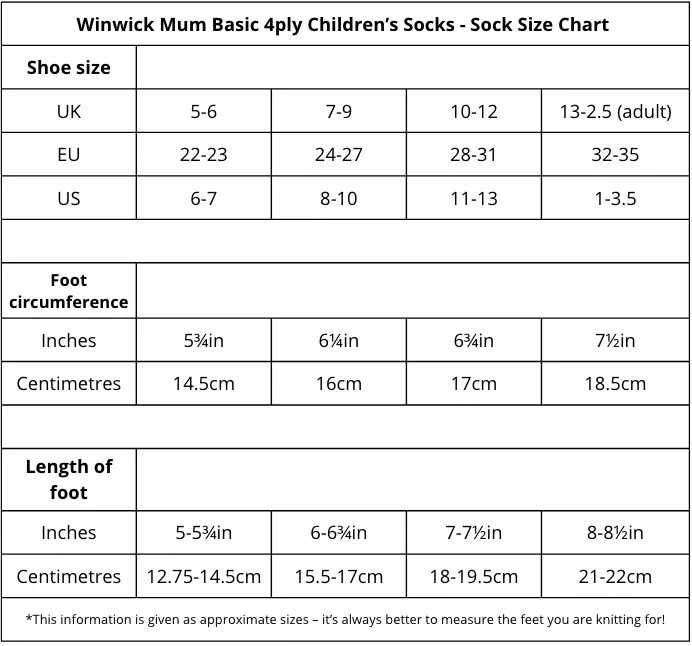
Winwick Mum Basic 4ply Children’s Socks – Sock Size Chart
How to use this chart
If you are unable to measure the foot circumference (around the ball of the foot) of the child you are knitting for, you can use these approximate measurements to help you work out the right size. Use the Sock Stitch Calculation to include the number of stitches that you knit at – this will give you the number of stitches to cast on which suits your own tension and result in a better-fitting sock.
And there we have it – socks for your little ones! Do let me know how you get on with knitting smaller versions of the Basic 4ply Socks! I have listed the pattern on Ravelry for those who are able to use it (there have been accessibility issues in recent years) and want to link it in their projects; if you are able to share your photos on social media, I would love to see them – the hashtag for this pair is #WinwickMumSocks.
This pattern is free on this blog and will always remain so. If you’ve enjoyed using it and would like to support my work so I can keep blogging and designing, you can browse my shop for patterns and books or buy me a brew – both are very much appreciated. Thank you! xx


This pattern copyright © 2023 Winwick Mum All rights reserved.
Not to be included in any collection or used for profit without written consent of Winwick Mum.
This pattern is based on my Basic 4ply Socks pattern, which means that you can find photo and video help in the Winwick Mum Sockalong tutorials. You can find out more here:
If you can already knit socks but would like to stay in touch, click the link below to join the Winwick Mum mailing list to hear about the latest blog posts, pattern updates, tutorials and more … but no spam, I promise!


I would like to join the Winter Have KAL 2023. No wys WM yarn but other options in stash.
That’s fine – just choose one of the Winwick Mum patterns (you can find them all here) and you’re all set! 🙂 xx
Thank you for the KAL shall join from Australia once I finish a Christmas stocking. At that toe now! Hugs WAHx
Brilliant! It’ll be great to have you with us! 🙂 xx
I’ve just read your blog, and I’m so excited to be able to knit socks for my grandchildren, that will fit them properly….it’s so important to have properly fitted socks as well as fitted shoes! Thank you for writing this blog, I’m just over the moon!!
I started sock making last Spring, and since then, have made 15 pairs of socks, I love making them! Also, getting such wonderful feedback about size and comfort is so encouraging. I made a pair for my brother in law for Xmas, he’s now converted, said they’re the best he’s ever had….my poor sister is now shopping for yarn to make his new socks collection 😂
Wow, you’ve certainly been bitten by the Sock Bug! 🙂 You’re right, it is wonderful when we get lovely feedback from people who enjoy knitting the socks we have made for them, and I hope your grandchildren love them as well! 🙂 xx
I’ll be joining the Winter Haven KAL again this year. I’m really pleased to have the children’s sock pattern although I wish I’d had it before Christmas when I was knitting a pair for my 5-year-old granddaughter. However, I managed to scale down the basic 4-ply sock pattern and made a really nice pair of socks in a WYS colourway she chose herself. Now I’ll just have to knit a pair for the other granddaughter 🙂 Oh and I might just try out the Couthie shawl… x
You’ll have used the same pattern for your granddaughter’s socks as this pattern is based on the Basic 4ply Socks 🙂 Good luck with all your knitting, it will be lovely having you join in with the KAL 🙂 xx
I’m later than most, but I’m in! I’ve just started the second basic 4-ply sock of my fifth pair, but the first pair where I had to adjust the size. I shall enjoy taking some meditative knitting time in the middle of the day as I work on this sock! If I finish before the end of January I’ll start on the children’s socks for the 4 year old grandchildren.
Thank you Christine, for all your work helping knitters of all ages. I’ve been knitting for 70 years (I started young!), but I’ve learned so much from you patterns.
I am truly loving this and thankful you have made patterns for our younger humans. I am in need of some advice from this tribe of sage sock knitters 🙂 A friend has asked me to knit some bed socks for her 6 year old son. Which yarn would work best, DK or aran? He is a big boy and size 10 in shoes/socks. I really appreciate any advice. Sarah xxx
You know, I think anything with a wool content would be great. I’d also consider alpaca although probably in a blend as it’s very soft on it’s own and might wear through too quickly. I don’t think that you always need super-thick yarn as the natural fibres do a good job of keeping the feet warm as that’s what they’re designed to do. DK socks would knit up faster than 4ply, aran might be a bit chunky for bed, but you don’t necessarily need to find anything with nylon in if they don’t need to be hardwearing socks xx
My great grandson , 4 years old, has been diagnosed with hip dysplasia. He is going into plater for 4 months. Want to knit heavy knee high socks. He won’t be able to walk. Have you for sale patterns and wool. I am 84 and no use with electronics need a paper patter.
Hello! I hope everything goes well with your great grandson’s operation. I’ve got a Basic 4ply Children’s Socks pattern that you could use with thicker yarn (you’d need to change the cast on number) – it’s a free pattern but you’d need to print it yourself, I don’t sell paper patterns. For a four year old, I’d work the leg in rib and just keep going! You could use the Sock Stitch Calculation with your thicker yarn to work out how many stitches to cast on, and you can find the sock pattern here.
what size are the socks in the photo? I’m trying to determine the length for the foot. Thank You and good find for the pattern
I can’t remember! They were just samples, not for particular feet 🙂 If you scroll to the bottom of the blog post or look at the last page of the pattern, you’ll see that there’s a chart to help you work out the foot size and length 🙂 xx