
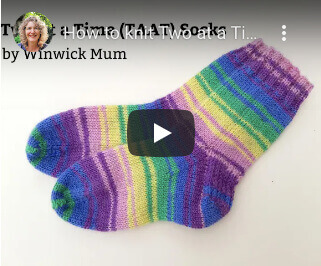
Two at a Time (TAAT) socks – free tutorial
I’ve been asked many times about knitting “two at a time” socks – that is, both socks of a pair knitted on one needle at the same time – and I’ve finally put together a tutorial and an accompanying video to show you how I do it with the cuff-down Sockalong sock pattern. This tutorial is long and picture heavy, so do be warned!
Is there a reason why you’d want to knit both socks at once?
Well, if you’re matching the yarns then it’s a good way to make sure that both socks are the same, and for that matter it also means that you don’t need to count rounds in quite the same way as both socks will be the same size. You turn both heels at the same time and you work the foot to the same length, and whatever your views about the Kitchener stitch, you’ve got two socks to work on and then – ta dah! – your pair is ready to wear. It’s the ideal solution to Second Sock Syndrome (that “ugh” feeling when you’ve knitted one and you really don’t want to cast on the second which afflicts some people) and apart from the fact that you can’t actually knit two socks in the same time that you can knit one (oh believe me, I’ve tried! 🙂 ), there’s nothing bad to say about it. If nothing else, it’s another technique to try and for that reason alone, I’d recommend that you give it a go. It never hurts to add another string to your sock-knitting bow!
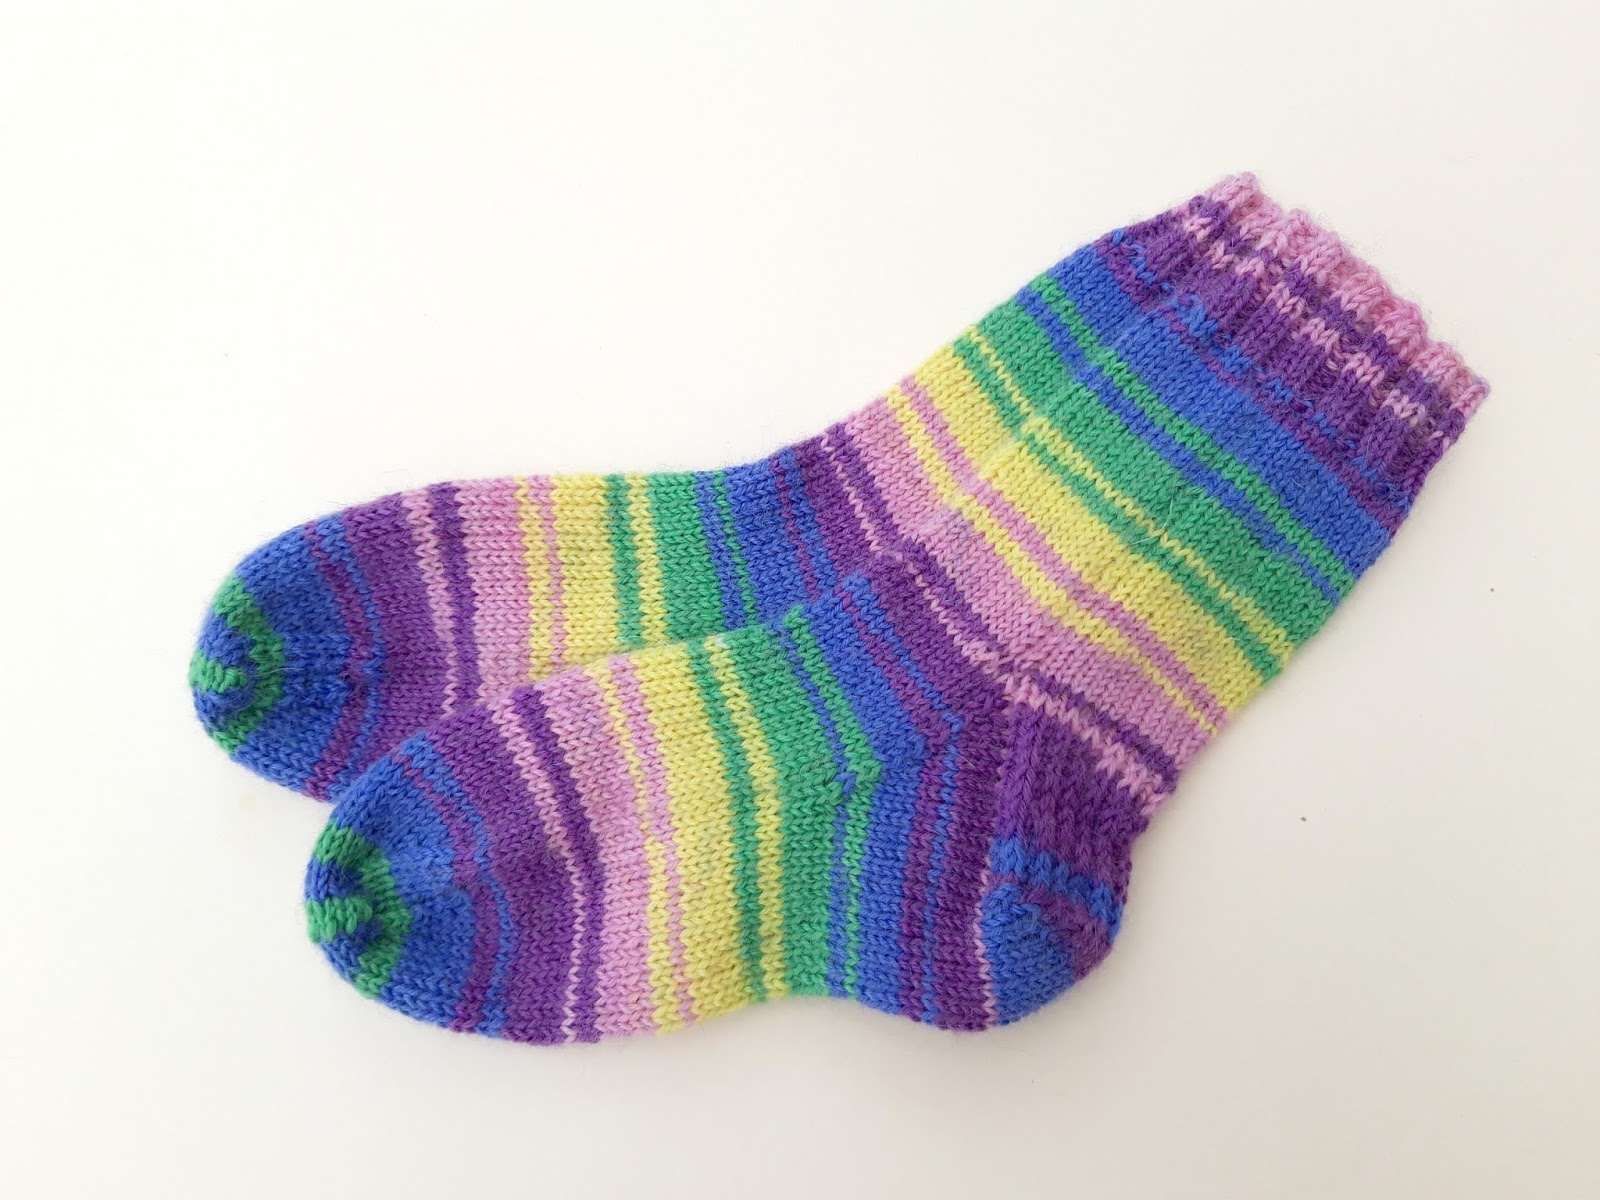
I’m going to use this technique to knit a pair of child’s socks; it’s exactly the same pattern as I’d use for an adult pair but smaller (obviously), and it’s really easy to adapt the Sockalong pattern to any size so you can knit for anyone you choose to.
I’ve added the notes for the children’s socks that I’ve made to the bottom of this tutorial.
This tutorial is to help you knit two socks at one time on one circular needle using magic loop – it sounds very complicated but it really isn’t, and once you’ve got the hang of it, I’m sure you’ll be knitting your socks in pairs on a regular basis!
The tutorial is based on my top down Basic 4ply Socks pattern and if you haven’t already got a copy of that, you can download it here. You can also download a copy of the Basic 4ply Children’s Socks if you’d like to – you can find that here. The video to go along with this tutorial is on YouTube here and you can use both the photos and the video to help you if you need to.
Right, are you ready to get started? Here we go! 🙂
Two At A Time (TAAT) Socks
You will need:
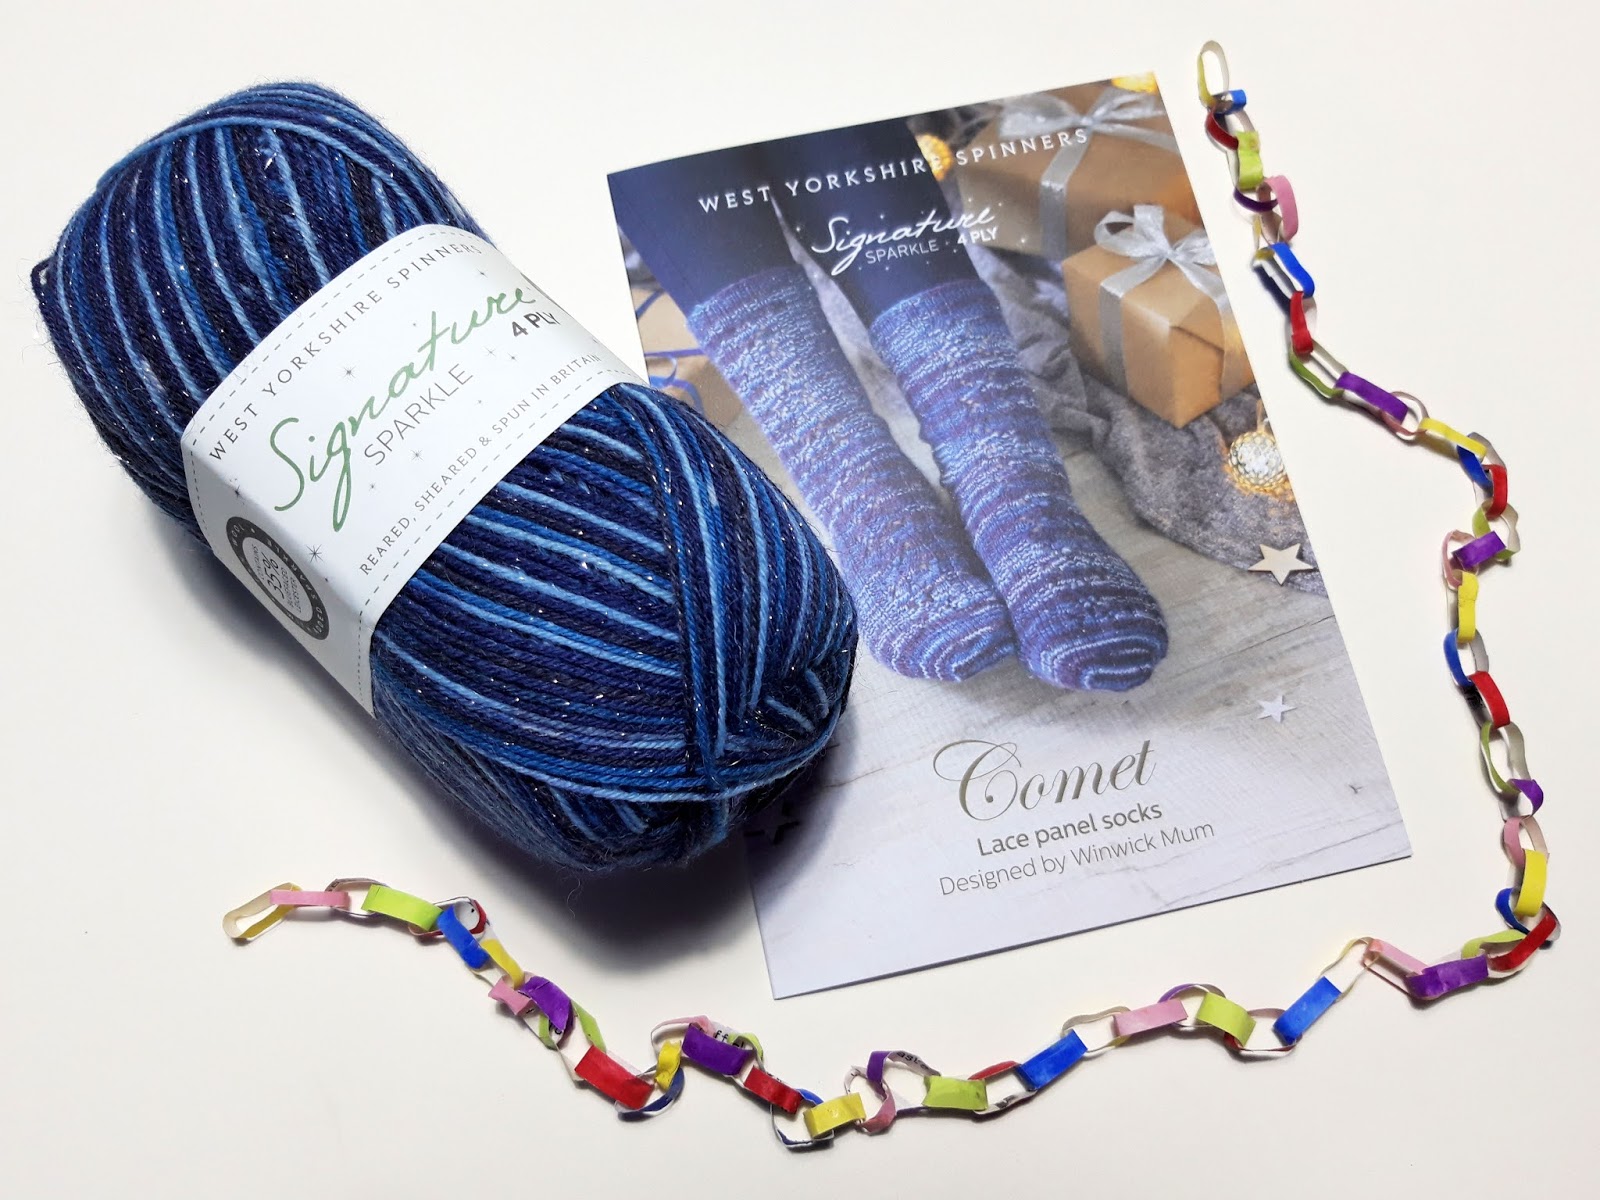
100g 4ply sock yarn (I’m using West Yorkshire Spinners Signature 4ply in Winwick Mum Collection Wildflower)
2.5mm circular needle in length 80-100cm (80cm is the very minimum, 100cm is more comfortable)
1 set DPNs size 2.5mm (optional 3.0mm for looser cast on)
2 safety pins or progress keepers
Wool needle
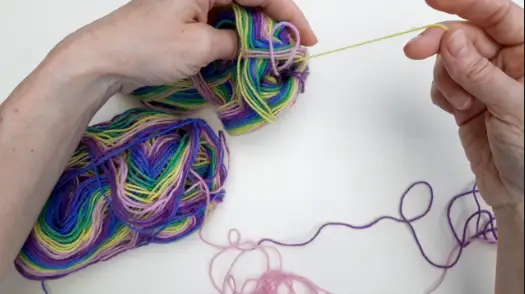
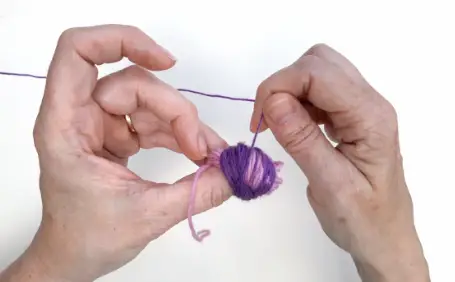
Because I’m using one ball of yarn and I want my socks to match, I’m going to wind the ball of yarn into two balls before I cast on. This way, I can make sure that my stripes match as well, but if you’re really not bothered about that kind of thing you can choose to use both ends of the ball at once or just pull the ball apart as I’m going to do and start at whatever colour comes out first.
I start by putting my fingers into the middle of the ball and pulling out a chunk. You can weigh them at this point too, so that you know you’ve got about 50g in each section. If you’re using two 50g balls there’s obviously no need to weigh them or pull them apart in this way, you’ll just need to find the end of each ball and match them as I’ll describe below. This is shown on the video if you want to watch how to do it.

The reason I’m pulling the yarn from the centre is that I want the stripes from both balls to go in the same direction and because I always knit from the centre of the ball, taking the big chunk out and then knitting from the yarn that’s still coming out of the ball means that will happen.
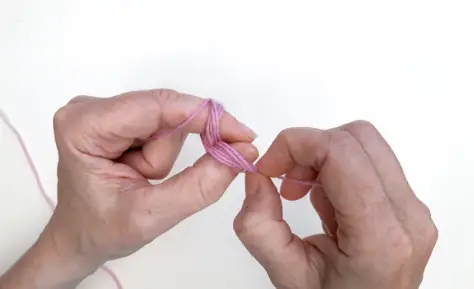
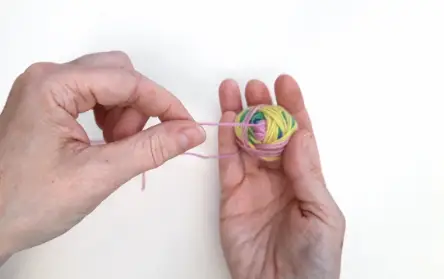
The next thing is to find the end of the ball in the section that you’ve just taken out (I’m going to call this the “inside ball”) and see what colour it is. Ignore the colour at the very end of the ball and start with the next colour in – this is because you don’t know where the yarn was cut in the mill so you can’t use the first colour as a comparison. Now take a look at the yarn that’s at the other end of the section, still attached to the main ball, and that’s what you’re going to match. Pull some of the yarn out of the inside ball (pulling from the centre of the ball) and lay it out in front of you so that you can see how the colours change, and then do the same with the “outside ball”
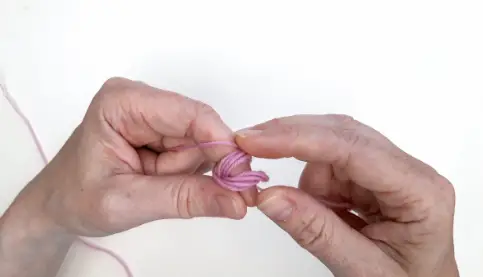
You should hopefully be able to find a match between the two balls quite easily, although sometimes it does involve pulling a fair bit out of both balls to get the colours the same so be careful not to get your yarns tangled up. If you need to, take a break and come back to it as sometimes you can see the match much more easily with fresh eyes! Don’t worry if you seem to be a long way into both balls when you find your match – you can just work your way backwards up the lengths of yarn until you get to the point the match is closest to the end of the yarn that’s coming from the inside ball – and sometimes it can surprise you where that match might be!
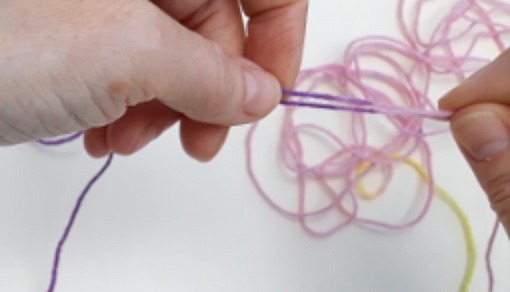
Weigh your yarn again if you’re worried that all the shuffling of colours will have affected the weight, and if you’re happy with the match that you’ve got, then and only then can you cut the yarn so that you’ve got two matching balls to work with. I quite often make the loops ready for putting over my needles in the yarn before making the cut so that I’m absolutely certain I’ve got the match where I want it to be.
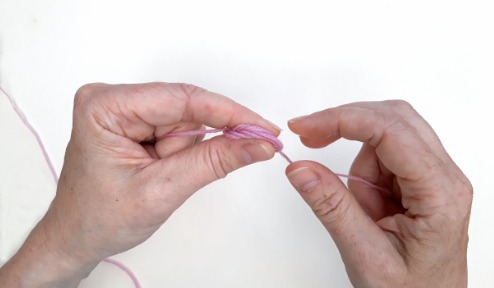
Depending how easily you found your match, you may well need to wind your single pulled-apart ball of yarn into two properly neat balls ready for working with. Do this however you like – use a ball winder, a nostepinne or wind by hand – remembering to make sure that both balls will start from the same place.
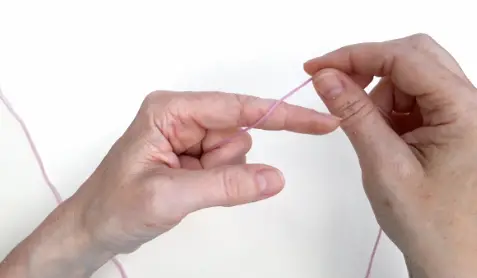
This is a simple way to wind a centre-pull ball if you don’t have a ball winder or nostepinne to use. This will work whether you’re left or right-handed, although I’m showing you how to do it from my right-handed perspective – just reverse the instructions if you need to! This is also shown on the video so if you want to watch how to do it, you’ll find it there.
1 Lay the end of the yarn across your left (or right) palm.
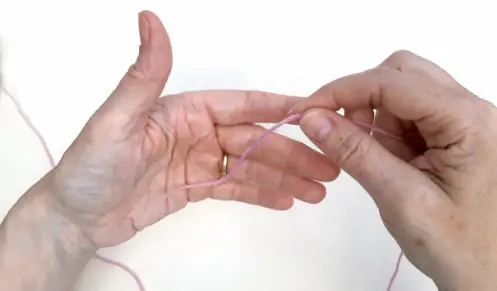
2 Holding the end of yarn firmly, wrap the yarn from inside to outside over your index finger.
3 Now bring the yarn down and over your thumb so that you are wrapping from inside to outside over your thumb.
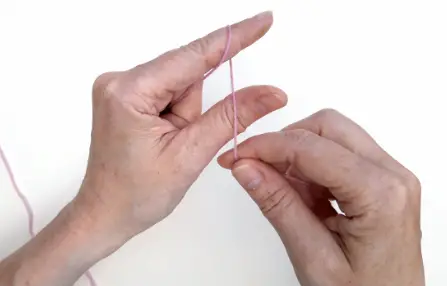
4 This makes a figure of eight formation with the yarn over your fingers.
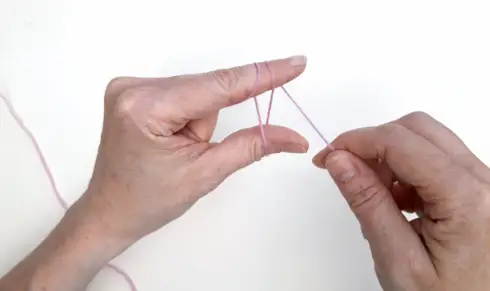
5 Continue to make the figure of eight for about ten or twelve more wraps – until you have a reasonable amount of yarn to get hold of.
6 Take hold of the yarn around your thumb and pull it forward and off your thumb.
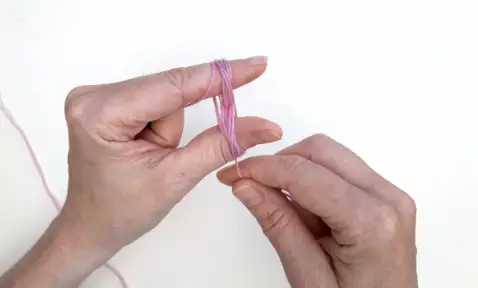
7 Now slide the yarn on your index finger off …
8 and grip all of the yarn firmly between your thumb and forefinger.
9 Wrap the yarn again, this time over both of your fingers and the yarn you’re holding. Make sure that you’ve still got tight hold of the end of the yarn in your palm.

10 Remember to adjust the yarn that you’re wrapping from time to time so that you create a ball shape rather than just wrapping over and over in the same place.

11 Once you have a reasonable amount of yarn wrapped, take your forefinger out of the yarn, leaving your thumb inside.
12 Continue to wrap the yarn around your thumb (this will make sure that you don’t accidentally wrap over where the yarn is coming from in the centre, making it difficult to pull)
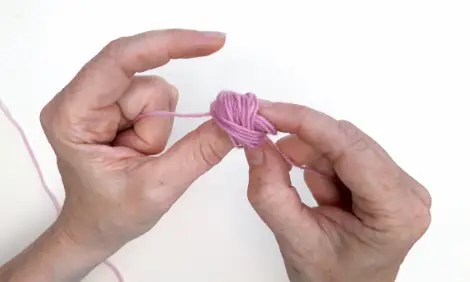
When you’ve wrapped all the yarn, you should have neat ball ready to use! Repeat for the second ball if you need to, and then it’s time to cast on!
If you’ve not got a copy of the Sockalong basic sock pattern already, this is a good time to print one off as I’m going to be talking about the technique of knitting both socks at the same time, not the pattern itself. You can get the pattern here.
You might also want to check the number of stitches for your sock or adjust it as I have done with my pair – I’m knitting a child’s pair and working on 48 stitches which will be to fit a child with UK 8/9 size feet. You can work out exactly the right number of stitches that you need to cast on for any size of foot and with any weight of yarn using the Sock Stitch Calculation which you will find here.
Casting on
If you want to cast on straight onto your long circular needle, that’s absolutely fine but remember that I’m all about going for the easiest option possible the first time you do something, so I choose to cast on for both of my socks onto DPNs and work the first two rows just as I do for a single sock. This means that when I come to join them into the round, they’re much less likely to twist. Don’t forget that all of this is covered in the video if you want to watch it.
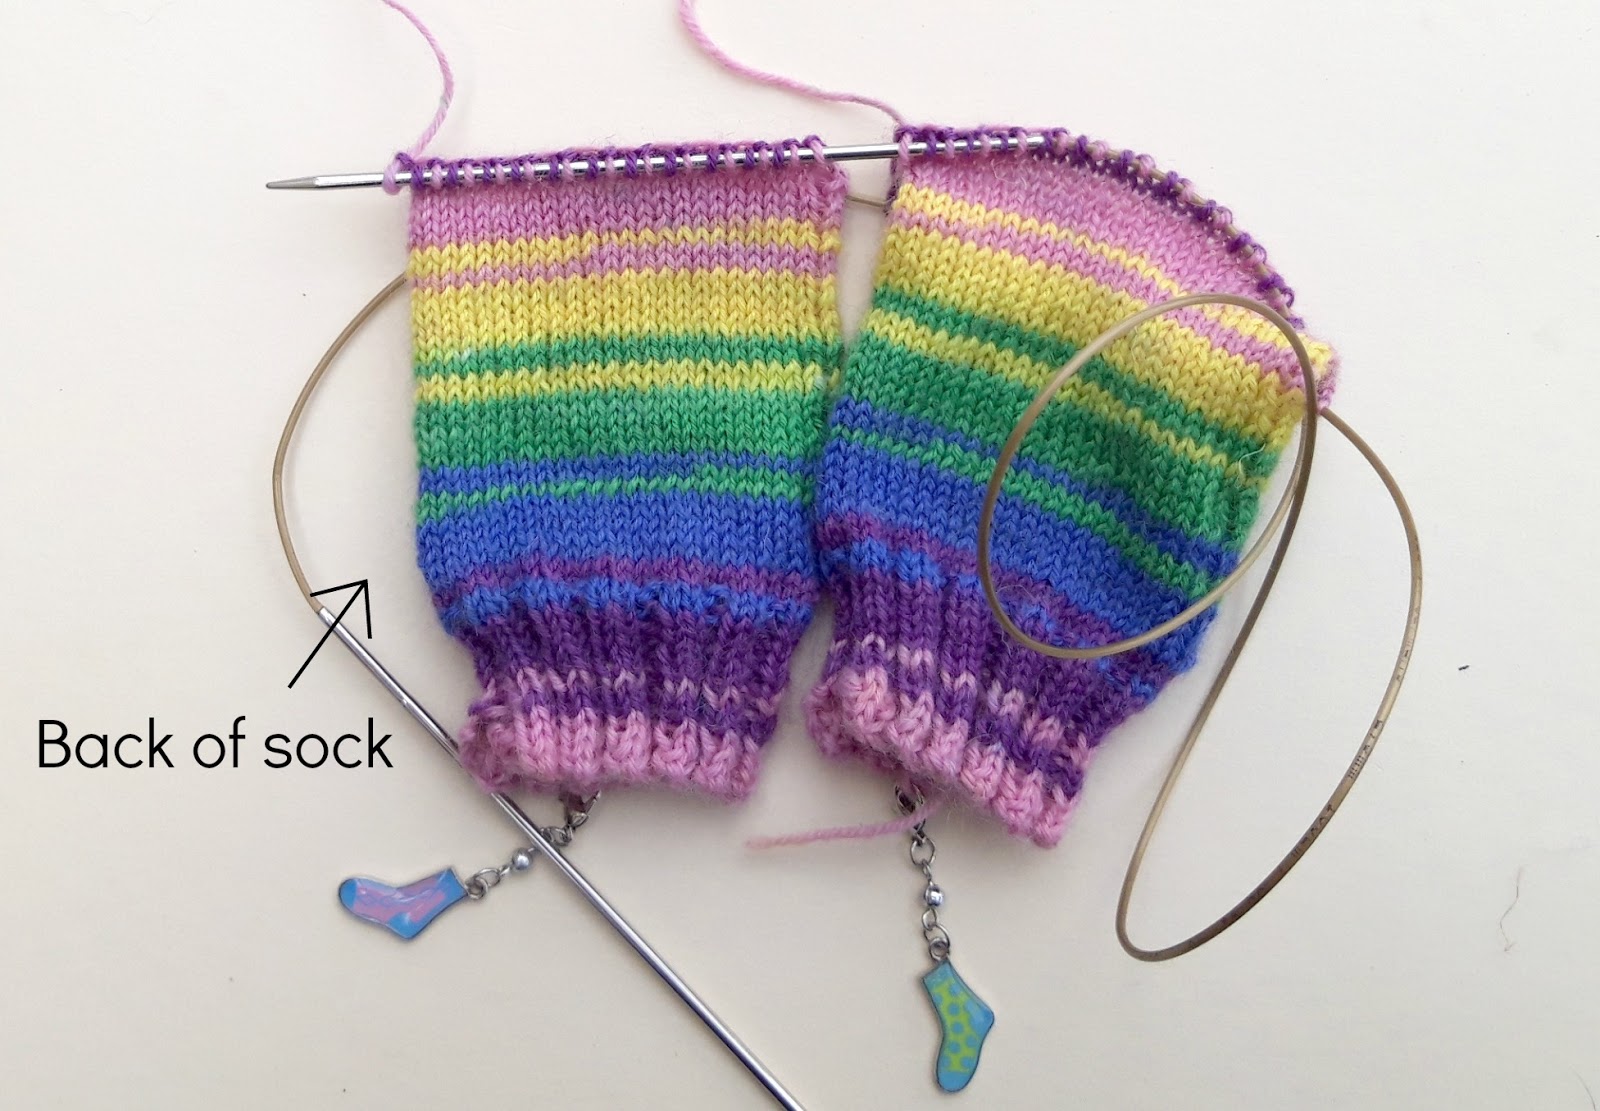
Here’s where we’re going to join into the round. I find it easiest to think of magic loop socks having a “front” and a “back” so I’ll refer to front and back stitches as we go along. We’re going to start with the front of your sock.
Start by working half of the stitches off the first needle onto your long circular needle, continuing in the K2 P2 rib that you worked on the DPNs.
When you get to half-way, stop and take your working yarn behind your needle out of the way. You’re going to save the rest of these stitches on the DPN for now, as these will form the “back” of your sock.
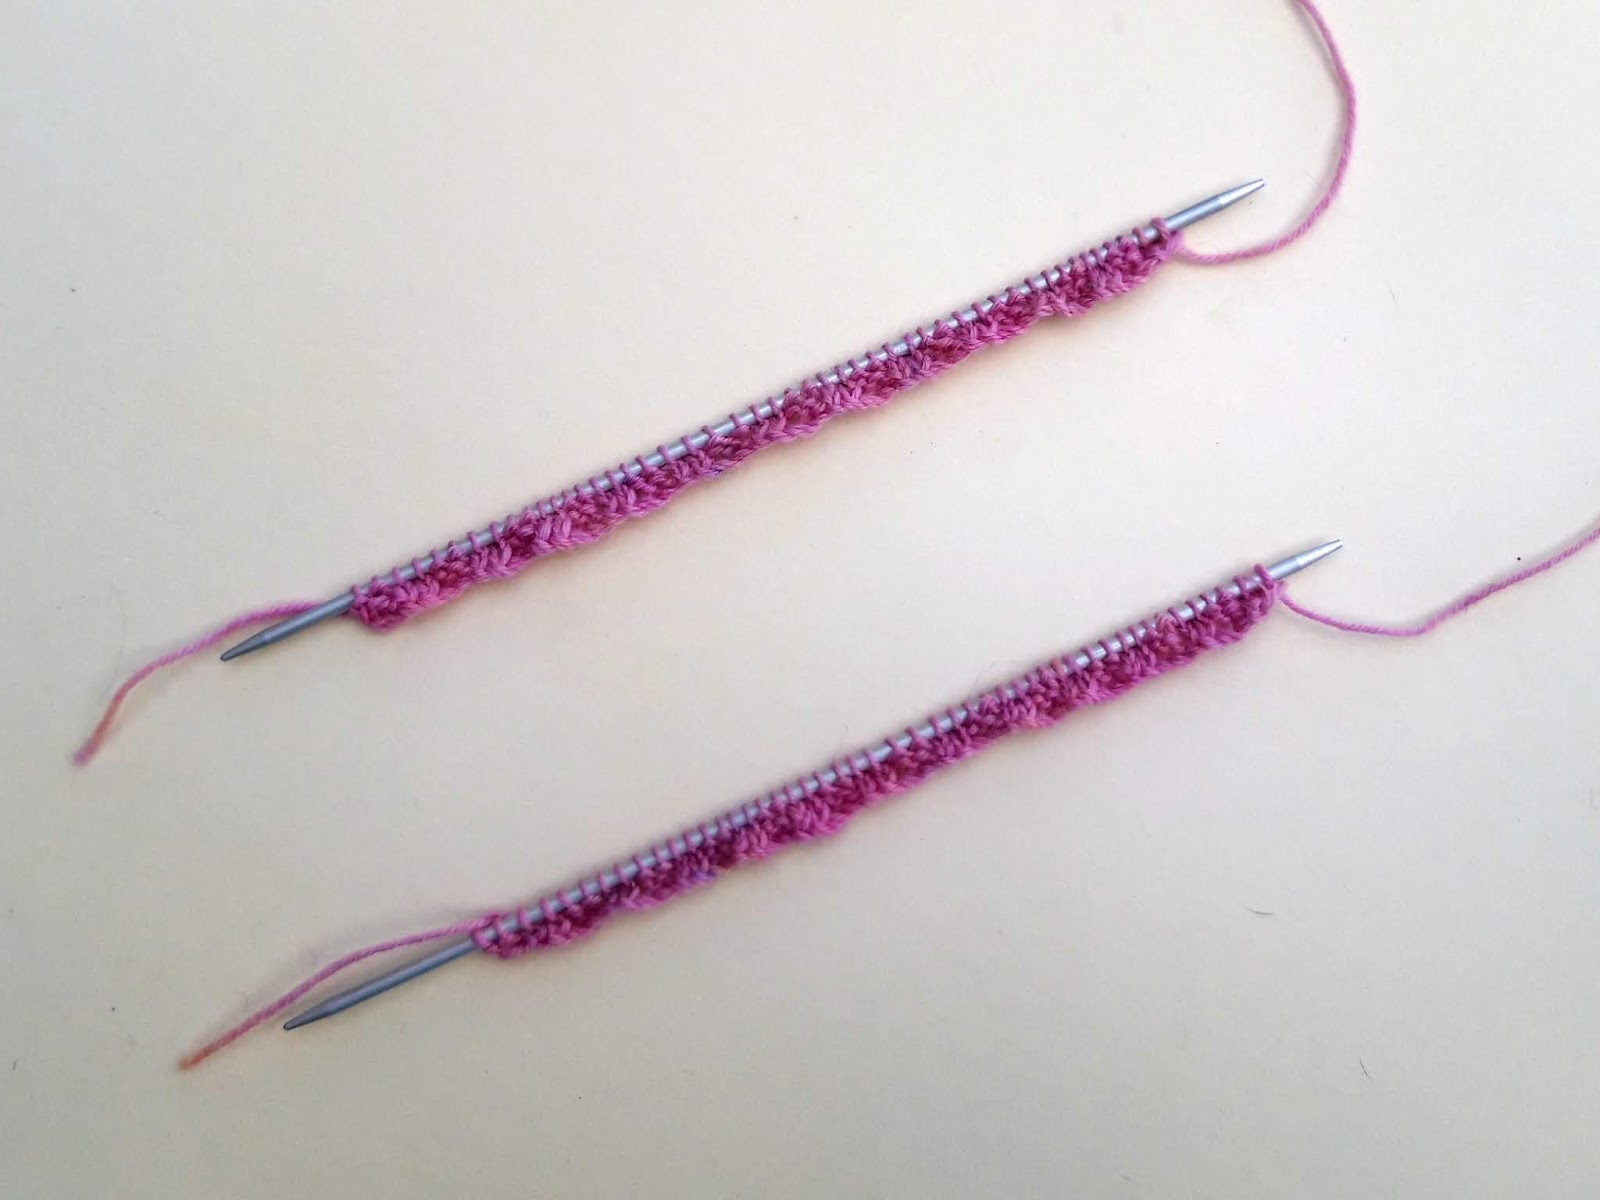
Sliding the front stitches safely down onto the cable and out of the way, knit the first half of the stitches off the second DPN so that you will have two “front” socks. It will be a bit fiddly, so take your time. It’s worth the effort, though, as you will find it much easier to get straight into the knitting in the round in just a few minutes.
This is what your knitting will look like once you’ve knitted half the stitches off both of the DPNs.
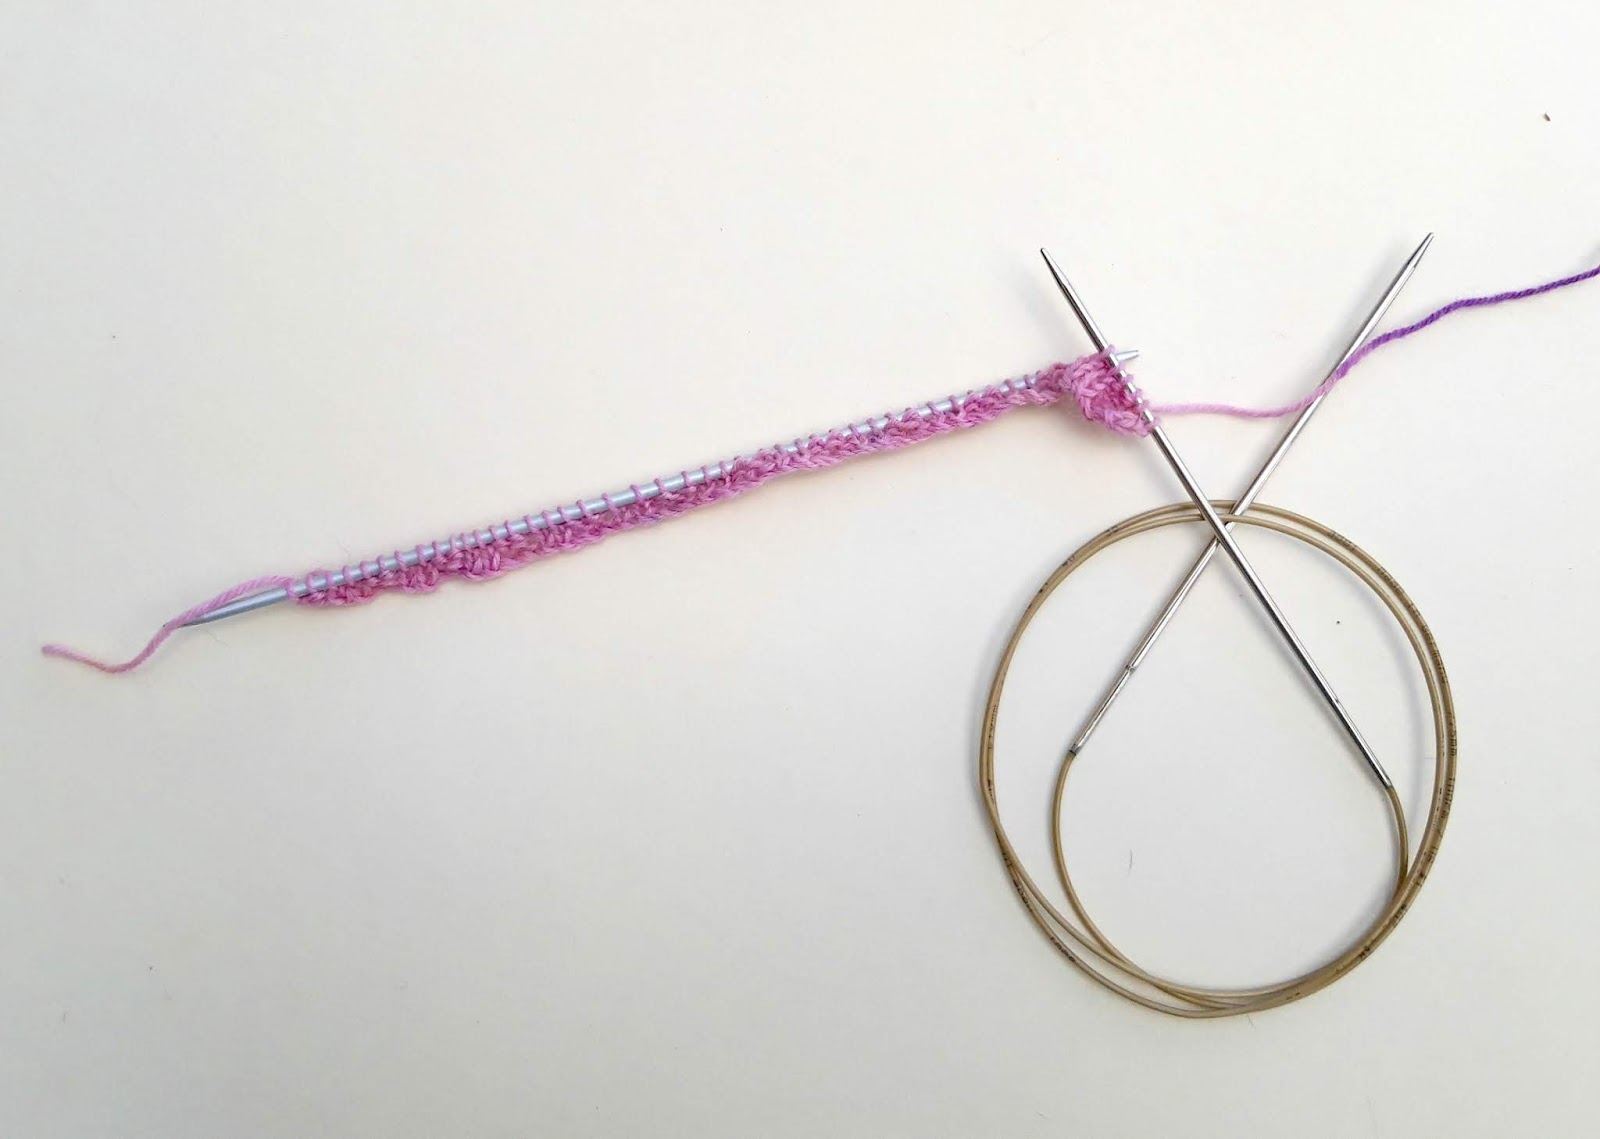
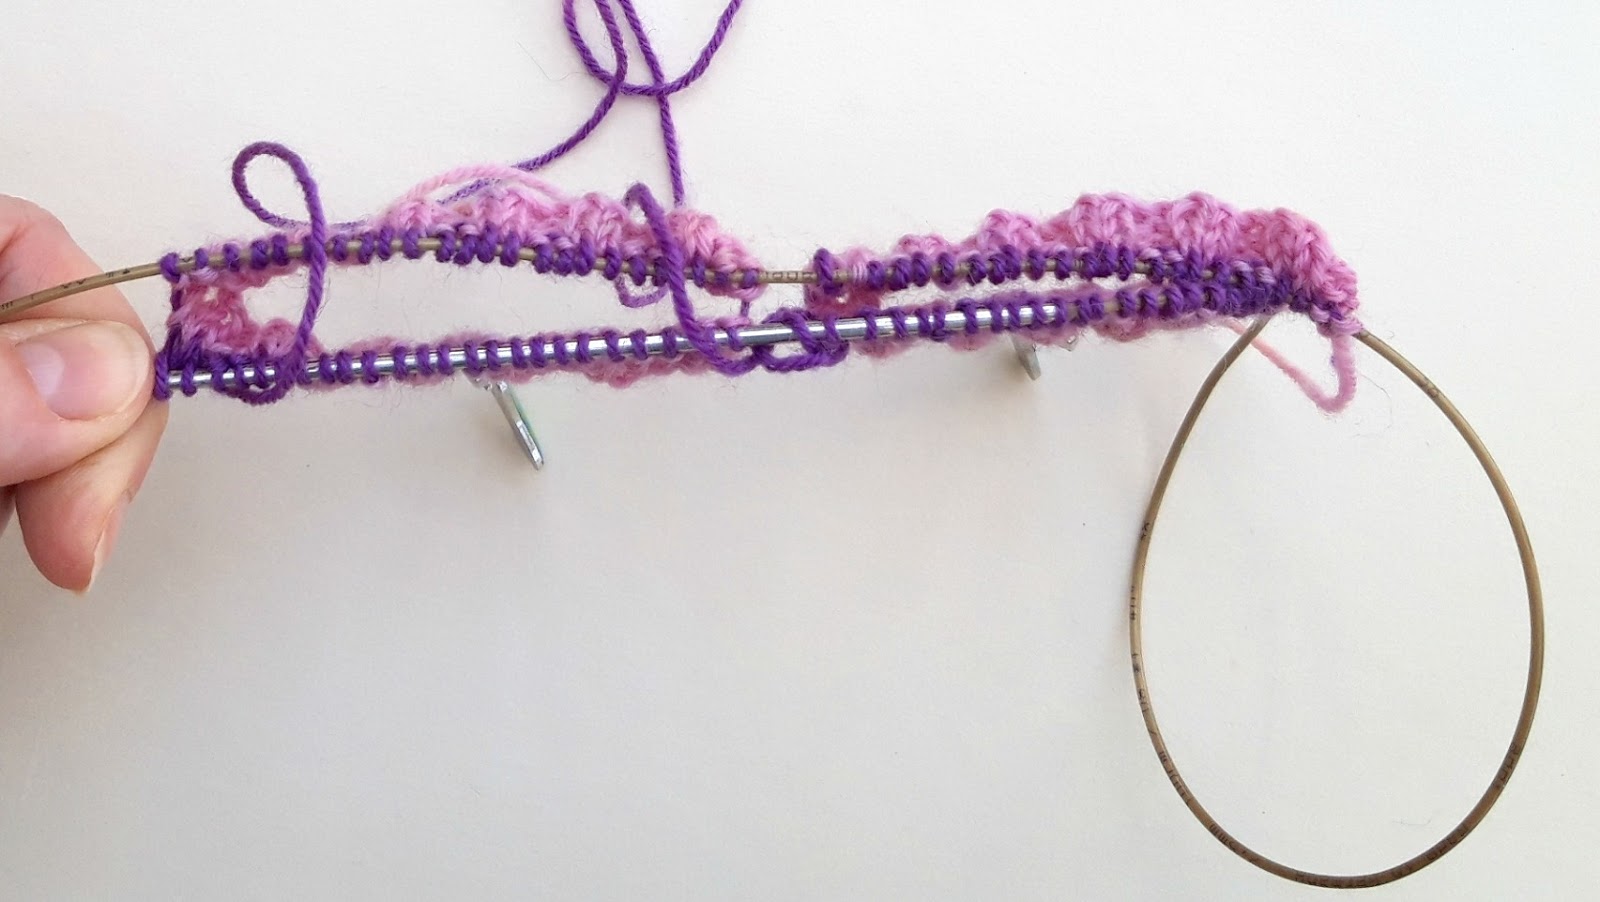
Here comes another fiddly bit so read this through first! You’re going to get hold of the tip of your long circular needle (make absolutely sure you’ve got that and not a DPN!) with your left hand and you’re going to slide all the stitches you’ve knitted onto the cable with your right hand, leaving you with a length of needle tip and cable in your left hand and the stitches sitting safely on the cable to the right.
It should look like this …
Now, you’re going to work the second half of the stitches on the second DPN – that’s the one that you’ve just used. Make sure that you keep a loop of cable free on the right hand side (this is your “magic loop”). Don’t forget that this is shown in the video if you need to see it!
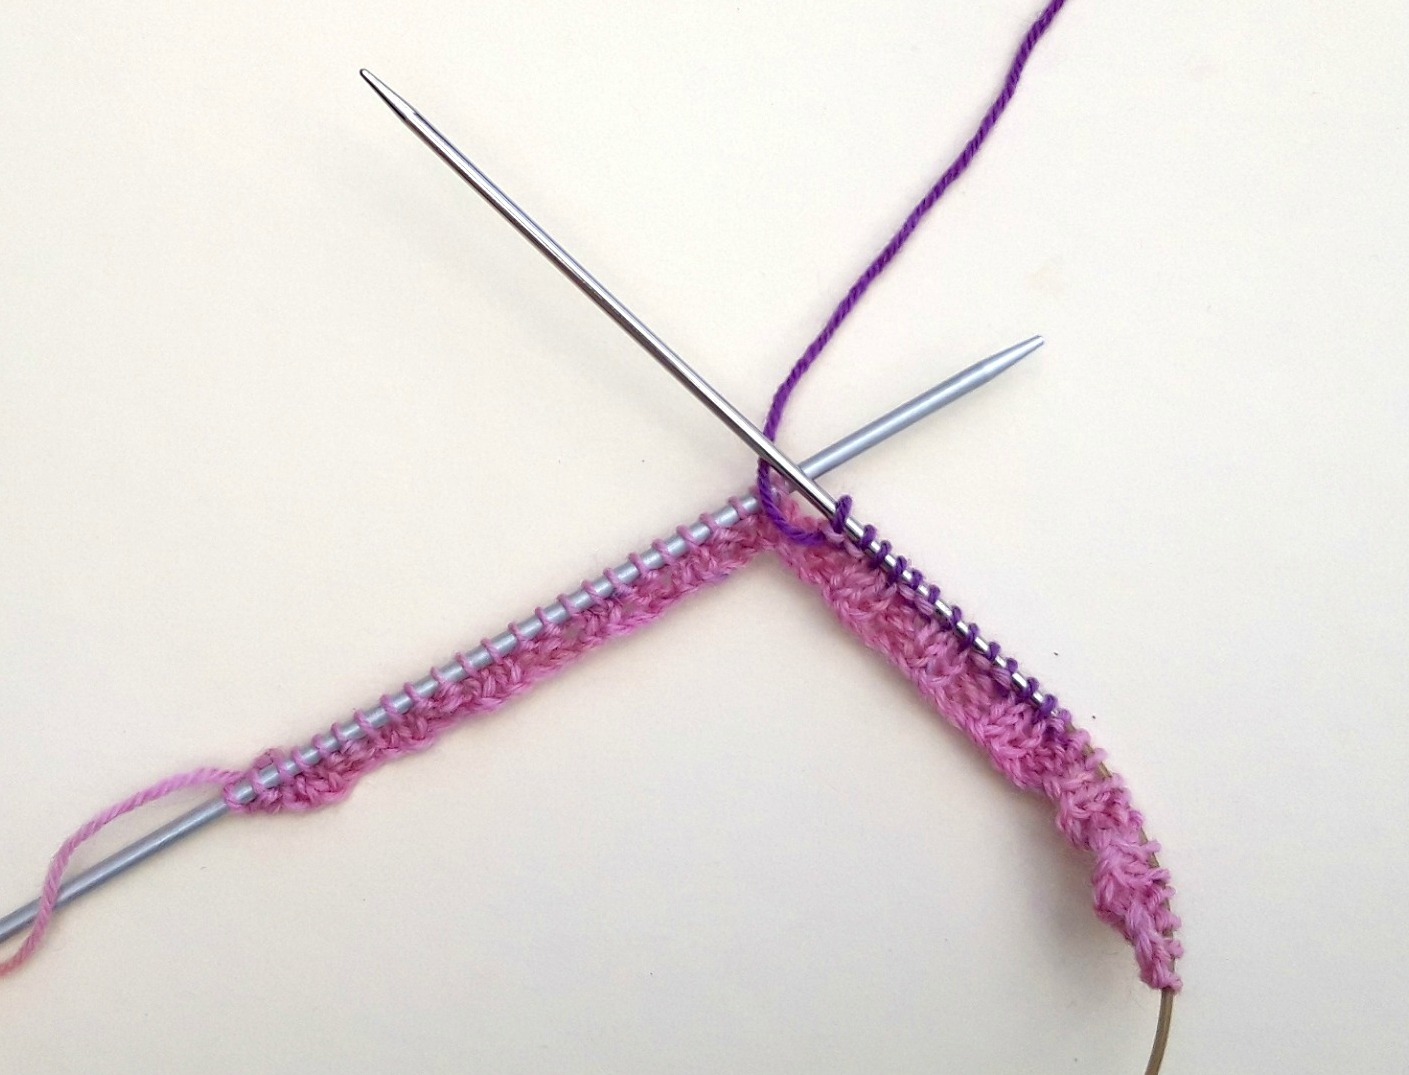
Here are my stitches all knitted off the DPN and onto the circular needle. You can see the “front” and “back” of the sock and you can see the loop to the right – if I was to pull that straight, it would be a good size and that’s what you need to keep free so that it’s easy to knit your socks.

Now, tuck the working yarn from the stitches you’ve just knitted out of the way and work the second half of the stitches from the first DPN using the working yarn that is attached to the stitches at the back of the needle. I know it does seem a bit strange doing it this way but it all works out!
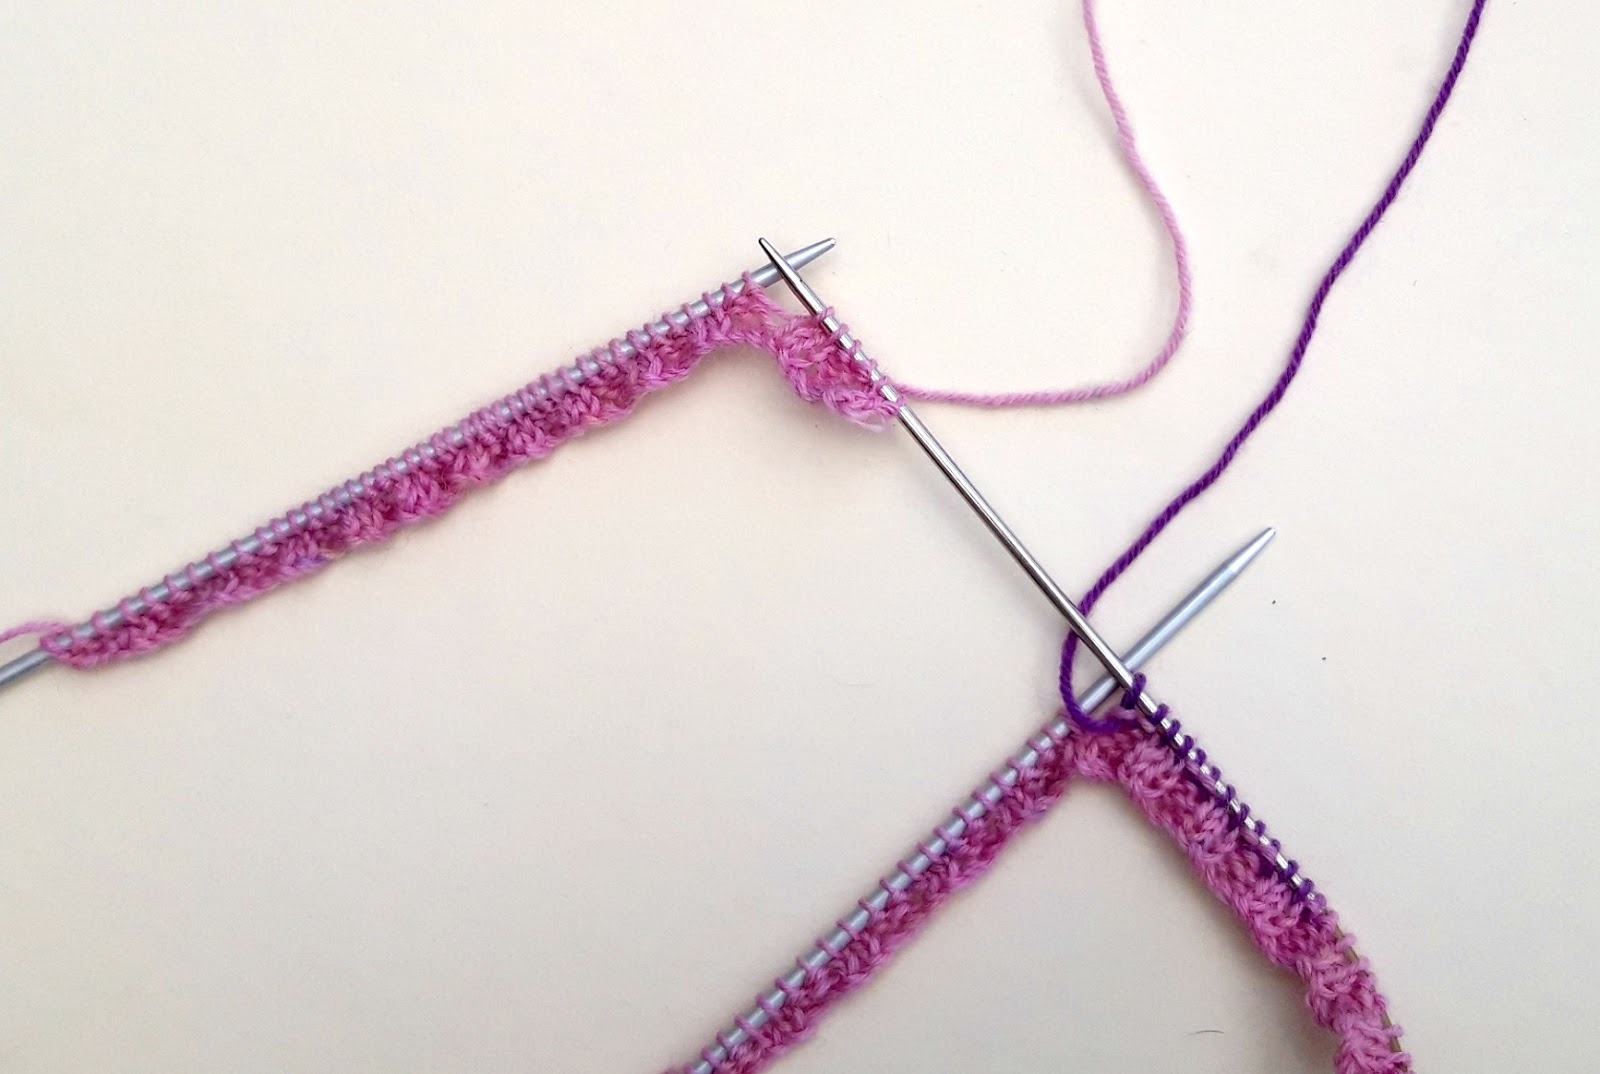
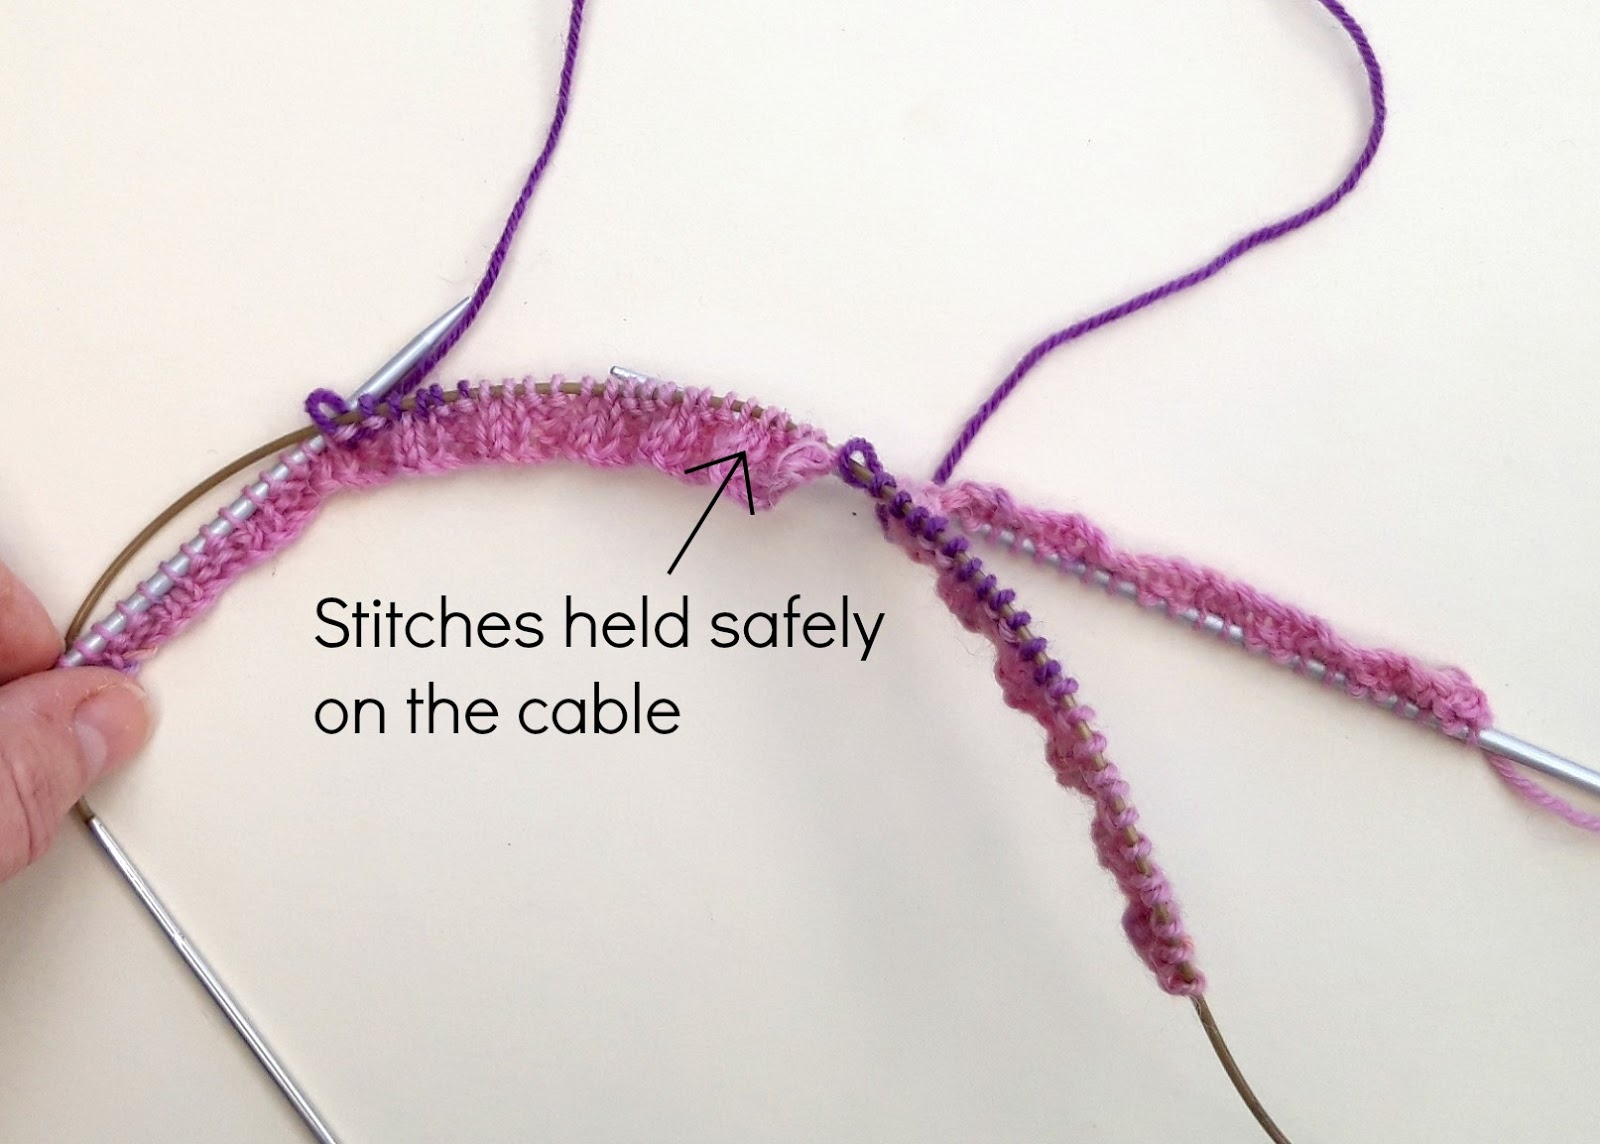
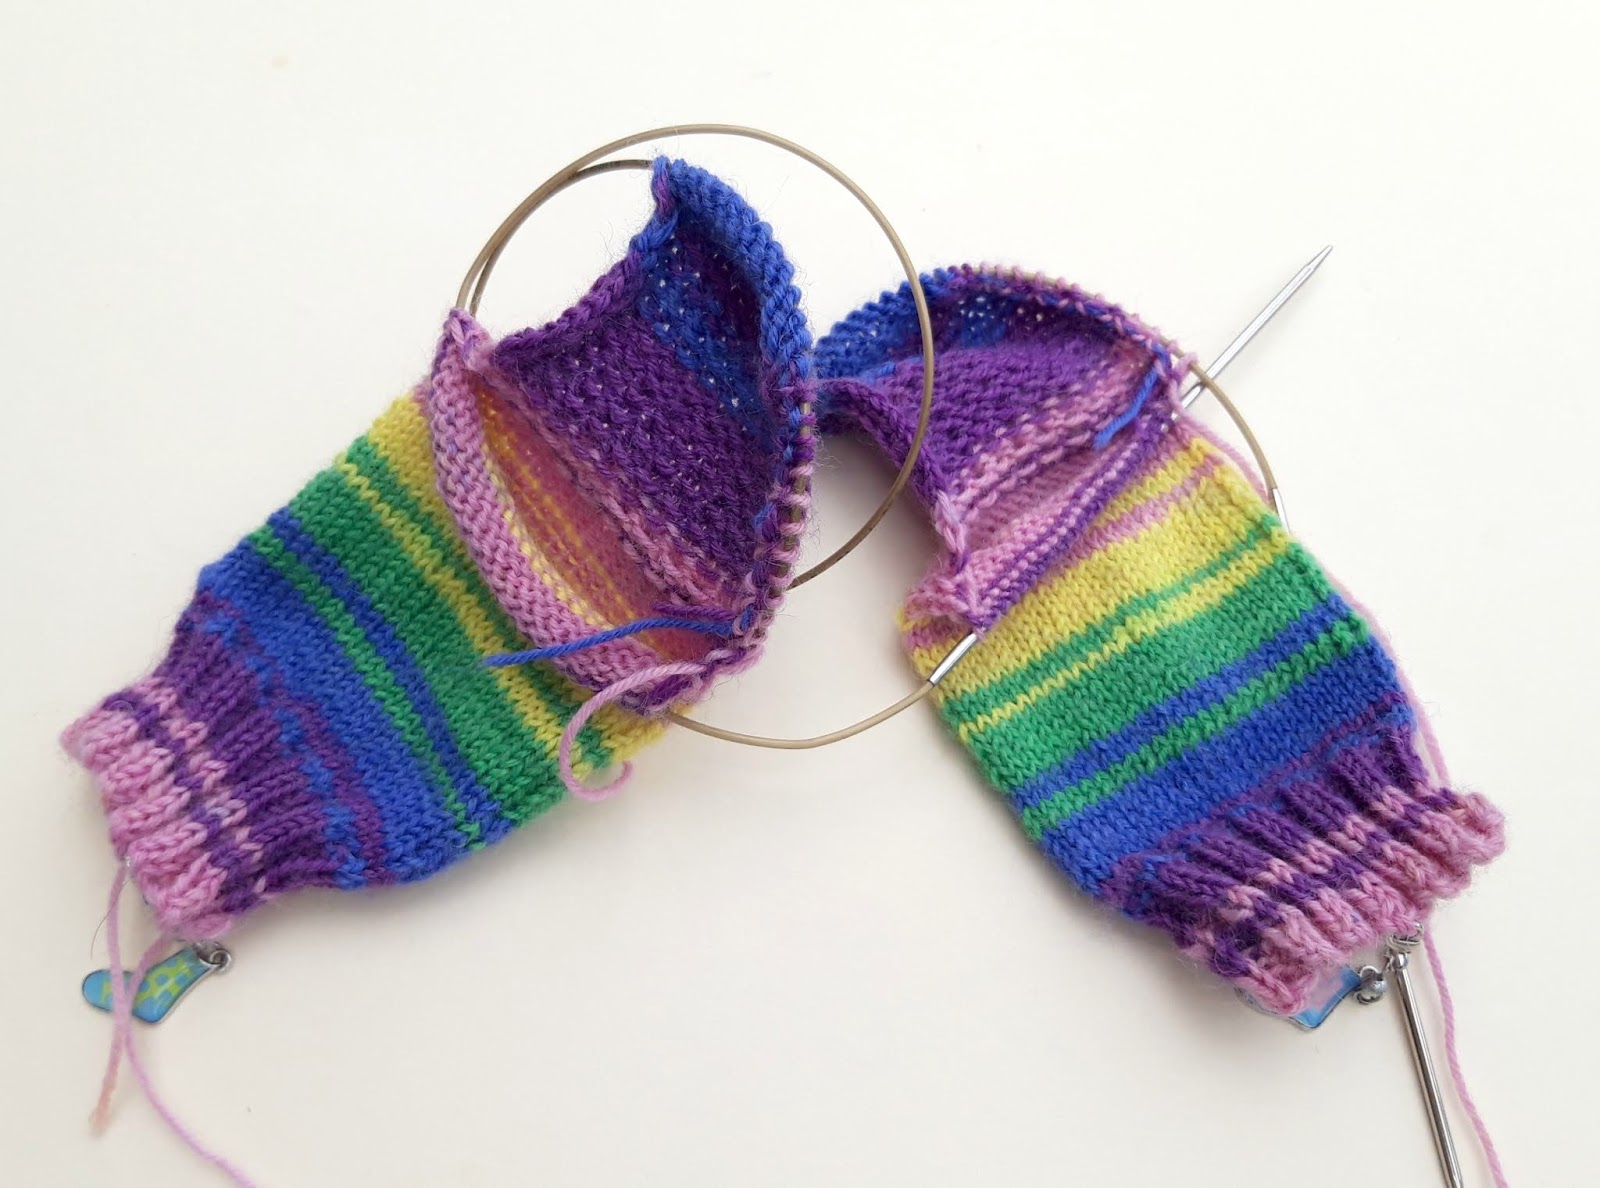
This is what you should have now. The stitches of one sock will be completely contained by the needle, and the other end will look like this, and this is where you’re going to make your first join.
Start by pushing the bottom needle tip backwards so that the stitches of the front of the sock slide back on the tip ready to knit, and carefully pull the top needle tip out so that you can make your loop of cable again.
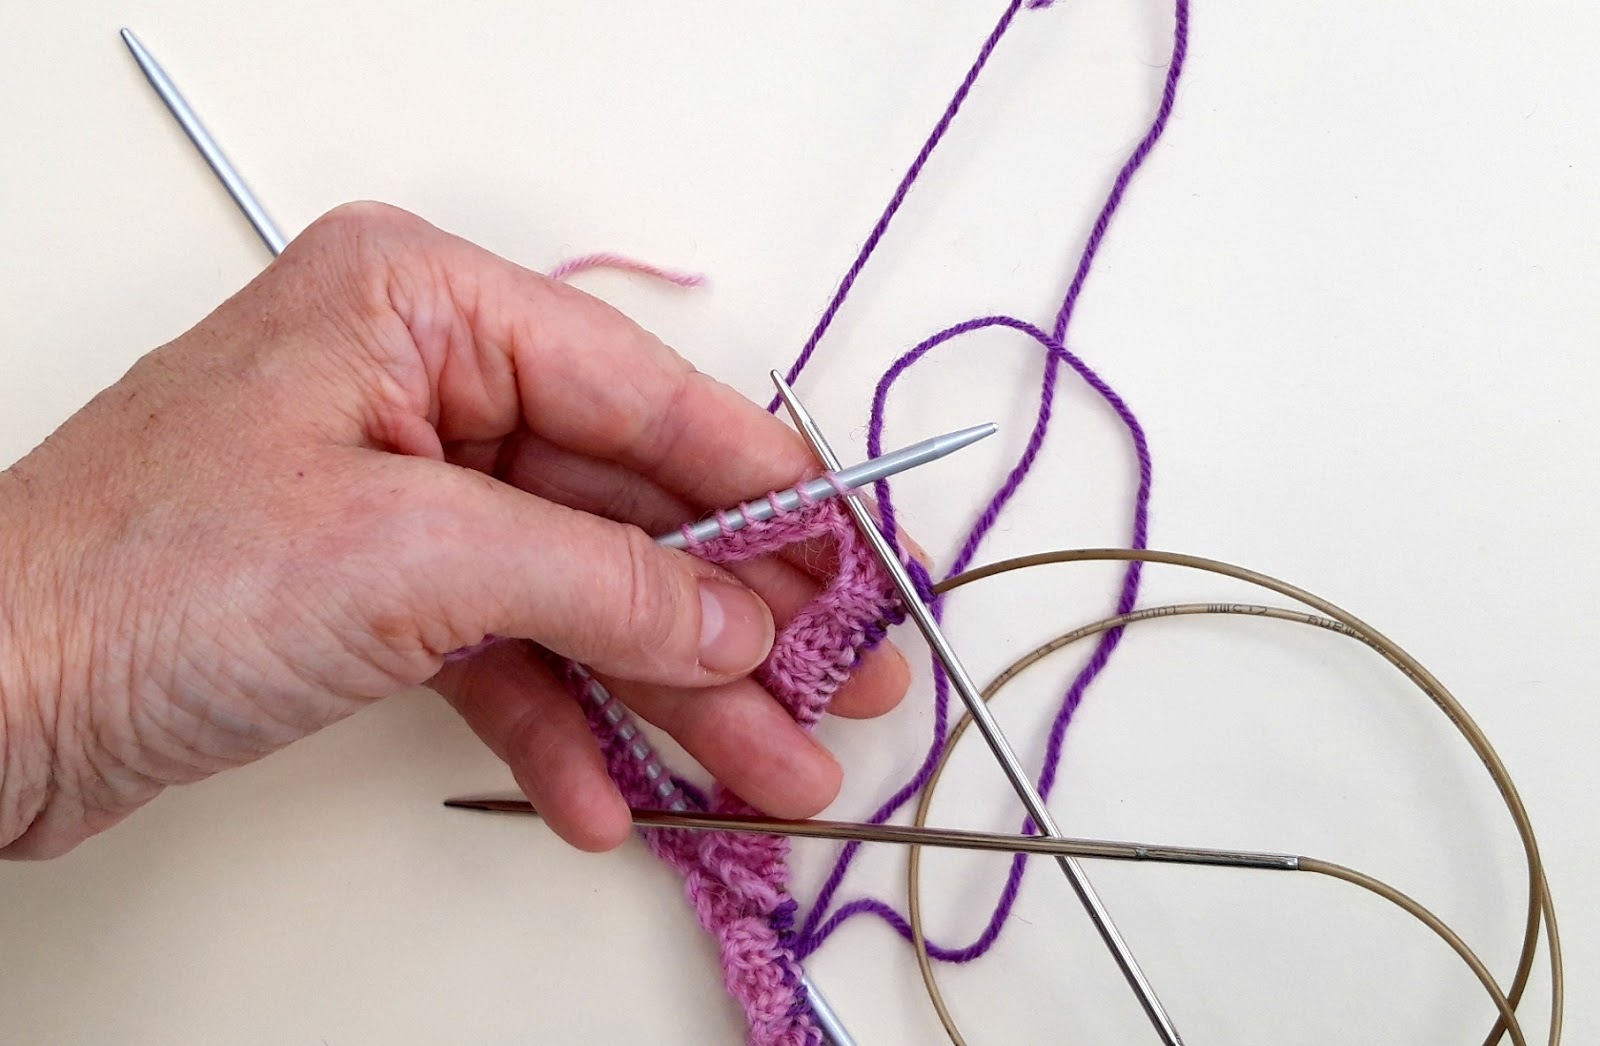
Now, work the front stitches on the bottom needle, pulling the yarn tightly to close the gap between the front and back stitches.
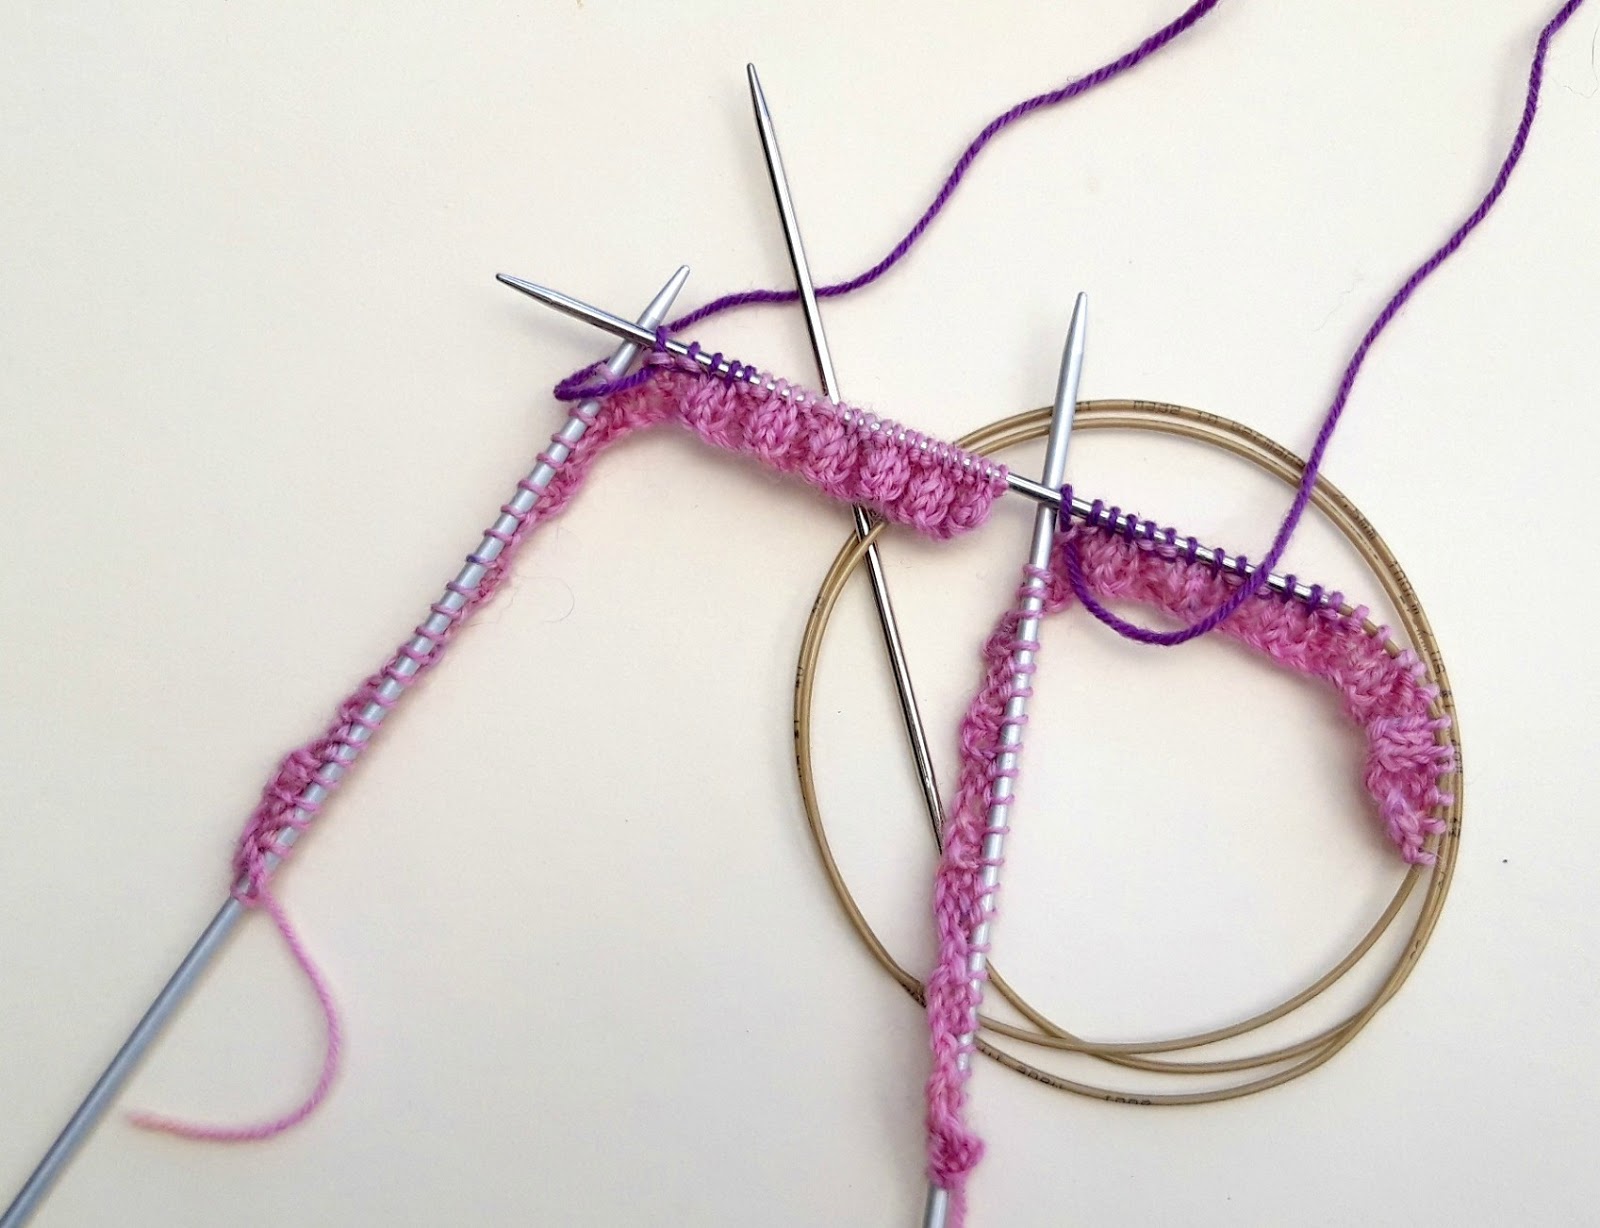
Once you have worked across the first set of stitches, put your working yarn out of the way and work the second sock stitches, remembering to pull the yarn tightly between the front and back stitches again. Don’t worry if it comes a bit loose, it will tighten up as you work and you can always fix it later if you need to when you sew in the end gap.
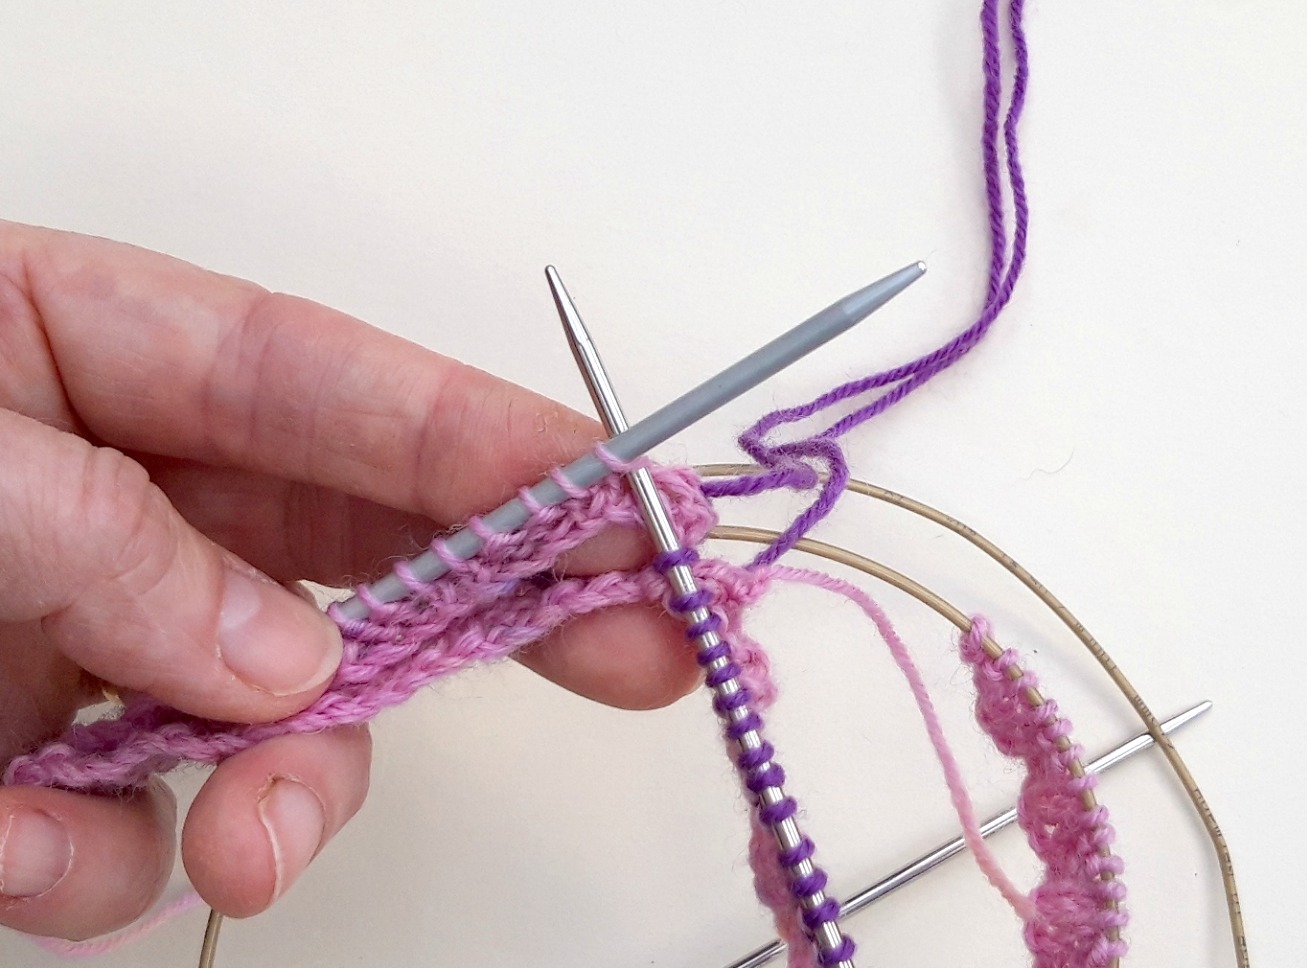
And look! There are your two socks both on one long circular needle.
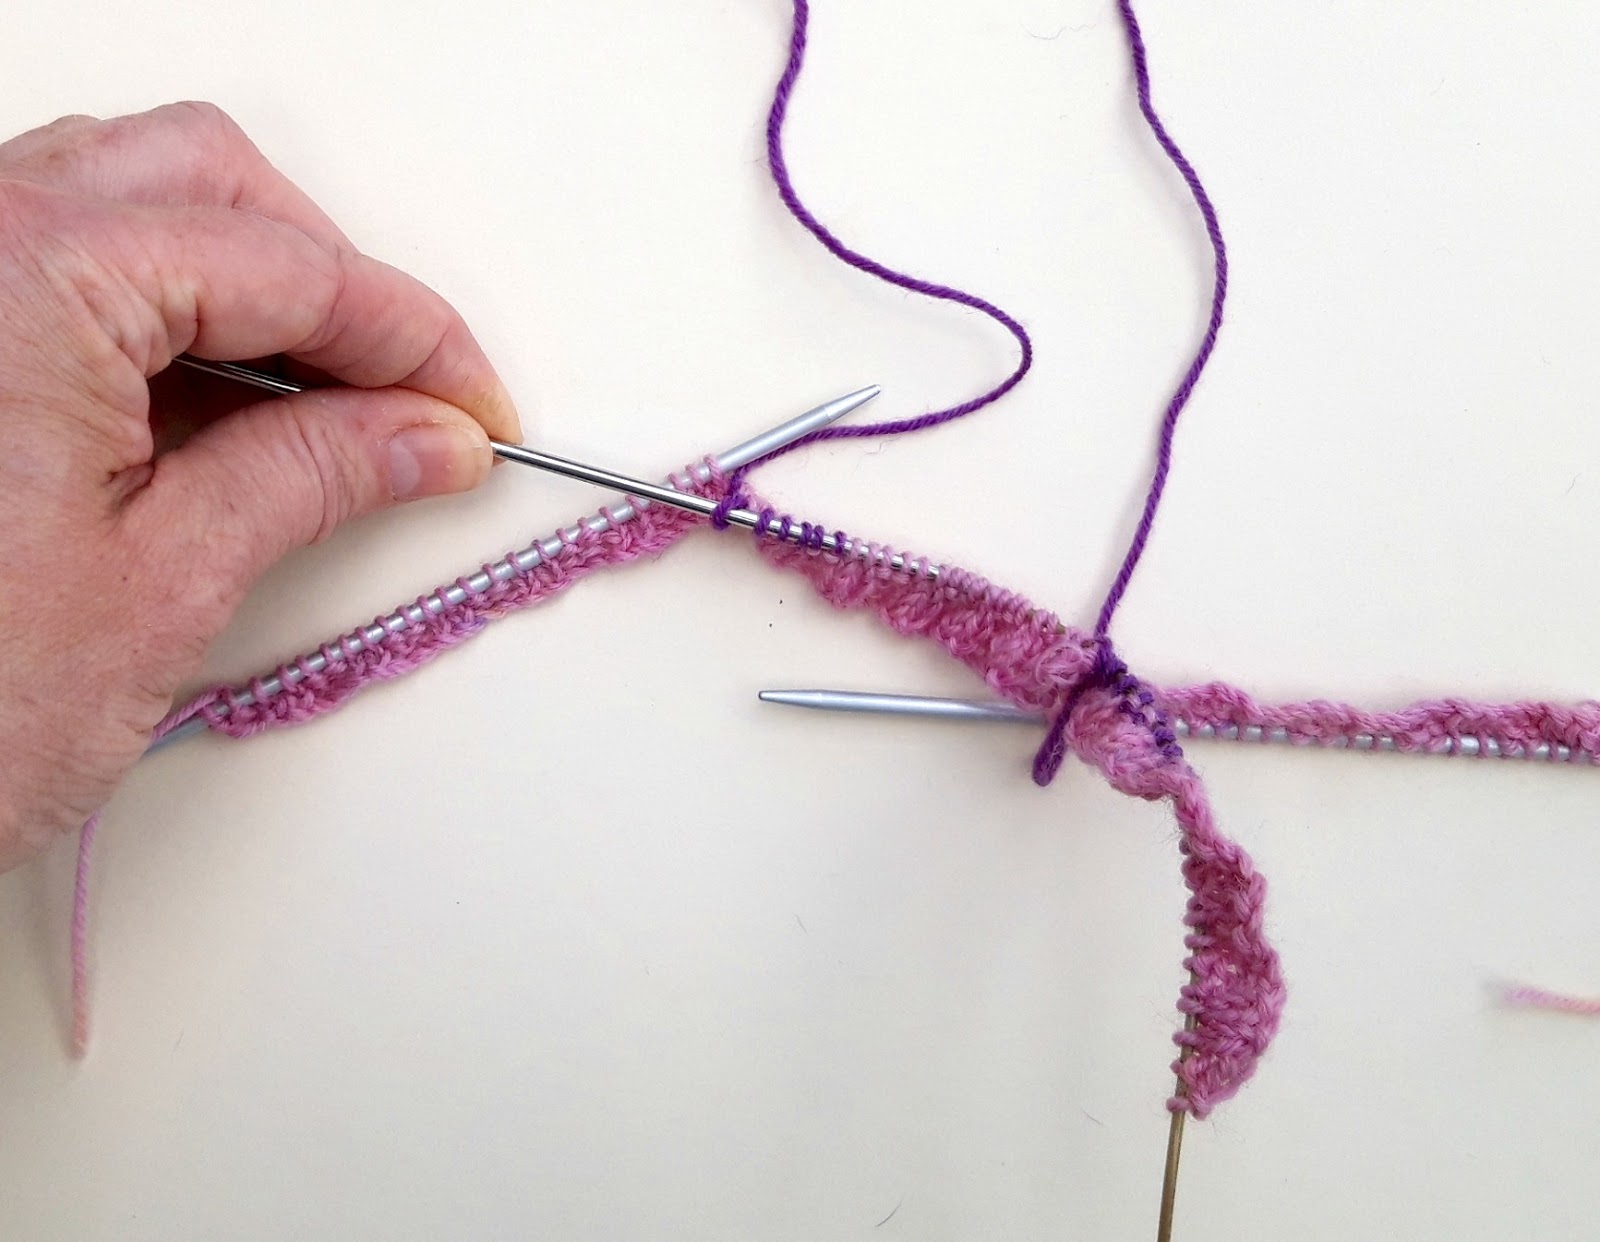
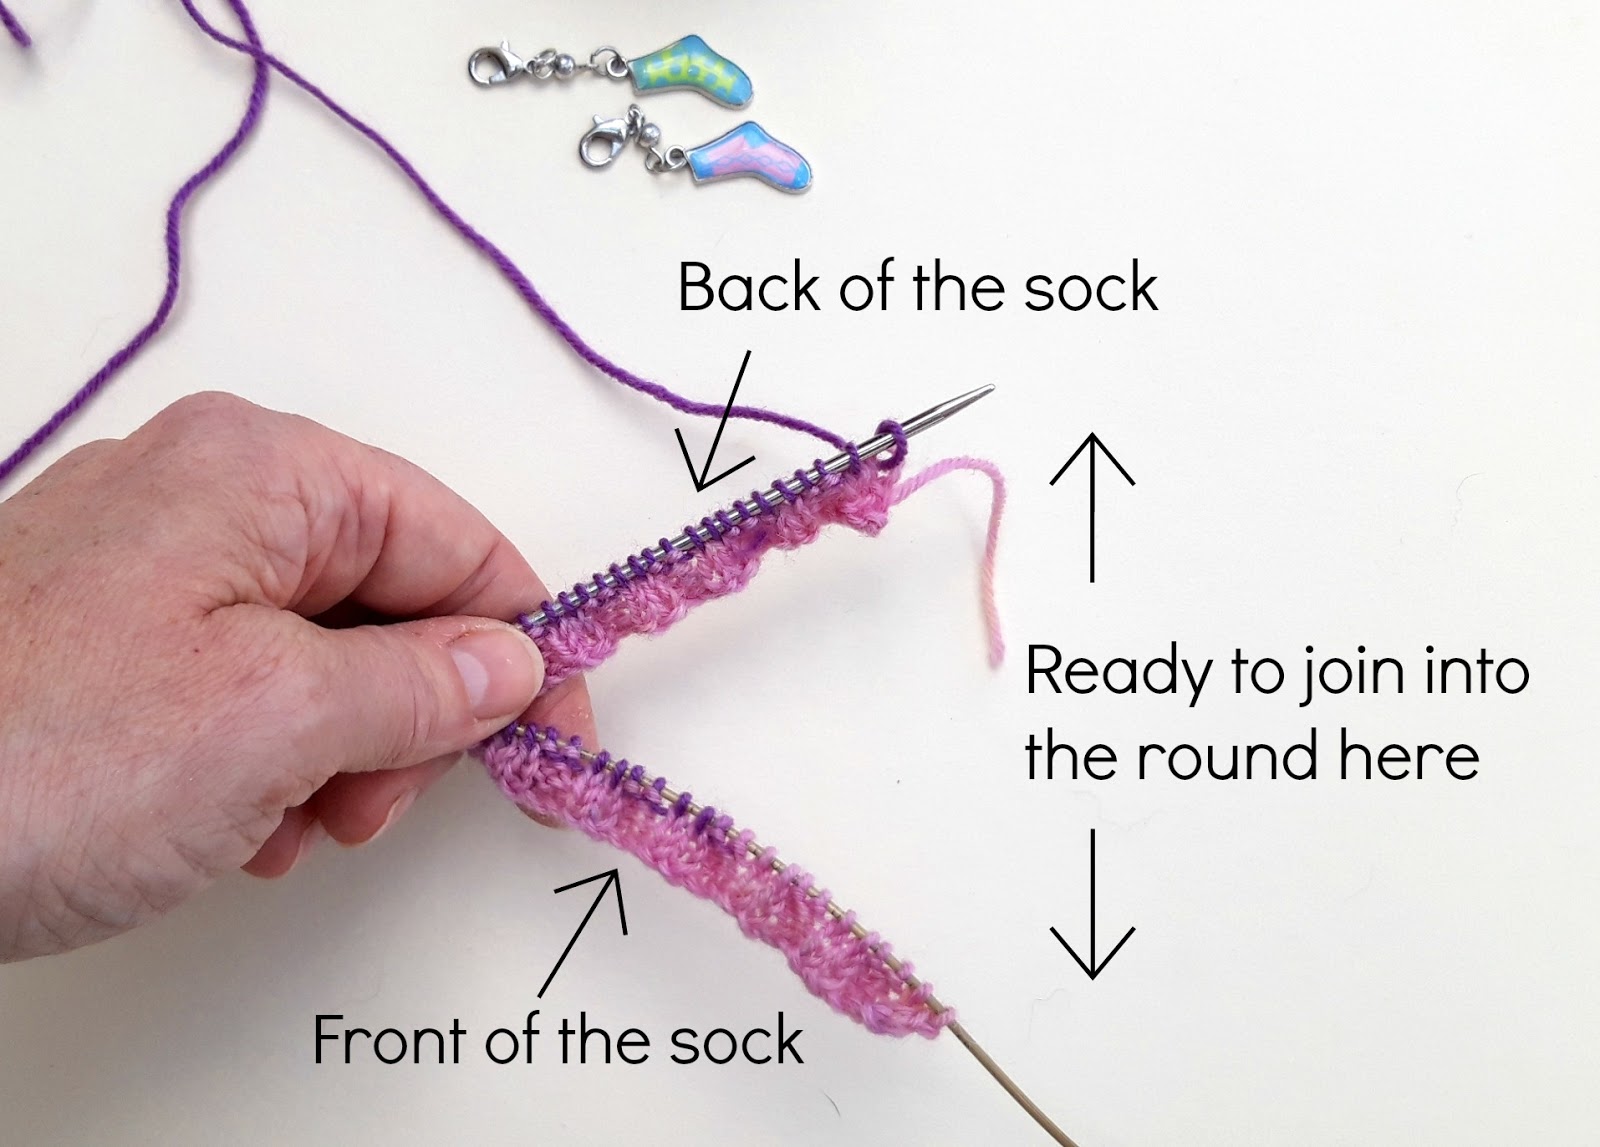
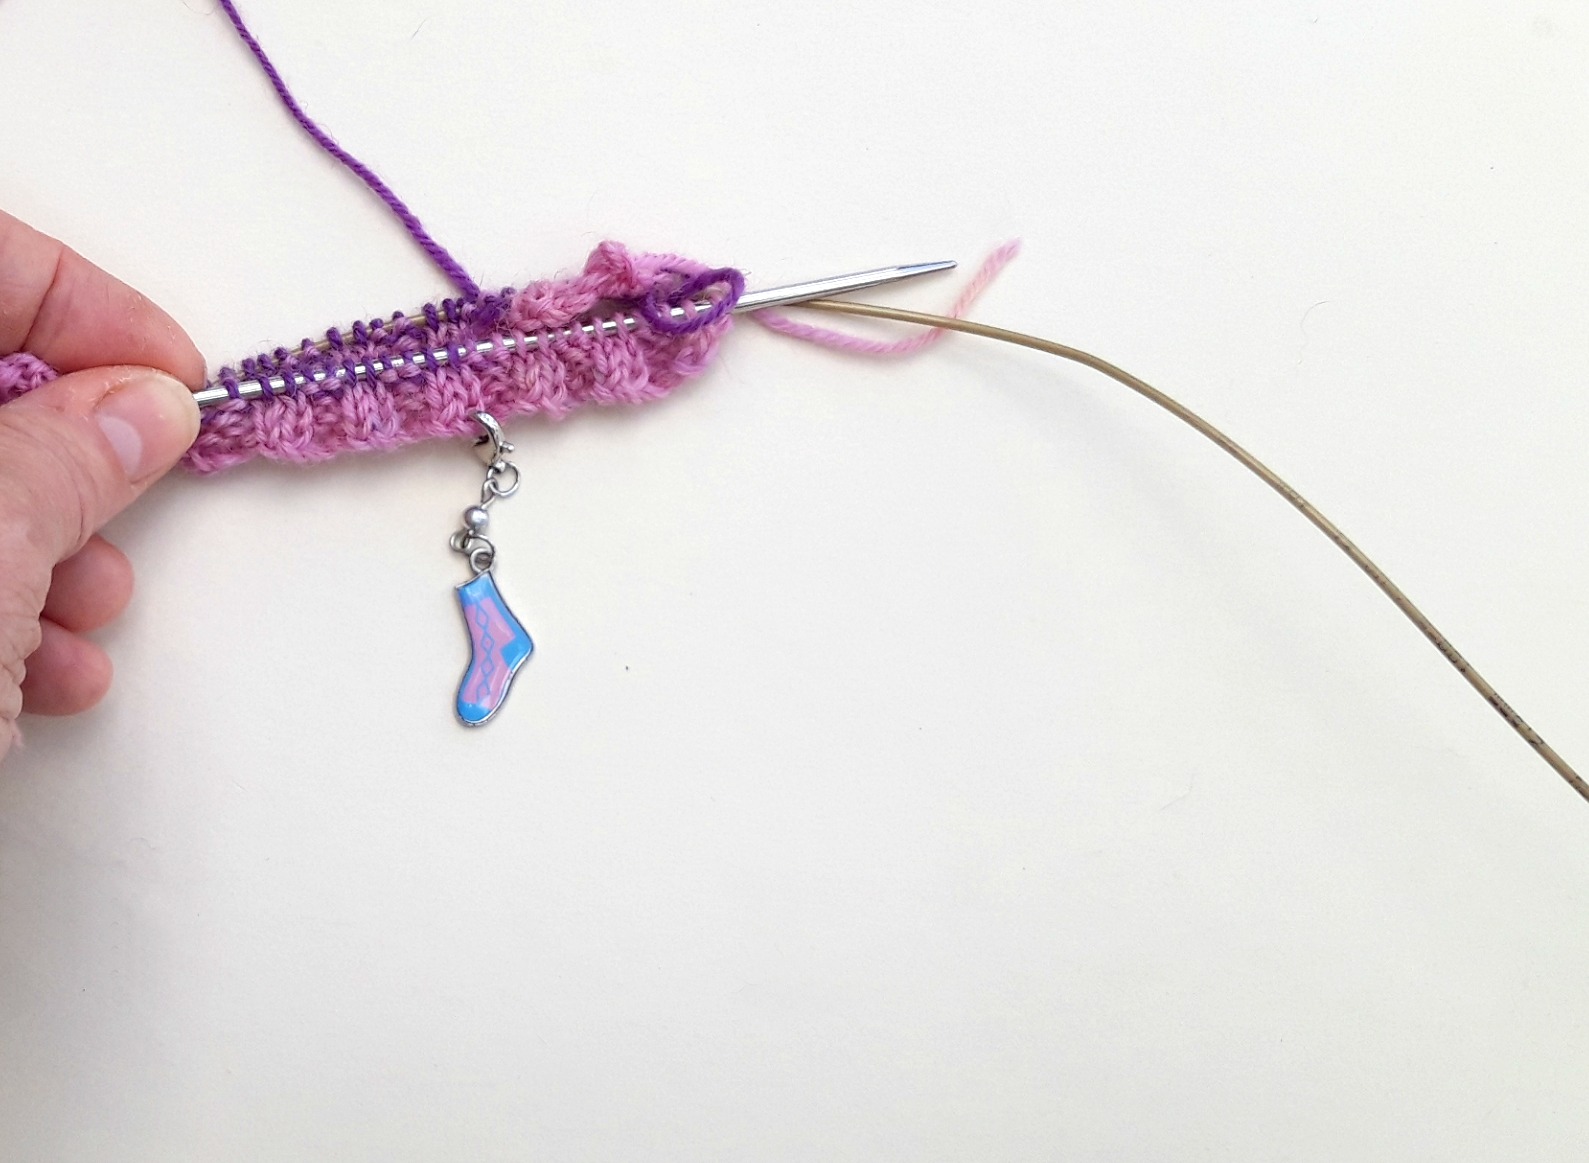
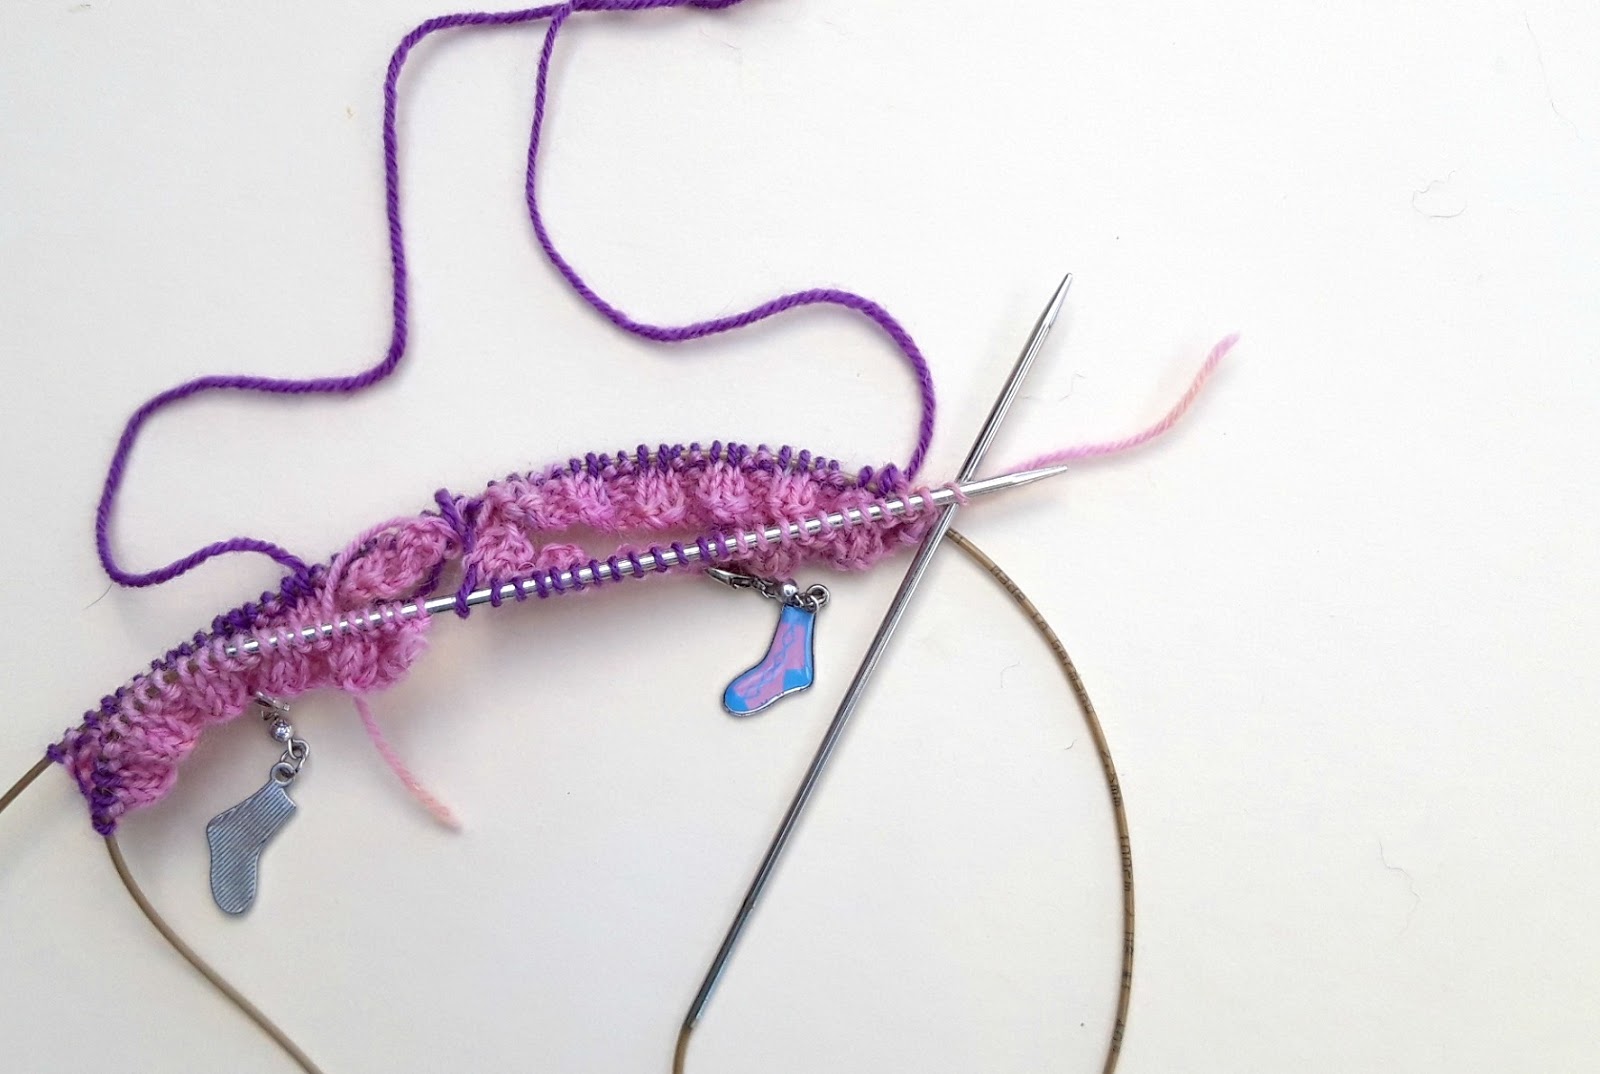
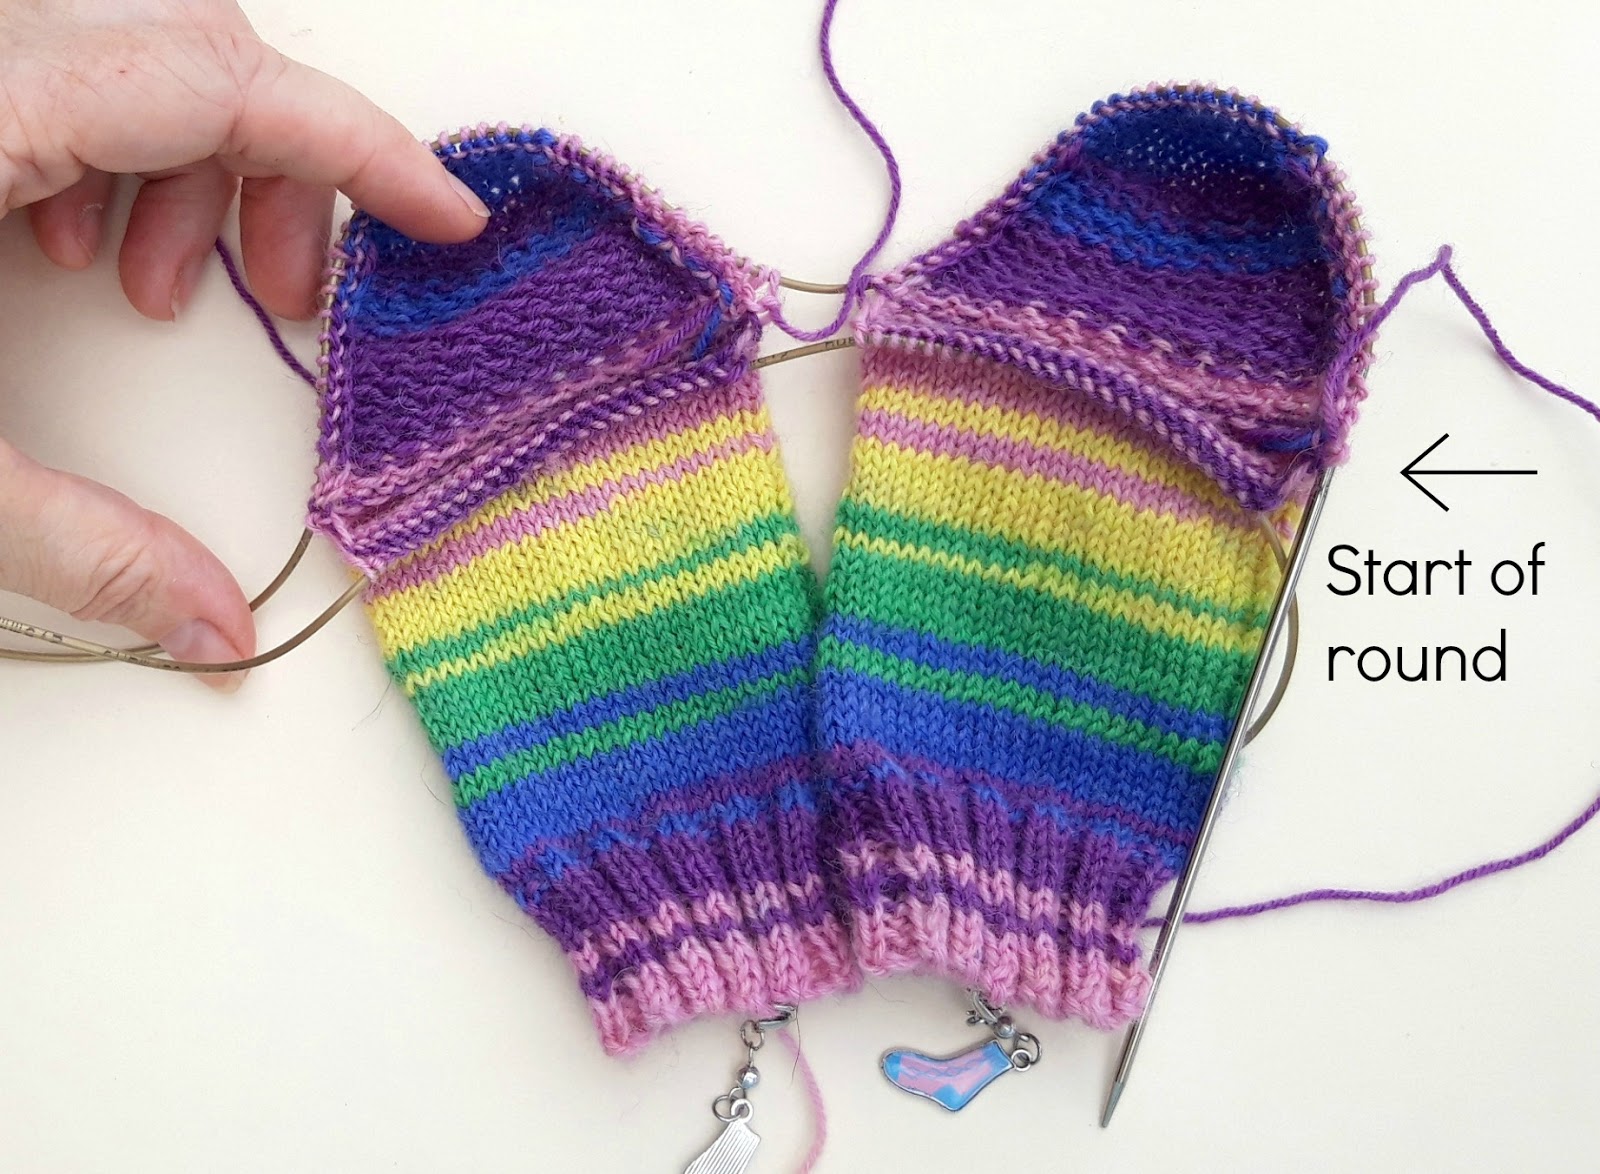
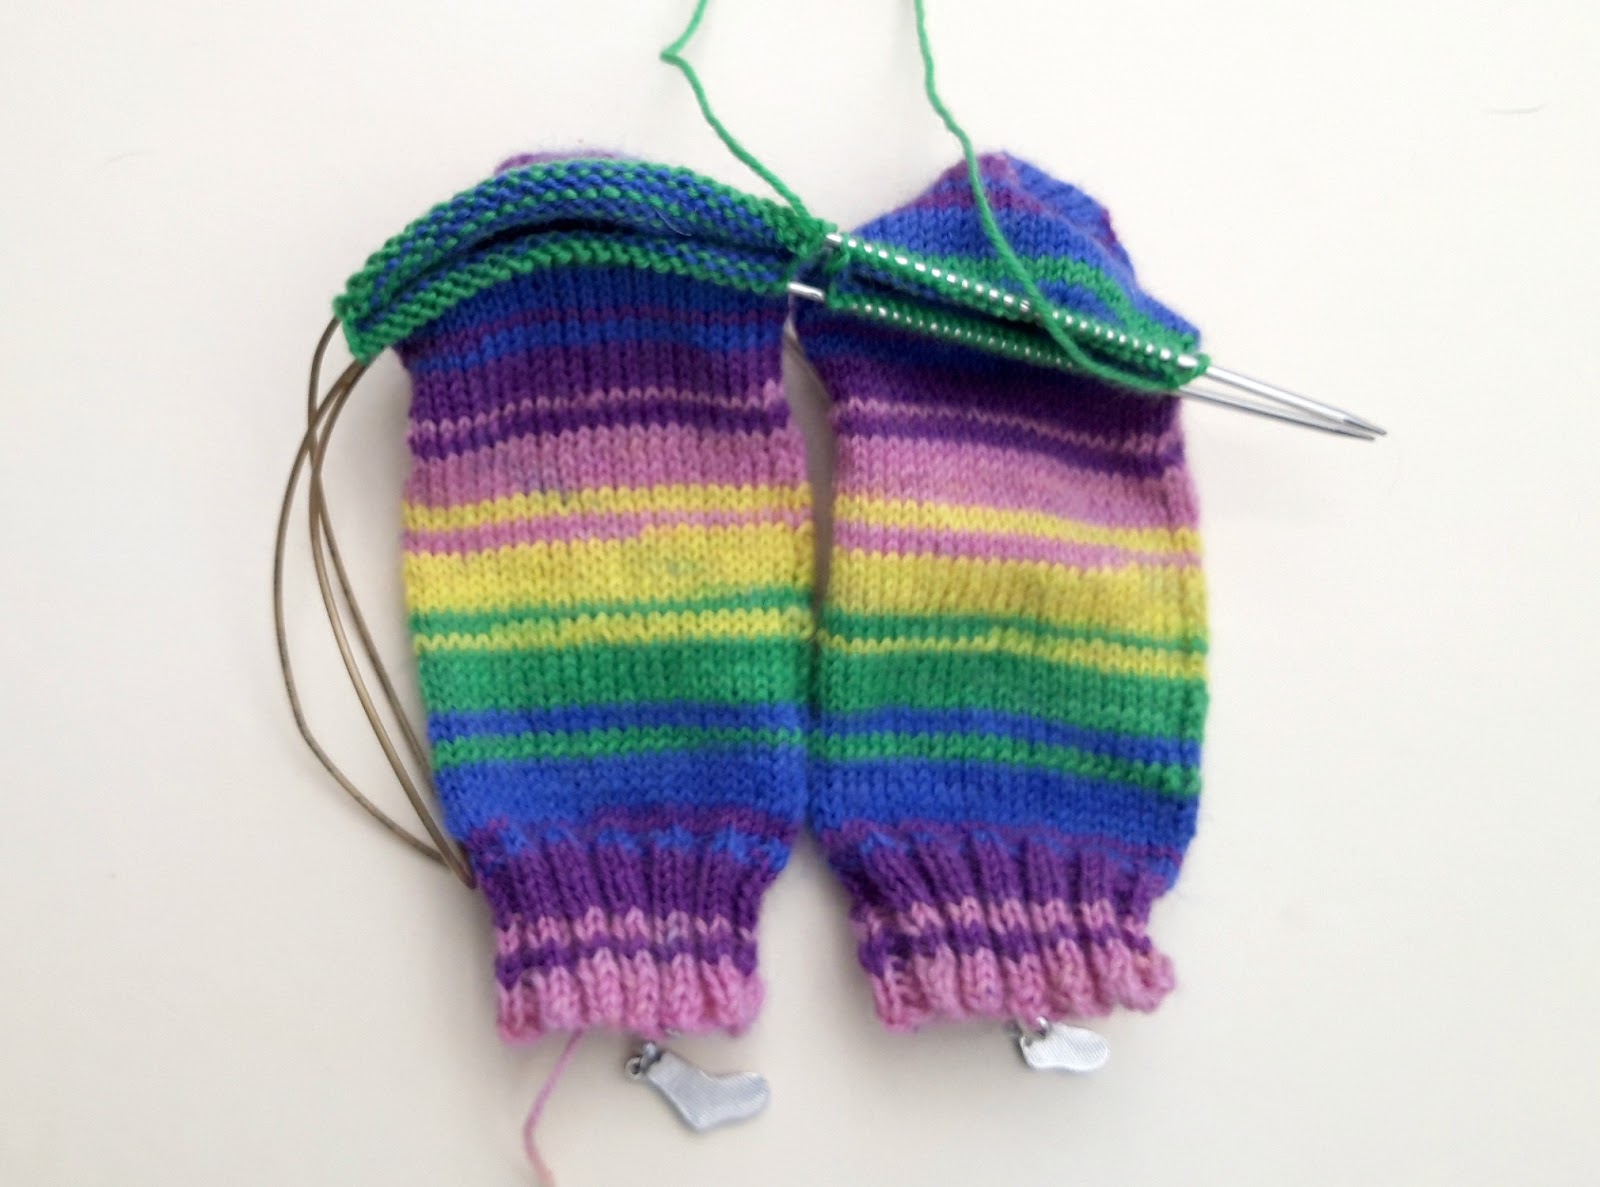
What I like to do now is to add a marker so that I know which is the front and back of my sock. You can tell by the tail end, but it’s easier to have a more obvious visual marker then there’s no risk of getting mixed up if you get distracted mid-row. I’m using these progress keepers that came from a knitting magazine (I couldn’t resist those tiny socks!) but anything will do – safety pins, badges, even paper clips as long as you can see which side of your sock is which.
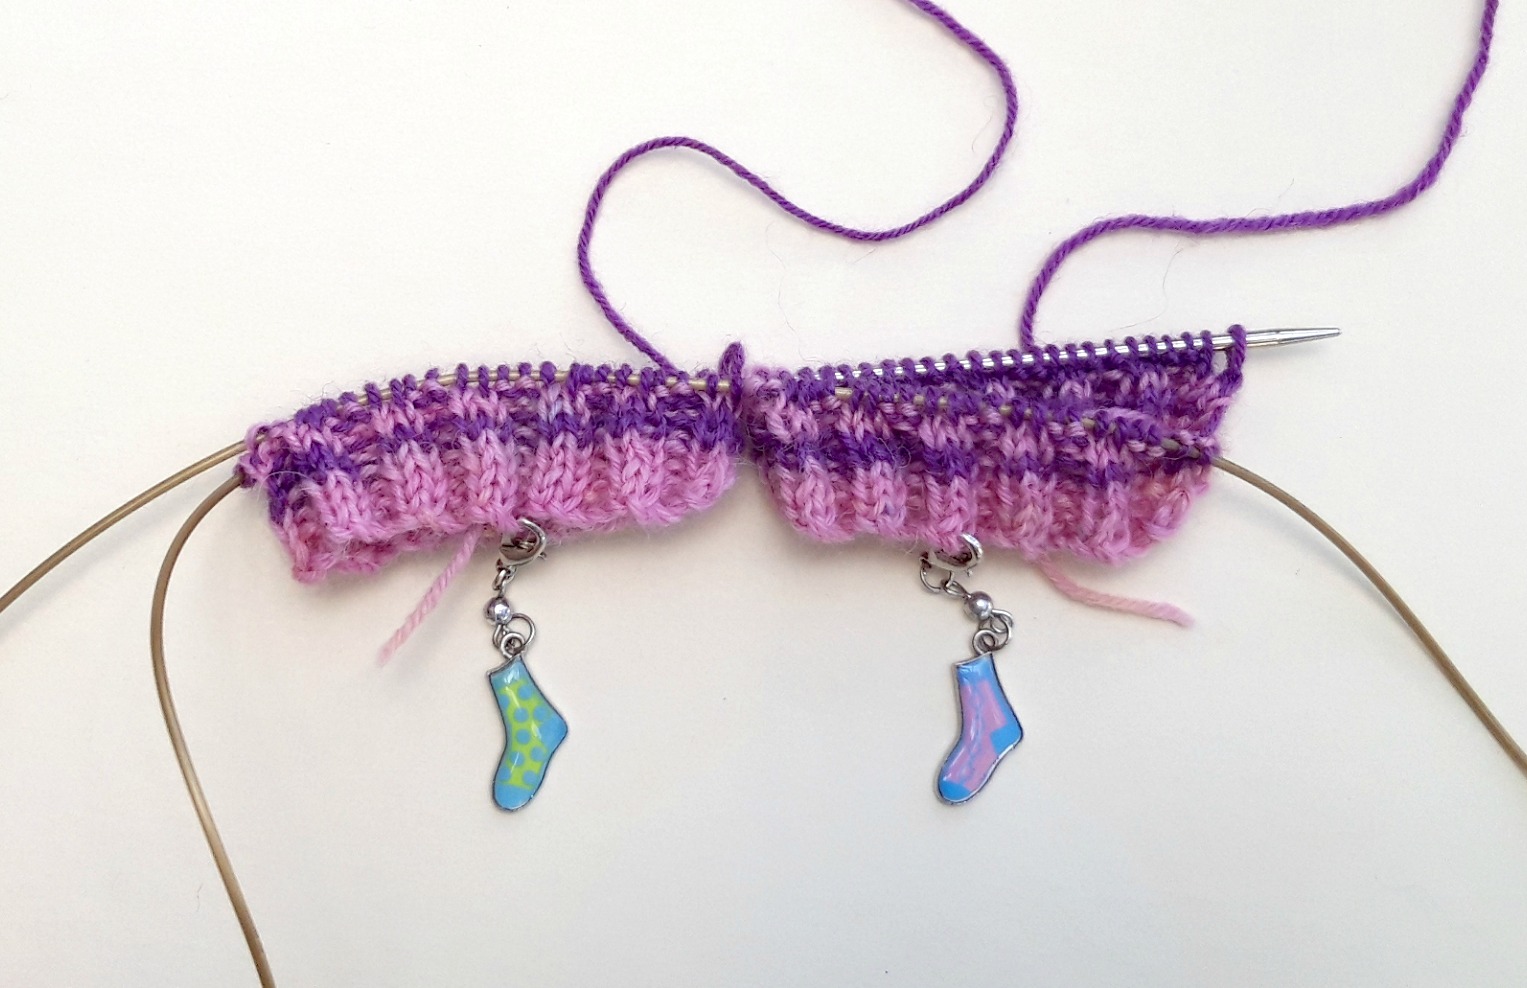
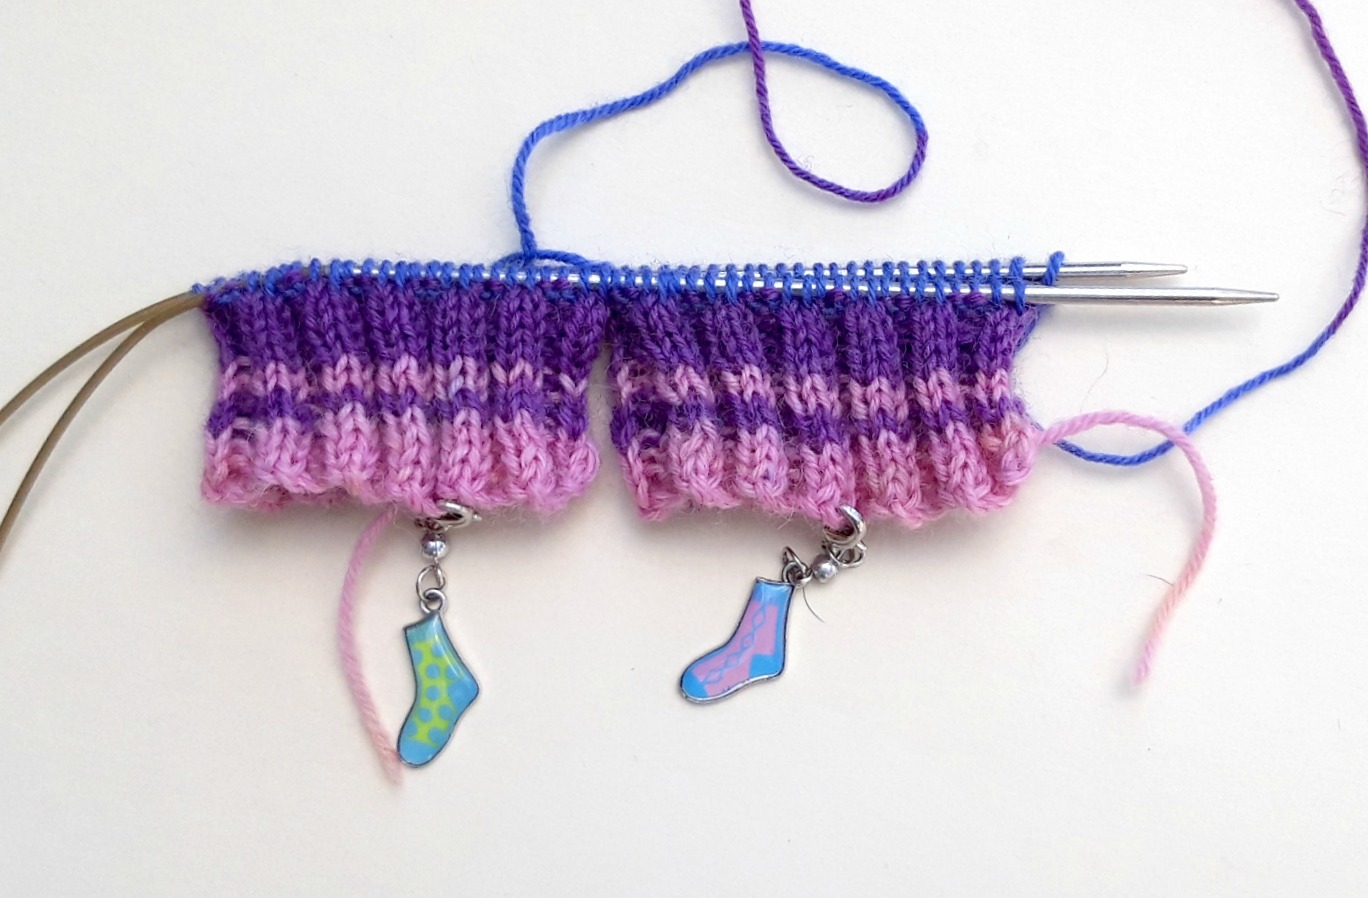
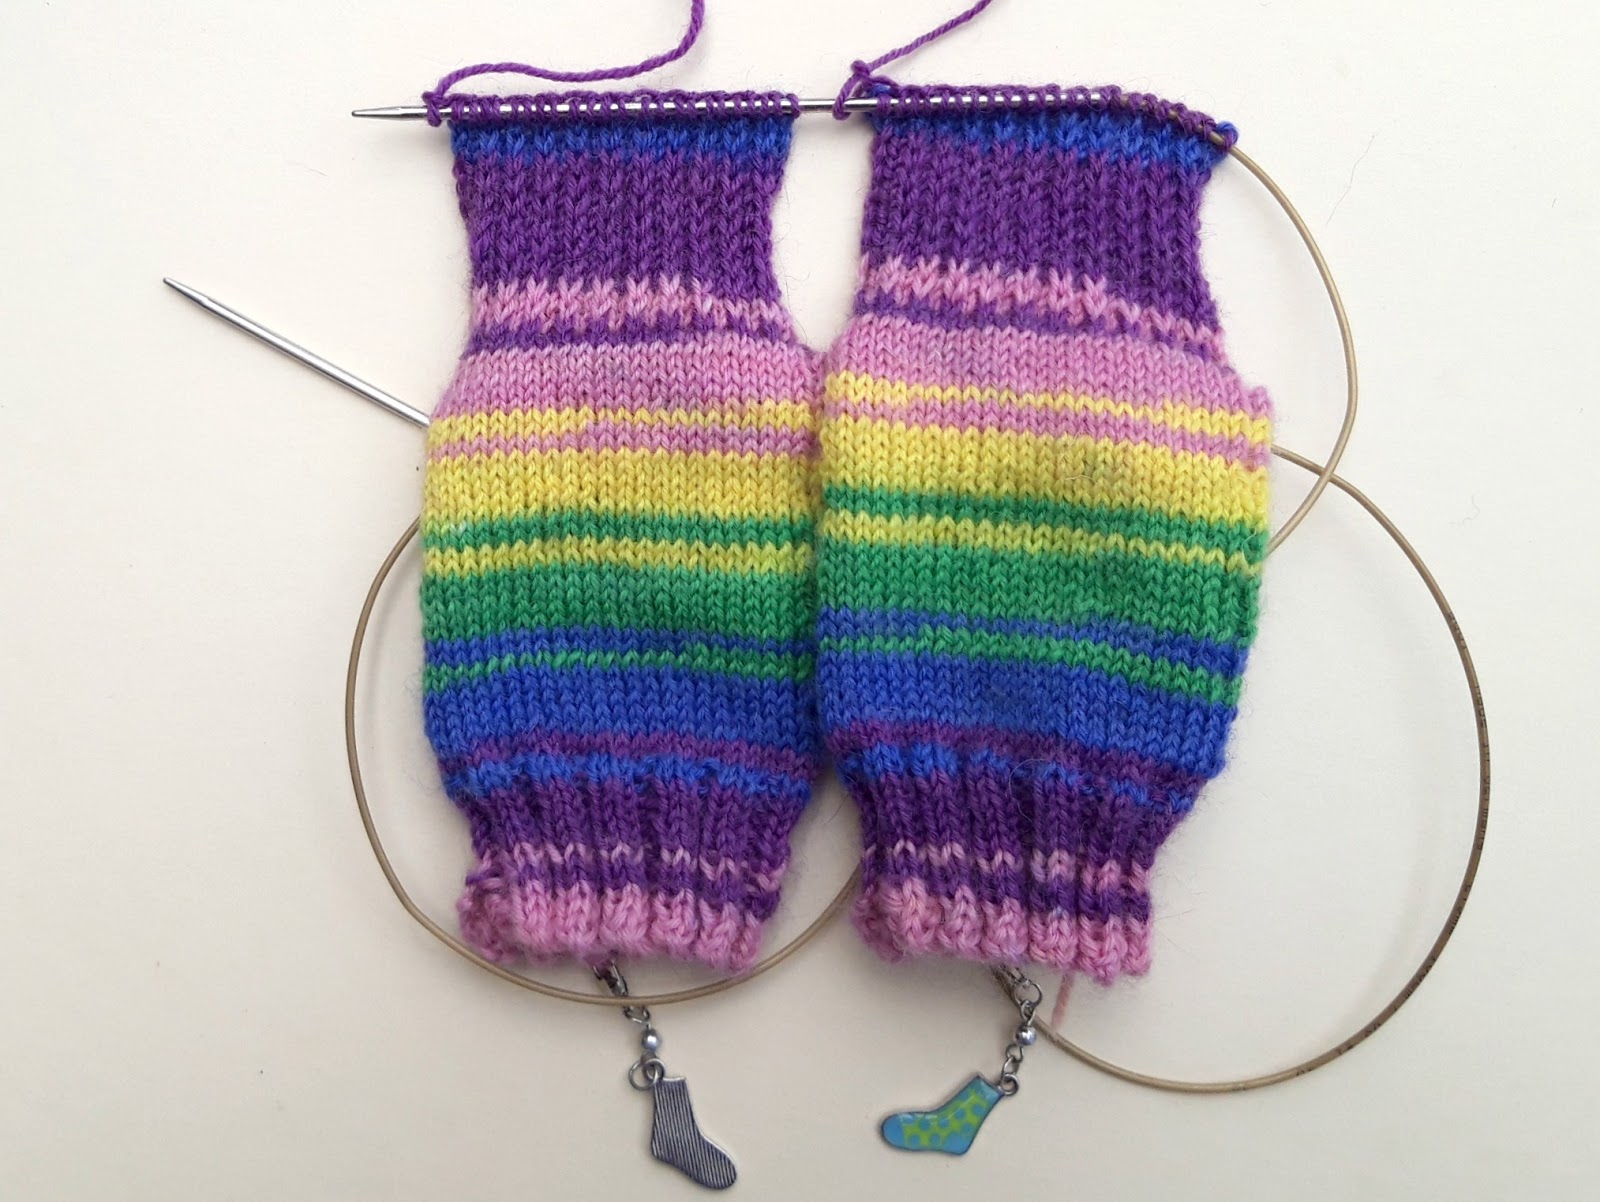
Keep working your rounds of rib, remembering to leave yourself a large loop at either side of your socks as you work, and once you’ve worked the required number, it’s just a case of knitting plain until you’re ready to start your heel flap.
Heel flap and turn
We’re half way through! Hopefully you’ve found it quite easy to get to this point after the initial fiddly bits at the cast on. The next section isn’t quite so fiddly, but it takes a bit of thinking about otherwise you run out of space to work (ask me how I know that! 🙂 ).
Your stitches are all safe on the needle and you’re going to work your heel flap on the back set of stitches.
For a plain sock, it really doesn’t matter if you choose to switch front and back at this point, starting the heel flap straight away at the start of your new round, but if you’re working a pattern into your sock then it might make a difference so I’m going to stick with the existing front and back stitches for this tutorial. This means that I have worked across the front stitches and I have the back of my sock facing me ready to start the heel flap.
Follow the pattern as it’s written, working the heel stitch as you would for a single sock, so that means back and forth on just these stitches. Your front stitches are held on the cable and aren’t going anywhere. It doesn’t matter if you want to knit both heel flaps at the same time or one and then the other as you will end up at the same point.
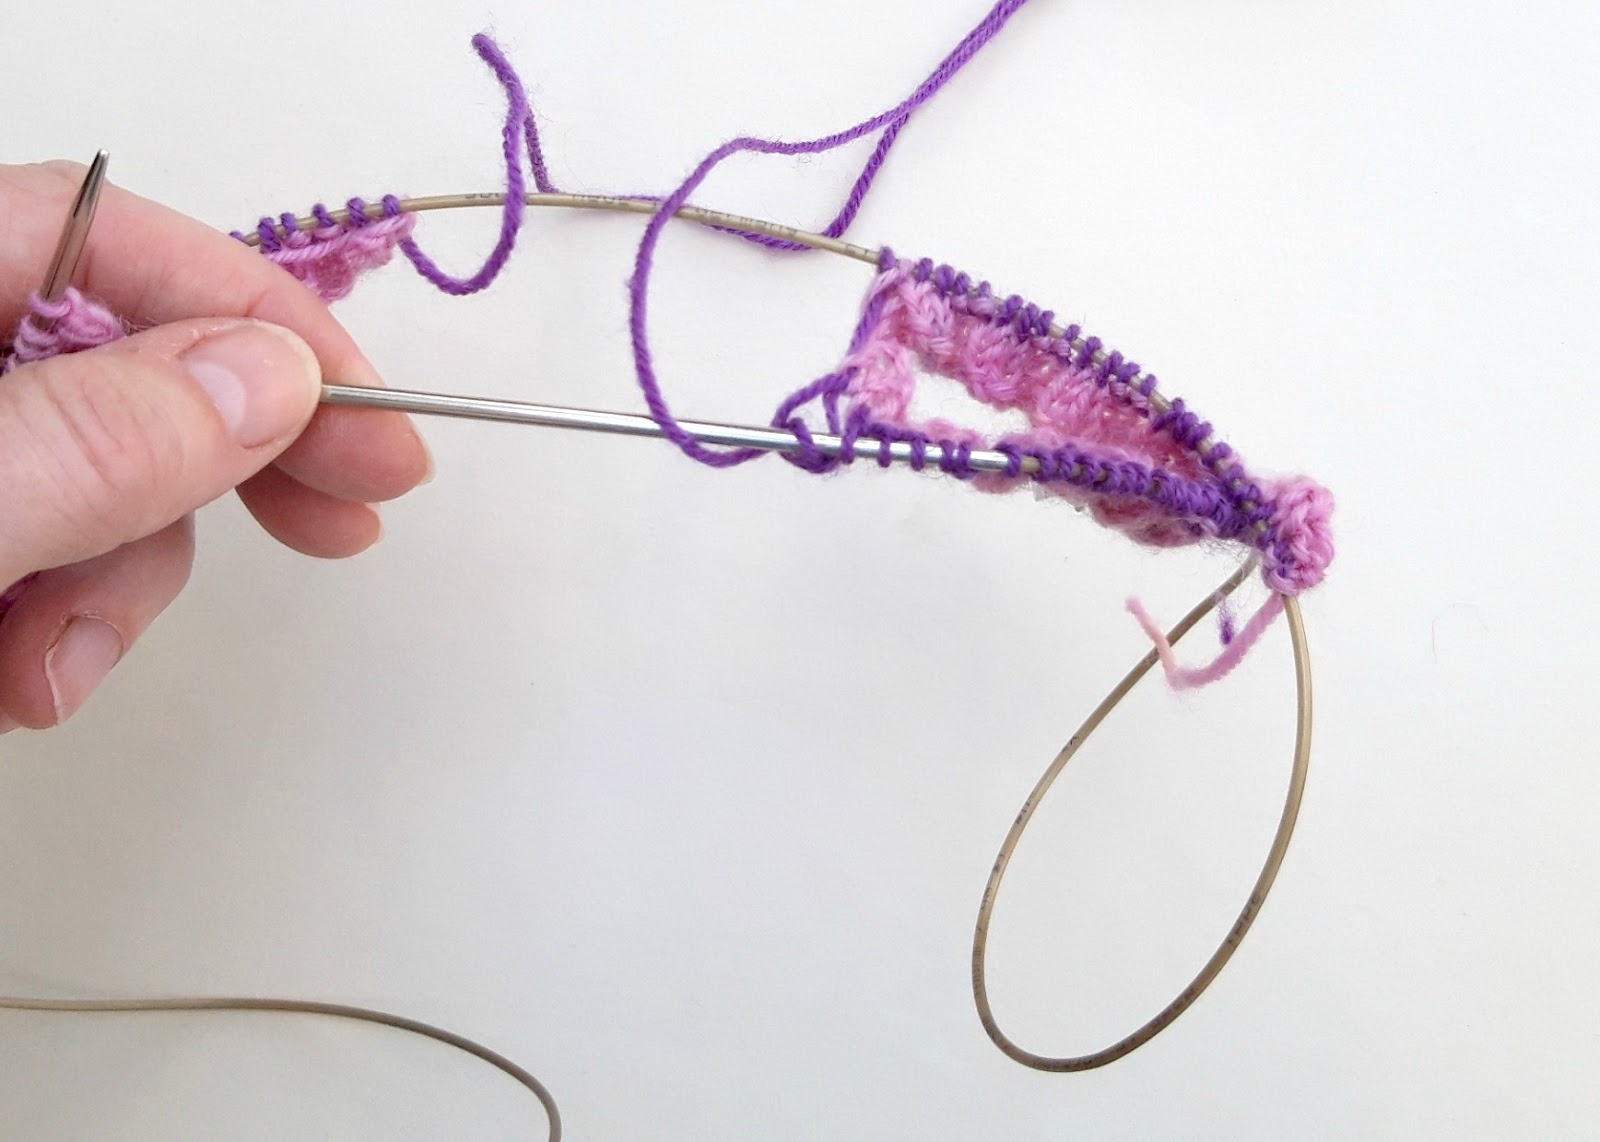
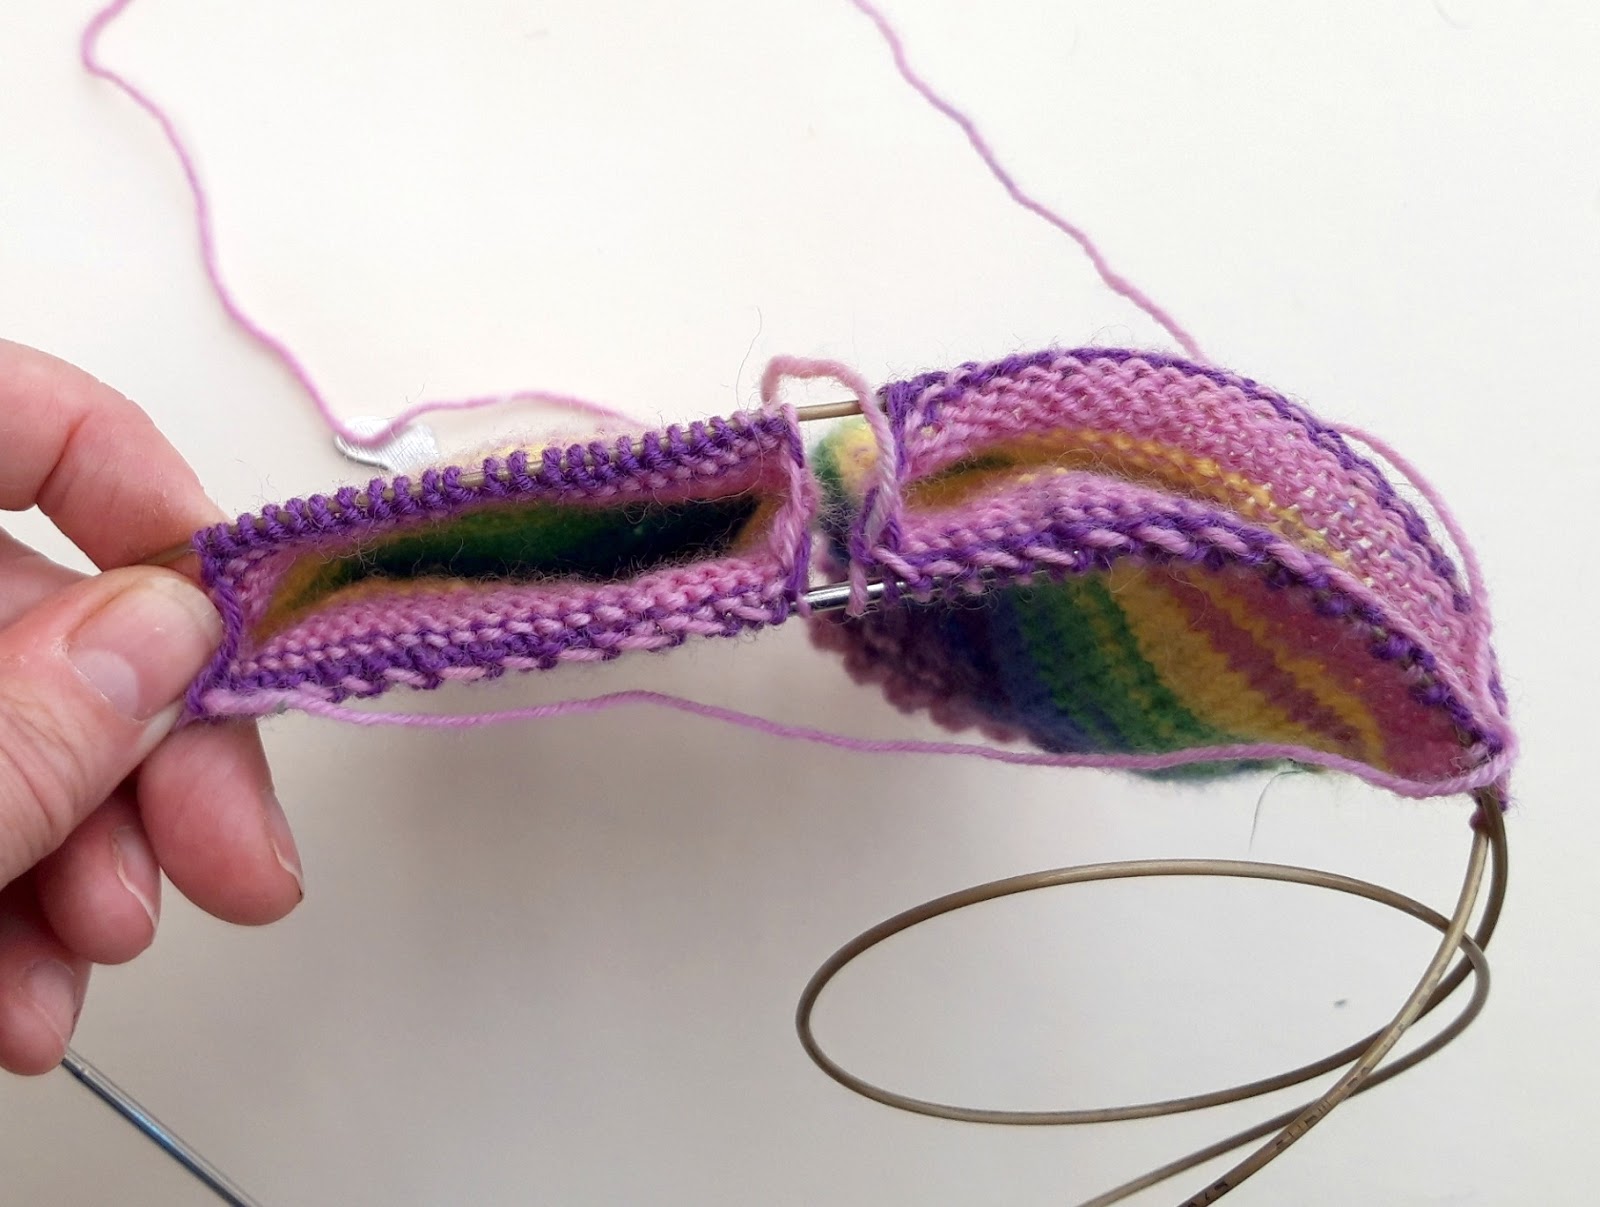
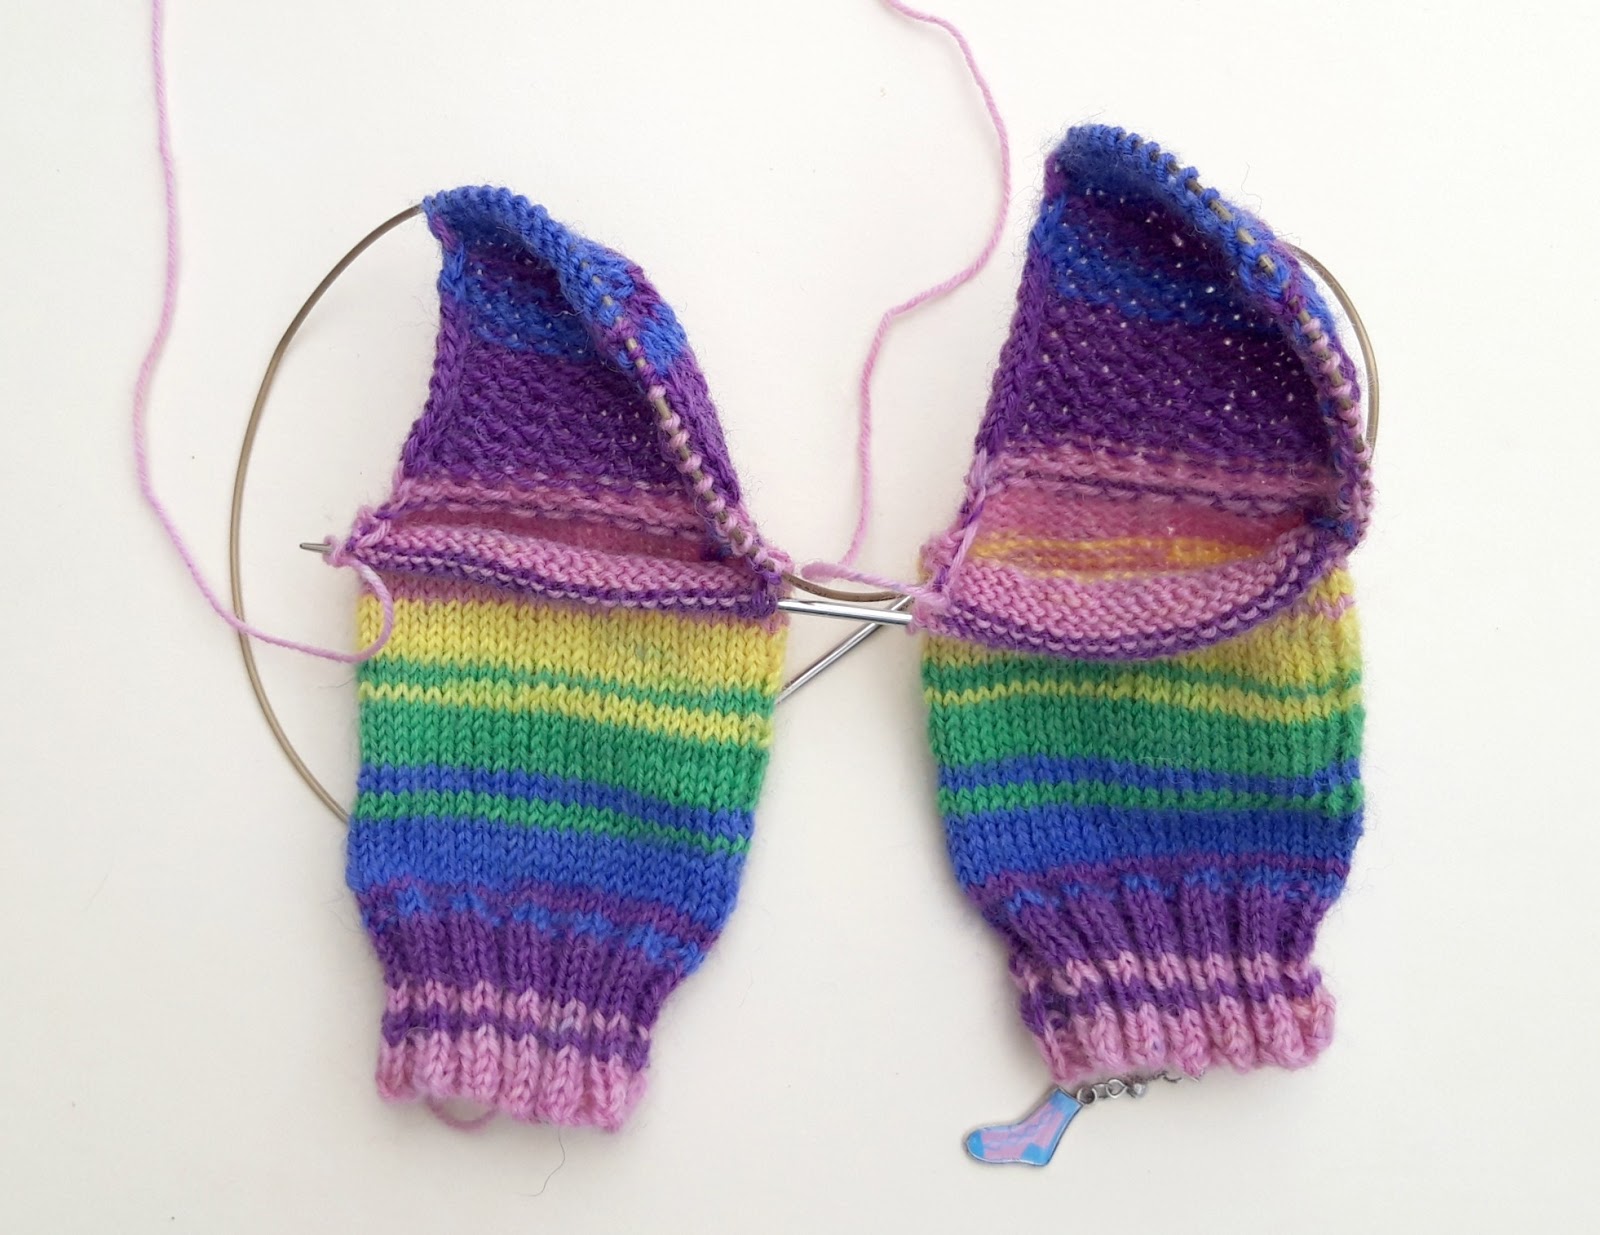
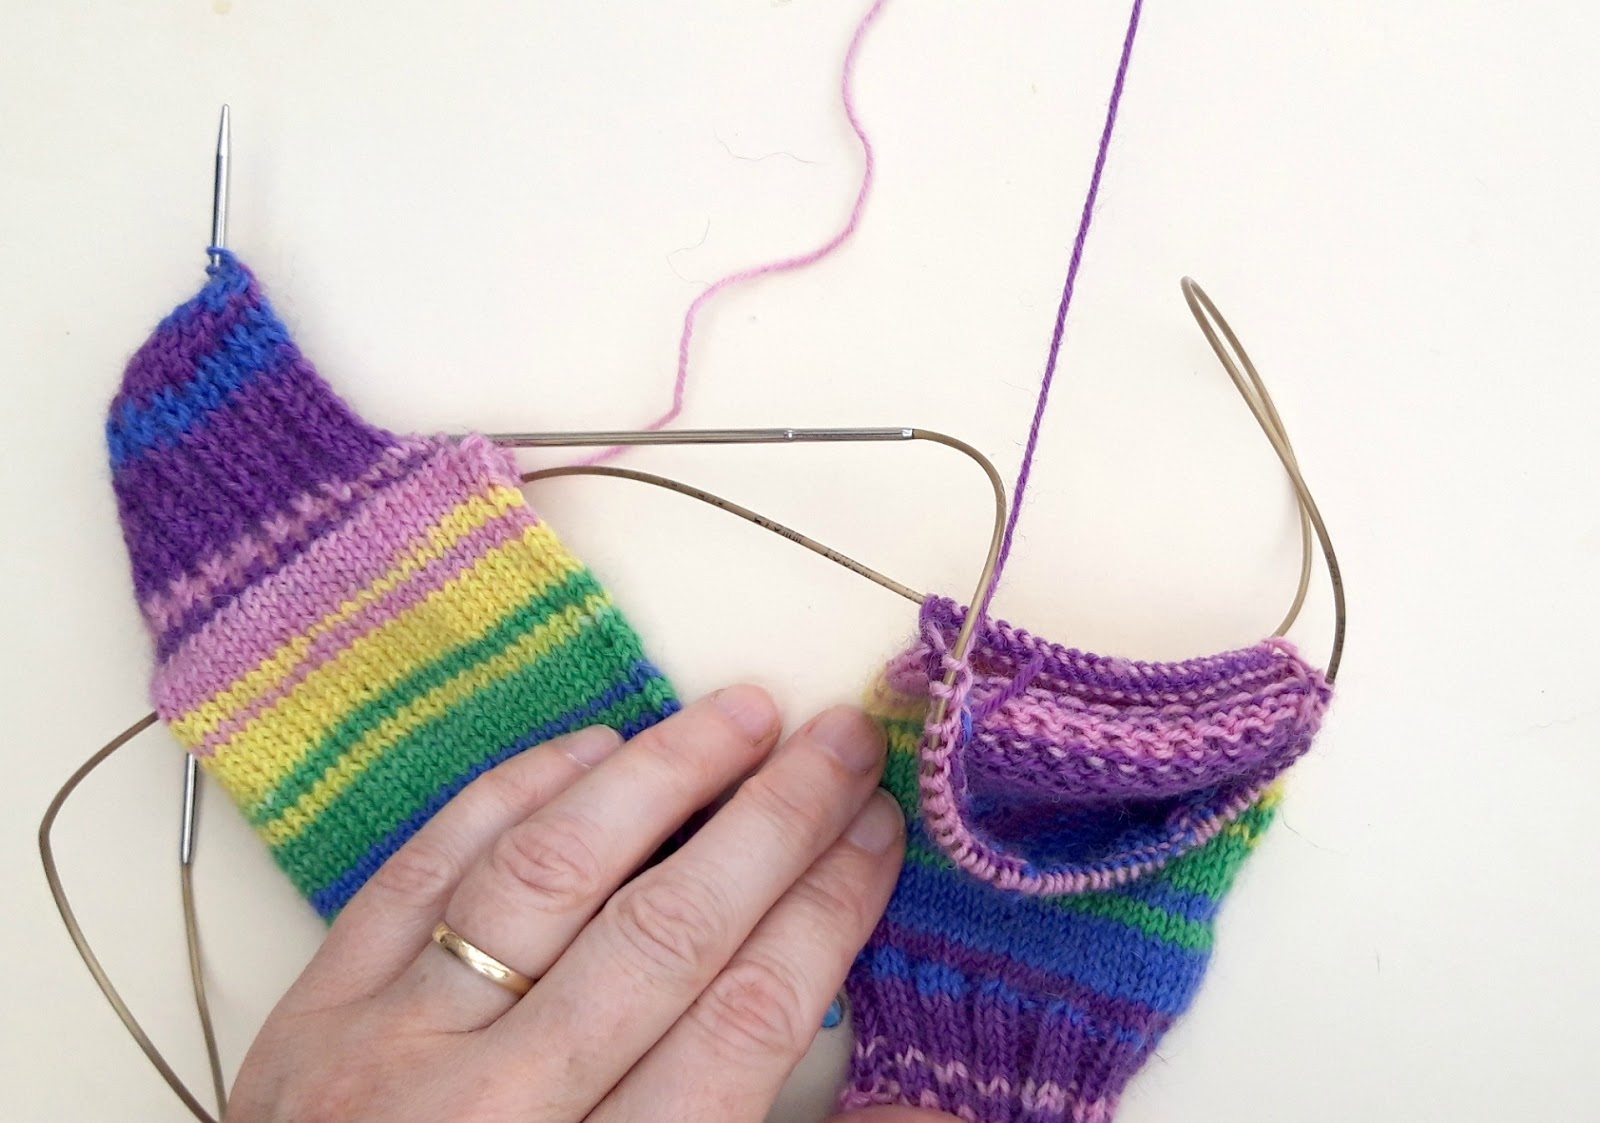
Here are the socks with both heel flaps completed. Before we start the heel turn, let’s just take a moment to think how this is going to work. You can’t work both heel turns at the same time here because of the short rows and some of the stitches needing to be left on the needle whilst you work the decreases. You also want to make sure that your yarn is going to travelling in the right direction when you start knitting both socks again so after the heel turn, you’ll need to pick up the first set of gusset stitches before moving on to the other sock, otherwise you’ll find that there’s no way to get back once your second sock is back on the same needle.
As you can only work one sock at a time here, the easiest thing to do is to slide the stitches of the left hand sock (as you look at the picture) onto the left hand needle tip to leave the stitches of the right hand sock (as you look at the picture) free, and start with that one.
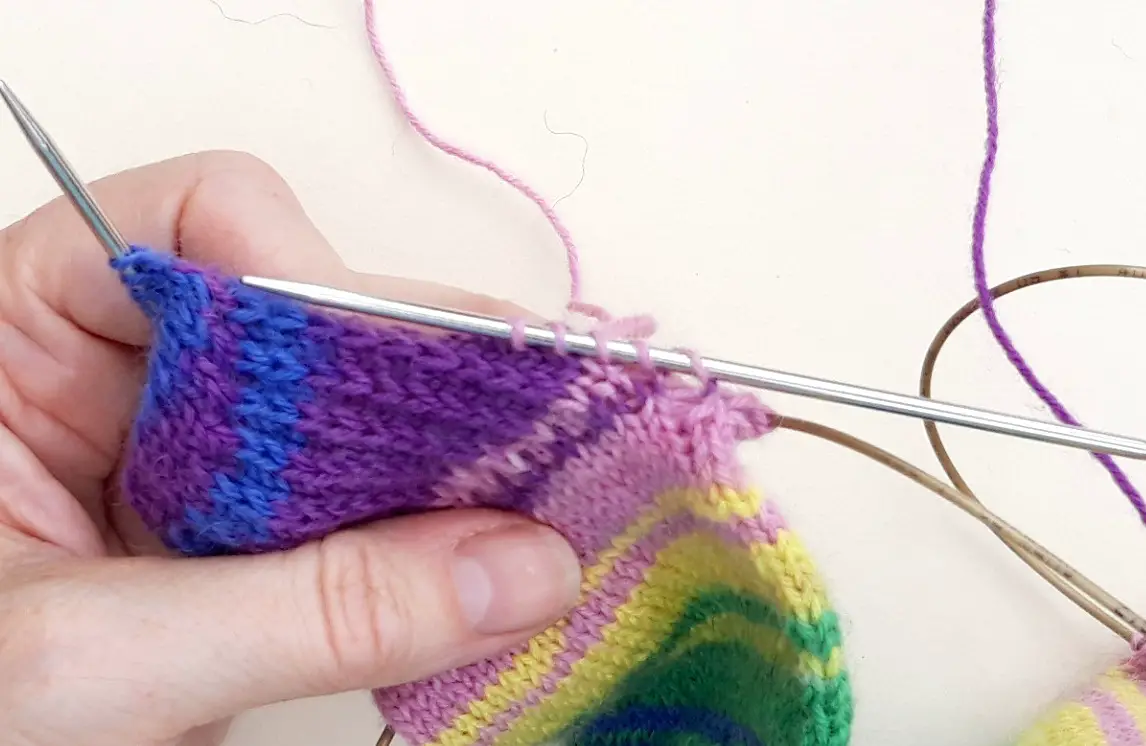
Work the heel turn as per the pattern, remembering to adjust the set-up row if you’ve altered the number of stitches (the set up row for a 60 st sock is Sl 1, P16, P2tog, P1; add or remove one stitch per 4 stitches more or less than 60 sts from the number of purl stitches highlighted in bold).
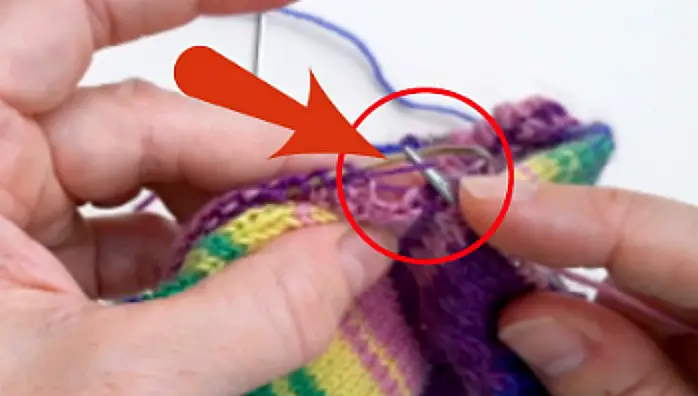
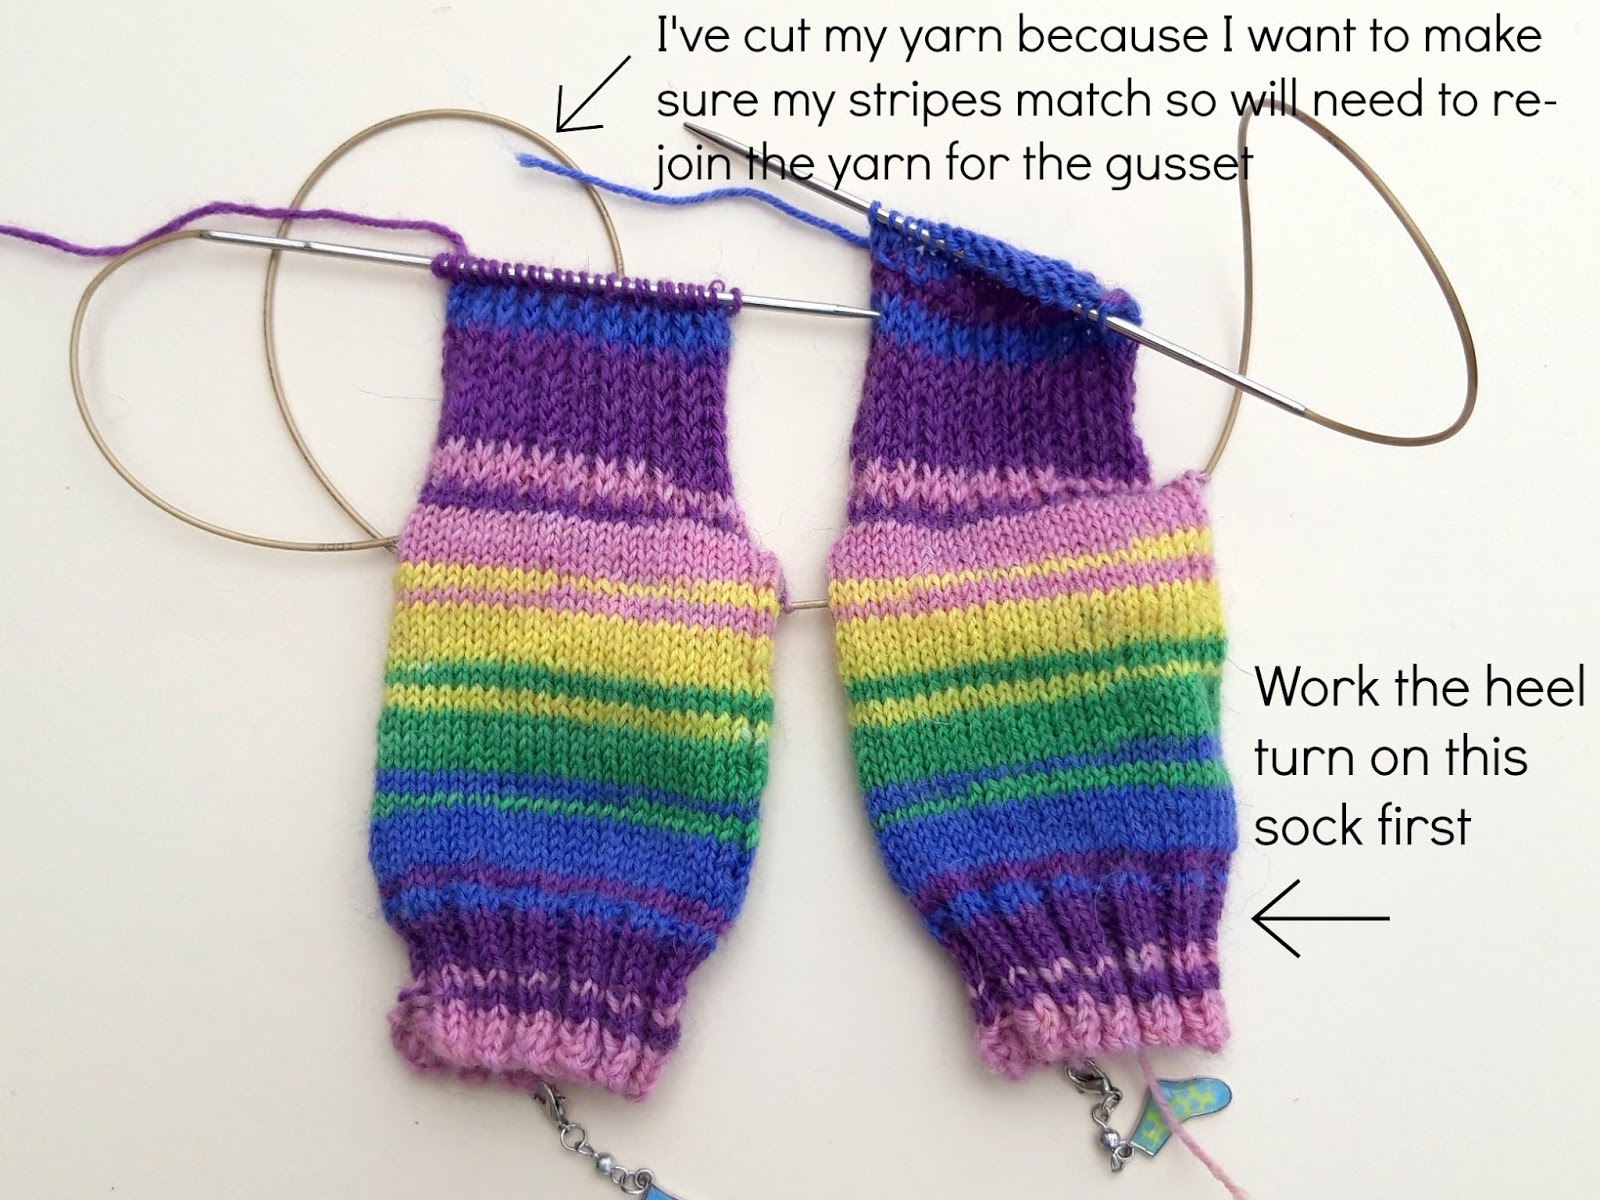
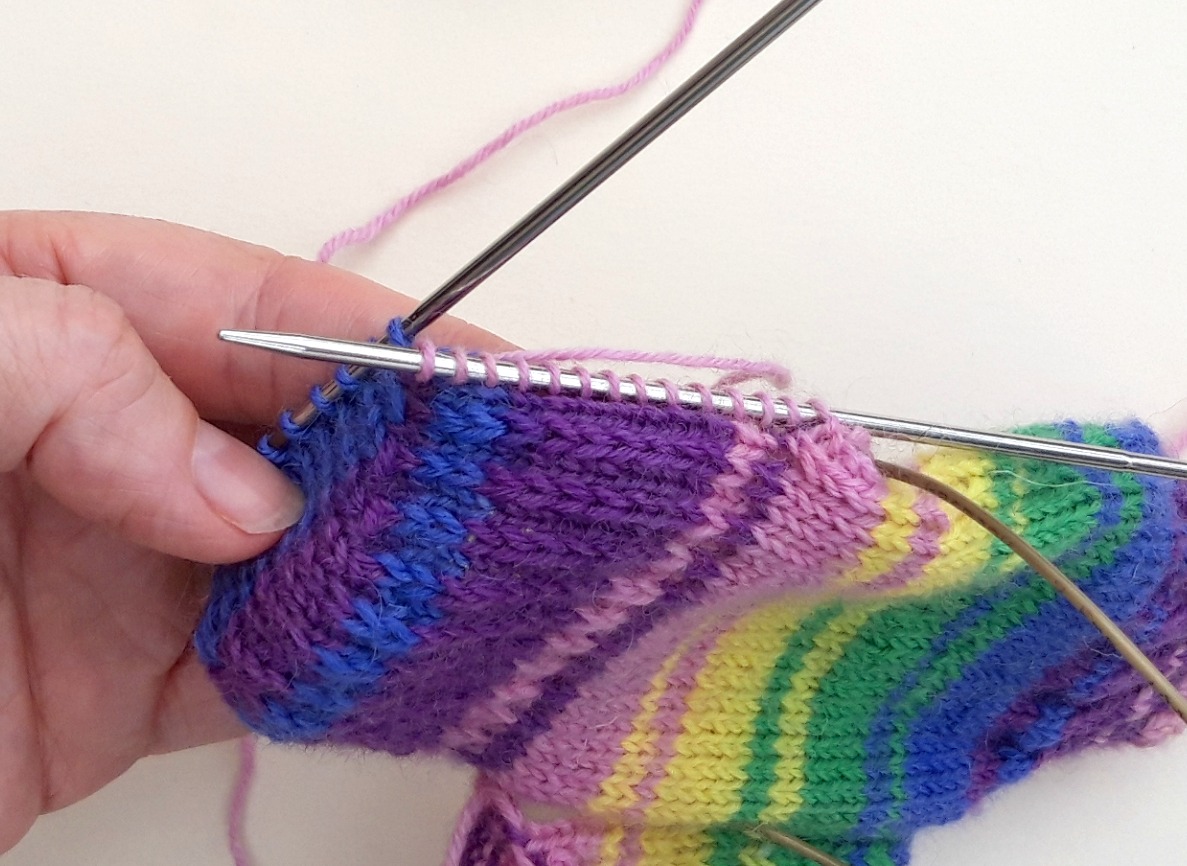
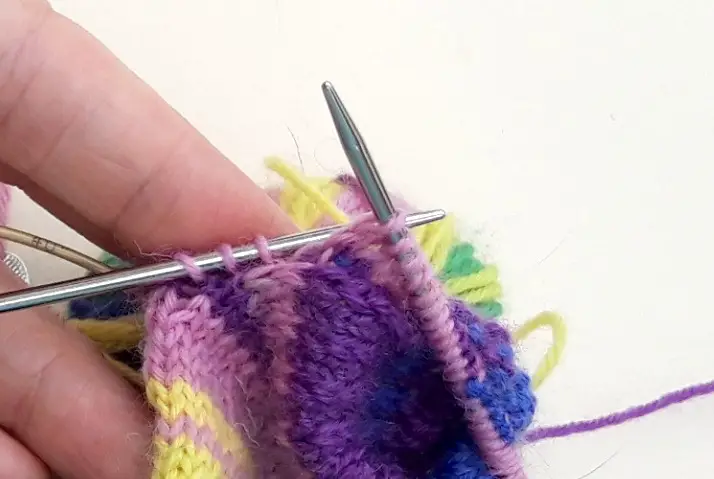
You can see in the picture below that the heel turn is complete and I’m ready to pick up the gusset stitches. Remember that just as for a single sock, you’ll want to avoid a hole at the gusset so you can pick up an extra stitch between the heel flap and the top of the foot stitches. Be sure to get the leg of the stitch …
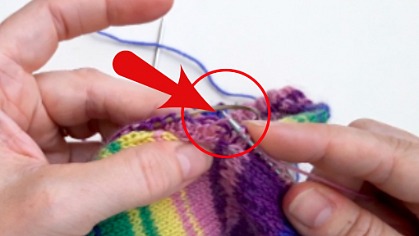
and not the bar between them as shown below:
I like my sock stripes to match so I’ve cut the yarn on the right hand sock ready to re-join it for the gusset so that the stripes match along the front of the sock, but this is purely optional – I am rather obsessive about matching stripes but I don’t expect everyone else to be as well! 🙂
Gusset
Here, I’ve joined in my new yarn (if you need help with that, have a look at this tutorial) and I’ve picked up the first set of stitches on the right hand sock. Don’t forget about the video if you need more help at this stage!
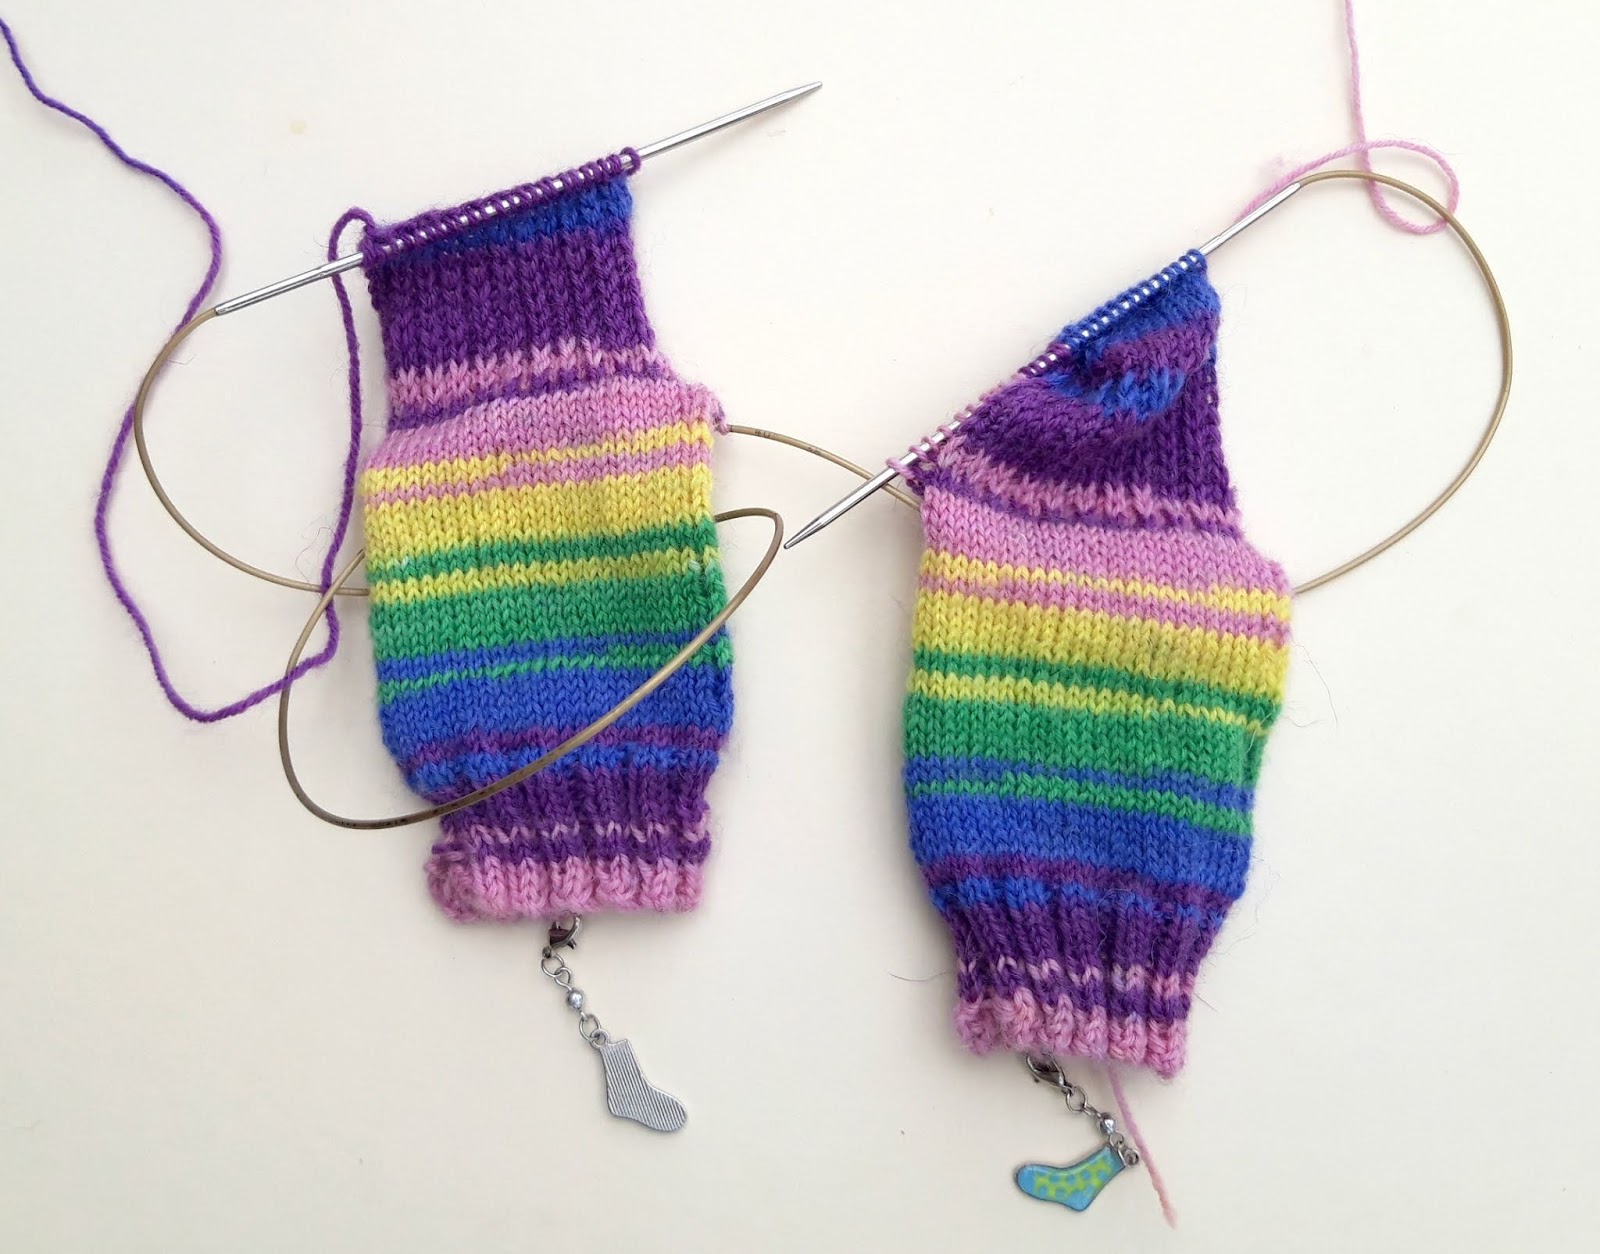
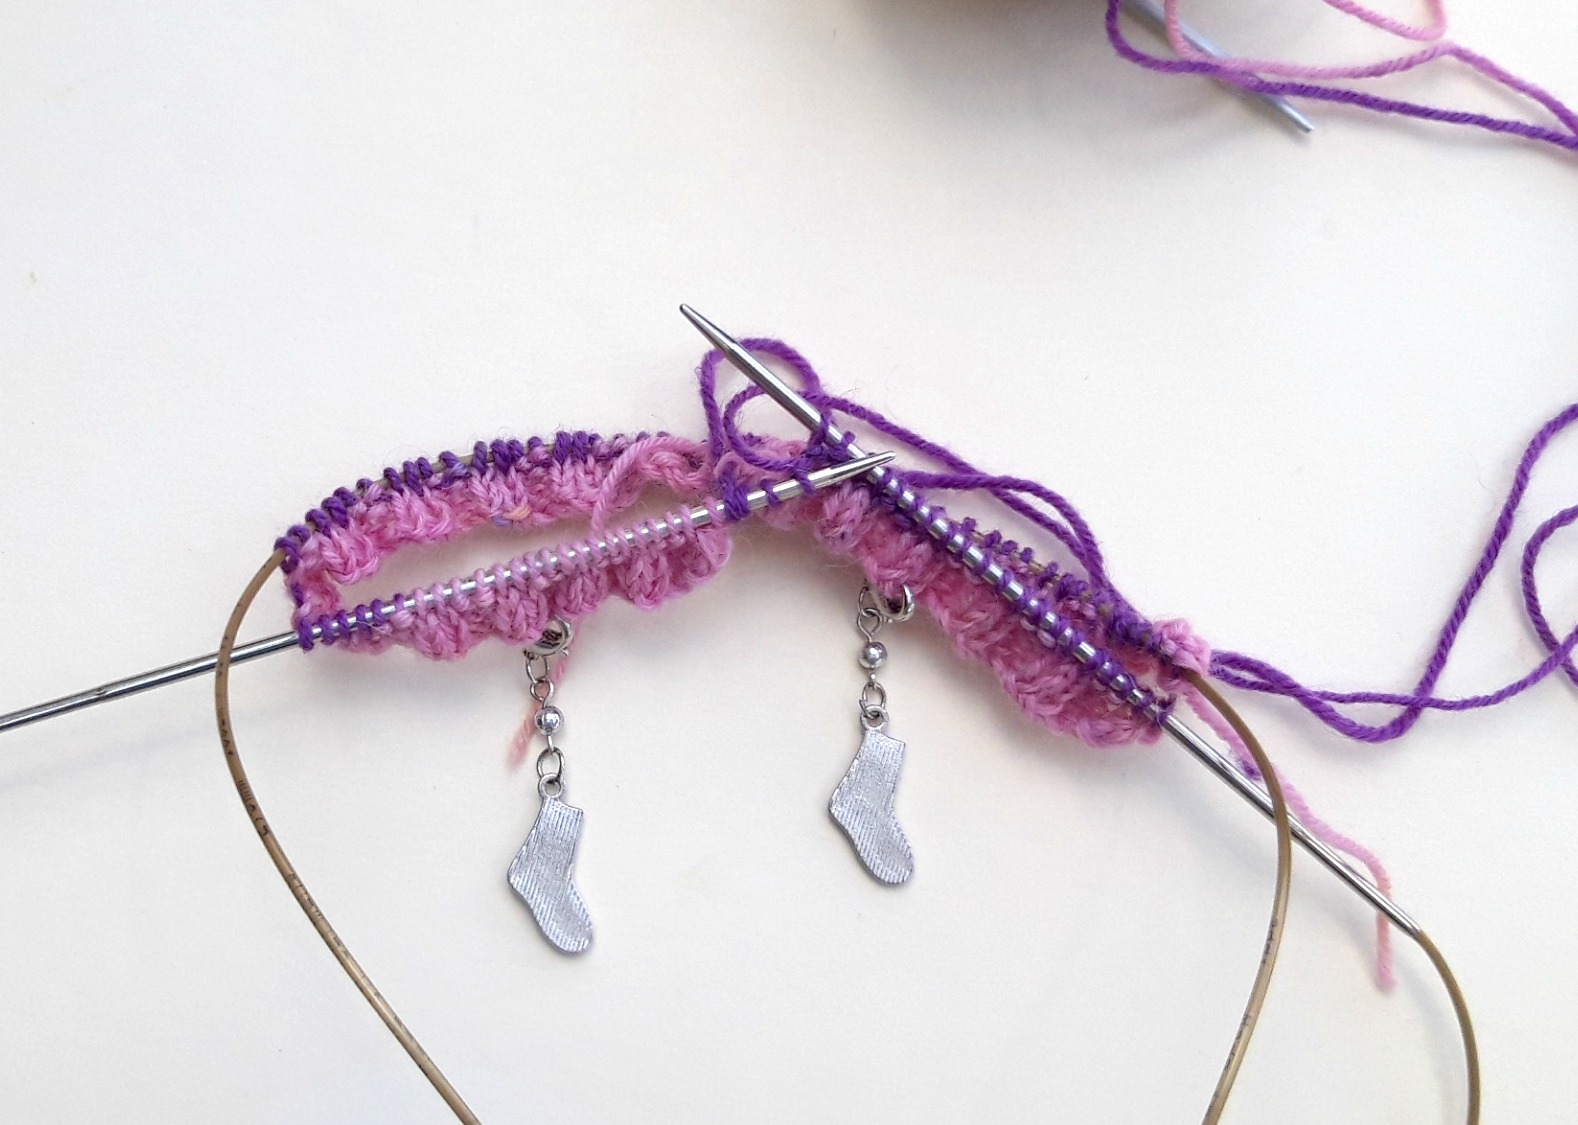
I’m done with that sock for now, so I’ve pushed all of the stitches right along the cable to keep them safe and I’ve transferred the stitches of the second (left hand) sock back to the right hand needle ready to start that heel turn.
This is the great thing about using a long circular needle! I could have managed with a slightly shorter one (80cm) for these small socks, but having that extra length means I can move my socks about as I need to without worrying about losing any stitches. The heel turn is complete here and I’m ready to pick up the gusset stitches again.
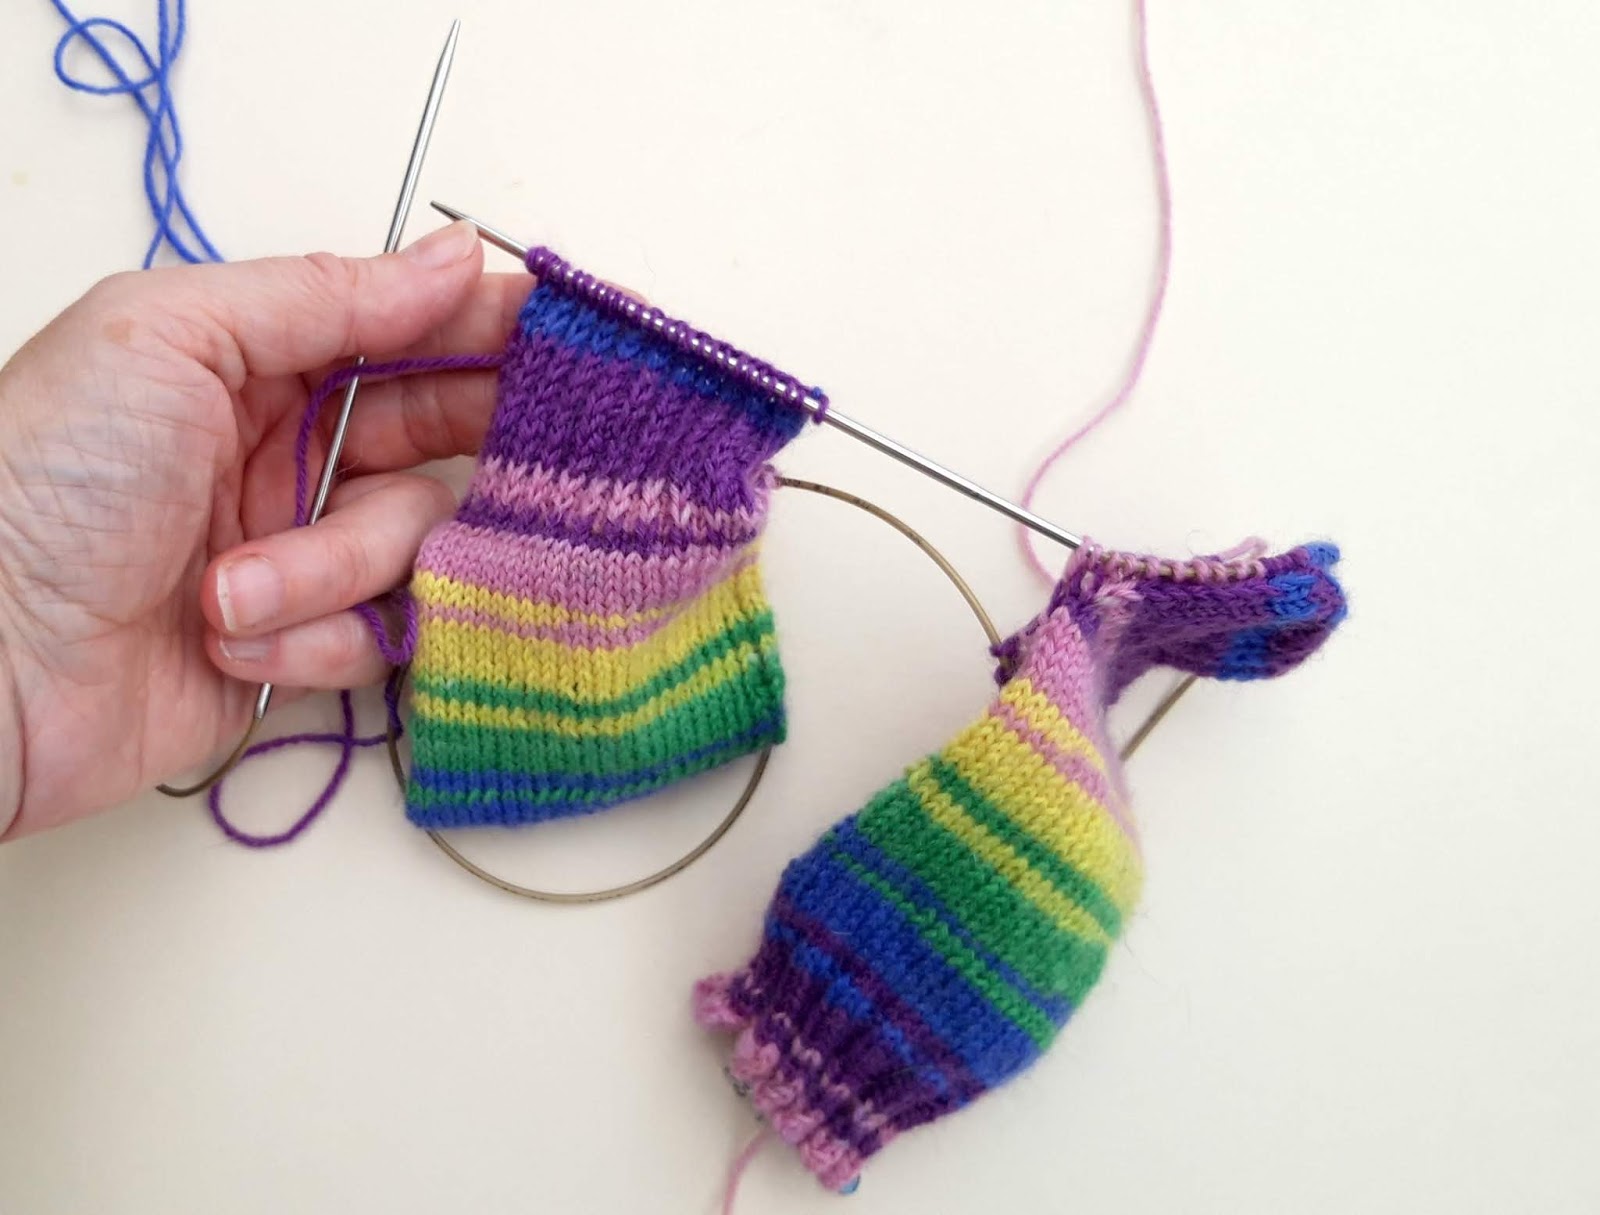
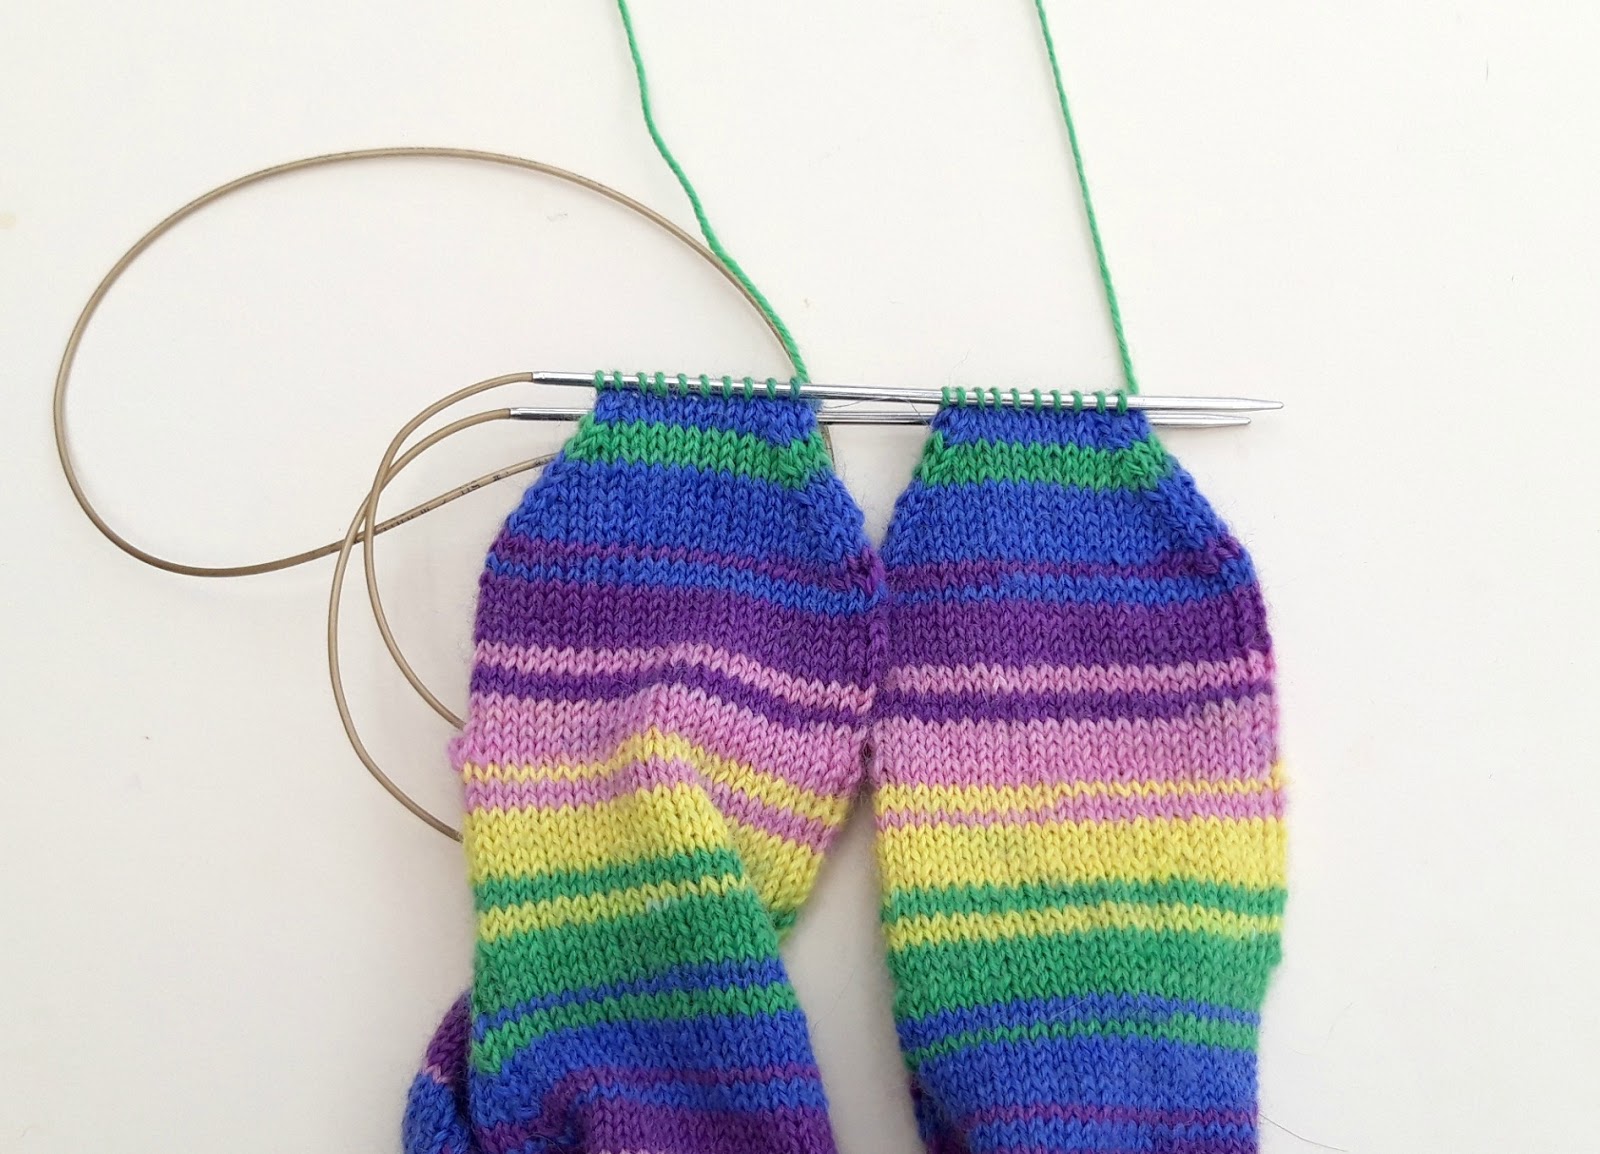
Turn your socks around and you’re ready to knit the top of the foot stitches at the front of your socks. Knit across the stitches of both socks.
This is what your sock will look like once you’ve worked across the front stitches. You’re going to pick up the gusset stitches on the other side of the heel flap. You might wonder why you didn’t pick up the ones on the right hand sock as you went past, and it’s so that you keep all the decreases at the back of the sock rather than having them half-front and half-back as would happen if you picked up the stitches now.
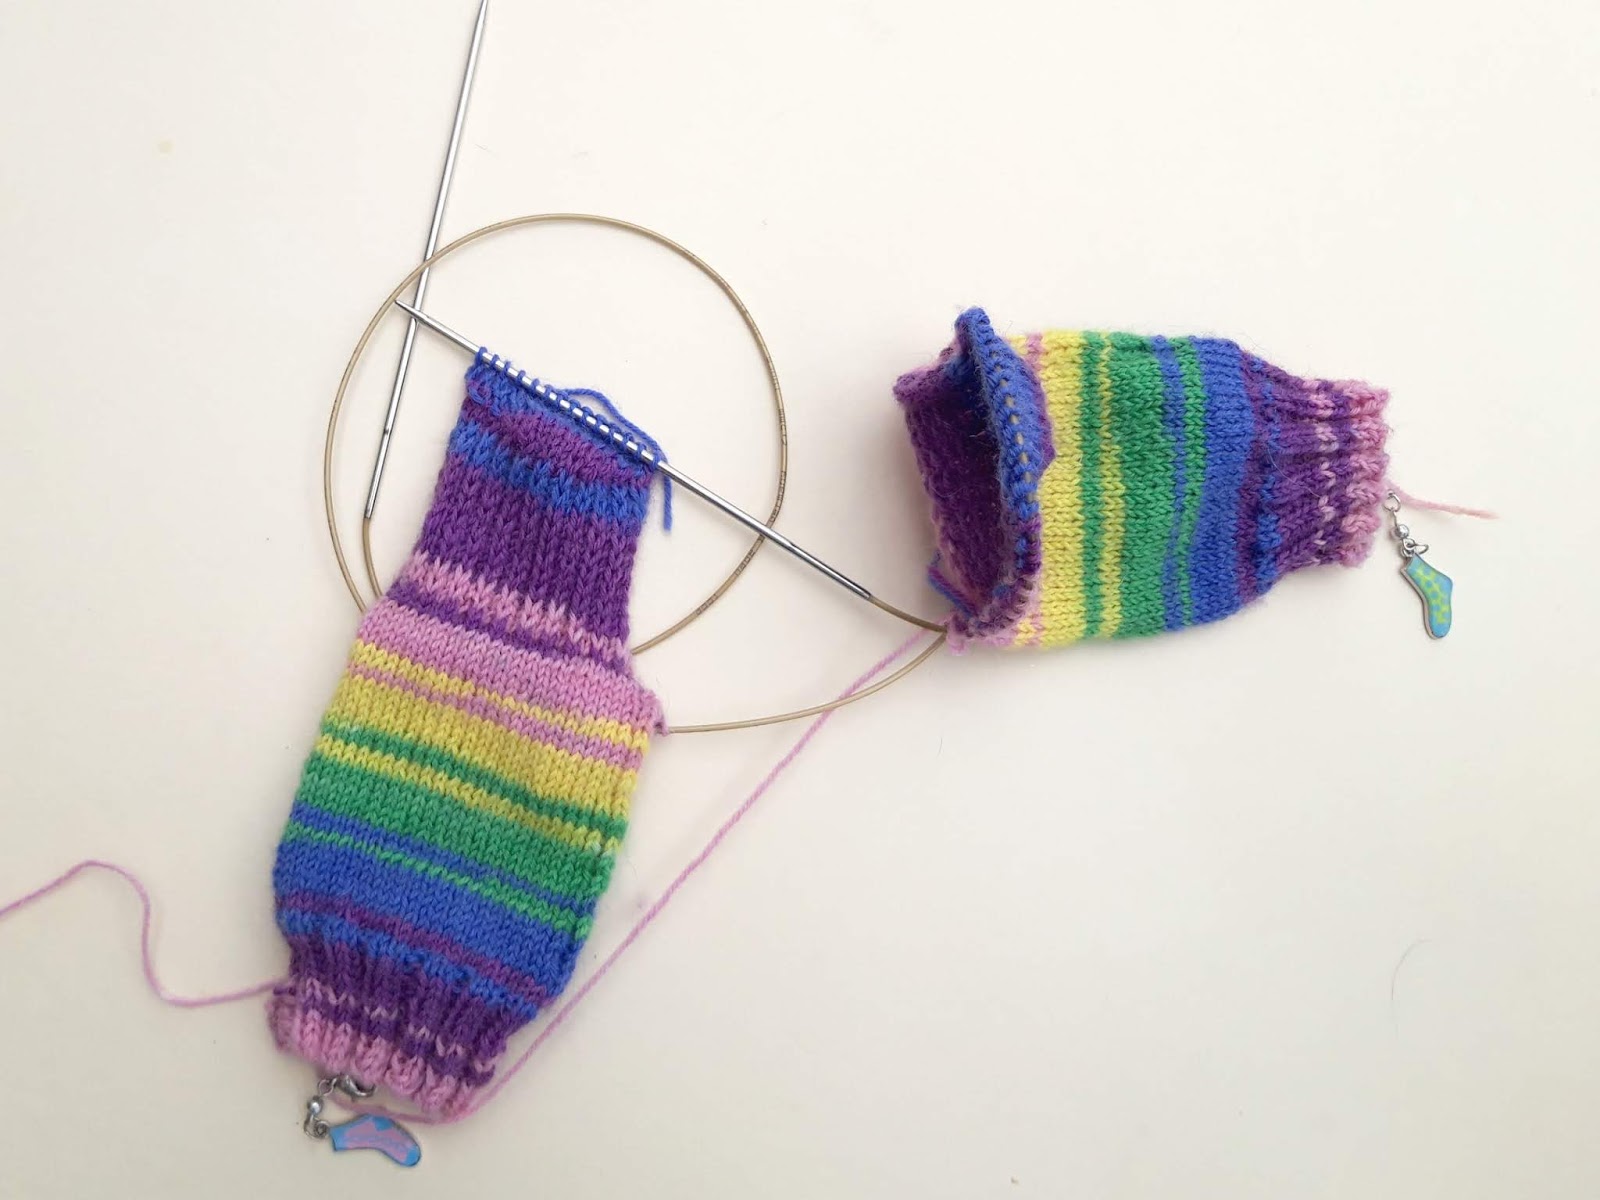
Pick up the stitches on the left hand sock (looking at the above picture), knit across the heel stitches and down the gusset stitches that you picked up previously, stopping 3 stitches before you reach the end.
Work the K2tog decrease at this point …
then slide that sock to the cable on the right giving yourself space to pick up the stitches on the other sock.
Pick up the next set of stitches, work across the heel stitches and down the gusset on the other side, remembering to do the K2tog decrease .
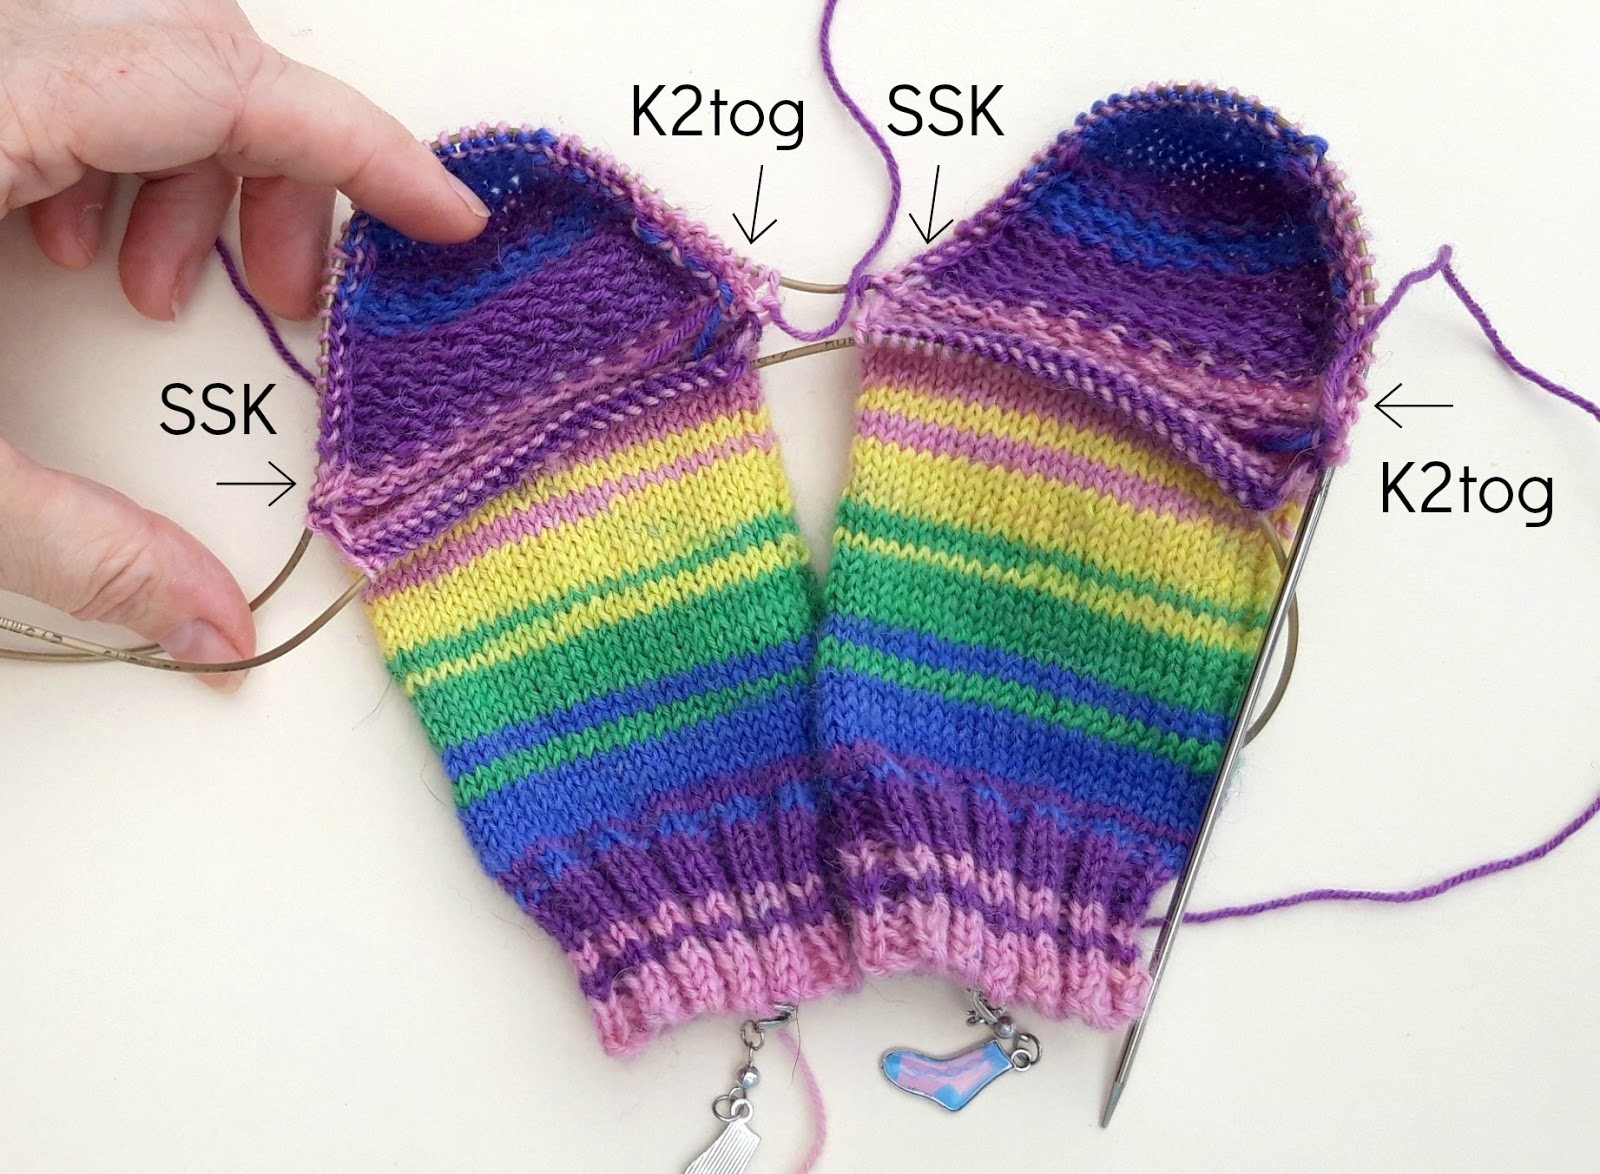
This is what your socks look like now. You’ve got all of the top of the foot stitches on the front needle and all of the gusset and heel stitches on the back needle meaning that there’s no need for any stitch markers and your decreases will be at either side of the sock.

The way that you create the gusset decreases hasn’t changed (ie, K2tog and SSK), but you’re fitting them around two socks now rather than just one so the way that you work them is a bit different. You are still decreasing on every other round, but you are working a decrease on every round, just on alternate sides of the sock. It sounds more complicated than it is!
OK, you’re back at the start of your round and ready to work across the top of the foot stitches.
This is how you’re going to work the decreases – just the same as for any other sock – but you do them in a different order as you’ve already worked the K2tog decrease on the set-up round when you were picking up all the stitches.
Round 1: Work across top of foot stitches, turn, [first sock] K1, SSK, knit to end of sock, [second sock] K1, SSK, knit to end of sock, turn.
Round 2: Work across top of foot stitches, turn, [first sock] knit to 3 stitches before end of sock, K2tog, K1, [second sock] knit to 3 stitches before end of sock, K2tog, K1, turn.
Repeat rounds 1 and 2 until you have decreased to the number of stitches that you cast on, then work straight until the foot is the required length.
(Alternatively, there’s no reason why you couldn’t knit the stitches on the first round instead of working the K2tog and then work all of your decreases on the next round so that you’ve got them all on the same round. This makes the SSK decrease the first decrease which is different to how the Sockalong pattern is written so I’ve shown you the way that fits with the pattern.)
Here are my socks just as I’ve finished the gusset from the front …
and the back.
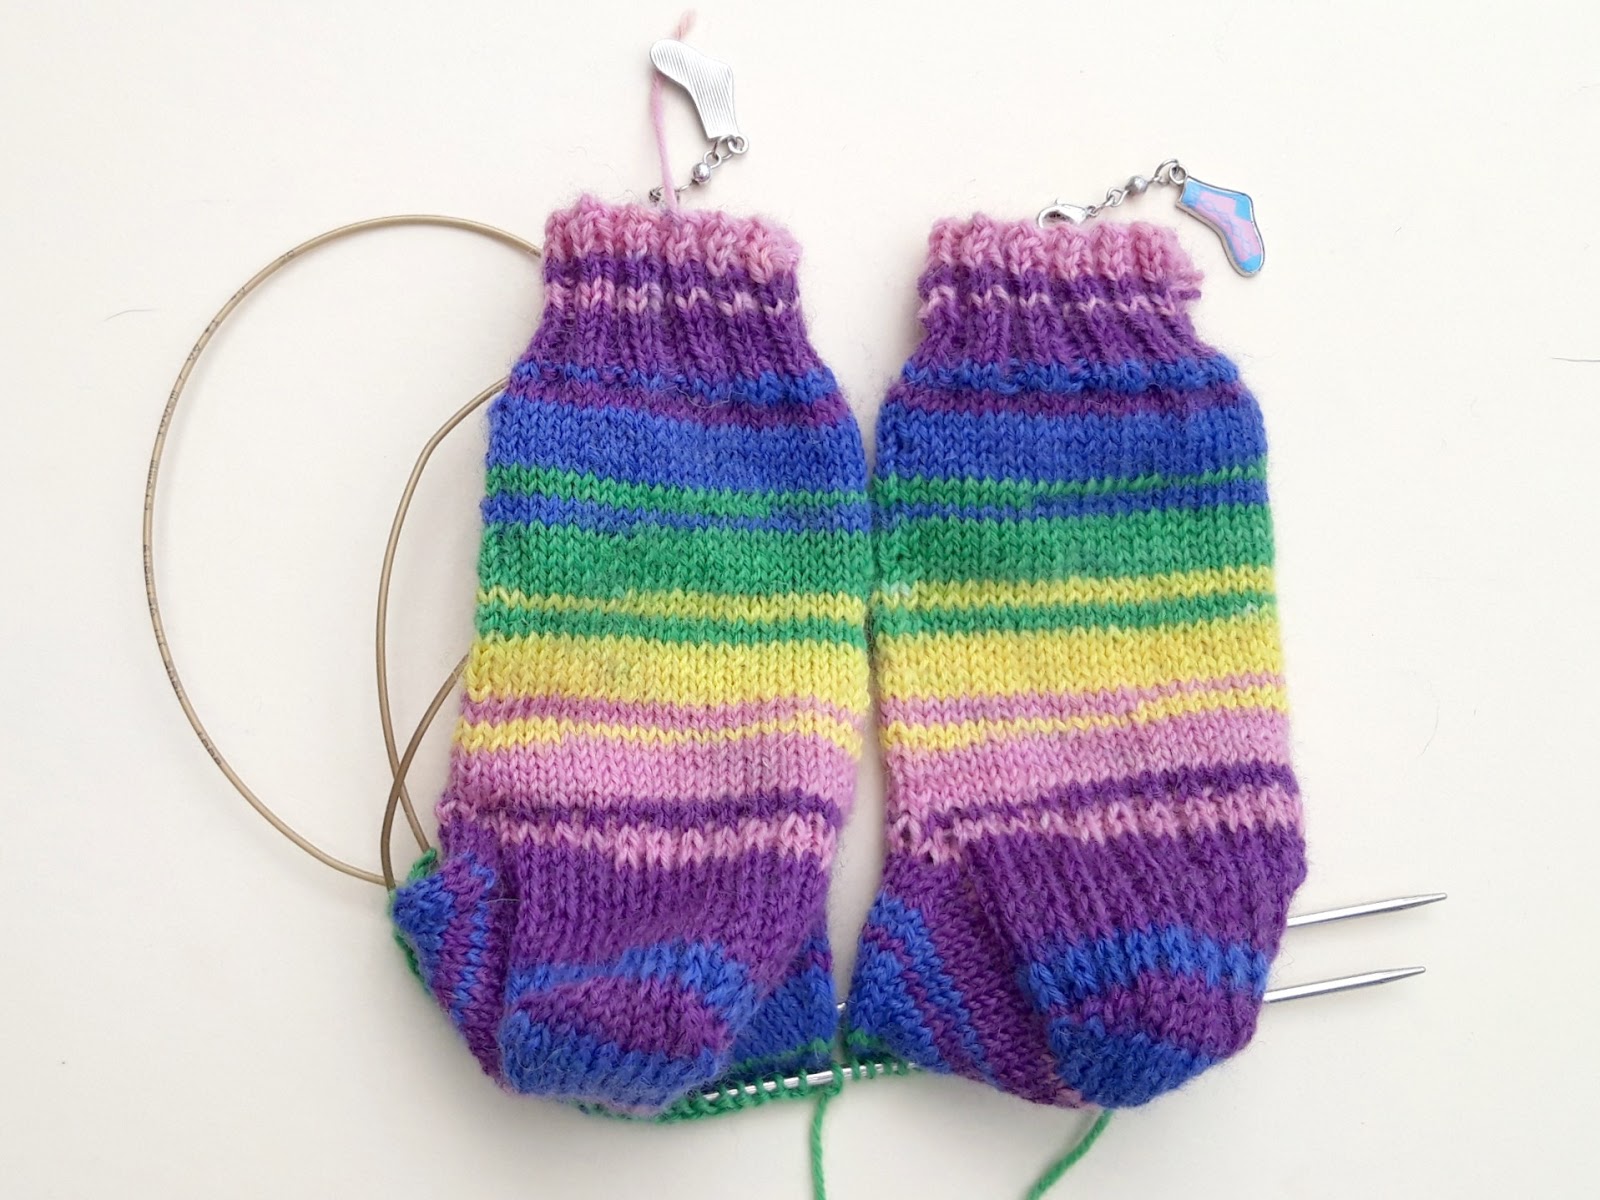
Toe decreases
Decreasing for the toes on TAAT socks couldn’t be easier as both of your socks are the same length and you’re going to decrease at both sides of each sock on both the front and the back. Here, I’ve worked the right hand sock decreases and I’m about to start on the left.
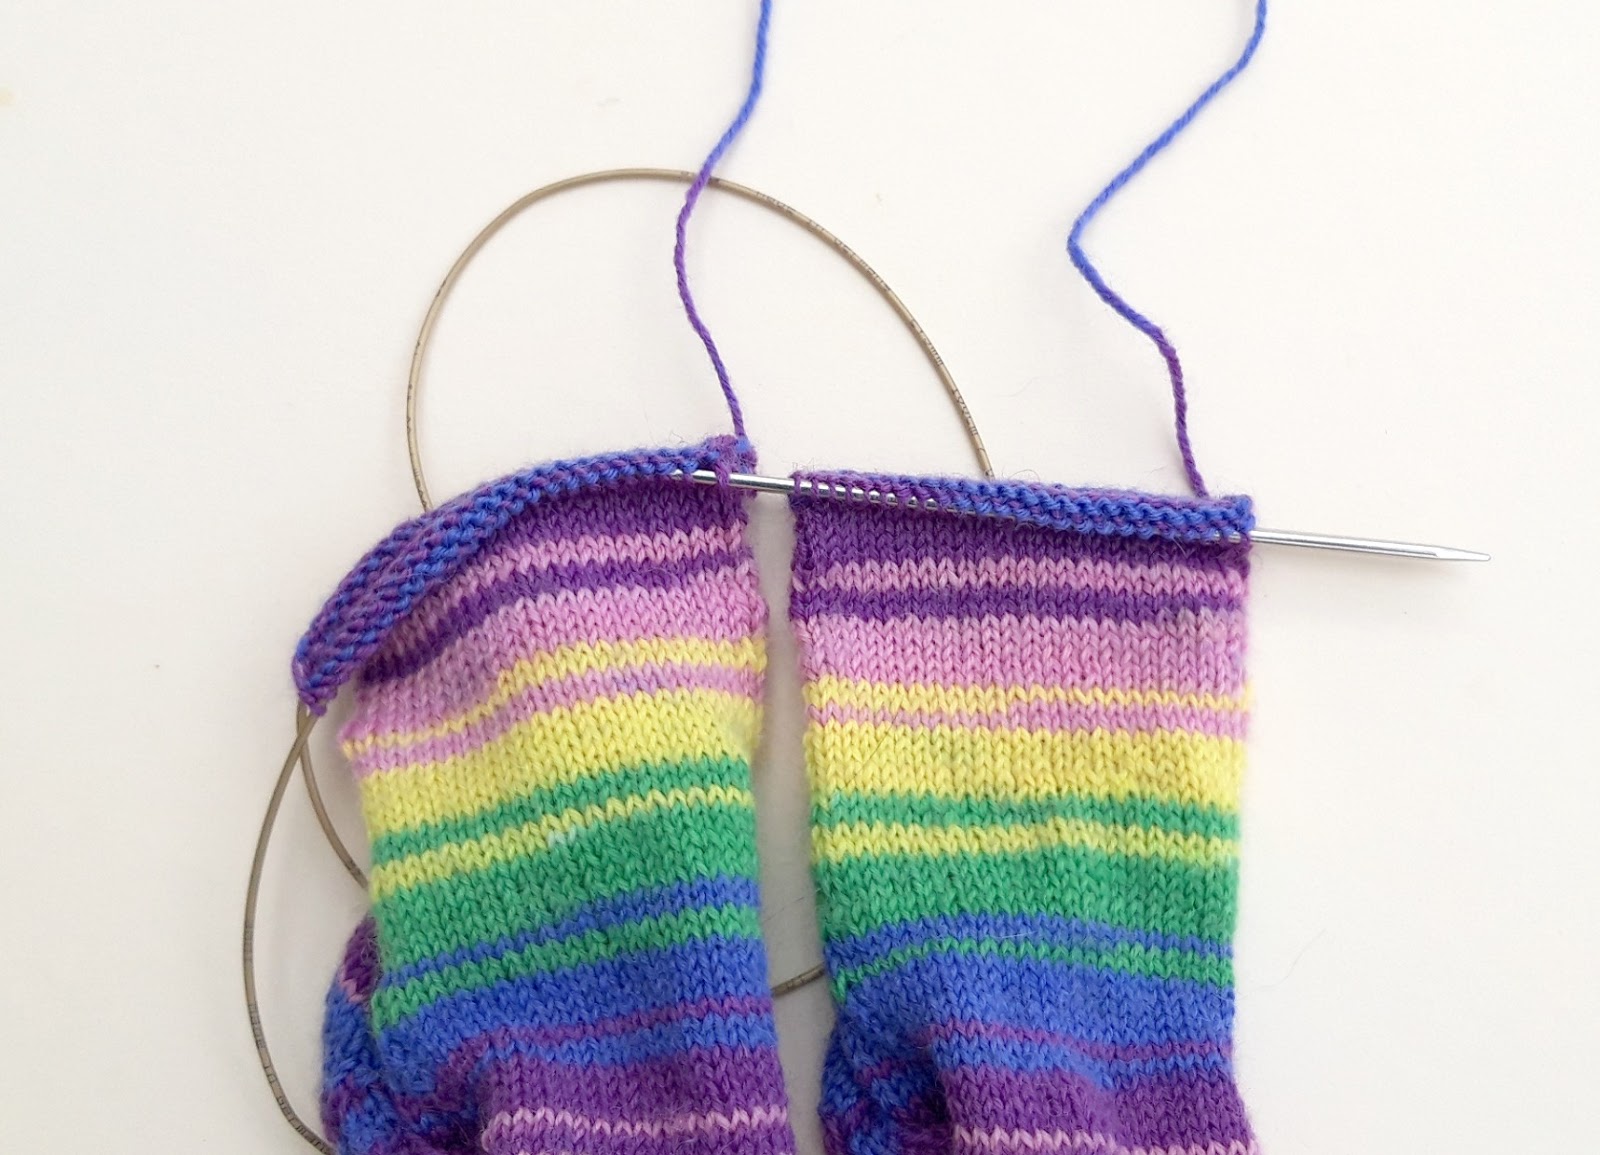
My socks are finished – almost!
There’s just the Kitchener stitch to do, and if you want help with that then you’ll find it either in the Sockalong tutorials here (written instructions with lots of photo help) or on the video here.
Phew, that was quite an epic tutorial post! I hope you’ve found it useful, do let me know how you get on and good luck with your two at a time socks!
Pattern notes for 48 st children’s socks:
Cast on 48 sts
Work 12 rounds of rib
Leg length from cuff to start of heel 4 inches (10 cm)
Heel flap length 2 inches (5 cm)
Heel turn – set up row: Sl 1, P13, P2tog, P1, turn, then same as adult sock
Length of foot to start of toe decreases 5.5 inches (14 cm)
Reduce to 20 sts (10 on each needle)
Total length of foot 6.75 inches (17 cm)
This pattern is free on this blog and will always remain so. If you’ve enjoyed using it and would like to support my work so I can keep blogging and designing, you can browse my shop for patterns and books or buy me a brew – both are very much appreciated. Thank you! xx


Basic 4ply Socks pattern © Winwick Mum 2014
TAAT socks tutorial © Winwick Mum 2019
This tutorial is based on my Basic 4ply Socks pattern, which means that you can find photo and video help in the Winwick Mum Sockalong tutorials. You can find out more here:
If you can already knit socks but would like to stay in touch, click the link below to join the Winwick Mum mailing list to hear about the latest blog posts, pattern updates, tutorials and more … but no spam, I promise!


Such a good tutorial! I like how you explained how to match the colours in the yarns before starting, very helpful. I knit my socks on dpns but am thinking I should give TAAT a try! Thank you!
I'm glad you liked it, thank you! I'm a bit obsessive about matching socks so thought I'd add that in for anyone else who's the same as me 🙂
I have knitted two at a time, but it's not my favourite way of knitting socks. Useful if you want them to match exactly, or you get second sock syndrome though. I don't tend to get SSS, in fact I usually find the second sock knits up quicker than the first! Your tip on finding a match for the yarn is useful. I usually unravel the yarn into my old-fashioned balance scale until I've got about 50g in there, then try to match up the colours. I have to be very careful not to get it knotted though, it sometimes looks like colourful spaghetti! xx
such a good tutorial, well written but i am happy to do mine one at a time for now, (have never had the 2nd sock syndrome) the magic loop does my head in lol
great post
thanx for sharing
Thanx so much for this tutorial. Easily followed and understood plus I love your northern accent. I'm from Manchester living in Scotland.
So far so good I've finished the cuff.
Well, I'm working my way through! 2020 ambition is to knit socks TAAT! I have already had to start over, but after obsessively reading this and viewing the video I THINK i know how to get the yarn from the second half of the DPNs. That's where I'm stuck at the moment but … I'm going to do this today!
The pattern link is broken, did you take down the pattern?
No, the pattern is still available and there are other links to it in the tutorial. I think what happened is that this one didn’t get updated when I transferred my blog to a new platform earlier this year. This is the link you’re looking for: Basic 4ply Socks pattern 🙂 xx
I have a question if I’m working a pattern where the legs of the sock are a different pattern or the instructions say left sock do this, right sock do something different can I work them up two at a time I have terrible second sock syndrome.
Yes, absolutely! You just need to be sure that you know which is the left and right sock – you can use another marker to show that as well as the one that shows which is the “front” of the socks – and you should be fine 🙂 xx
Thank you for sharing this wonderful knitted socks tutorial! Your clear instructions and helpful tips made it easy for me to create my own cozy pair. I appreciate your generosity in sharing your expertise. Can’t wait to try more of your knitting projects!