
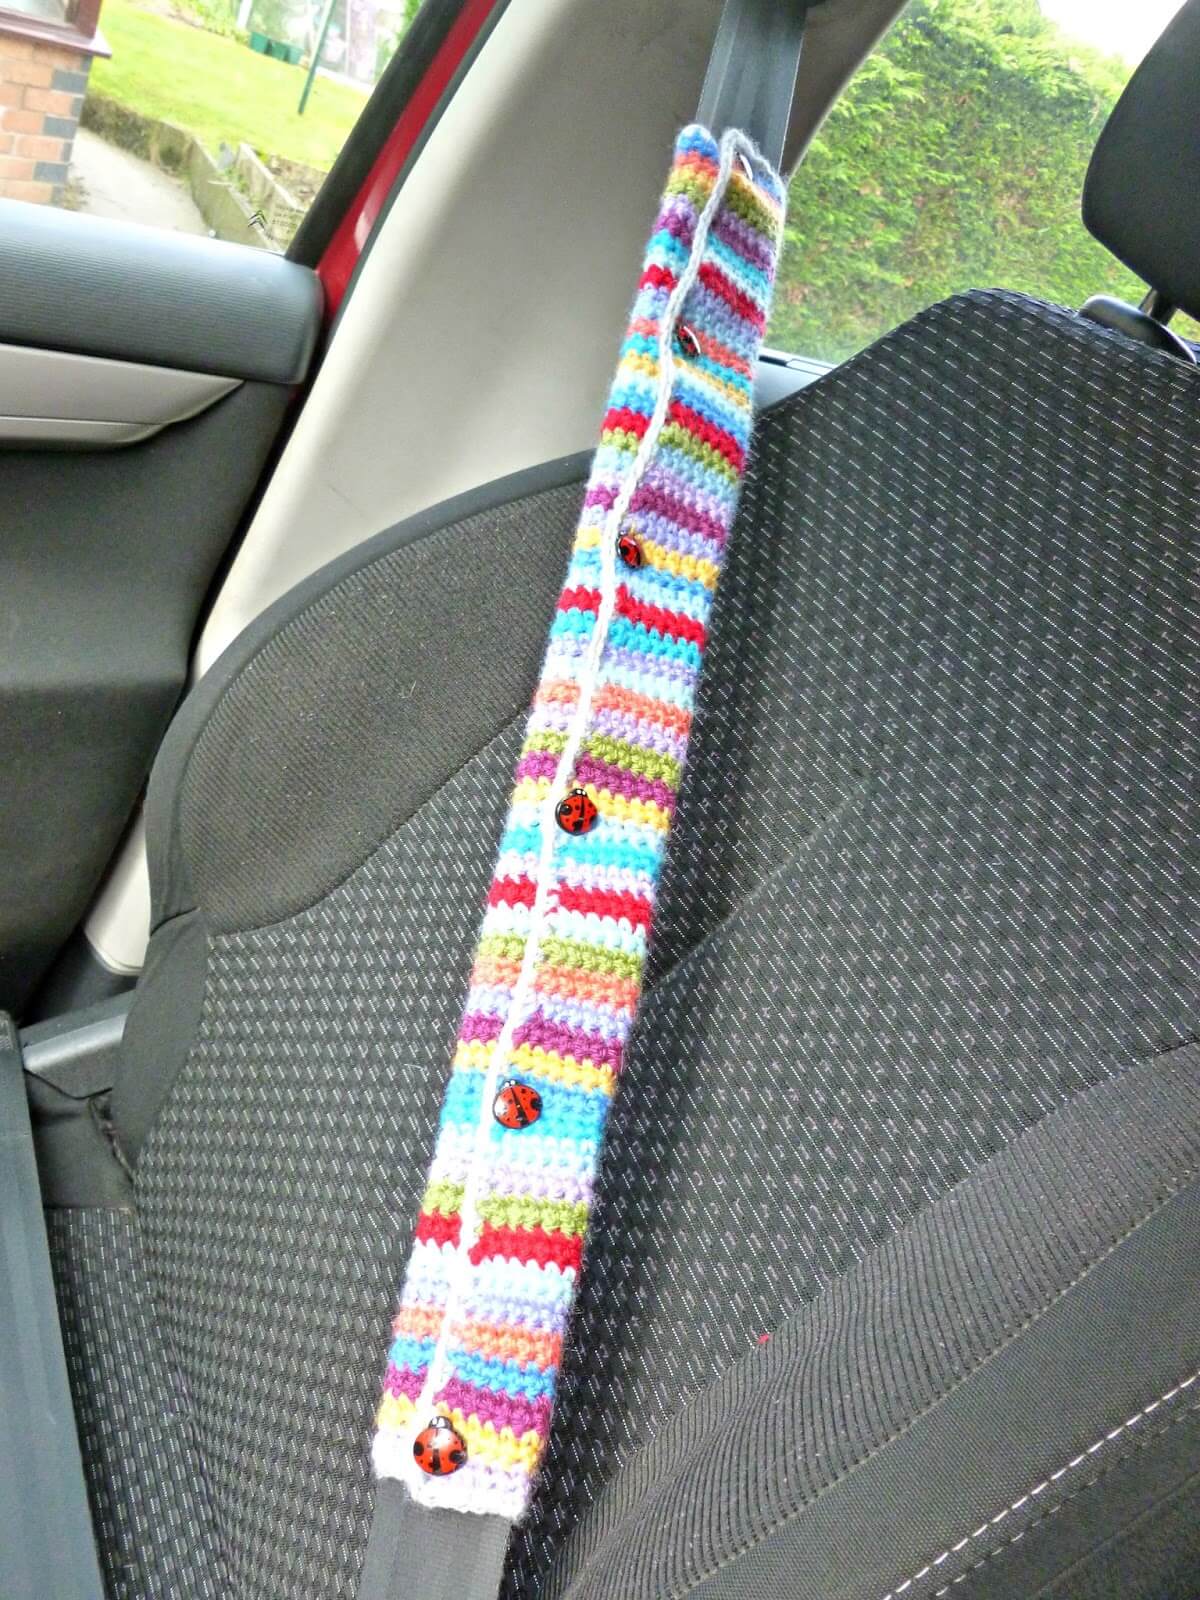
Crochet car seat belt cover
Ever since listening to Betsan Corkhill a week or so ago, I have shed any guilt that I might have about the number of projects that I have on the go. It’s fine to have projects to suit any mood or occasion, and sometimes we just need something that’s fun.
Cue my latest ta-dah moment. My husband had bought some seat belt covers for his car to protect his clothes (clearly I am not the only one with clothes with shiny shoulders, disintegrated printing on t-shirts, lines of bobbles and even ridges where the seat belt has rubbed) and it struck me that I could do with something similar. However, despite the simplicity of clicking and ordering these days, I have always been the type of person to think “I can make that for myself” (sometimes with spectacularly disastrous results, it has to be said, but we don’t need to go into that!) and a seat belt cover seemed like just the sort of thing that I could manage in between other projects.
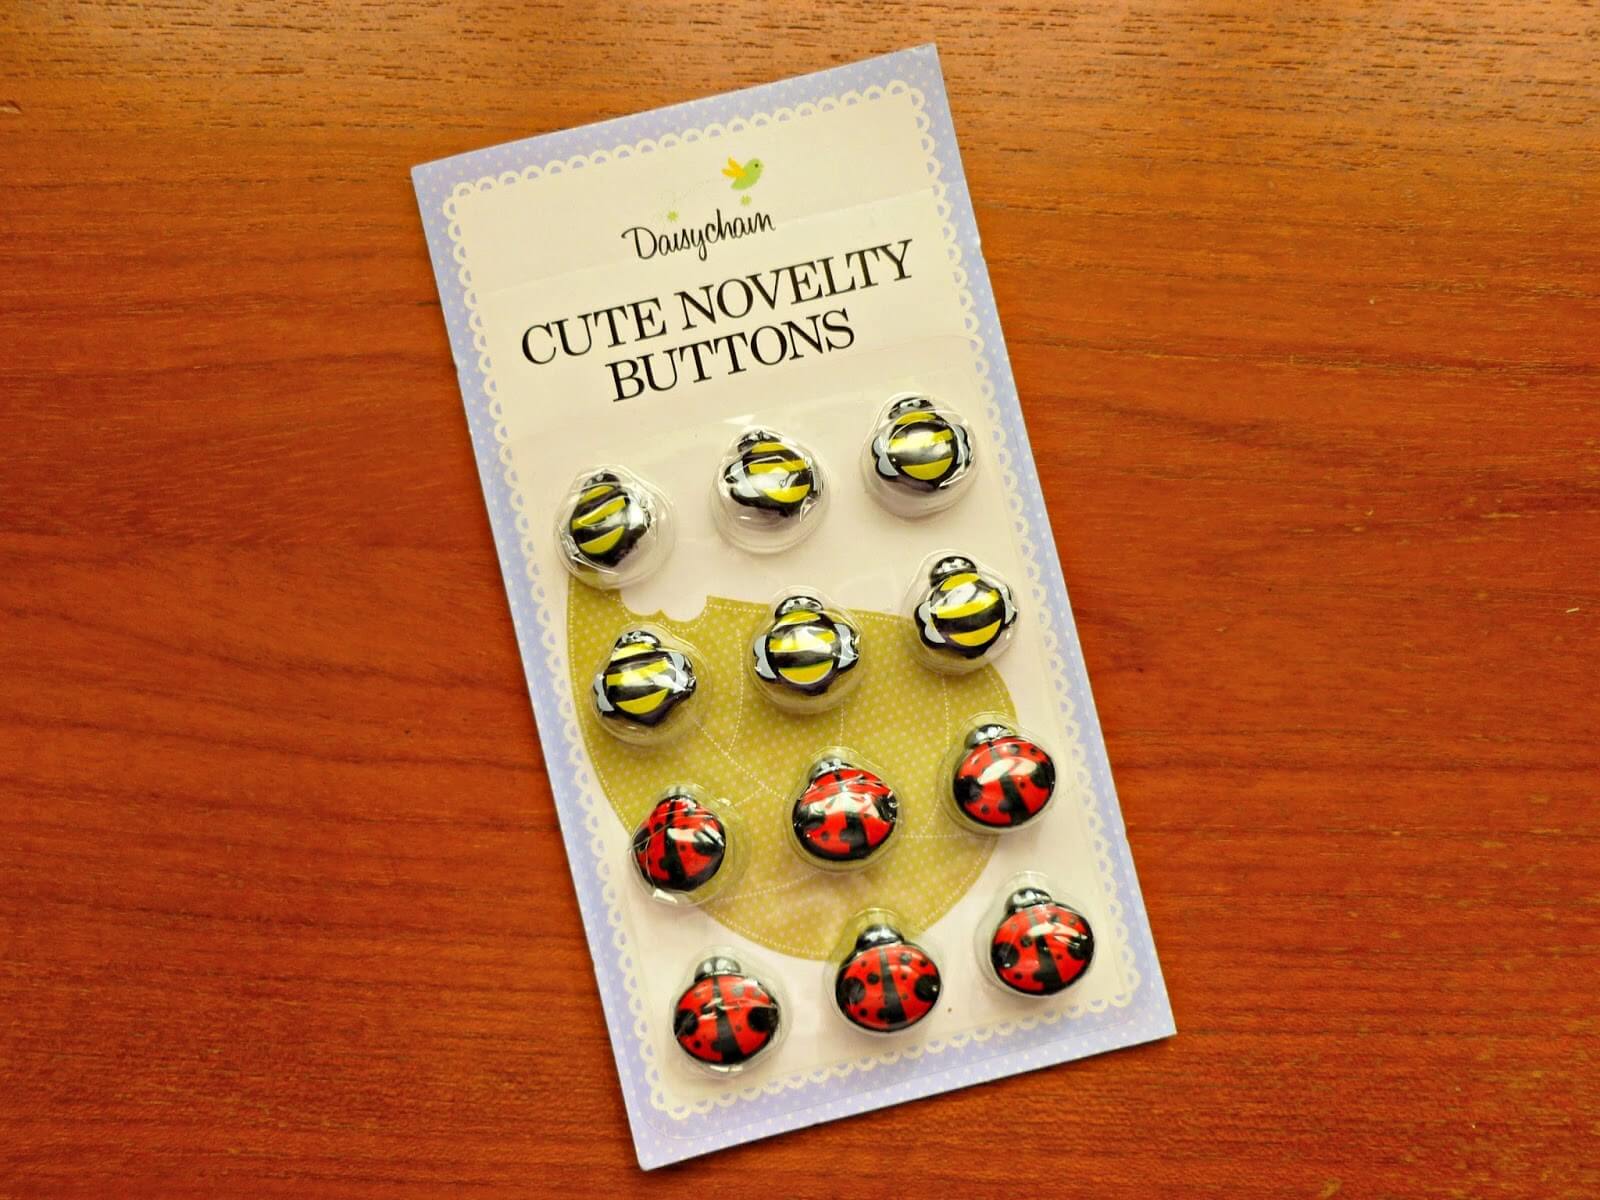
Ta-dah! Just the thing for a colourful quick-fix project that also made use of leftover yarns and some buttons that came free with a magazine a long time ago that have been waiting to get out of their packet.
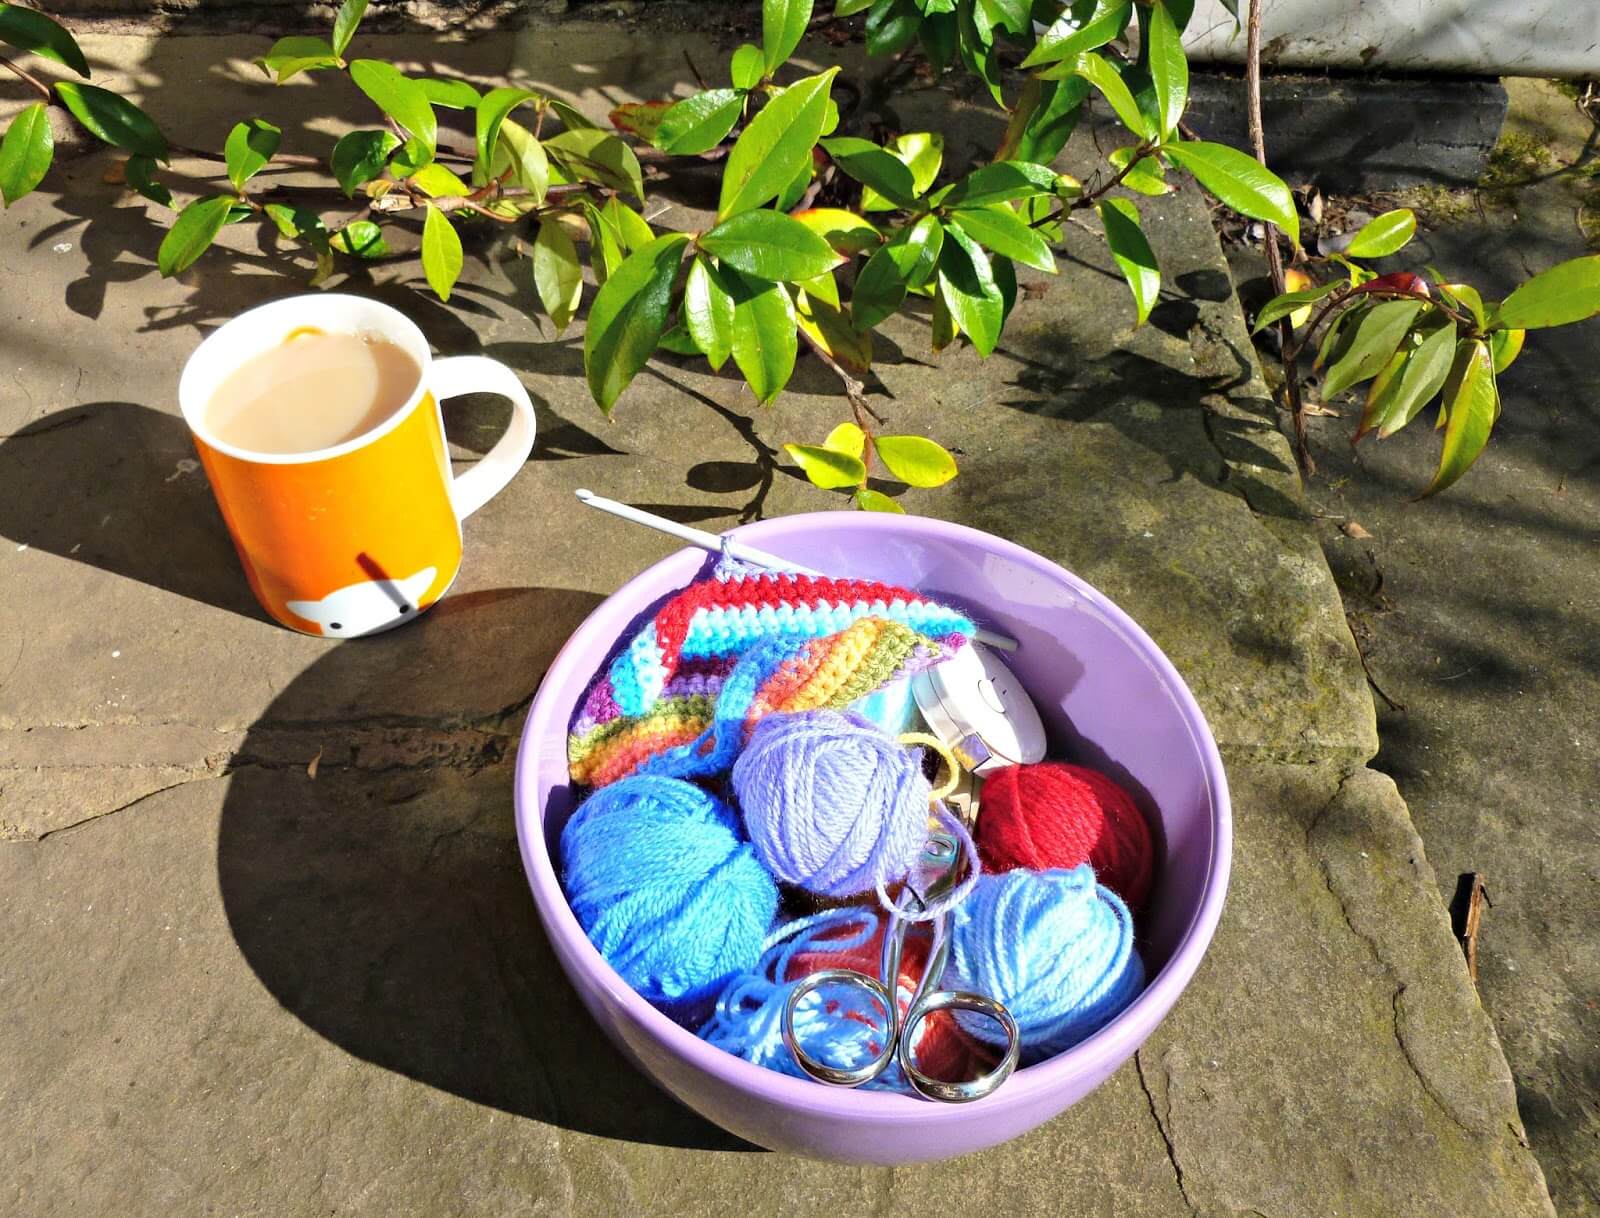
And most of all, it was fun. I haven’t crocheted for quite a while and it’s good to swap crafts so that you exercise a different part of your brain and move your hands differently. And it’s very nice to sit in the sunshine and crochet too!
My crochet guru has promised to give me a masterclass on technique so that I can learn another way to hold my yarn and hook (in much the same way that I’ve been experimenting with other knitting styles) and I think there may well be another blanket in progress over the summer!
So if you need a colourful, quick-fix project for yourself and you think that you can’t possibly live without one of these in your car, then here’s how I made it J
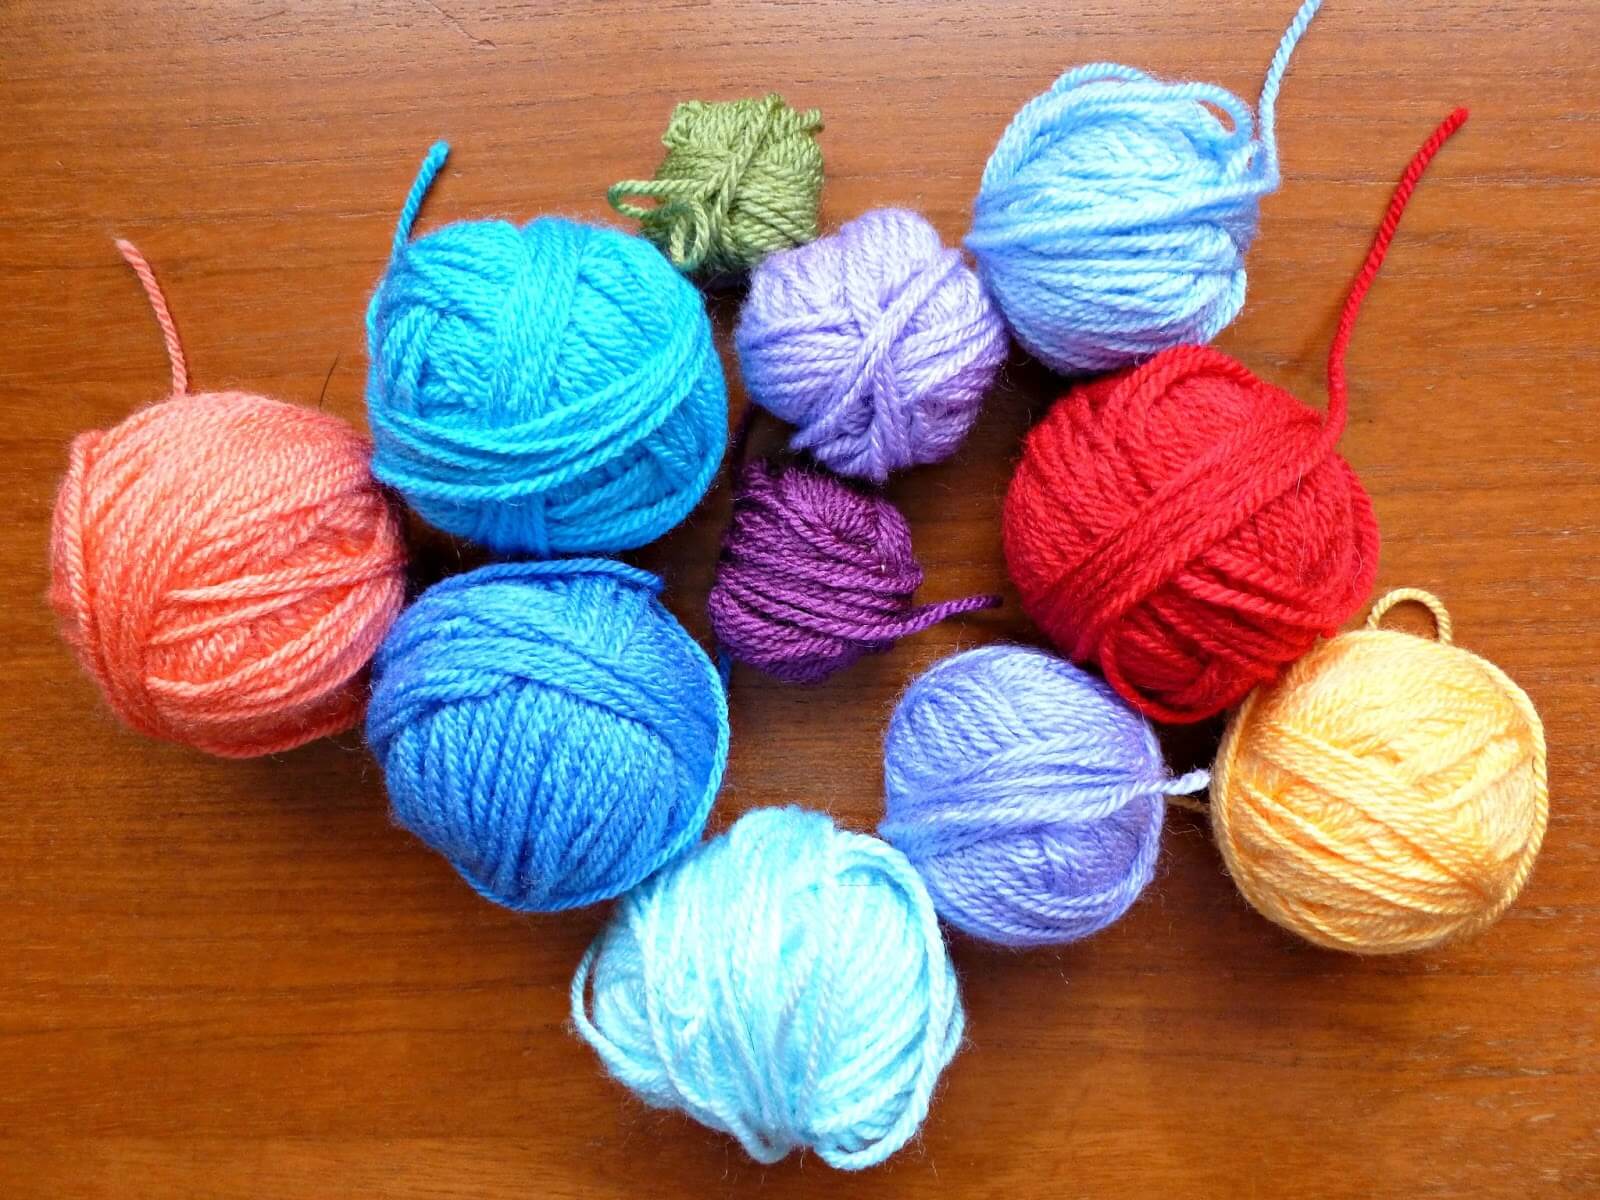
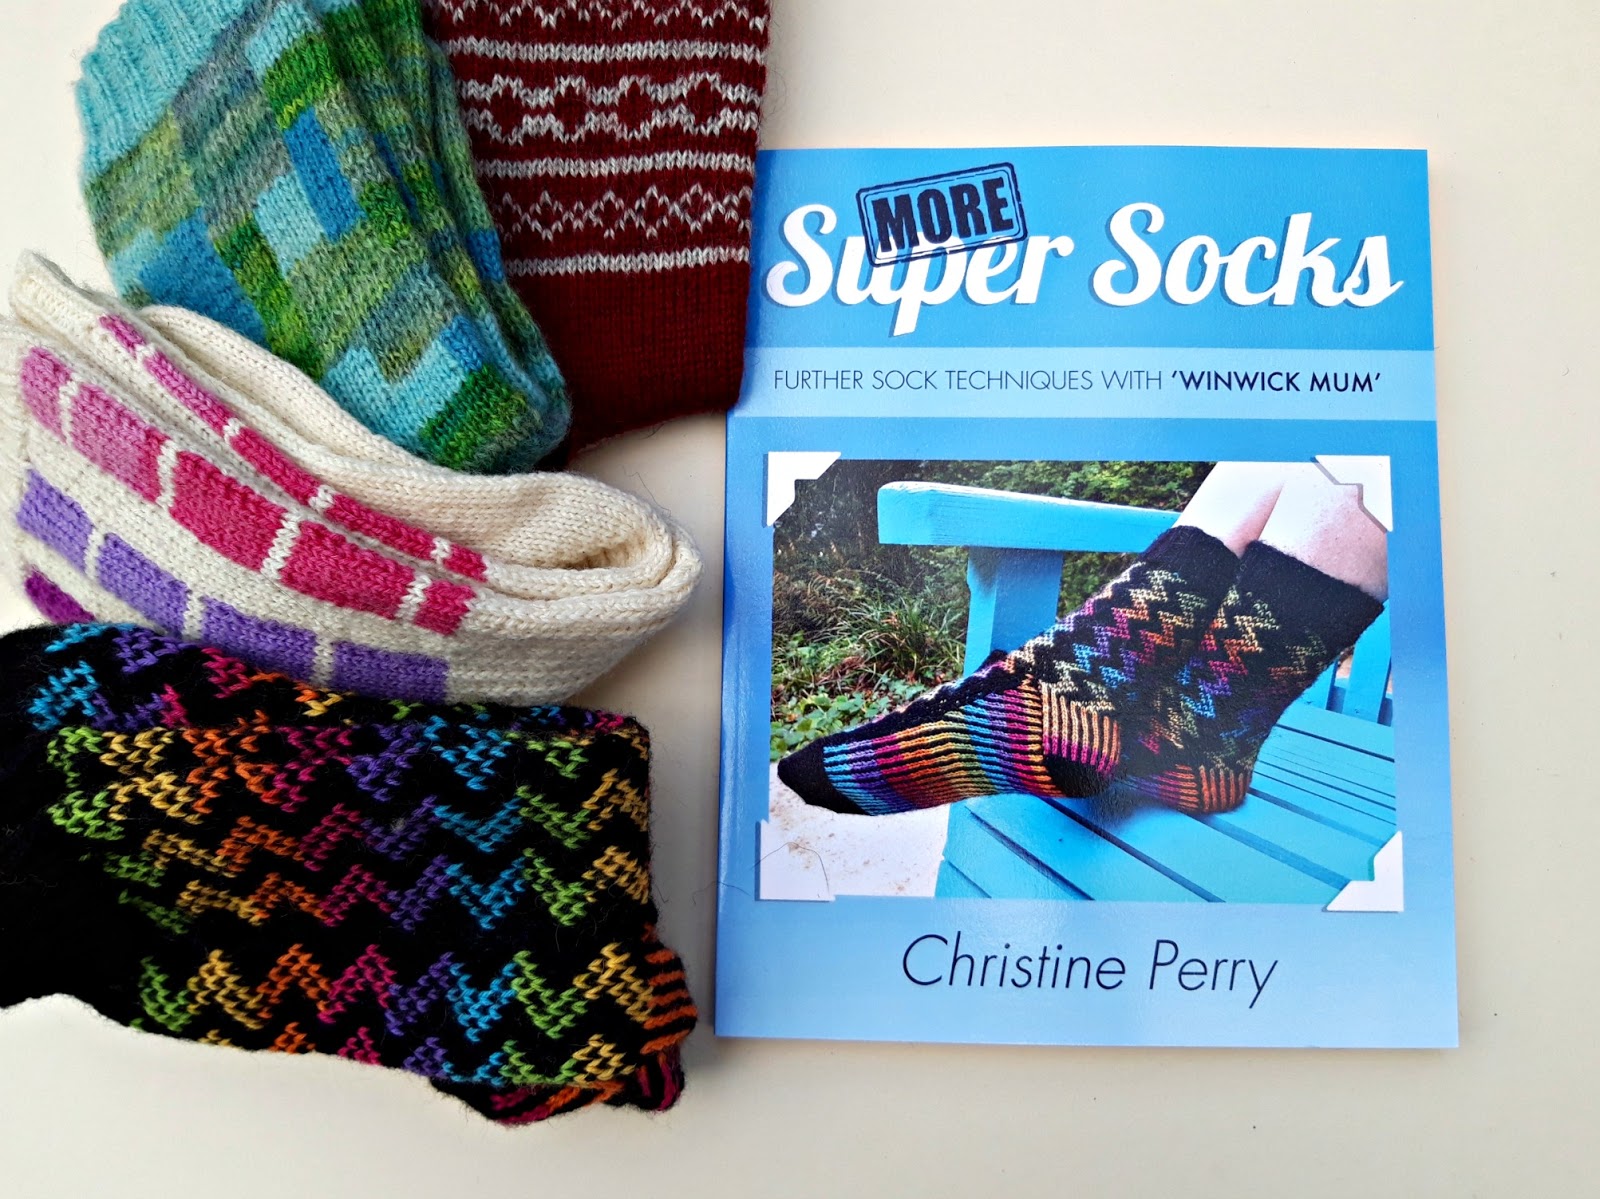
I rootled out some leftover Stylecraft Special DK from when I made my Neat Ripple blanket
and found the packet of buttons that had been gathering dust for far too long.
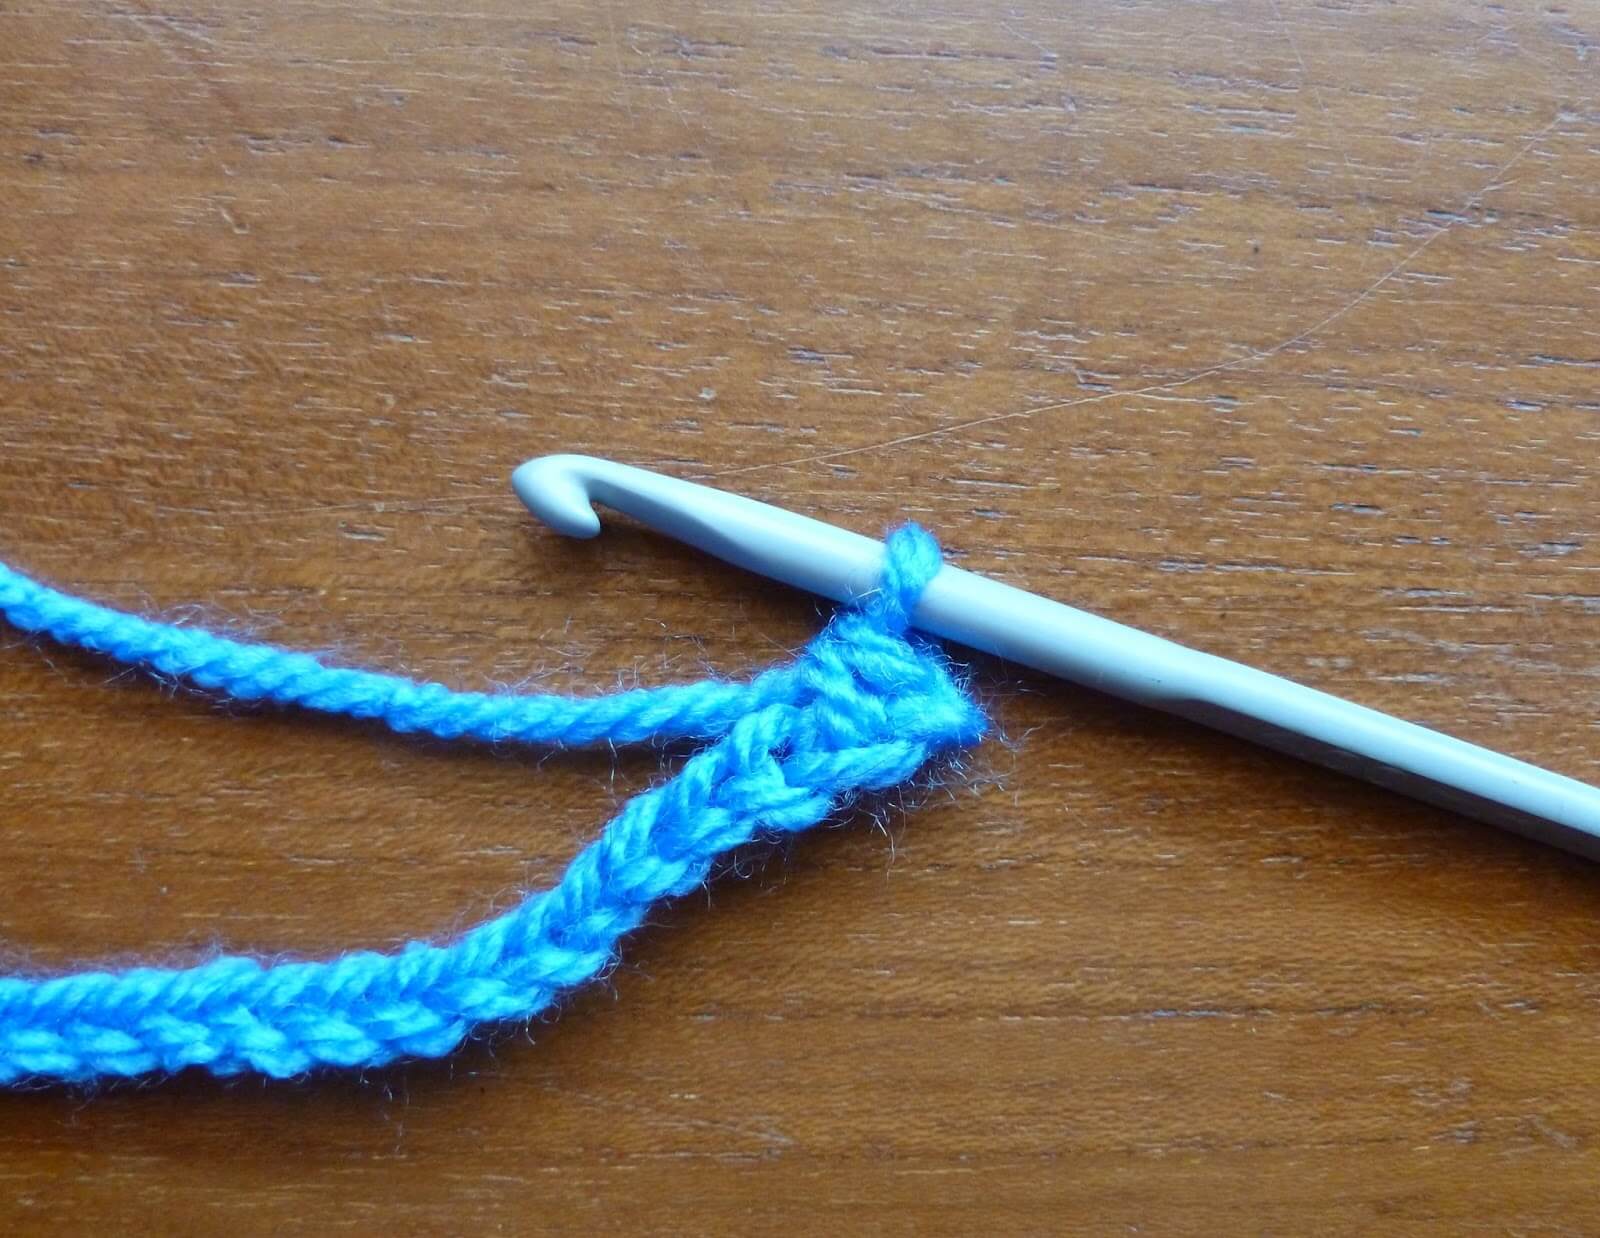
I measured my seat belt (5cm across), multiplied that by 2 to cover the front and the back and then added 2cm for the buttons. This meant that I chained 24 to get started. Missing out the first stitch, I put my hook into the second stitch along ready to start on my double crochets (single crochet in the US).
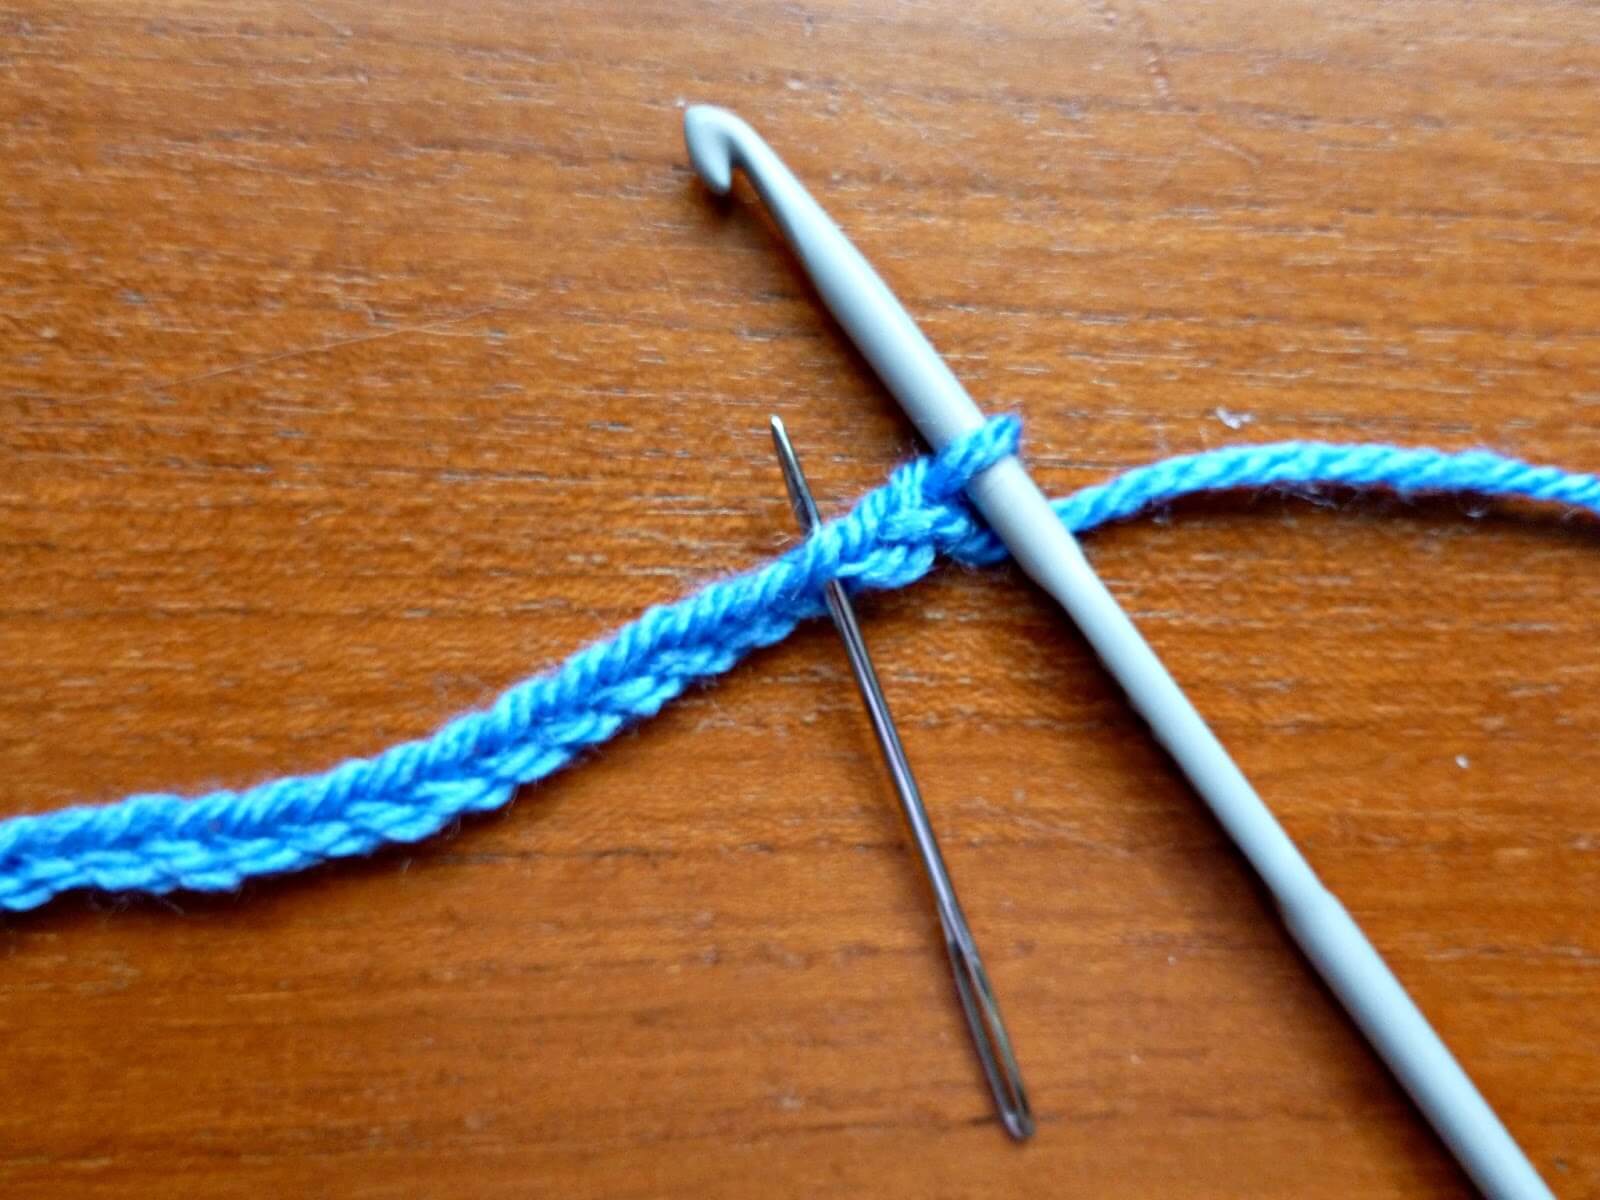
To make a double crochet (dc) stitch, put the hook through the second stitch, wrap the yarn around and pull through to make two loops …
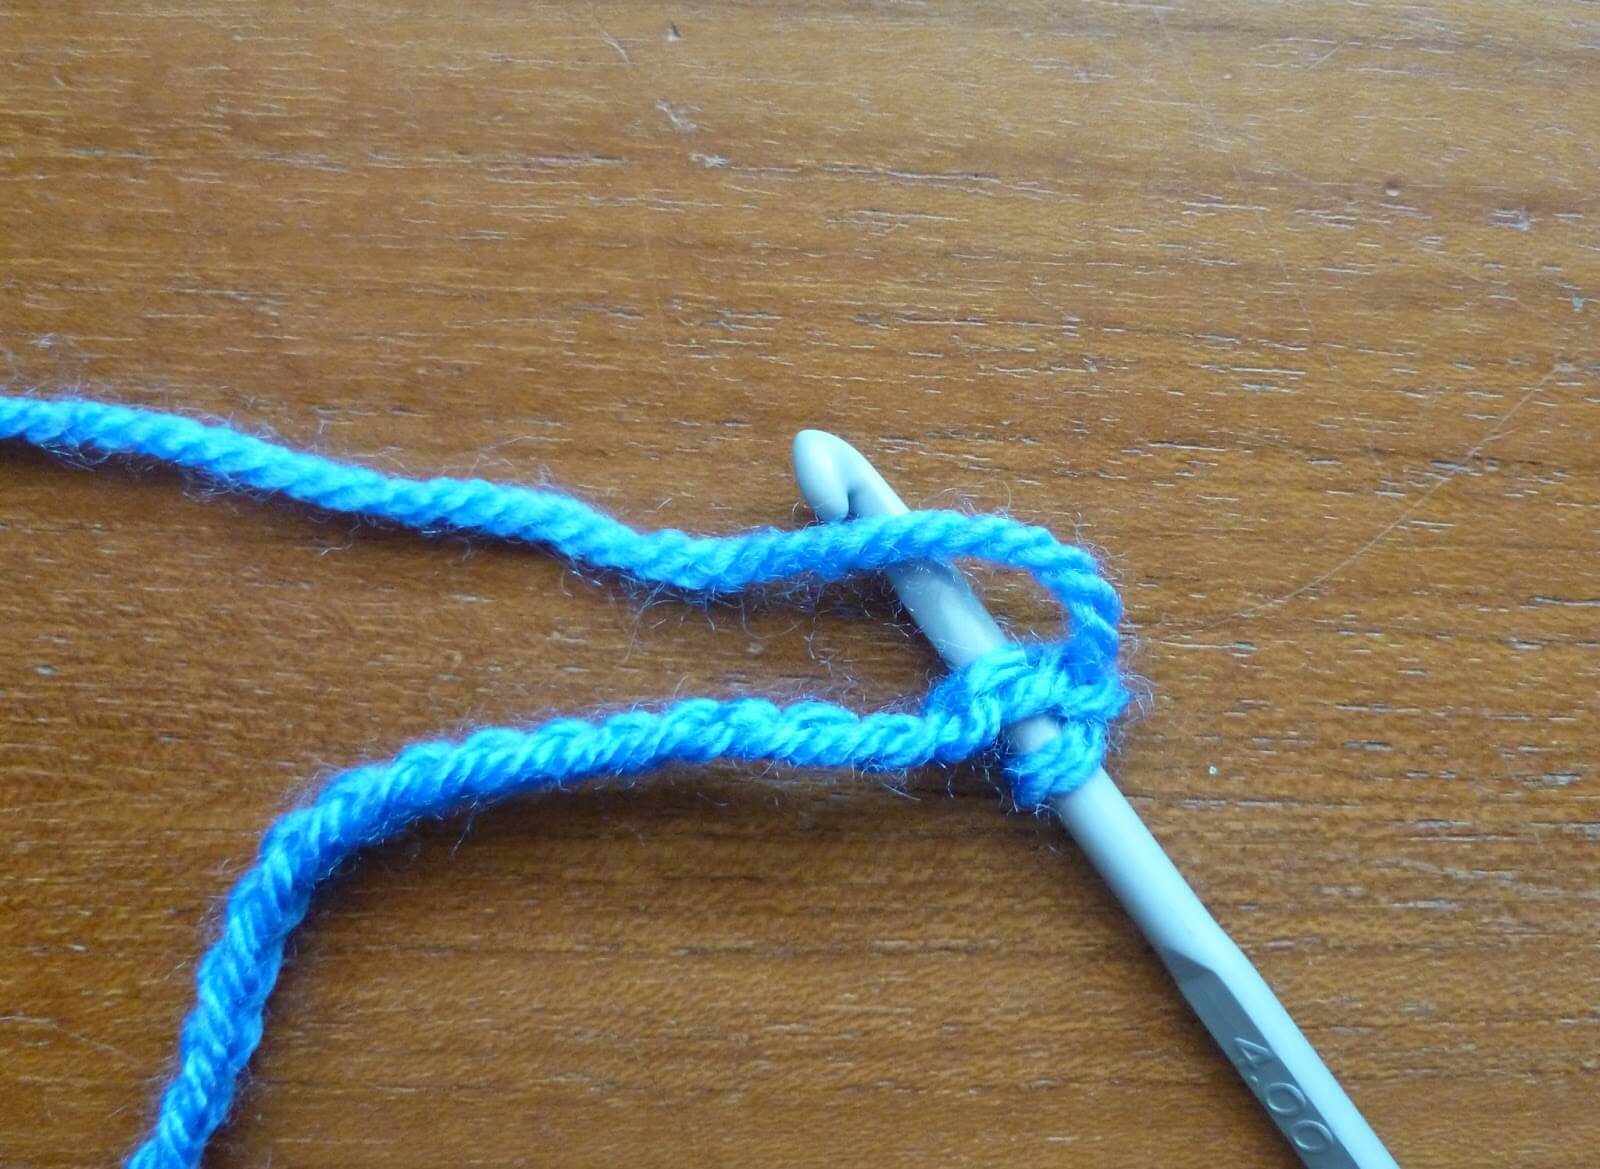
then wrap the hook around the yarn again …
and pull through both loops to make the stitch.
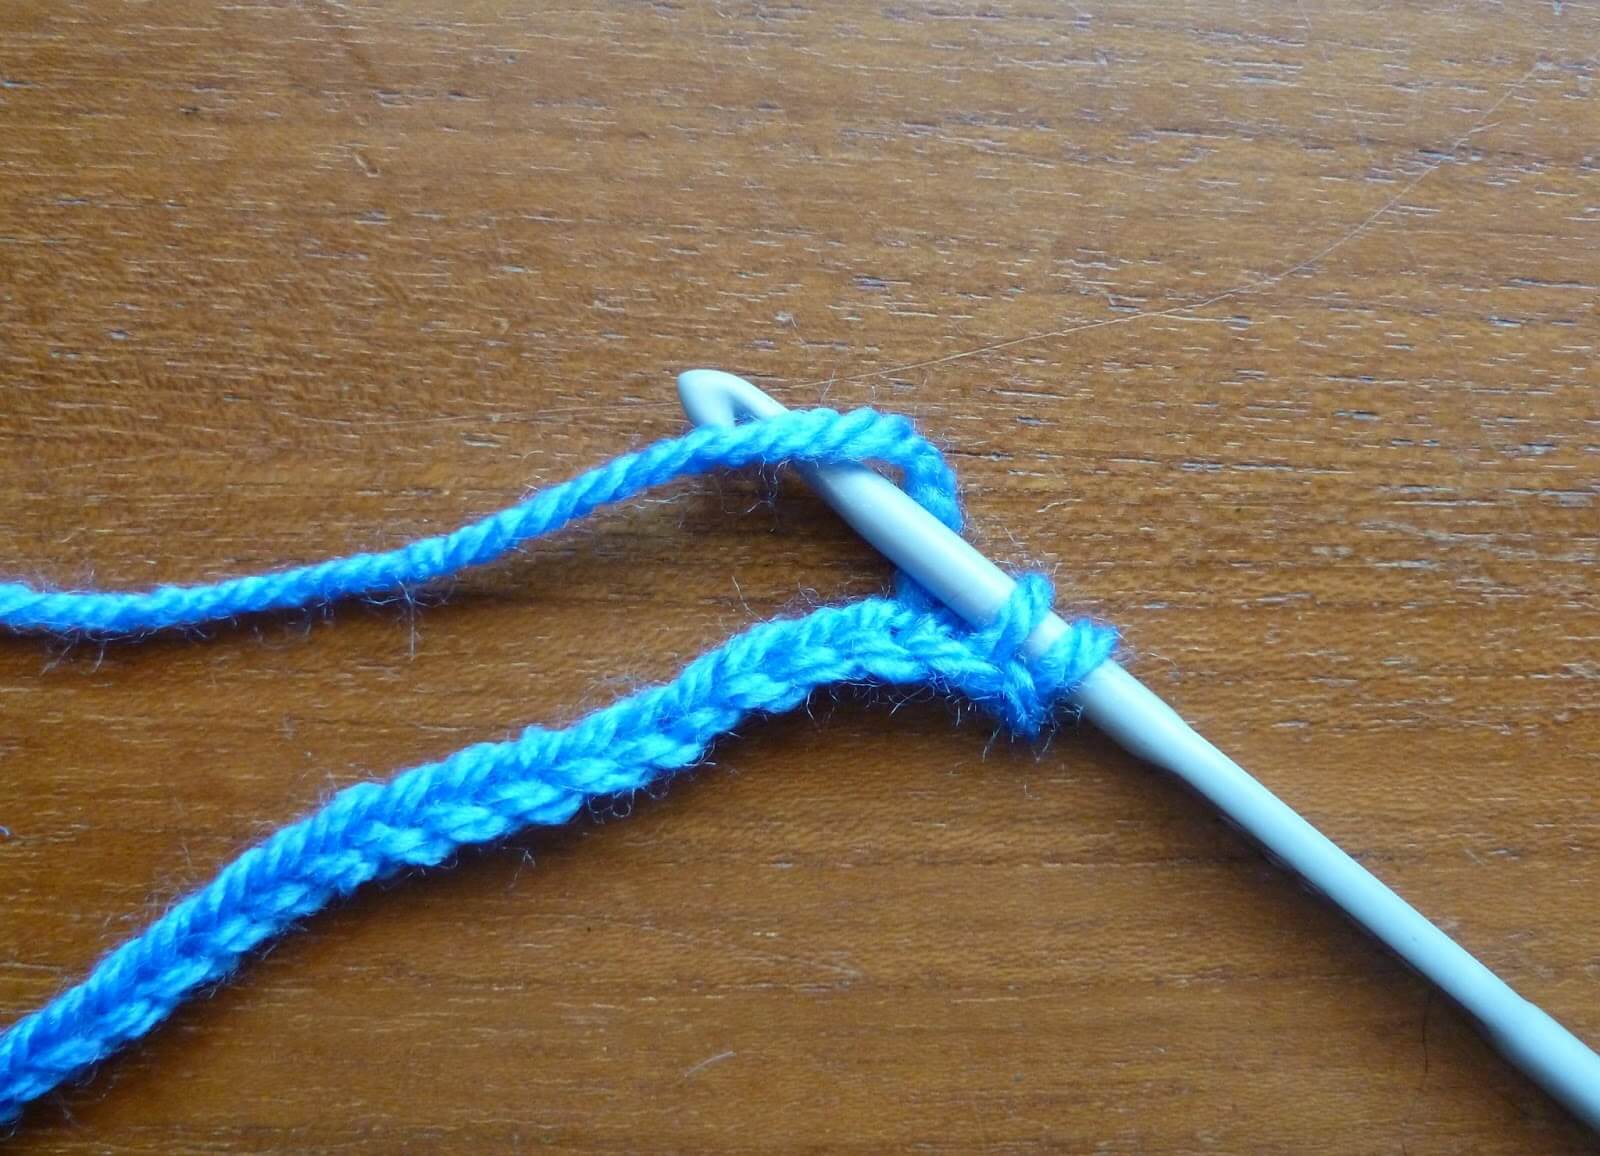
Remember to chain 1 at the end of your round before you turn to go back the other way.
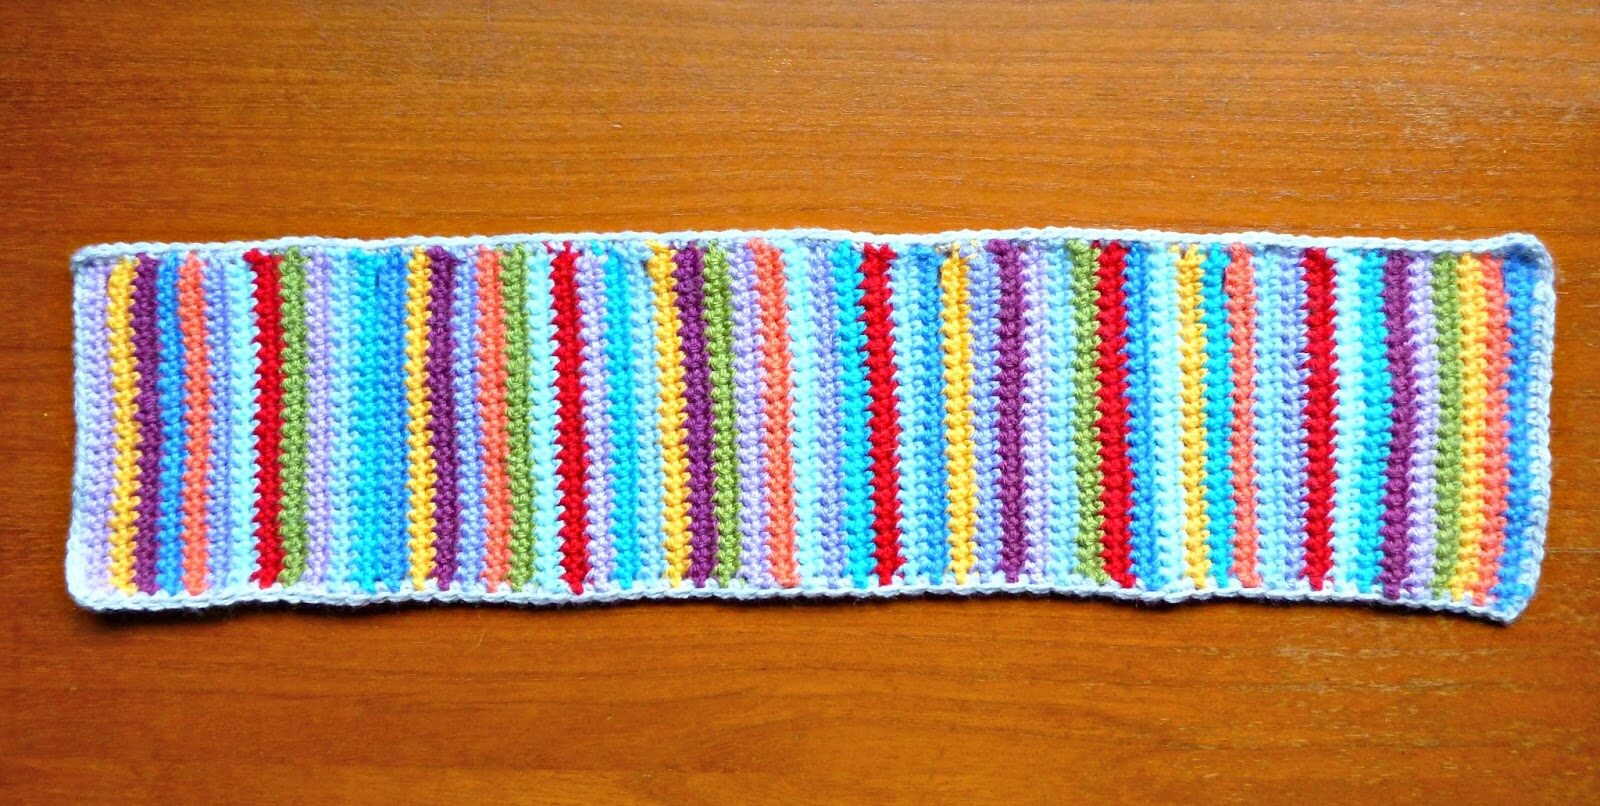
You can make the seat belt cover as long or a short as you want. I wanted to use up as much of the yarn as I could, and fit in all six of the buttons, and make sure that the cover protected as much of my clothing as possible so mine is 56cm long. I must confess that I didn’t think about the seat belt rolling back up into it’s holder when you take it off, so that’s something that you might want to take into consideration!
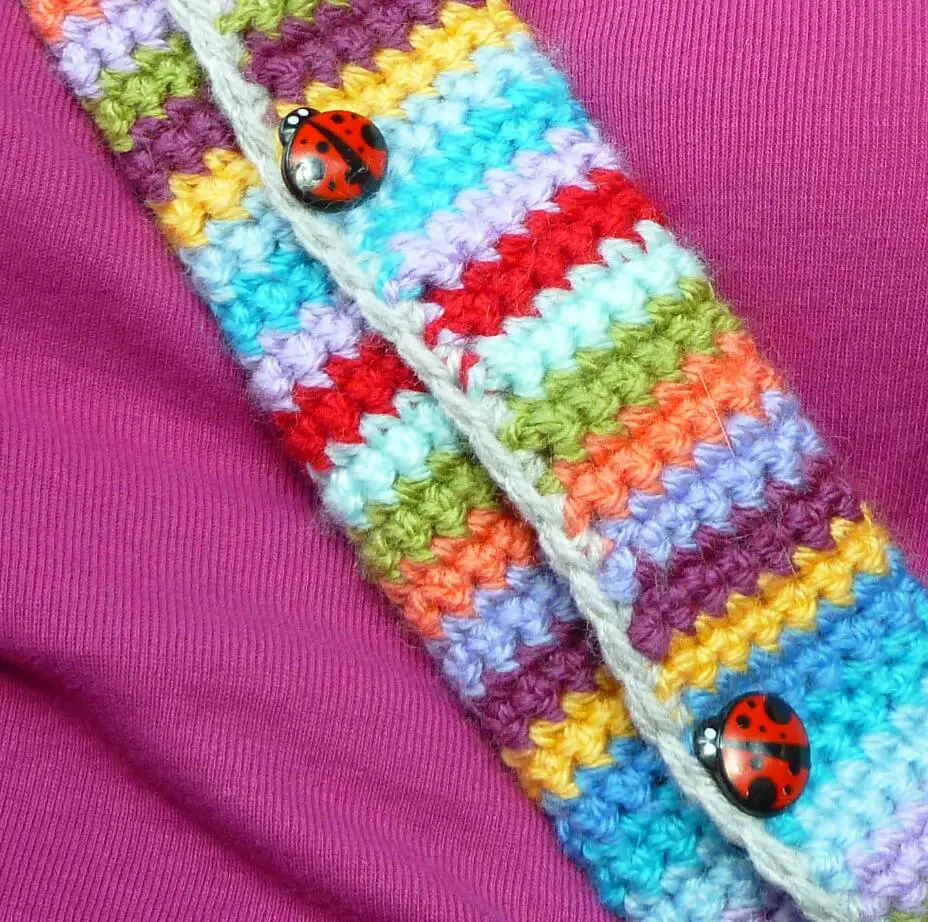
I had 11 colours so to work out the buttonholes I made one after the first two rows, then worked 11 colours (22 rows) before making the next one. I worked two more rows (1 colour) after the last buttonhole it matched the other end of the cover.
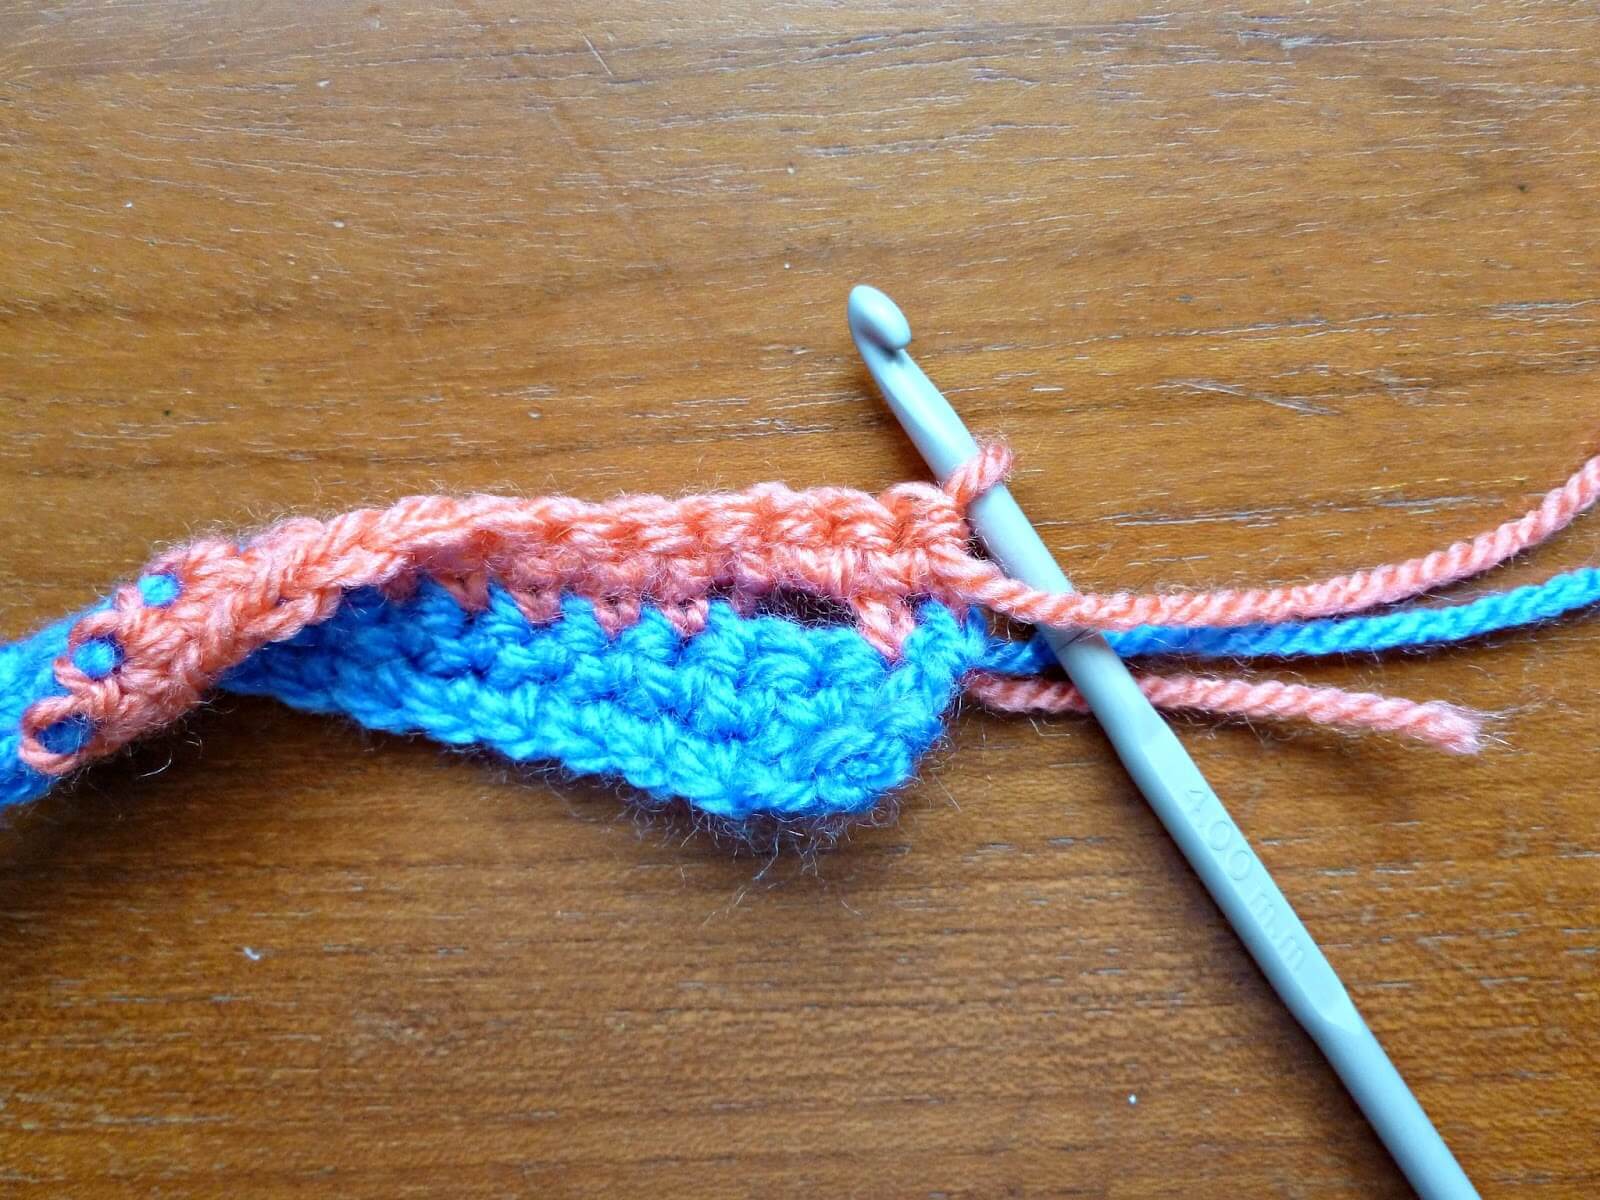
To make the buttonholes, make 1 dc stitch, chain 2 to replace the 2 stitches that are being missed out to create the buttonhole. You can see the stitches indicated here by the wool needles.
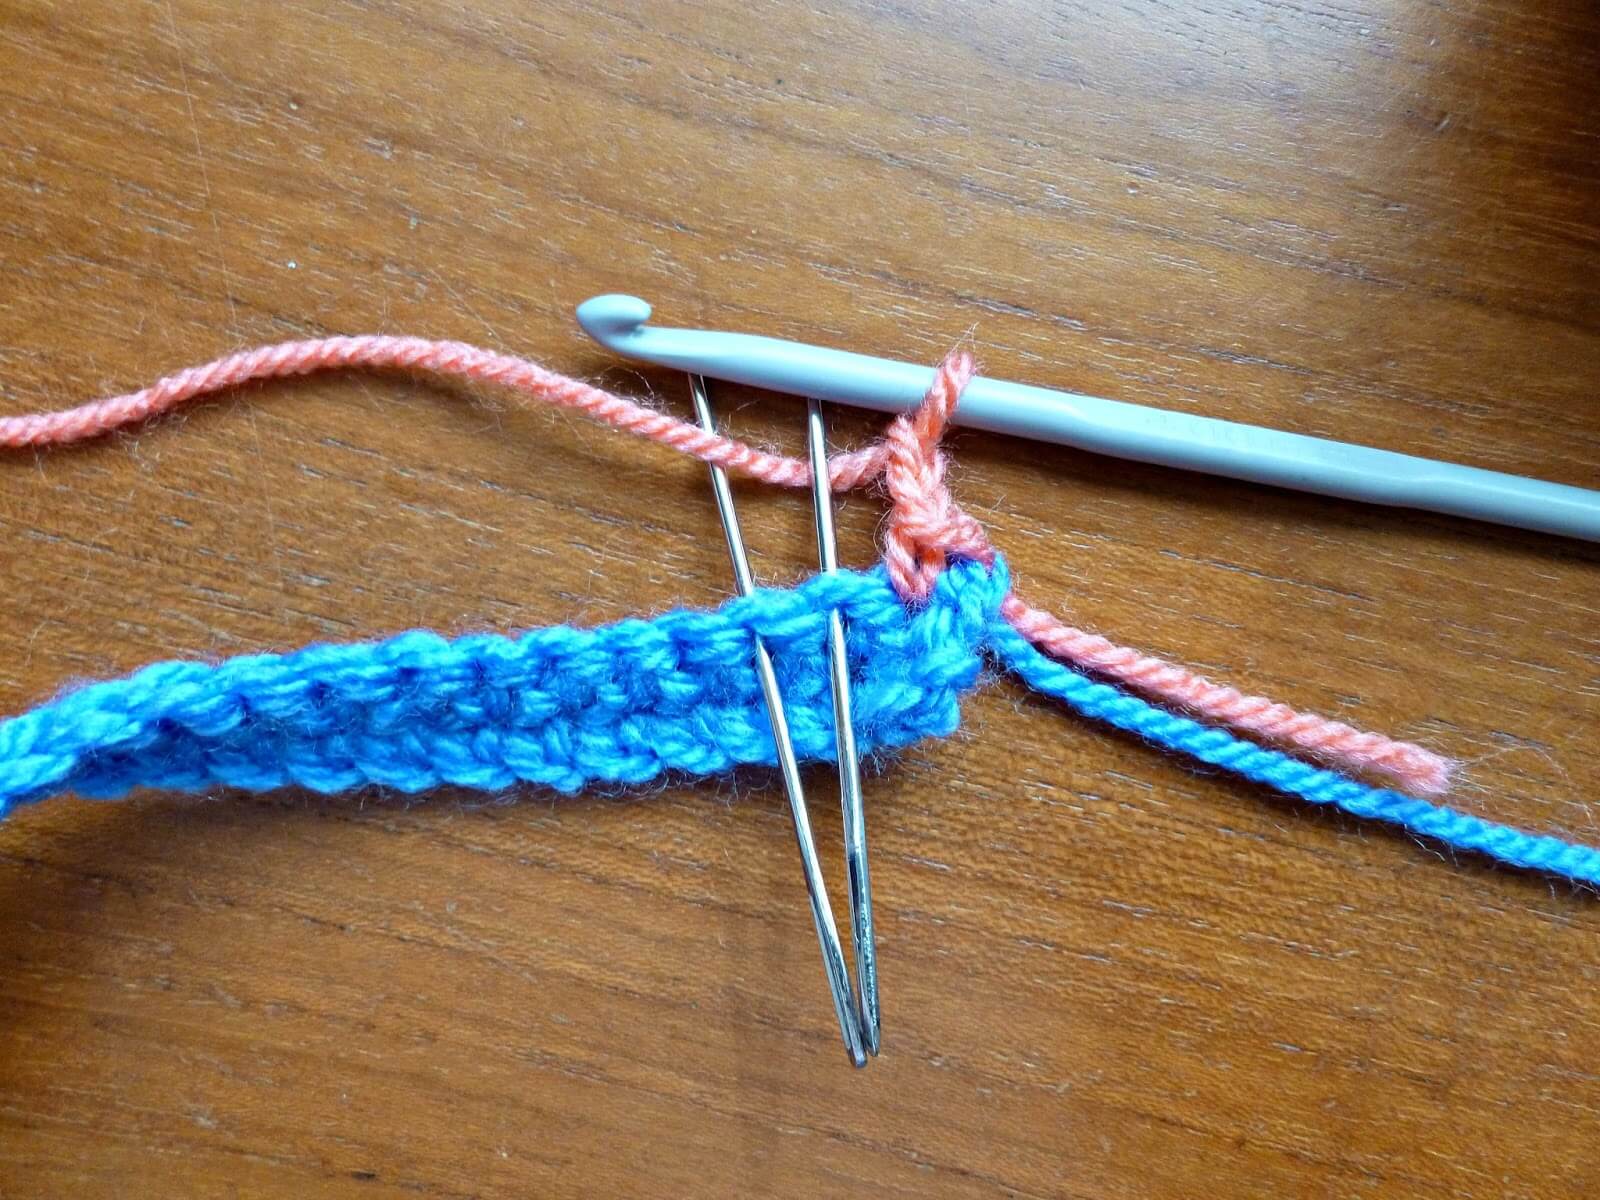
Then work 1 dc stitch into the next stitch along …
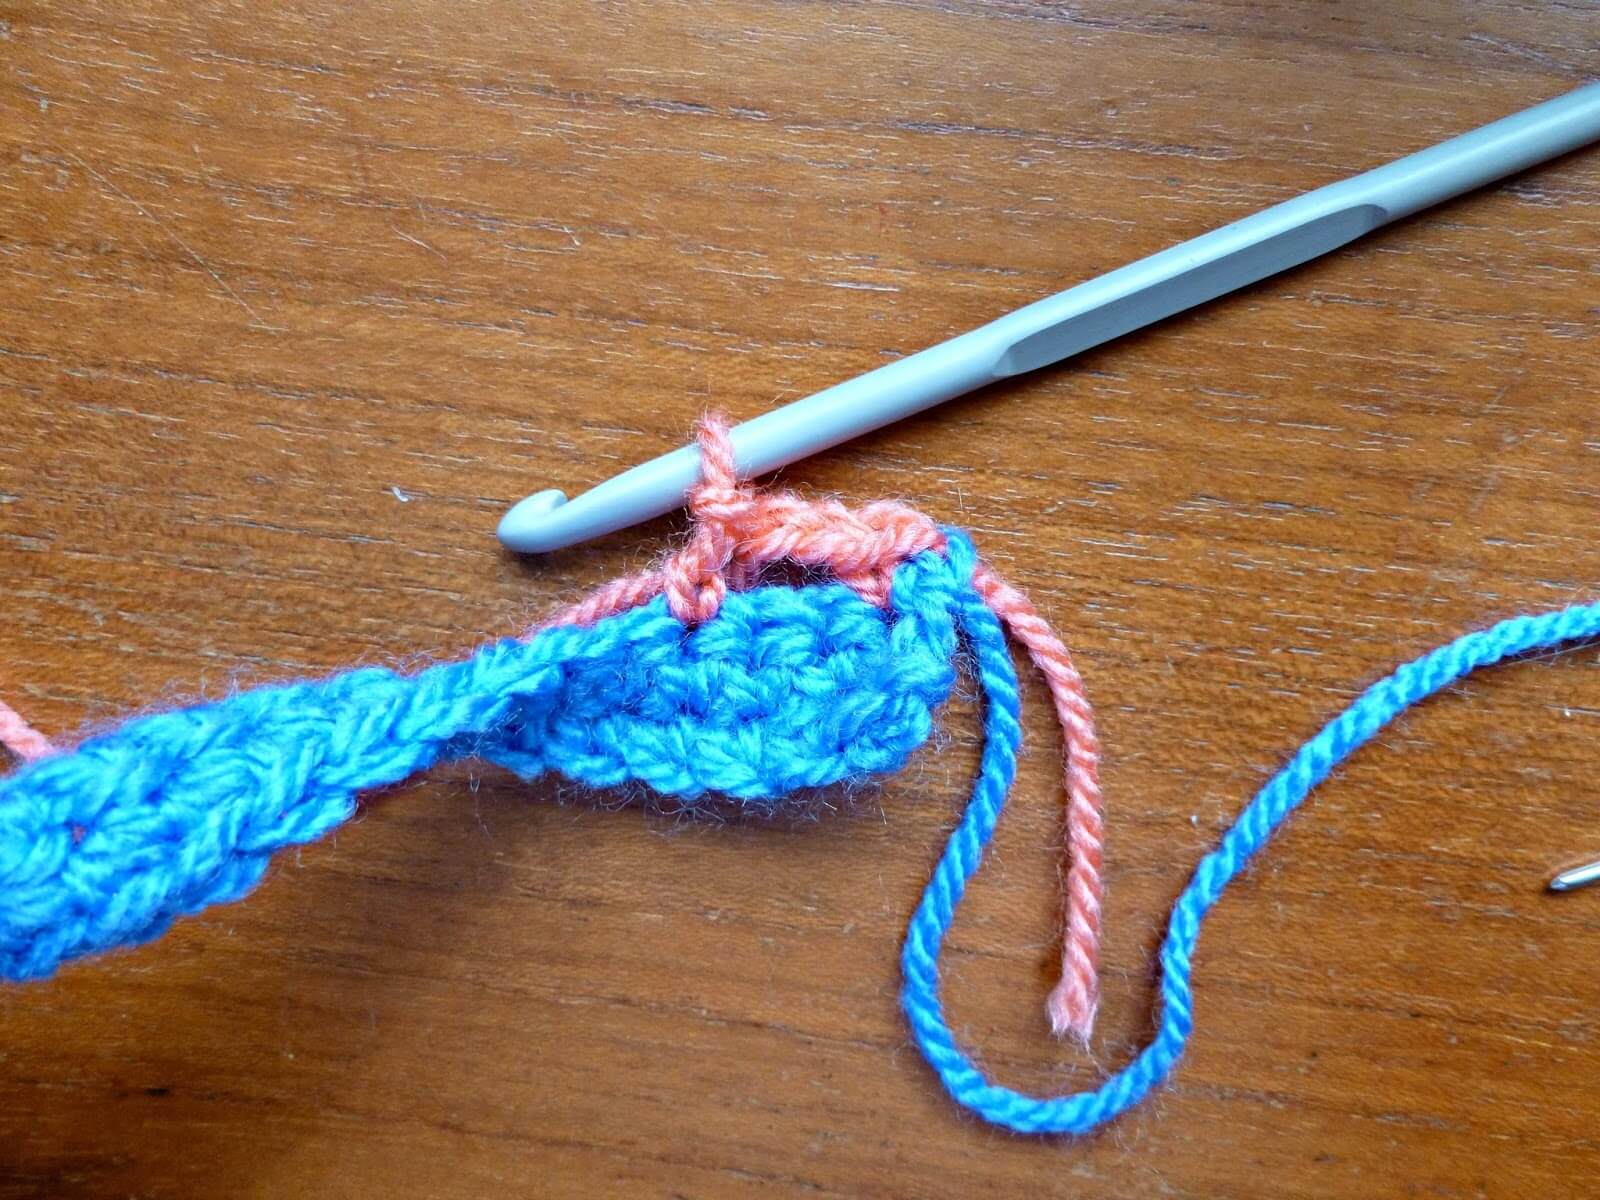
and continue to the end of the round, ch1, turn, work to the 2 chains. Then insert your hook into the gap created by the chains and work 2 dc into the gap.
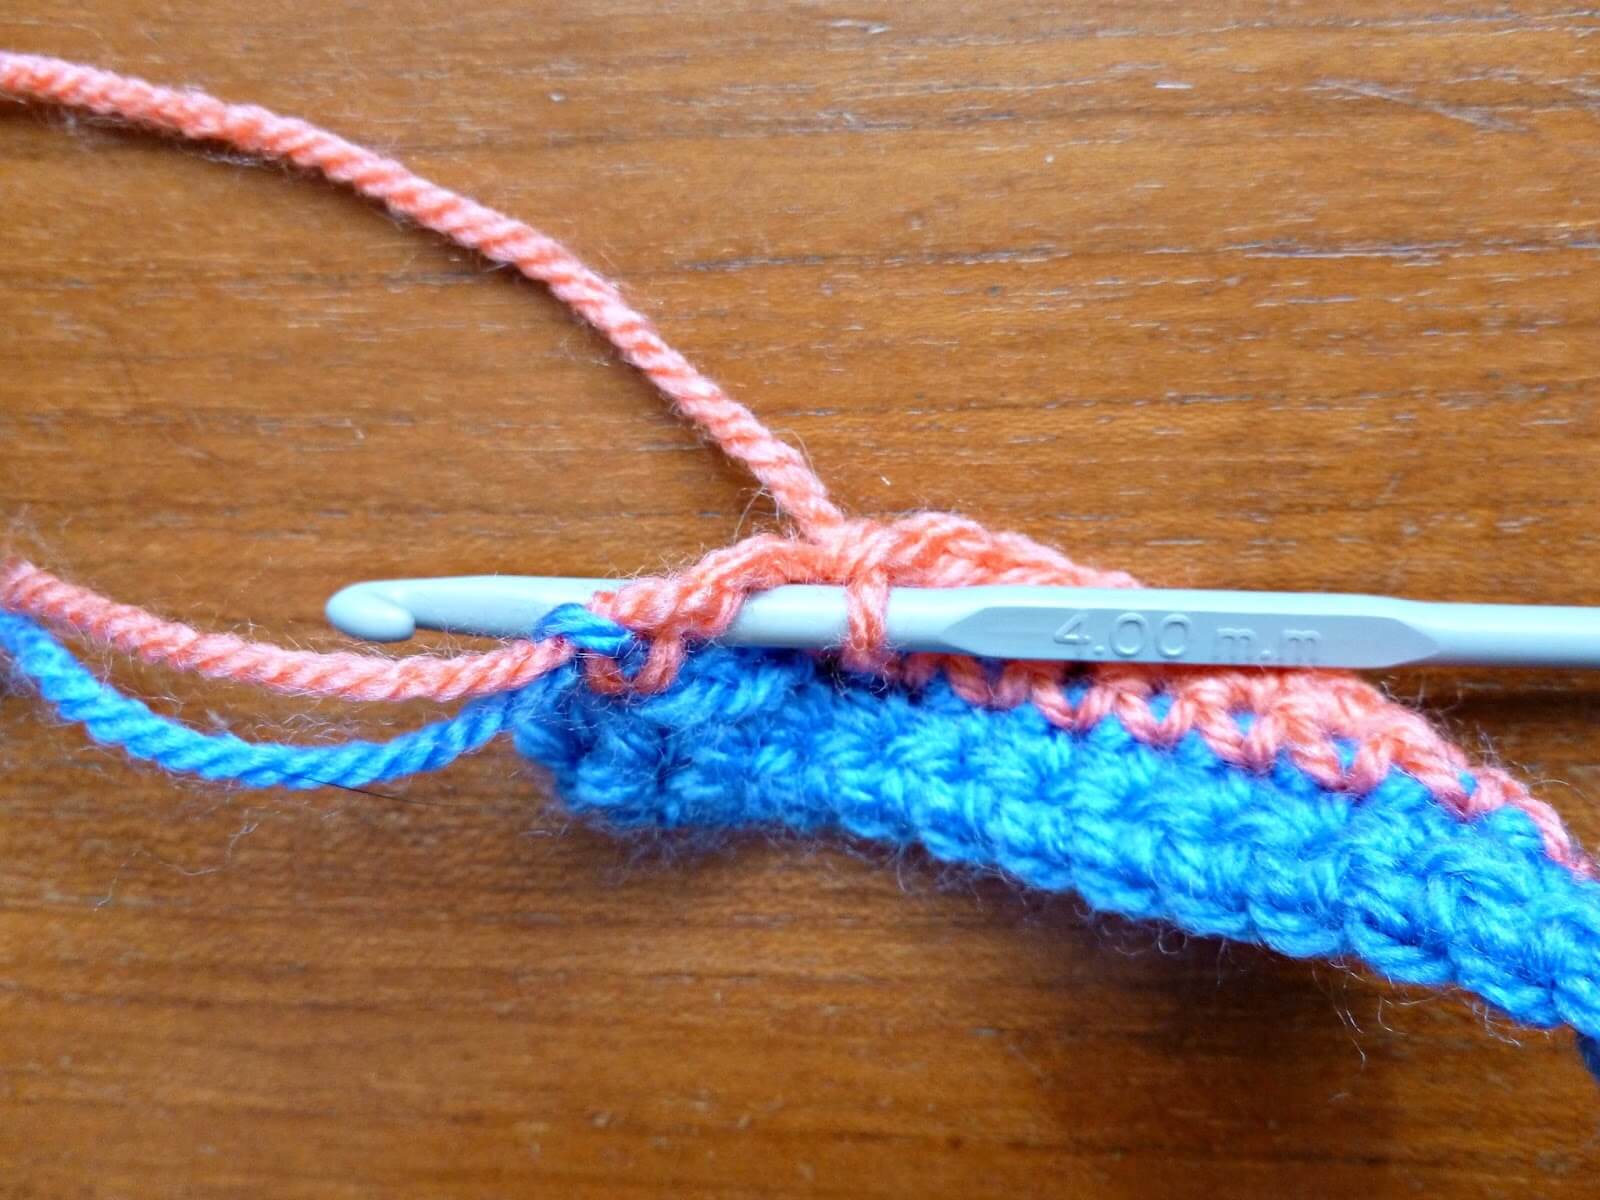
This creates a nice neat buttonhole.
There’s no particular sequence to my colours; I just made sure to use each colour once in every block of 11 colours. You might think that given my obsession with matching socks this seems strange, but I actually like the randomness of the colours in my crochet!
This is what I ended up with. I worked a round of double crochet in grey to neaten off the edges …
then it was time to sew on the buttons. This was easy enough – it was just a case of lining them up with the buttonholes (having previously checked where to position them on the seatbelt).
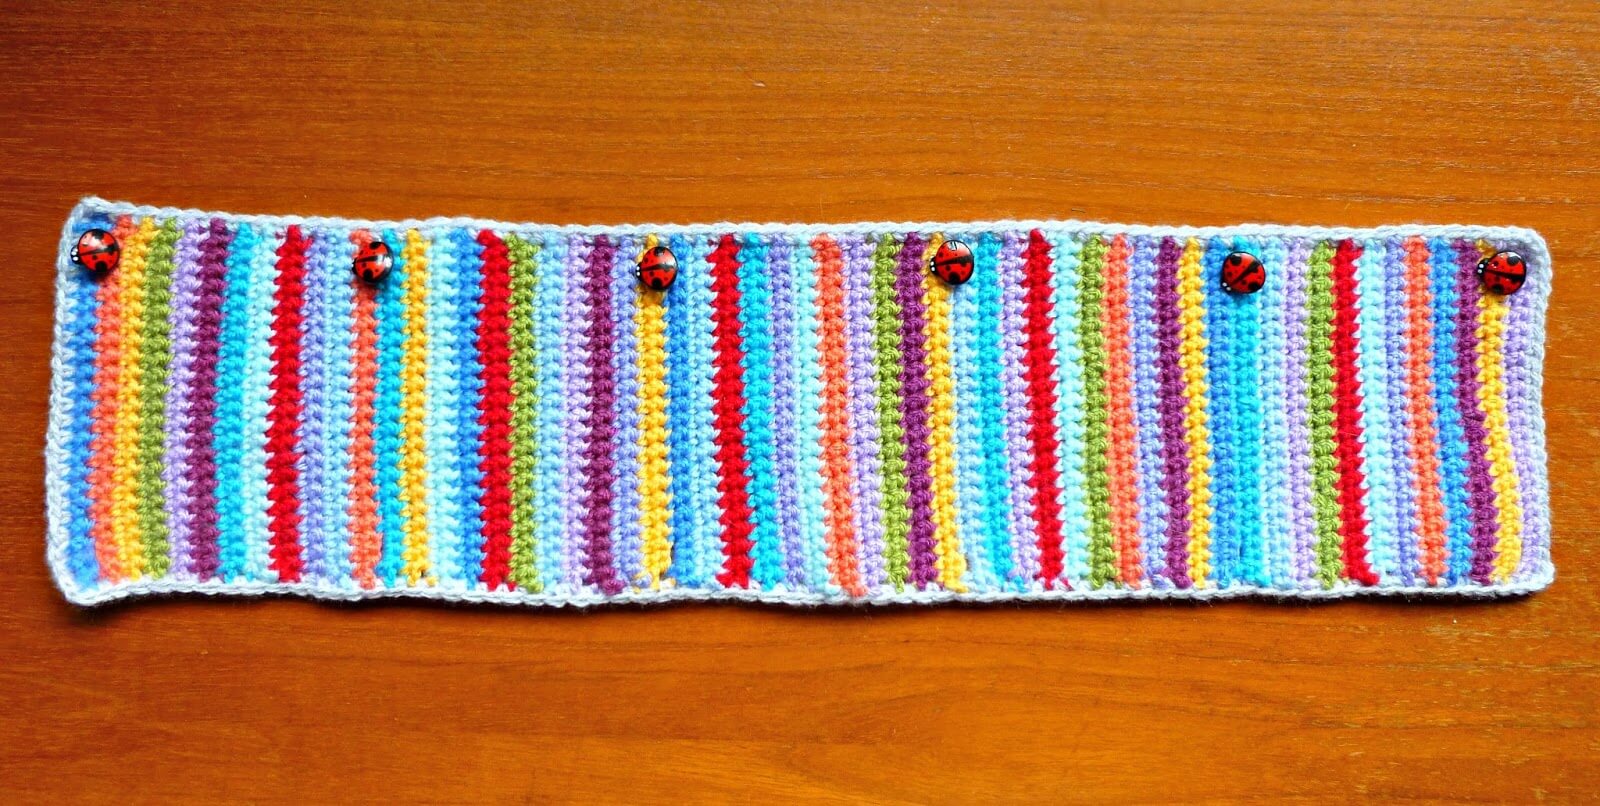
And there we are!

It’s just a bit of fun, but there’s nothing wrong with that, is there? 🙂
This pattern is free on this blog and will always remain so. If you’ve enjoyed using it and would like to support my work so I can keep blogging and designing, you can browse my shop for patterns and books or buy me a brew – both are very much appreciated. Thank you! xx


This pattern copyright © 2016 Winwick Mum All rights reserved.
Not to be included in any collection or used for profit without written consent of Winwick Mum.
If you would like to stay in touch, click the link below to join the Winwick Mum mailing list to hear about the latest blog posts, pattern updates, tutorials and more … but no spam, I promise!


Great idea!! The buttons are very cute aren't they. I like the rainbow colours too. xx
The buttons are fab! They were wasted sitting in the packet 🙂 xx
There is everything right about making something colourful just for fun! And for the record, I think I quite like being called a guru 😉
xxxxxxxxxxxxxxxxxxxxxxxxxxxxxxxxxxxxxxxxxxxxxxxxxxxxx
Ha ha, I'll be holding you to that masterclass promise, you know! 😉 xx
How cut is that! I do like the idea of a seat belt cover. My grandpa always had one, a big sheep skin furry one. x
I've never really been one for accessorising my car (you'll certainly never see my car with headlamp eyelashes!) but this seemed like a practical idea. A sheep skin one sounds much more glamorous than mine! xx
Well didn't that just put a smile on my face. What a wonderful, colorful and fun item to crochet.
Thank you! xx
LOVE this! xxx (BTW, what does happen to it when your seatbelt retracts???)
Erm … the seatbelt doesn't totally retract any more! I think mine is a bit long but because you can make it any size, you can make sure that it fits 🙂 xx
It looks great!
Thank you! It makes me smile every time I get into the car! xx
What a fabulous idea, and the buttons add a lovely finishing touch.
The buttons are fab, aren't they? I knew they'd come in handy one day! xx
Absolutely love this idea Christine – you could make another for the passenger seat belt using the bee buttons xx Joy xx
That's the plan, Joy, although maybe not quite as long as this one! 🙂 xx
Christine, this is superb. Pure genius. So obvious to make and yet no one thought to do it but clever you. LOVE it, well done again x
You're very kind, Selma, although I'm not sure it's an original idea – this is just my version with added ladybirds! 🙂 xx
It looks like you had lots of fun making these very useful covers. What a great idea! And, I love the little embellishment of the buttons, too. I too have a couple of unfinished projects but a new one I'm wanting to start but should I start it before I finish my other WIP?? That's my dilemma. I hope you enjoy your weekend. My best to you. Hugs, Pat
I am less concerned about the WIPs these days – I know they will all get done eventually and unless I've got a deadline to work to, then I just pick the one I fancy doing. Sometimes that means casting on a new one too! 🙂 xx
What a great idea, we bought padded covers from Halfords for our seat belts, they were rubbing and painful against my skin in the summer when I was wearing thin clothes but this is so much prettier and jolly.
I have a 20 year old Corsa called Megan, I think something like this would be prettier than black covers, however I would have to adapt to provide a cushioned effect.
Isn't the best thing about making something for yourself that you can adapt it to make it fit you (or your car!) perfectly? If you were to make it twice as wide you could wrap it around the seatbelt twice and that would work, or you could stitch some foam to the inside of the cover … there are so many possibilities! 🙂 xx
Hand stitch a lining of polar fleece for extra padding, or a double layer polar fleece. Fleece doesn't need to be turned under so it's easy to do.
OO! I think we need some of those! Very pretty.
I would expect yours to be much more glamorous and felted though! 🙂 xx
Ohhh… I need one of those! What an awesome idea and have lots of leftovers that would lovely.
They're a great way to use up leftovers! xx
I love the idea of making it longer. I have 4 for us girls in the family and one just moves around too much and never stays where you need it. I think making a long one will ensure I am super comfy…..all the way home!!!!! Thank you and God Bless you!
That's a great idea! Mine is still going strong – the yarn looks a bit worn now (as it is) but my clothes aren't 🙂 xx
Love this idea! Yours is so cute! Just curious, where did your husband find them to order online?
He ordered ones to match his car brand from the car manufacturers, I think. Sadly, there's no way he'd entertain colourful crochet covers in his car, he draws the line at wearing hand knit socks! 🙂 xx
Thank you for the easy breakdown tutorial. I'm a novice at crochet but I can chain and dc just find following patterns hard. Great colours and machine washable too.
After I made my first car seat belt cover and loved it it came time for another one. i was rather sloppy with the first one. I just wanted to see if it solved my problem with being so short hoping it would be more comfortable when the seat belt touched my chin. Thankfully it worked! It’s rare I go in a car besides my own. I realized when I went with someone in her car I need to make a new one for my car and a to go seat belt cover. That way I don’t have to remember to take the seat belt cover from my car and put it back. I finished it this month. I believe I used your pattern. Now I am making my on the go seat belt cover. I got peaches and cream stripped pink and white yarn years ago. It’s the $1.99 kind from walmart by peaches and cream. A project like this is perfect for this amount of yarn! I had bought one ball at the time. Thank you for sharing the tutorial for free. It has been a major help thanl you so much!!
Thank you – it’s always really good to know that a pattern has been useful and it’s a good way to use up your yarn stash too! Just in case you’re wondering, I’ve removed your Rav name for security 🙂 xx