
Couthie Shawl – free pattern and tutorial
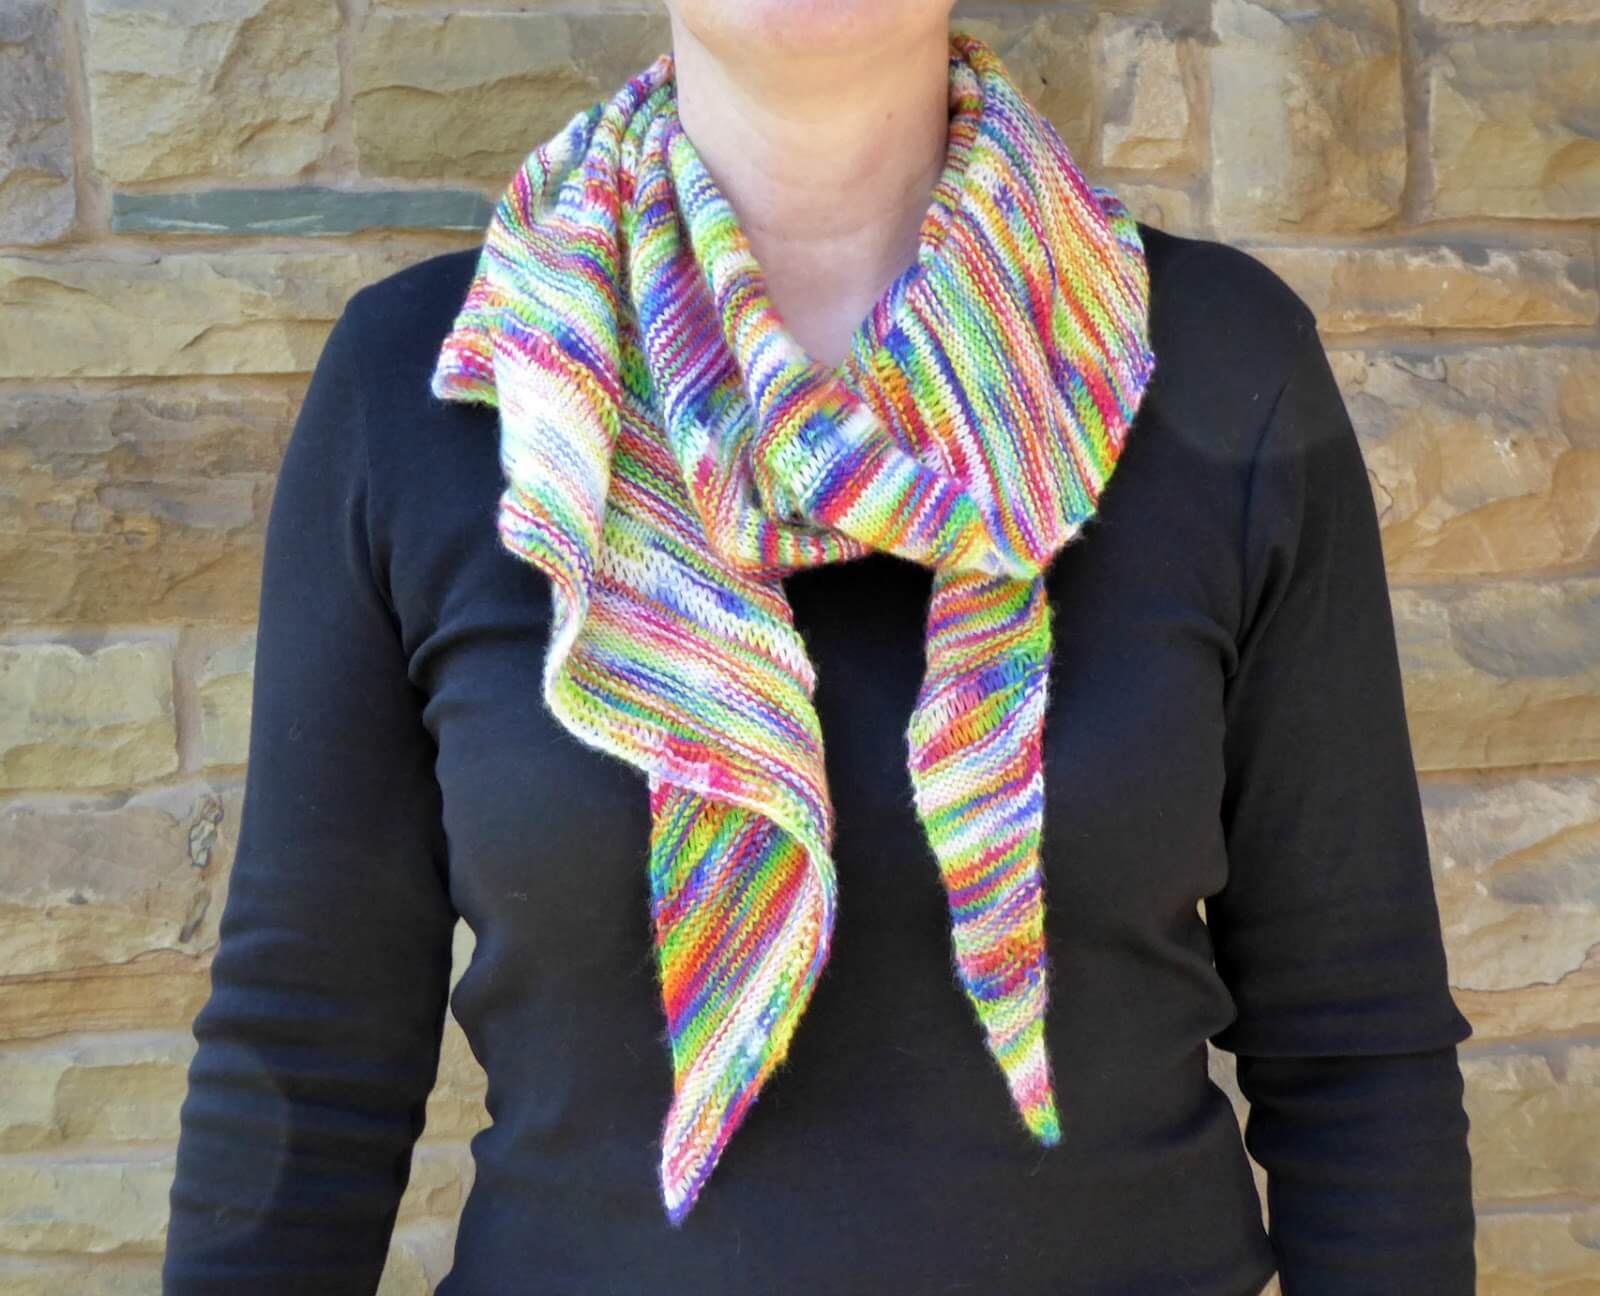
Good morning everyone! It’s a beautiful day here in Winwick, the sun is shining, the birds are singing and it’s the perfect day to start a new shawl!
Thank you so much to everyone who commented on the ta-dah post and let me know what you thought about the name – Couthie it is! (I did like the other suggestions too and will tuck those away for future projects, thank you 🙂 ) I’m glad you liked it – I love the idea of wrapping myself up in something that is not just cosy and comfortable by nature but by name as well.
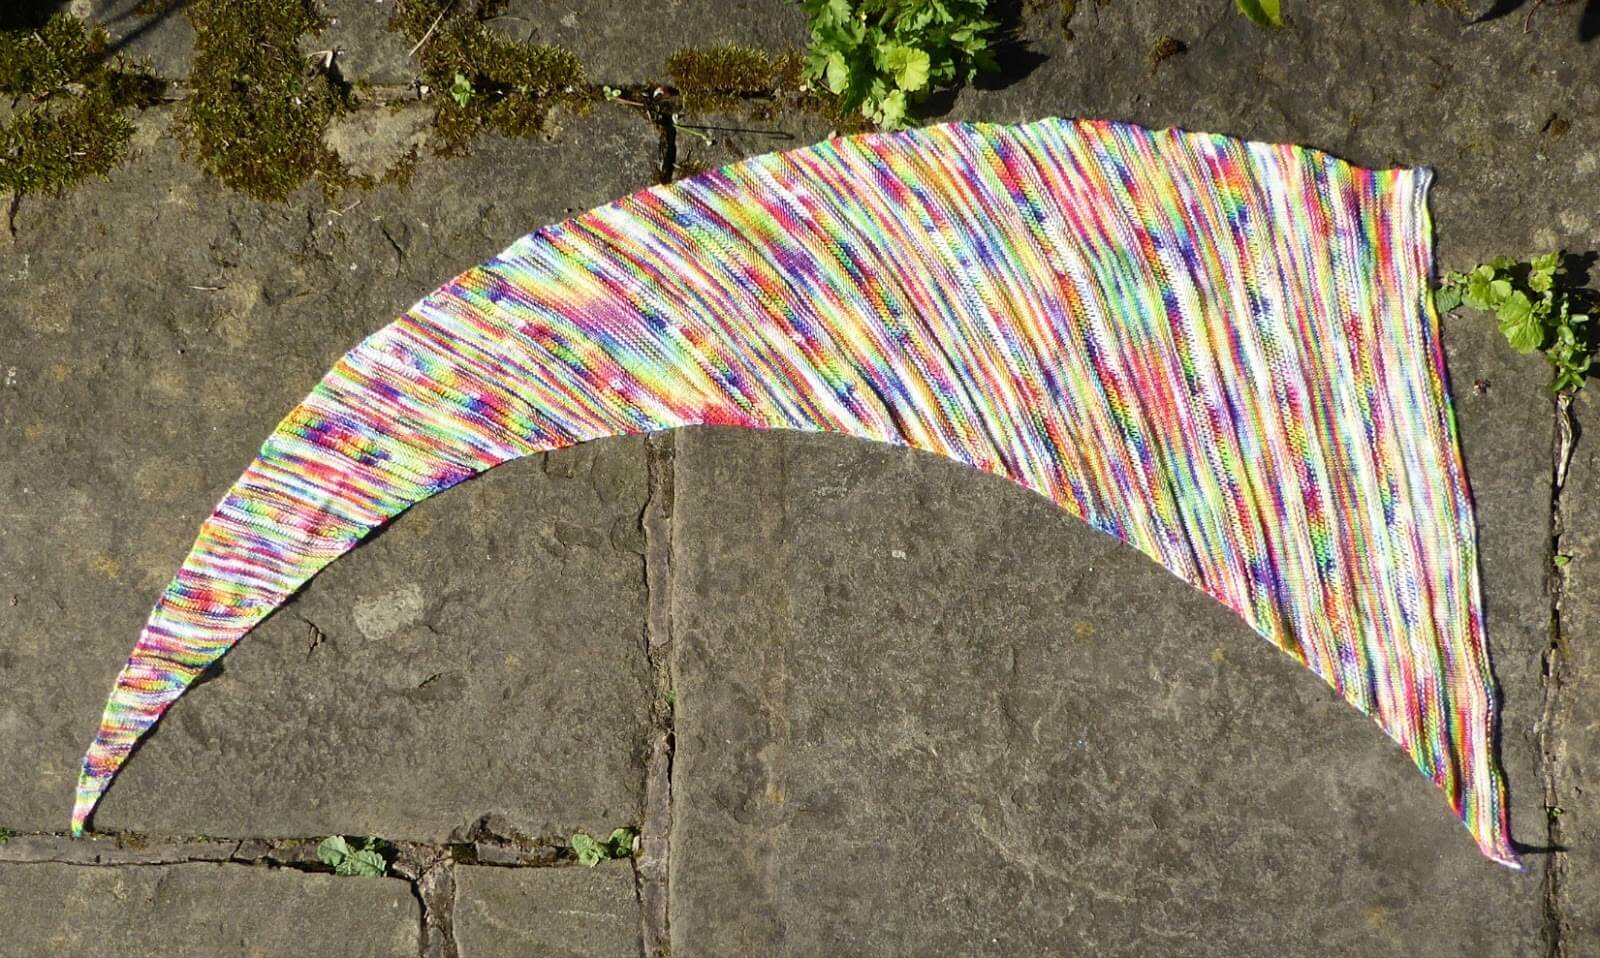
So without further ado, let’s get started. As I said in the ta-dah post, this is a really simple pattern – blocks of stocking stitch broken up with rows of drop stitch. I’ll show you how to do that below. The curved shape is created by increasing and decreasing on opposite sides of the shawl, but that’s very simple to do as well.
Couthie Shawl
(you can download a PDF copy of the pattern here)
Couth-ie (Scottish) cosy, comfortable, not over complicated
of a person – sociable, friendly
The shawl is knitted in one piece and increases in size as you go. There is no limit to the size of the shawl other than the length of the yarn in your skein or ball. It can be knitted in any weight of yarn, and with any needle size that you prefer. I knitted this shawl on 3.25mm needles, but with 4ply yarn you could choose any size between 3mm and 3.5mm – the best way to determine which size needles to use is to do a small swatch to see how the yarn knits up. You are looking for a fabric which is soft and drapey but not so loose that all of the stitches will look like drop stitches.
As far as the yarn goes, you could use any weight and any type of yarn that you like. Stripes, variegated, gradient – they will all look perfect as a Couthie! It’s just the thing for showing off a special hand-dyed skein too!
Materials
3mm-3.5mm needles depending on preference (I used a 3.25mm circular needle in 80cm length)
One skein or ball of 4ply yarn (I used Cuddlebums merino sock in colourway Melted Crayon, 425m in the skein)
wool needle
Pins, thread or blocking wires for blocking
Abbreviations
K Knit
P Purl
D Drop stitch (wind yarn round needle twice when creating knit stitch)
Kfb Knit into the front and back of the stitch to make one new stitch
K2tog Knit two stitches together
P2tog Purl two stitches together
Pattern
The pattern for this shawl is worked over 28 rows which do not change however many stitches you have on your needle. This chart shows how the rows are made up: starting from the bottom and with the right side of your work facing you, work 15 rows of stocking stitch starting with a knit row on the right side, 5 rows of stocking stitch starting with a knit row on the wrong side (therefore a purl on the right side), 1 row of drop stitch, 1 row of knit, 1 row of drop stitch and 5 rows of stocking stitch starting with a knit row on the wrong side (therefore a purl on the right side).

You will increase one stitch at the start of every right side row using the Kfb increase (indicated in red) and decrease one stitch every 5 rows using K2tog at the end of the row or P2tog at the start of the row depending on whether you are on a knit or a purl row (indicated in blue). It really is much easier once you start knitting than it might look on the screen!
To follow this chart, simply start knitting at the right hand edge of row 1, and when you have completed 28 rows, start back at row 1 again to work the next block of the pattern. The number of blocks you have will depend on the yarn you have chosen.
Note: you will need to keep count of your decreases so that they occur every 5 rows as where the decrease falls will alter from where they are marked on the chart as you get further up your shawl.
For those who don’t like charts, the pattern is still very simple to follow:
Rows 1-15: Knit on right side, purl on wrong side.
Rows 16-20: Purl on right side, knit on wrong side.
Row 21: Drop stitch.
Row 22: Knit.
Row 23: Drop stitch.
Rows 24-28: Purl on right side, knit on wrong side.
You will still need to remember to increase on every right side row and decrease every 5 rows.
Still with me so far? We’re going to do the set up rows and everything should fall into place as you see how the rows fit together. It really doesn’t take long for your shawl to take shape.
I’ve created another chart which can be used to keep track of where your decreases should go. If you prefer to follow a written pattern rather than a chart, this should make it easier for you. Simply start at the top left hand corner of the chart and tick off each row as you complete it – the colours indicate which row you should be on. The decrease rows are outlined in bold. It’s included with the PDF pattern that you can download above, but if you need another copy or you just want one so that you’ve got it to hand whilst we work through the tutorial, you can download it here.
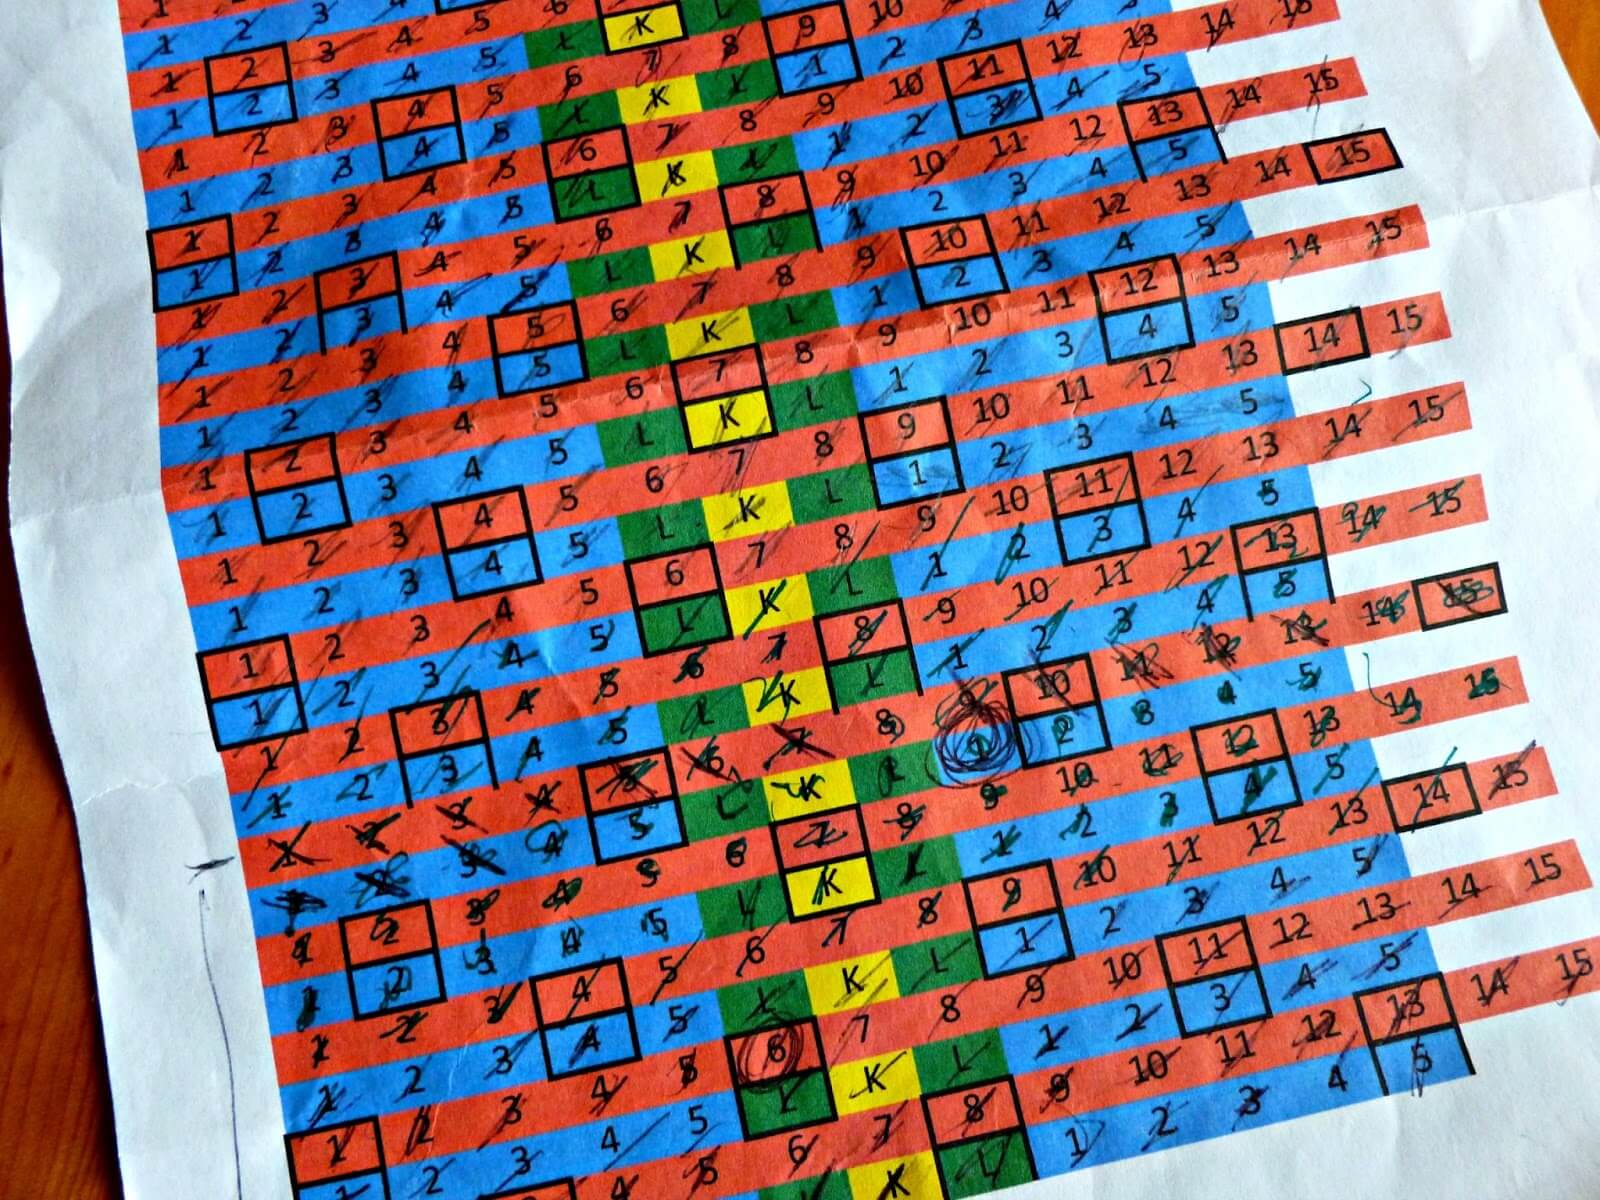
(This photo shows the prototype I used whilst designing the shawl, the chart you will download has a “D” instead of an “L” written on it to indicate the drop stitch rows.)
Set up rows
Start by casting on 2 stitches. (I chose to use a circular needle for the whole of my shawl but if you’d rather start on straight needles and switch later that’s fine.)
Row 1 (RS): Kfb, K1, turn
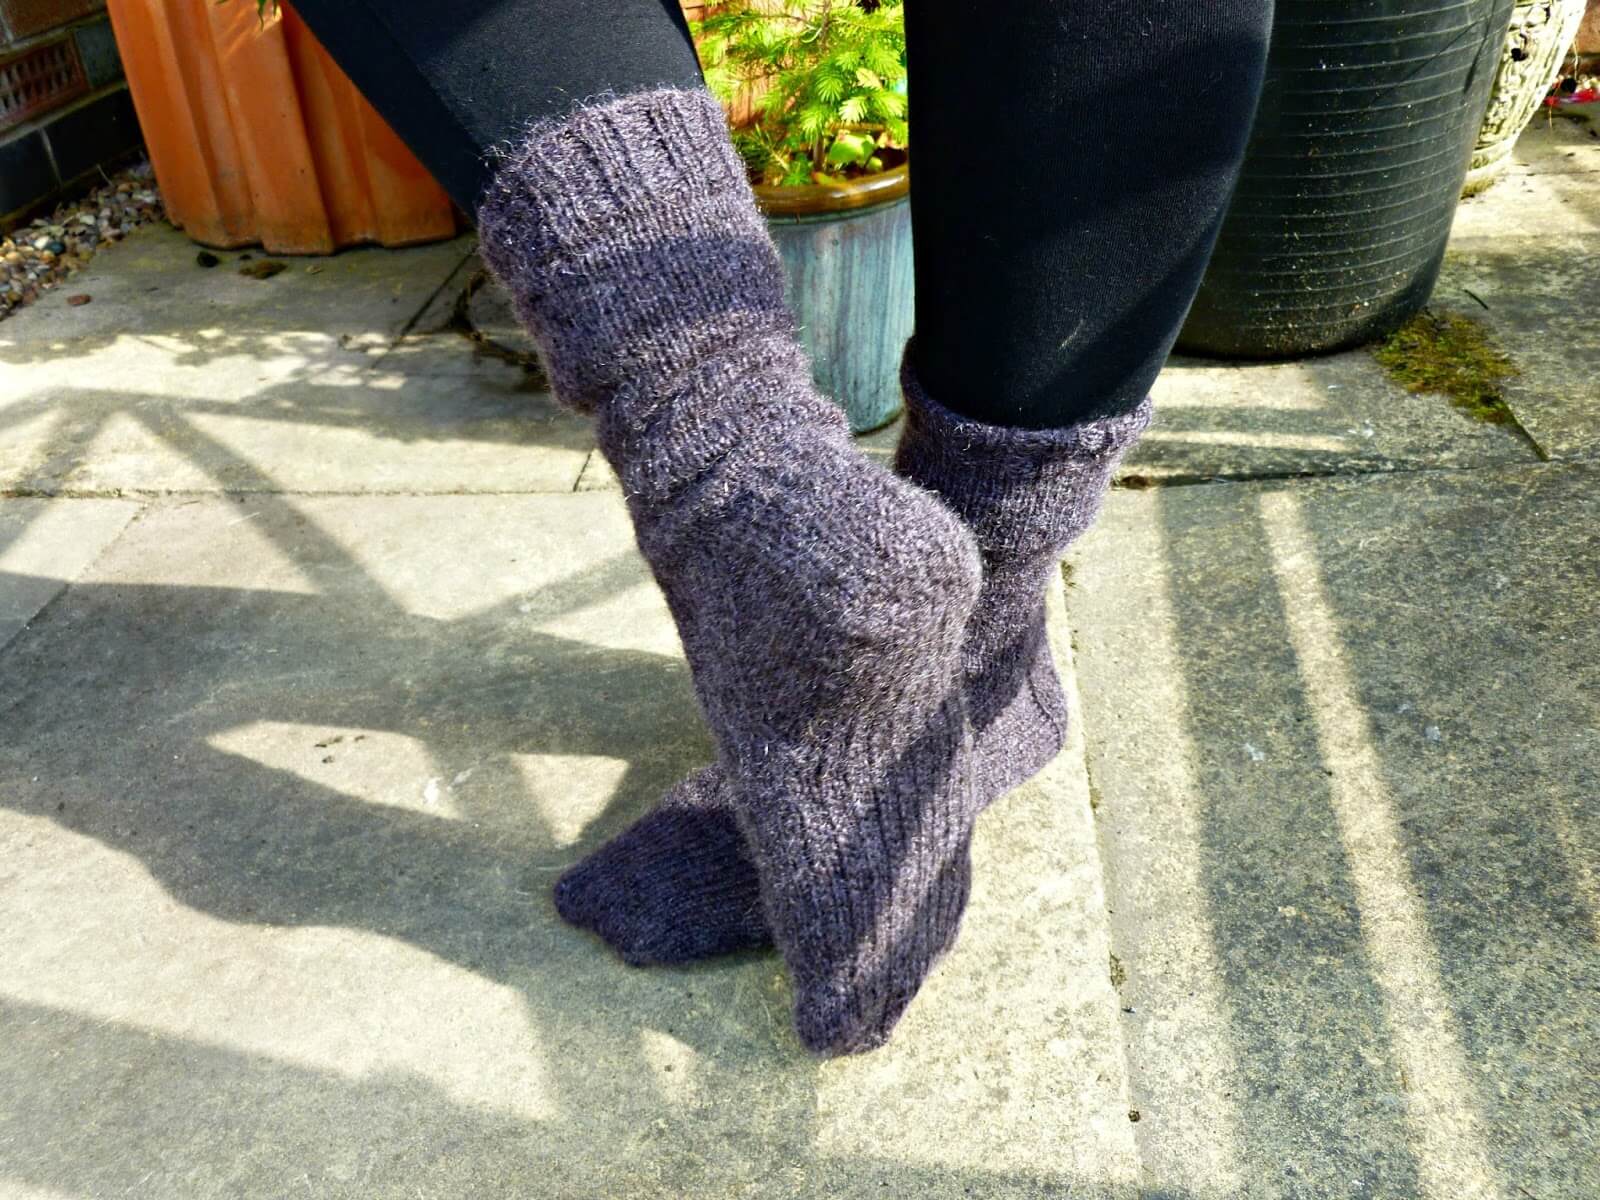
Kfb is an increase stitch and this is what’s going to create the inside curve of your shawl (if you look at the picture at the top of the post of it lying flat, the Kfb side is at the bottom of the picture) and you create it like this:
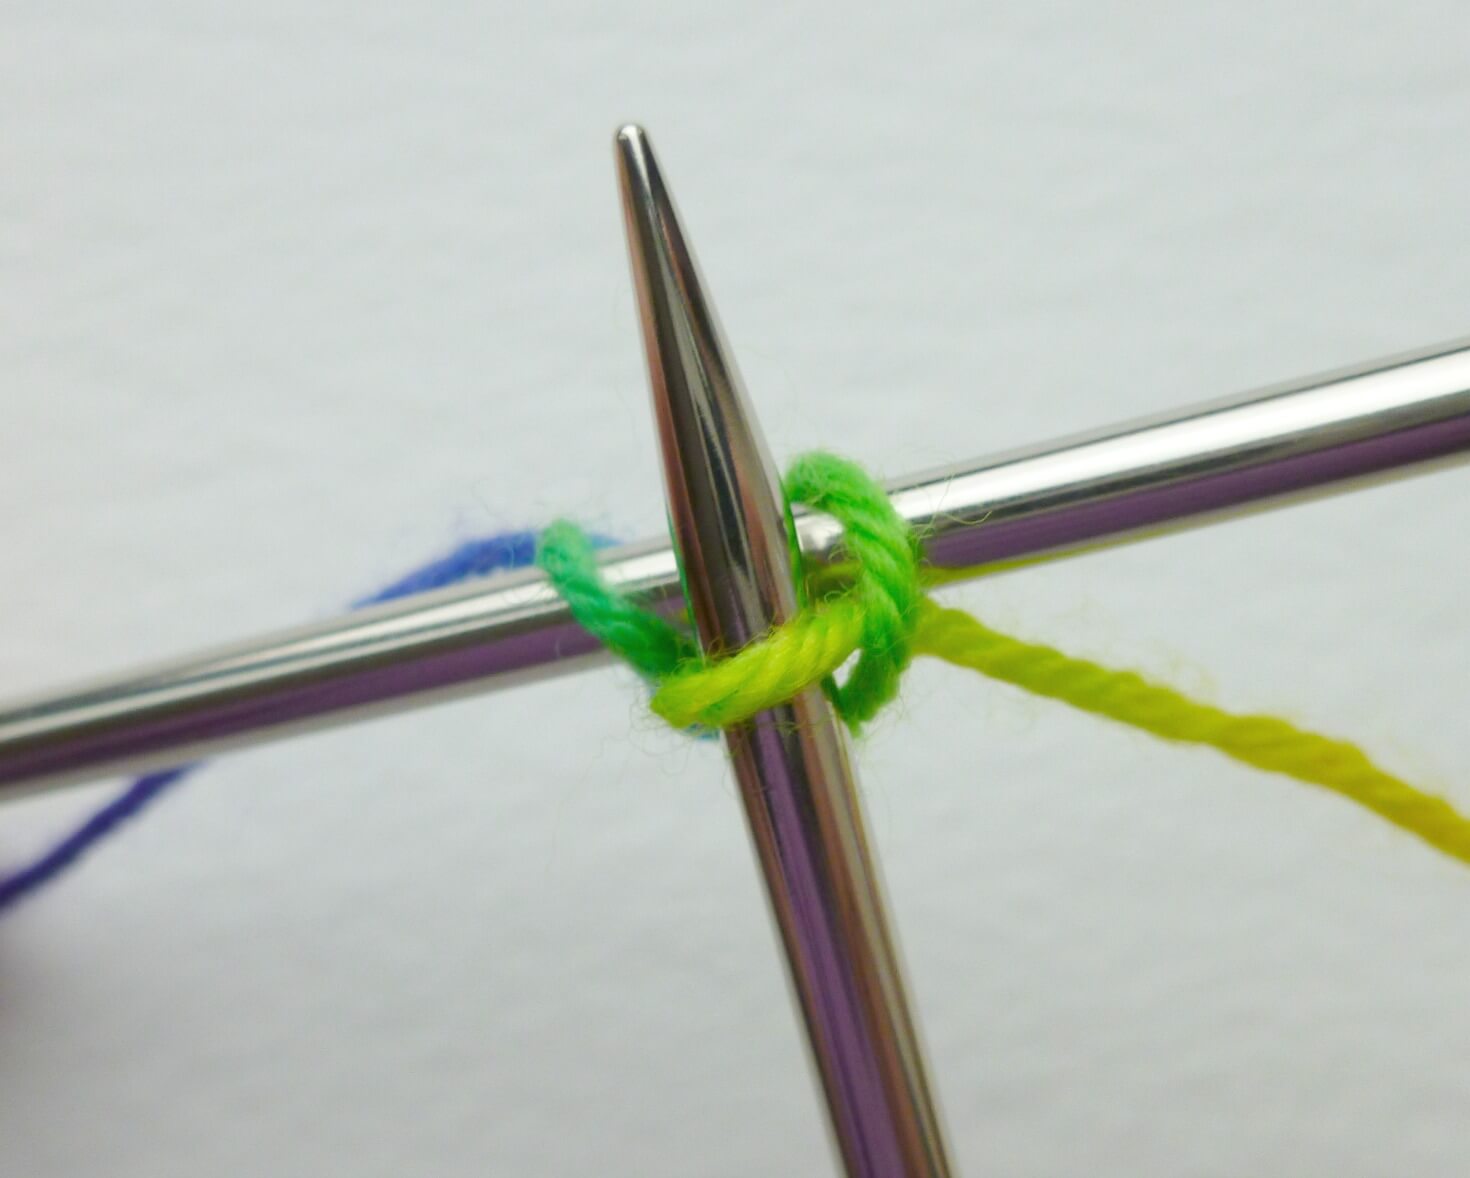
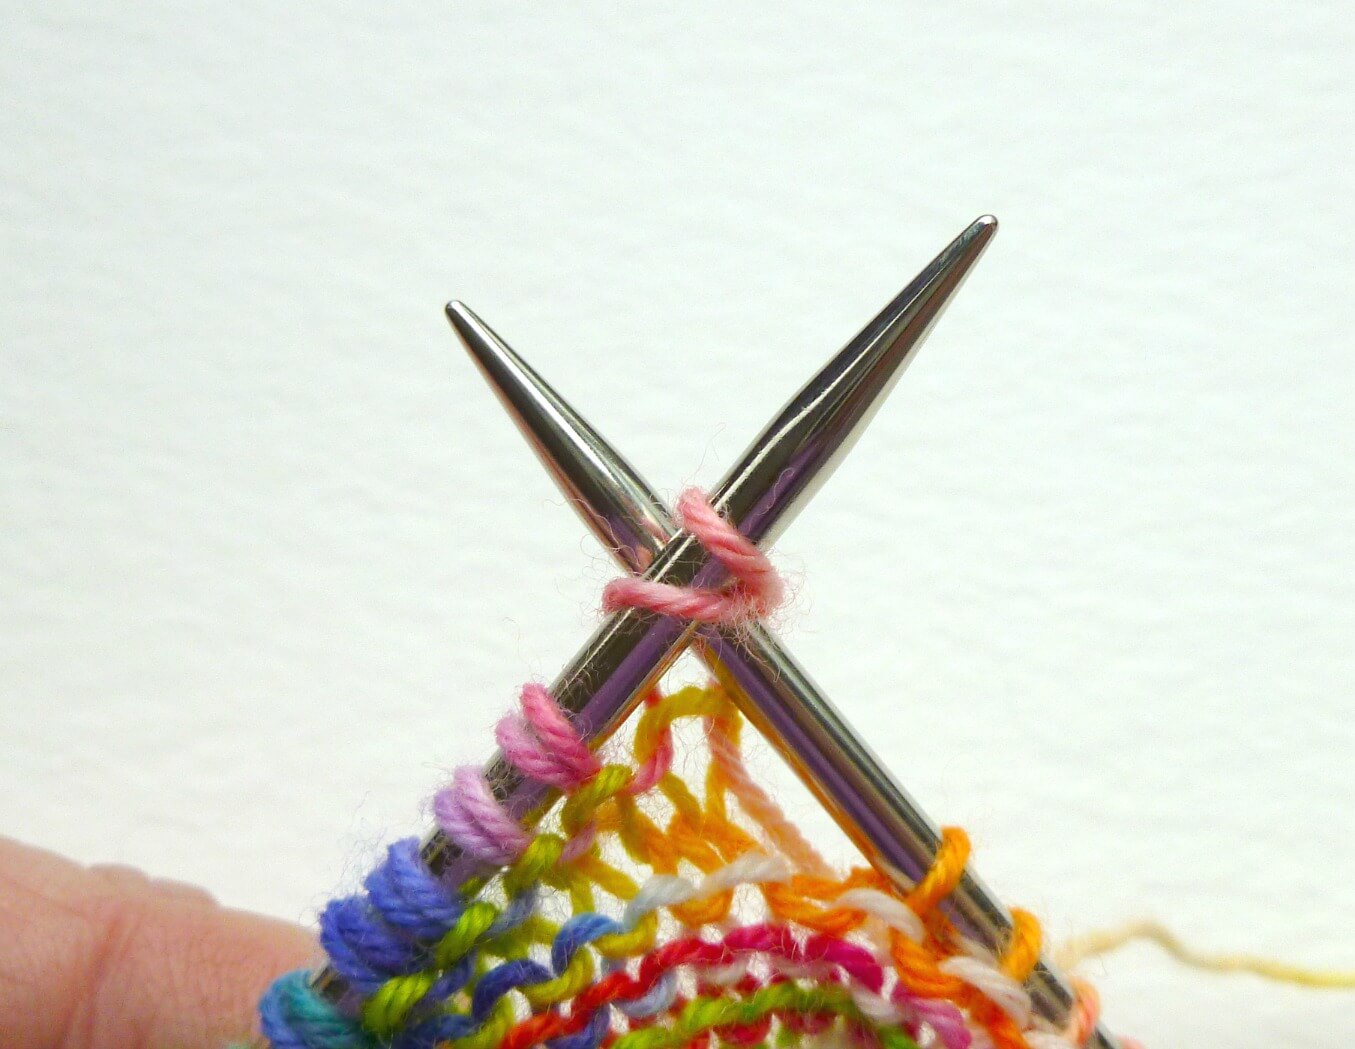
1 Put your needle into the first stitch as if to knit …
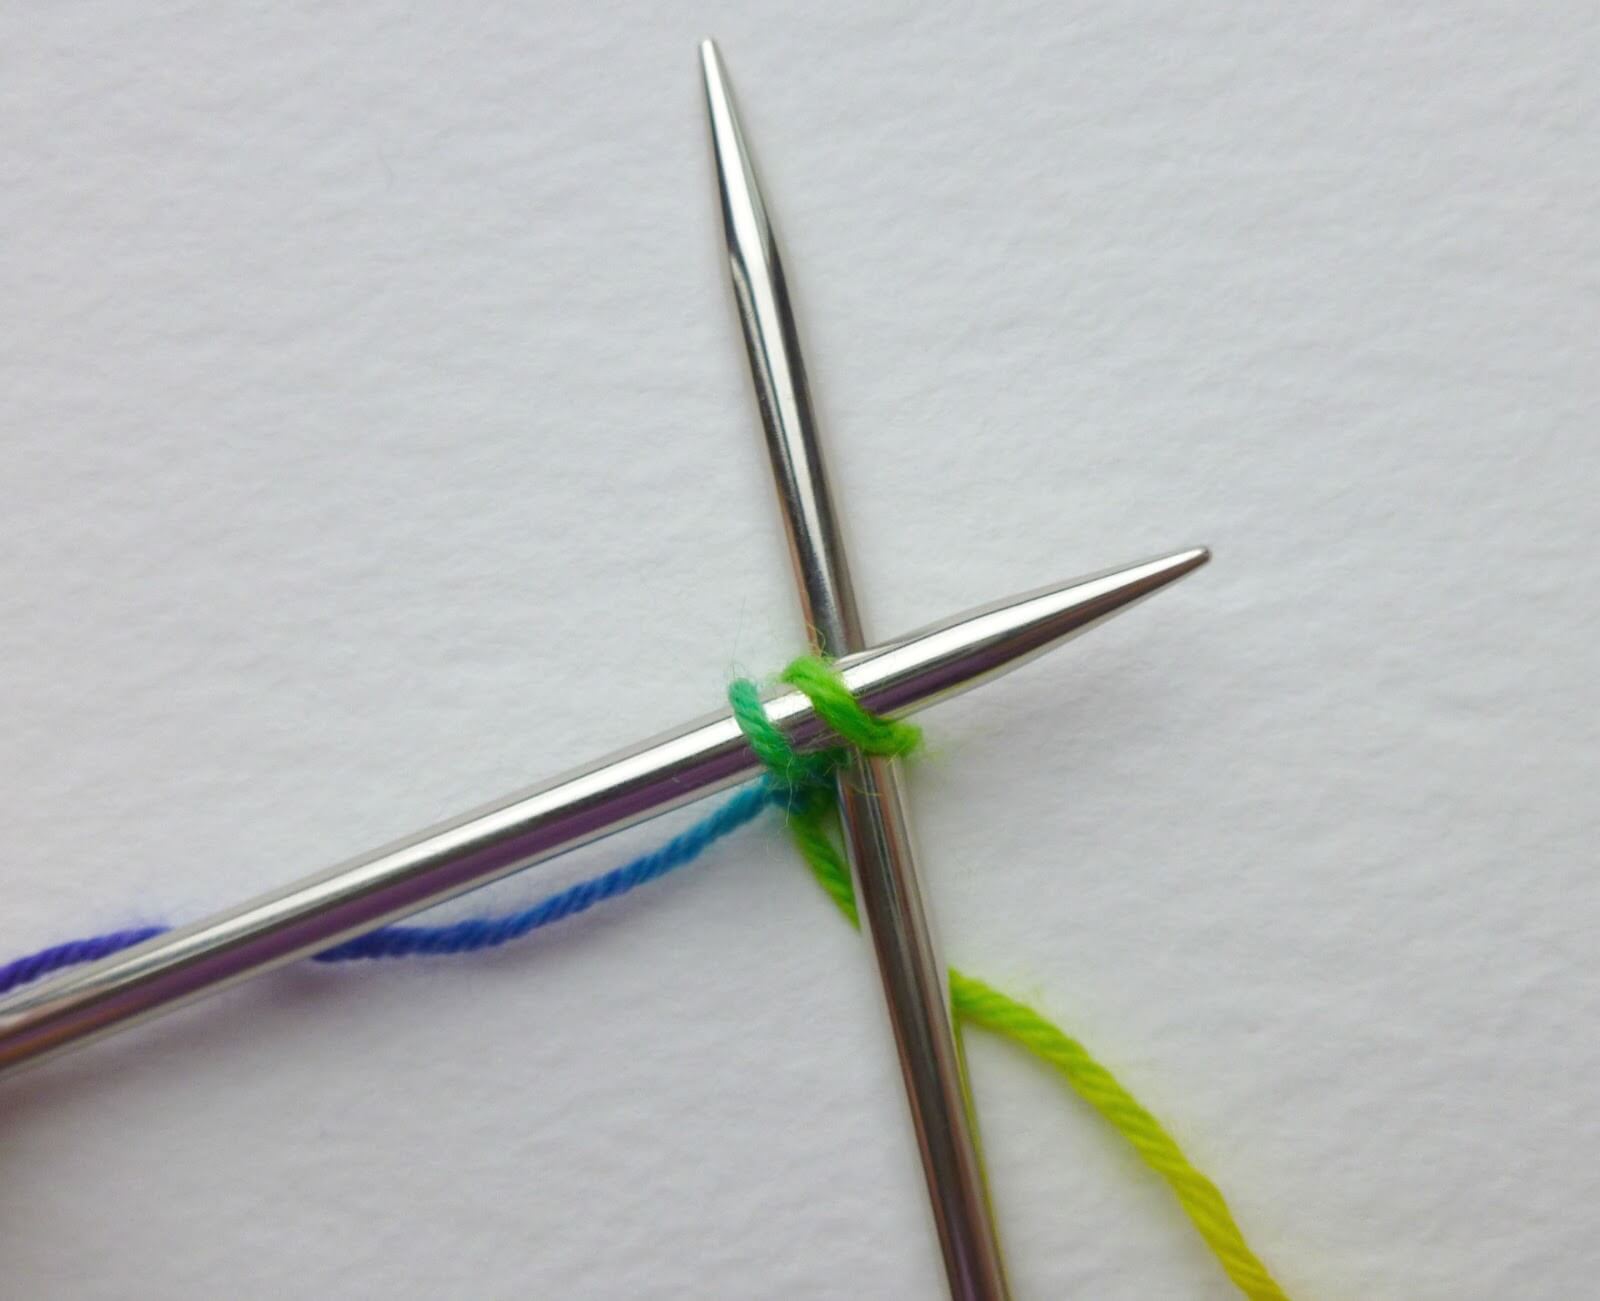
2 wrap the yarn around the needle and pull it through as if to create a knit stitch but don’t slide it off the needle.
3 Swing your needle around and put the tip into the back of the first stitch …
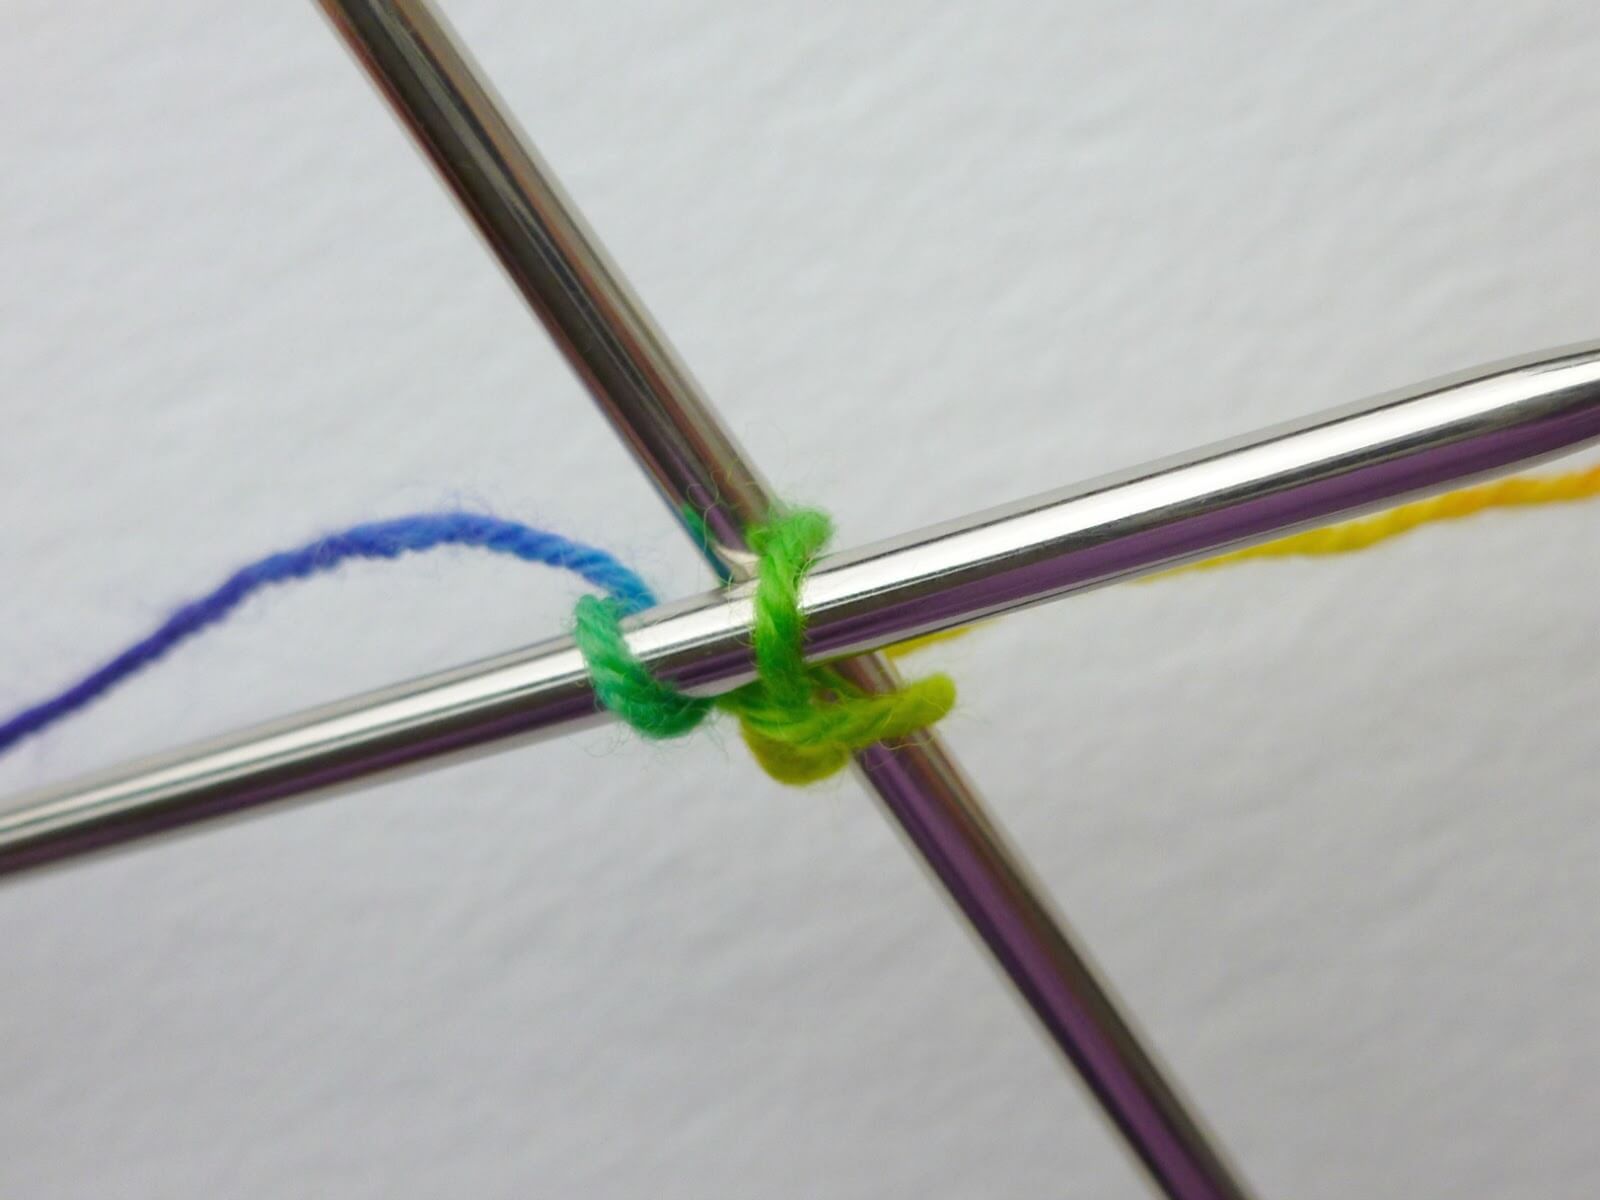
4 wrap the yarn around again and pull it through as if to knit. You now have two loops where you would normally have one, and now you’re going to slide your stitch off your needle.
Knit the next stitch and your 2 cast on stitches have become 3!
Row 2 (WS): P to end, turn.
Row 3: Kfb, K to end, turn.
Row 4: P to end, turn.
Now you need to do your first decrease row.
Row 5: Kfb, K to last 2 stitches, K2tog, turn.
Row 6: P to end, turn.
Row 7: Kfb, K to end, turn.
Row 8: P to end, turn.
Row 9: Kfb, K to end, turn.
Here comes your next decrease row:
Row 10: P2tog, P to end, turn
You’re going to continue knitting your shawl, but don’t worry too much about keeping track the number of knit and purl stitches on each row – what’s more important is that you follow the chart as set, increasing and decreasing as required until are almost at the end of your yarn. If you use the tick-off decrease chart it’s easy to see where you’re up to.
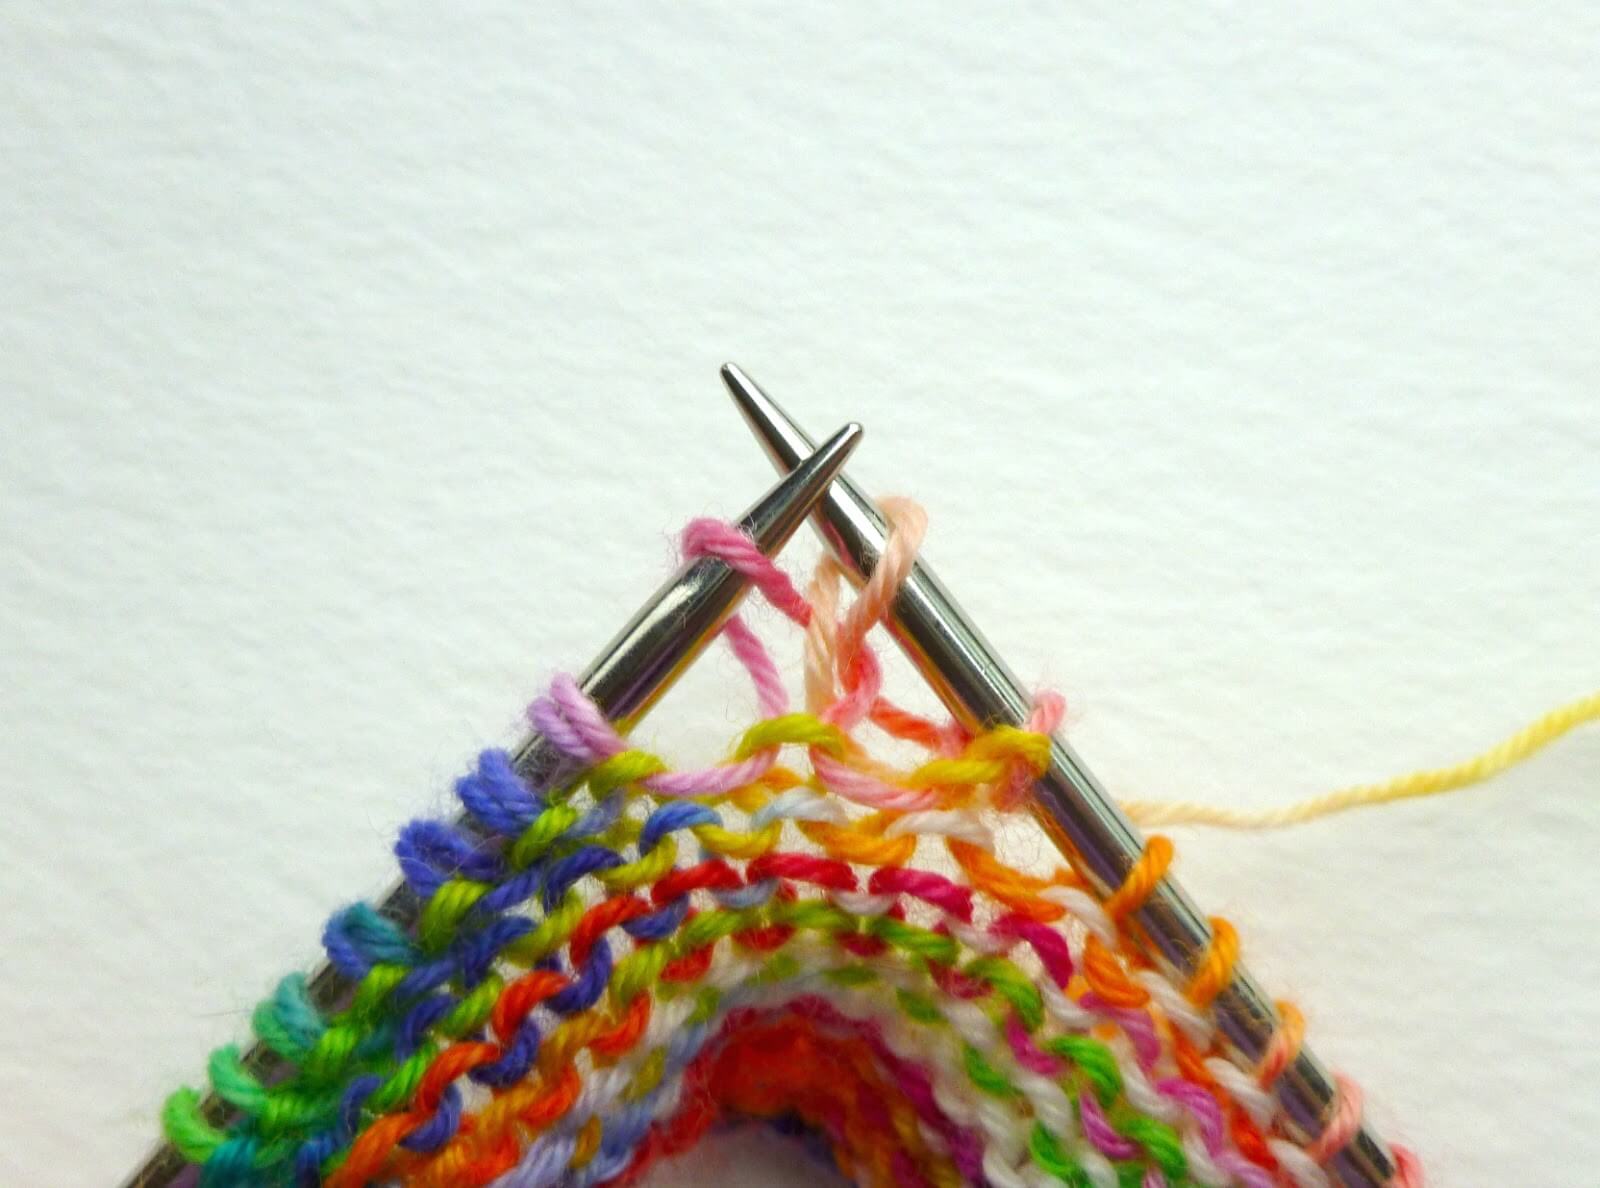
When you come to a drop stitch row, you create the stitches like this:
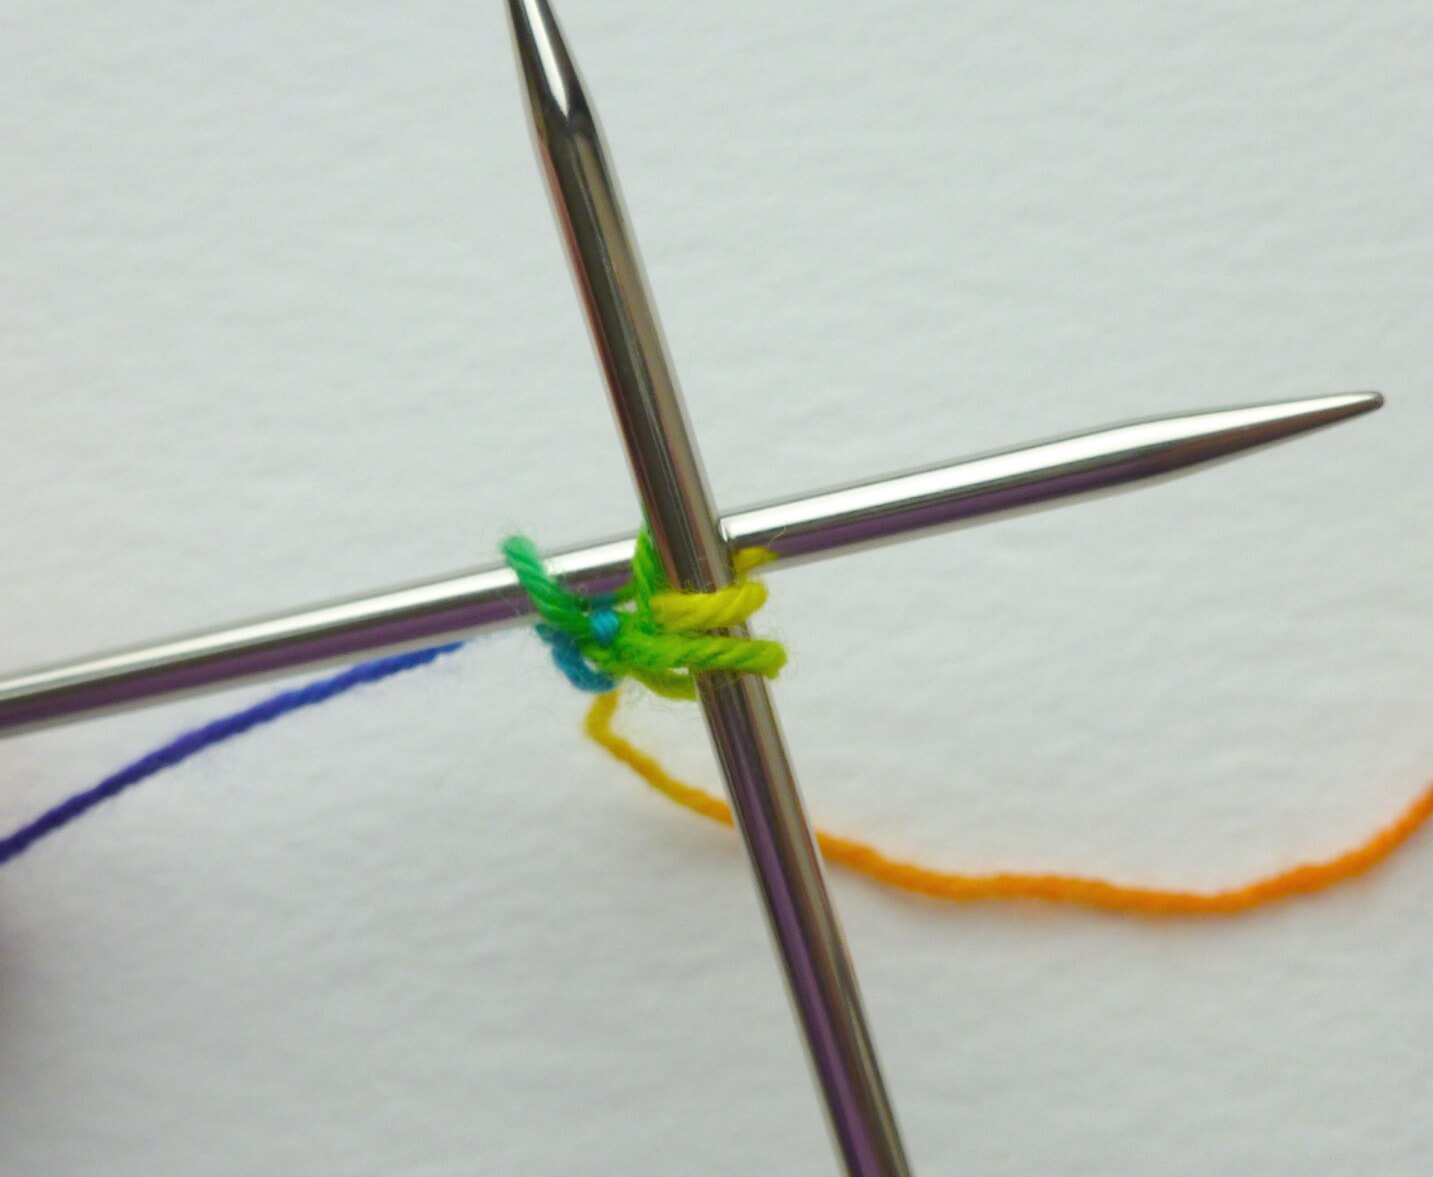
1 Insert your needle as if to knit and wrap the yarn around your needle twice …
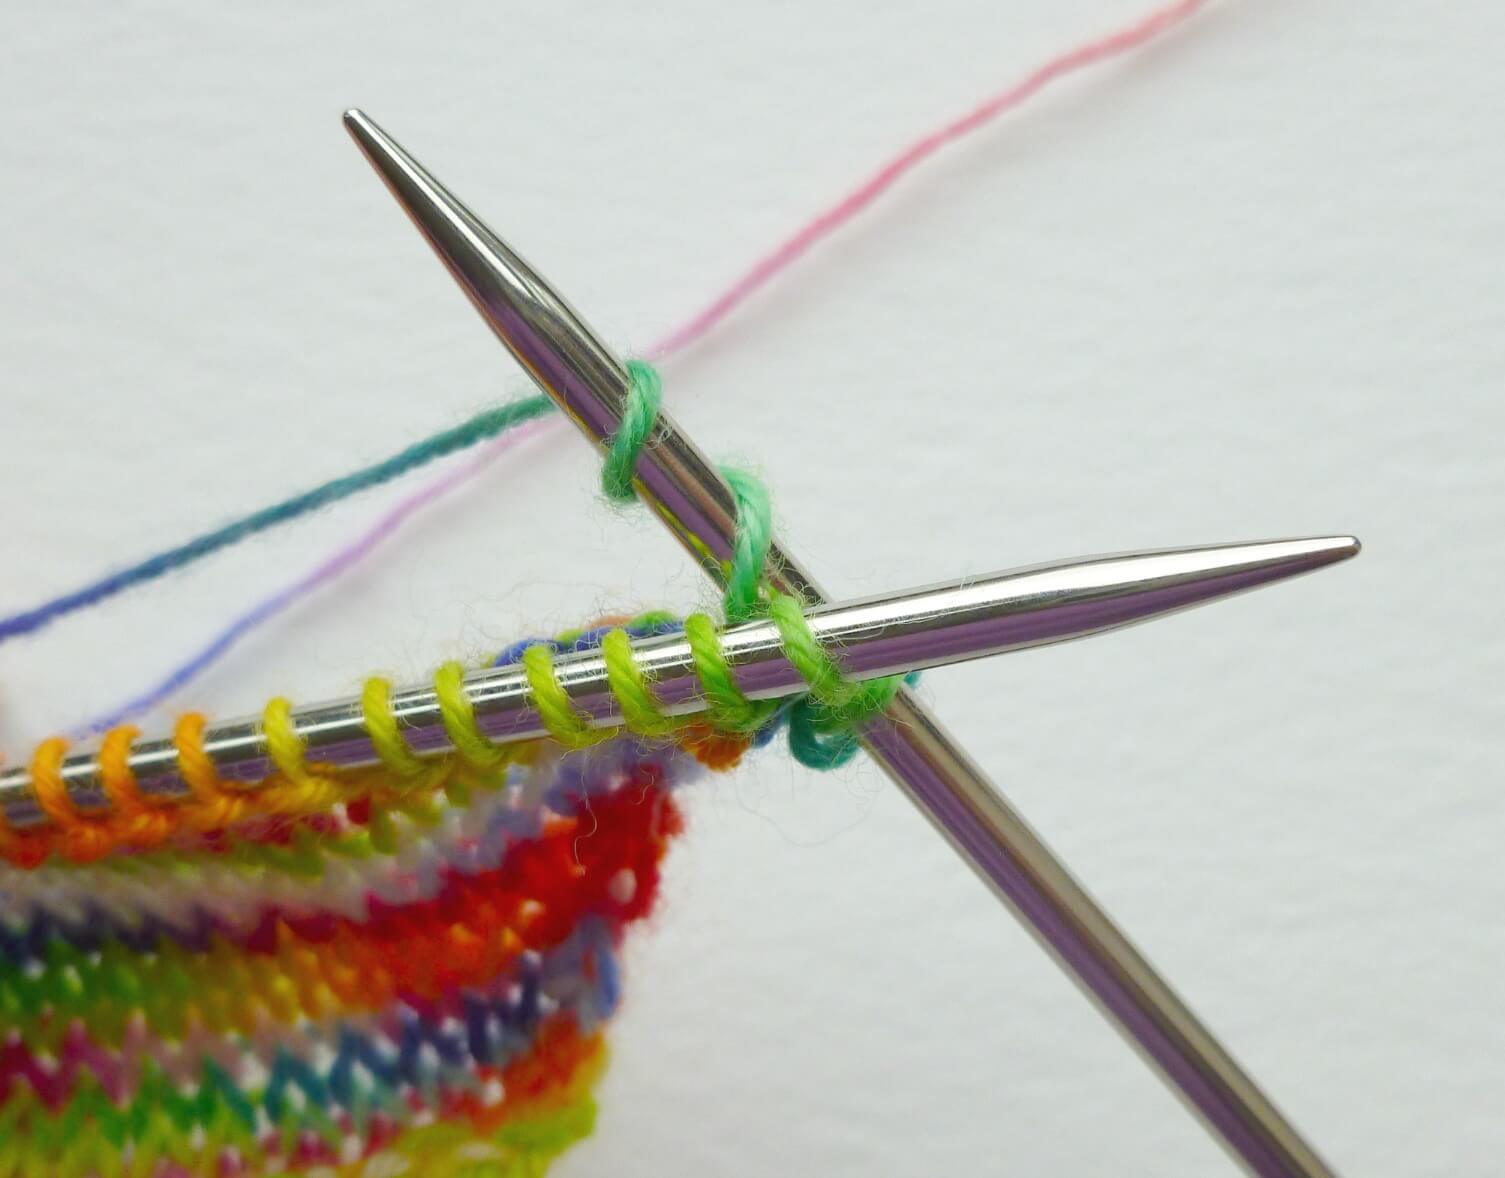
2 then pull the needle with both loops through as you would with a normal knit stitch.
You can see here that it creates a double stitch on your needle.
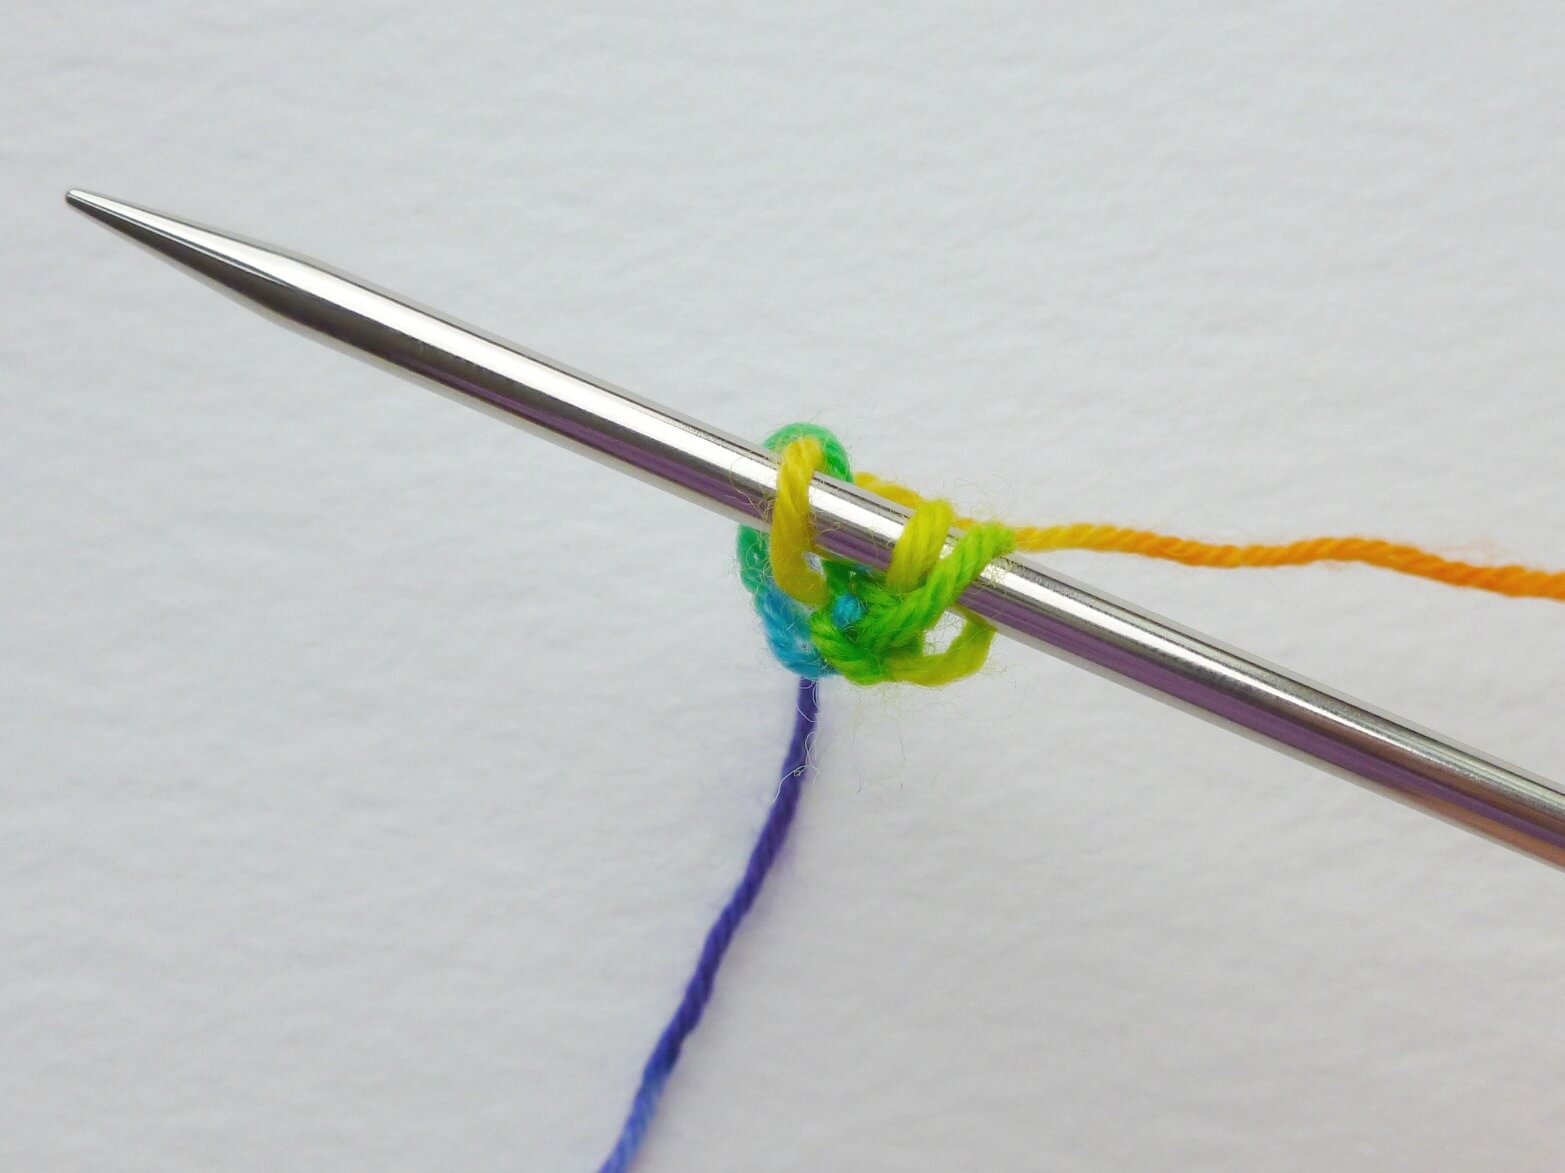
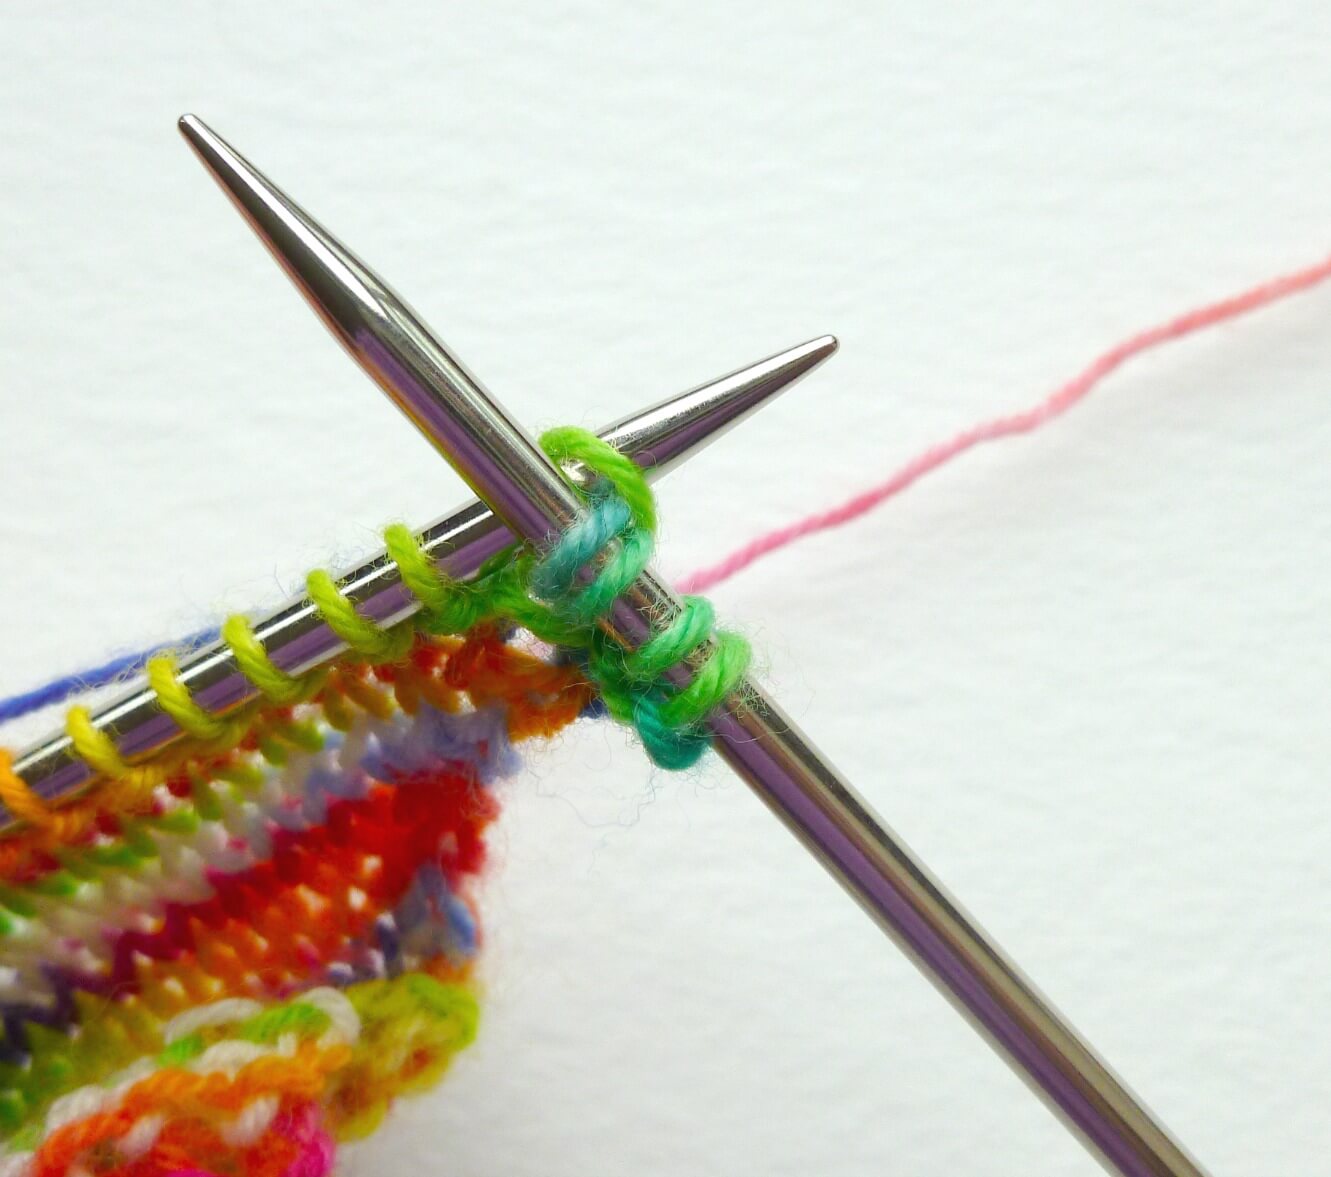
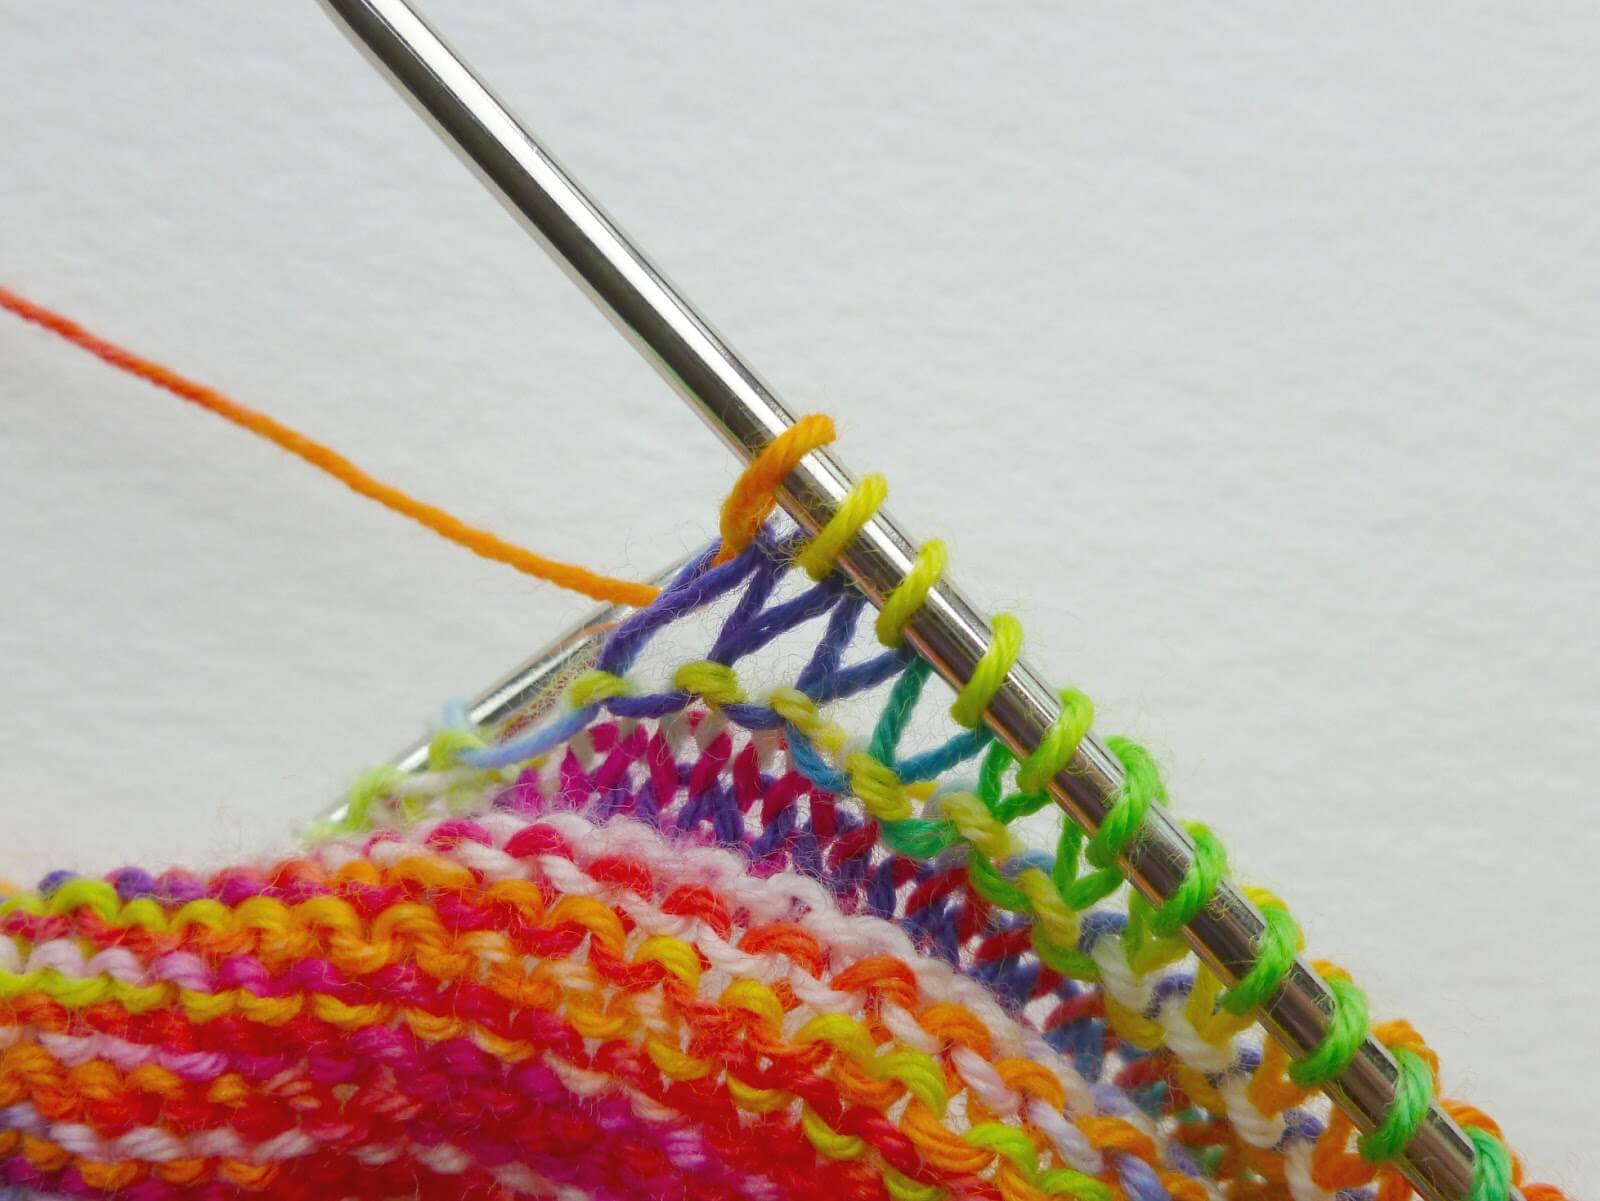
When you come to knit the stitch on the next row, you simply put your needle into the stitch as you would do for a normal knit stitch …
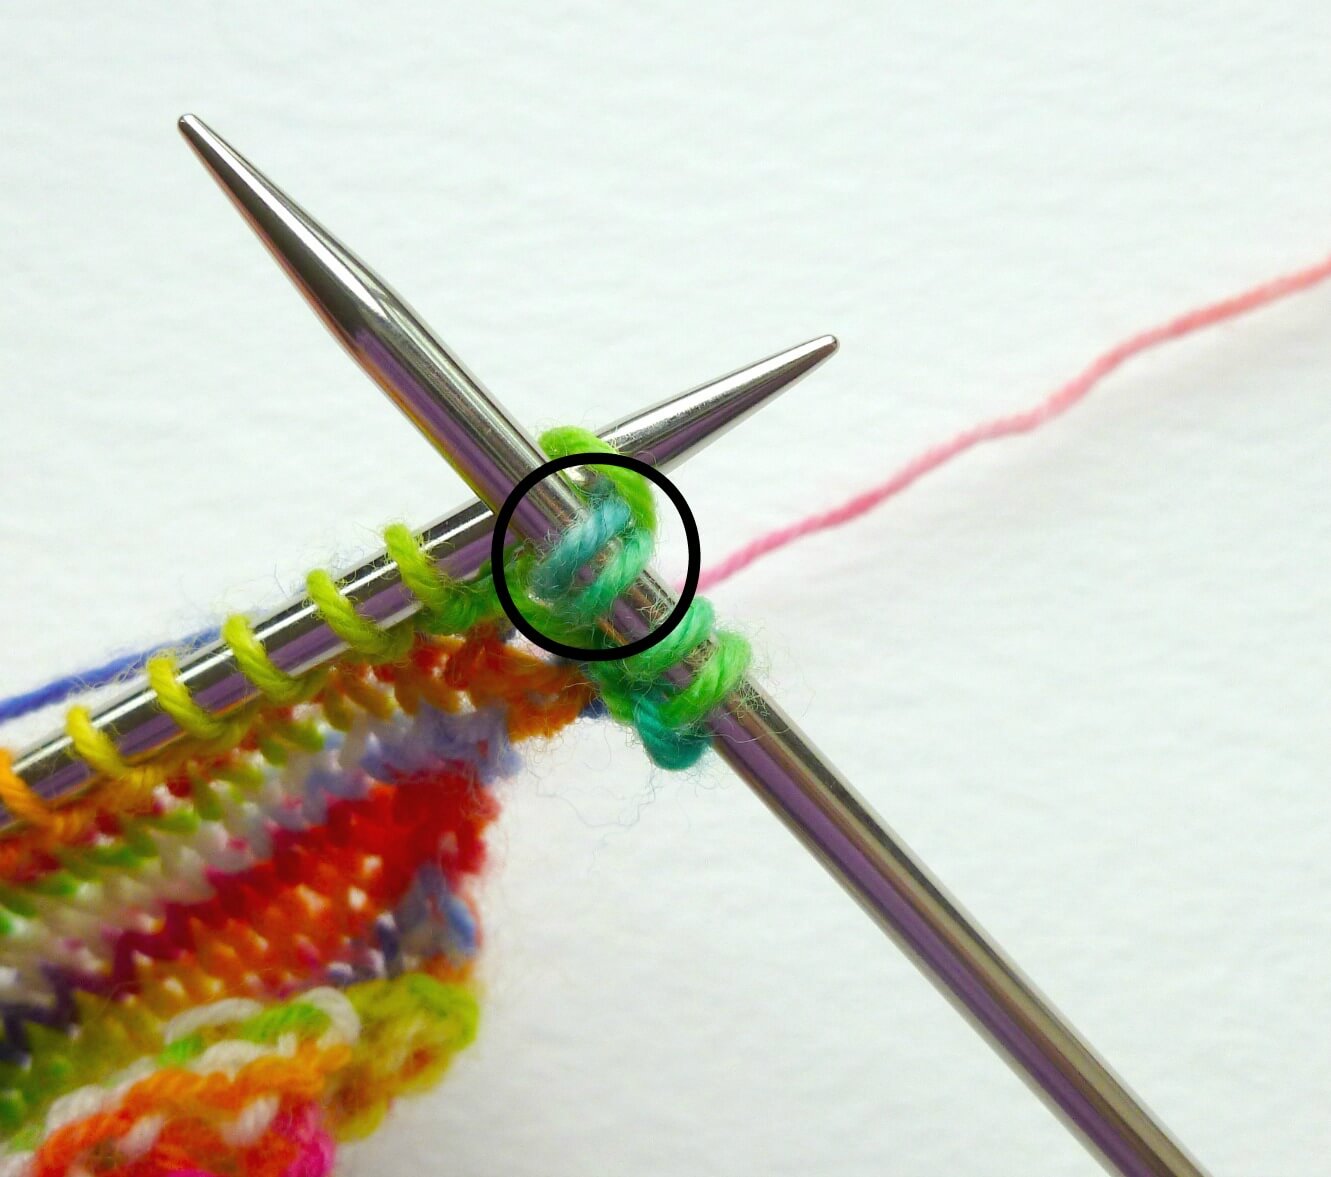
and pull the yarn through. Don’t be tempted to try to knit both strands of the loop, just treat it like an ordinary knit stitch.
When you take the stitch off your left hand needle you’ll have a big loop and this is your drop stitch row.
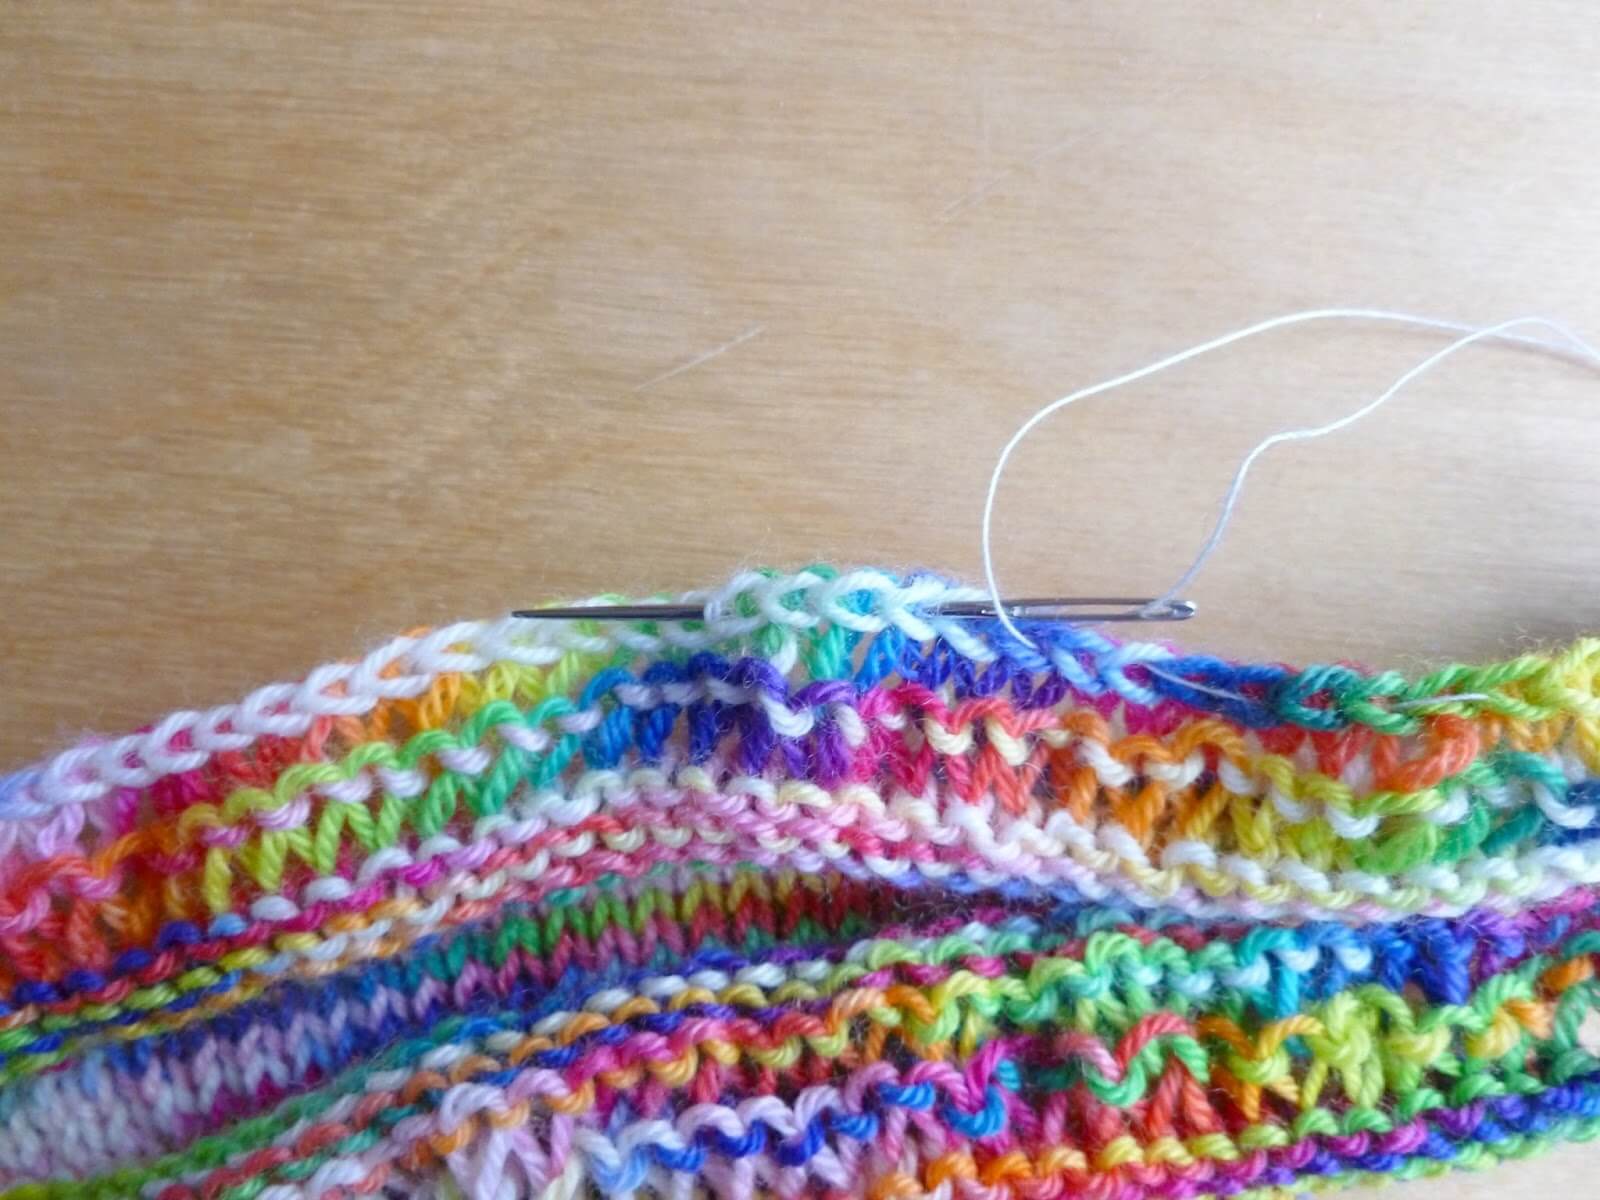
It doesn’t matter which row you finish your shawl on, but to be sure that you have enough yarn left to cast off, you need to have enough yarn to stretch approximately three times the length of your row. Cast off loosely and weave in the ends.
Just in case you end up playing the game of “yarn chicken” as I did (which will run out first, yarn or stitches? 🙂 ), and in case you’re not quite as lucky as I was …
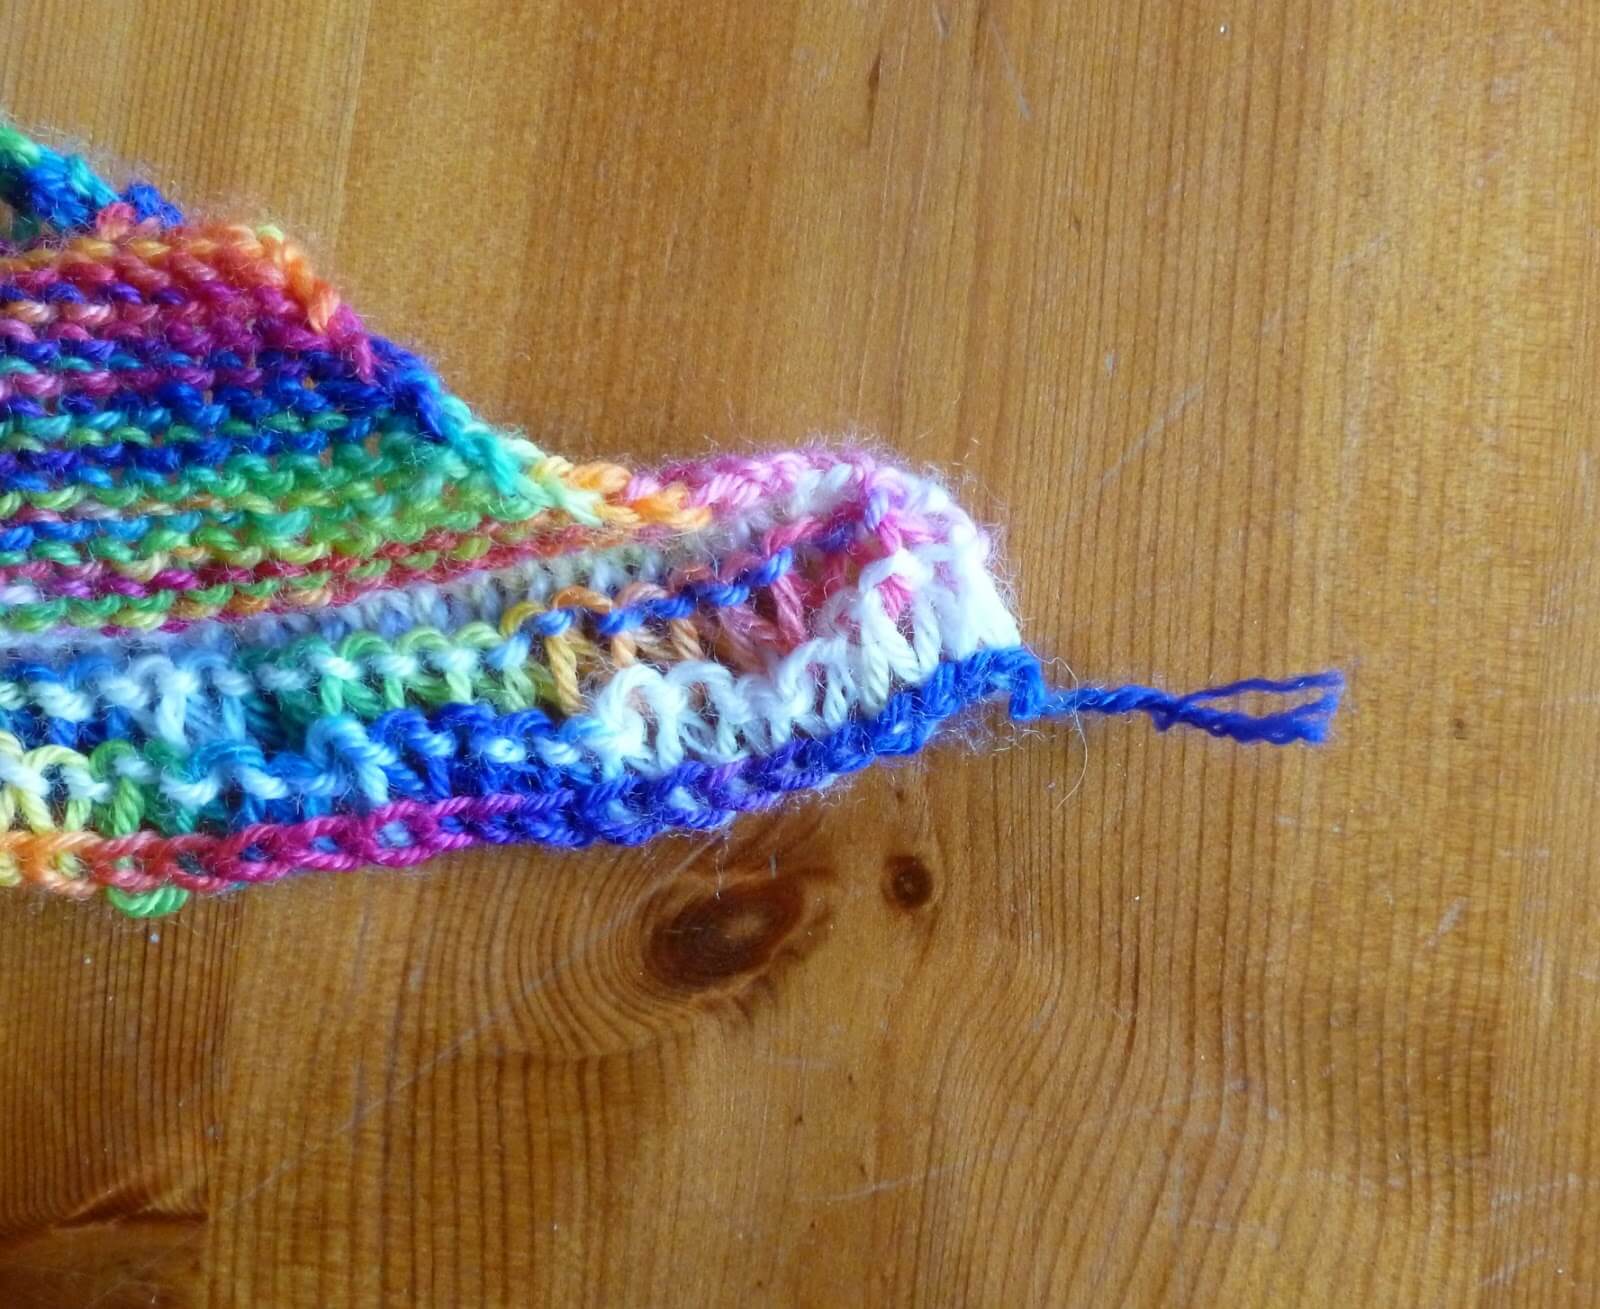
this is a useful video to watch. It shows you how to cast off even if you’ve run out of yarn – sometimes a better option than having to unpick your rows!
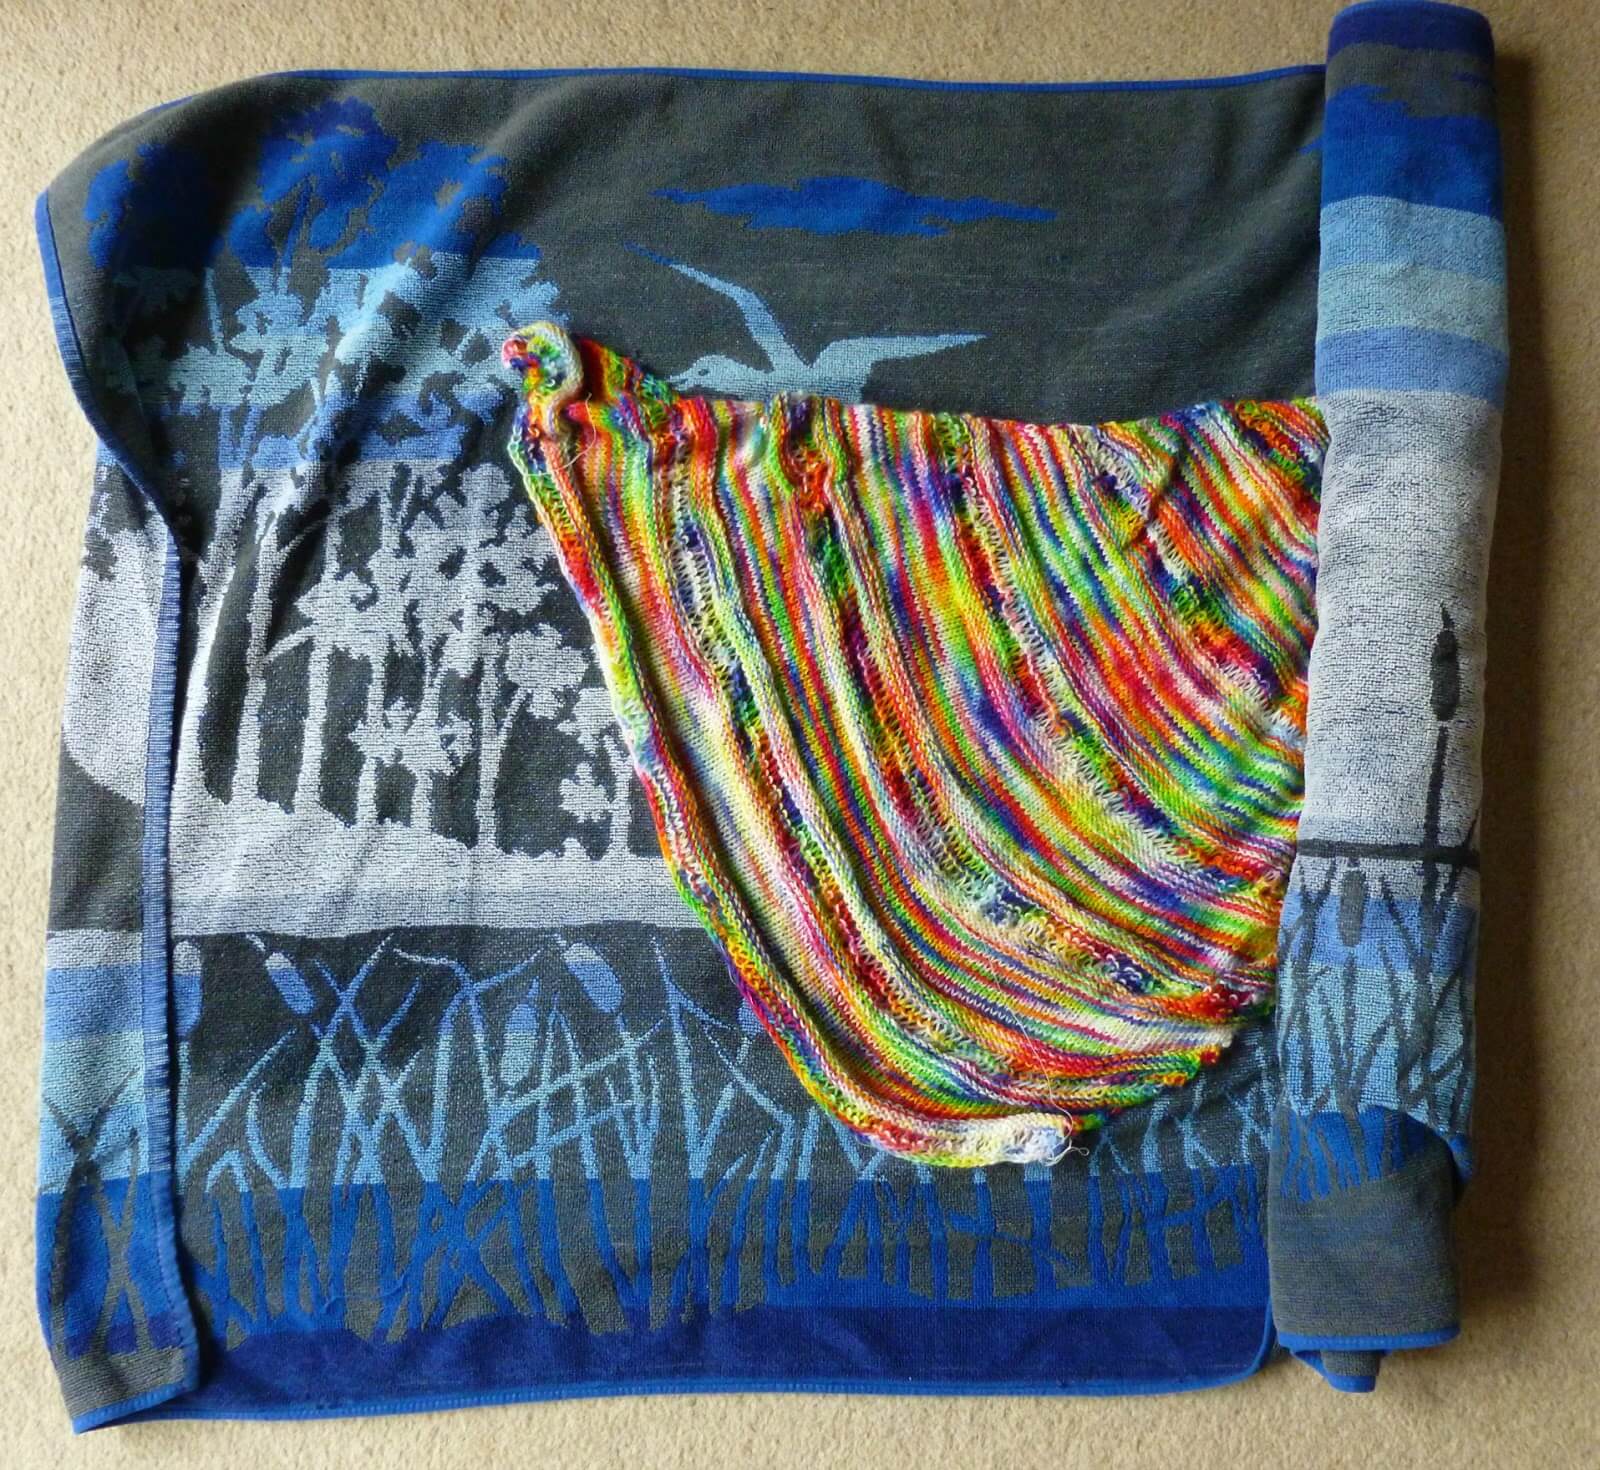
Now all that remains is to block your shawl. Do you really need to? Well yes, you do, despite the fact that you’re probably impatient to wrap your Couthie around your neck. Otherwise your shawl will look like this and although it is a rather fetching ammonite shape, it’s not going to drape quite so beautifully across your shoulders in it’s current curled up state.
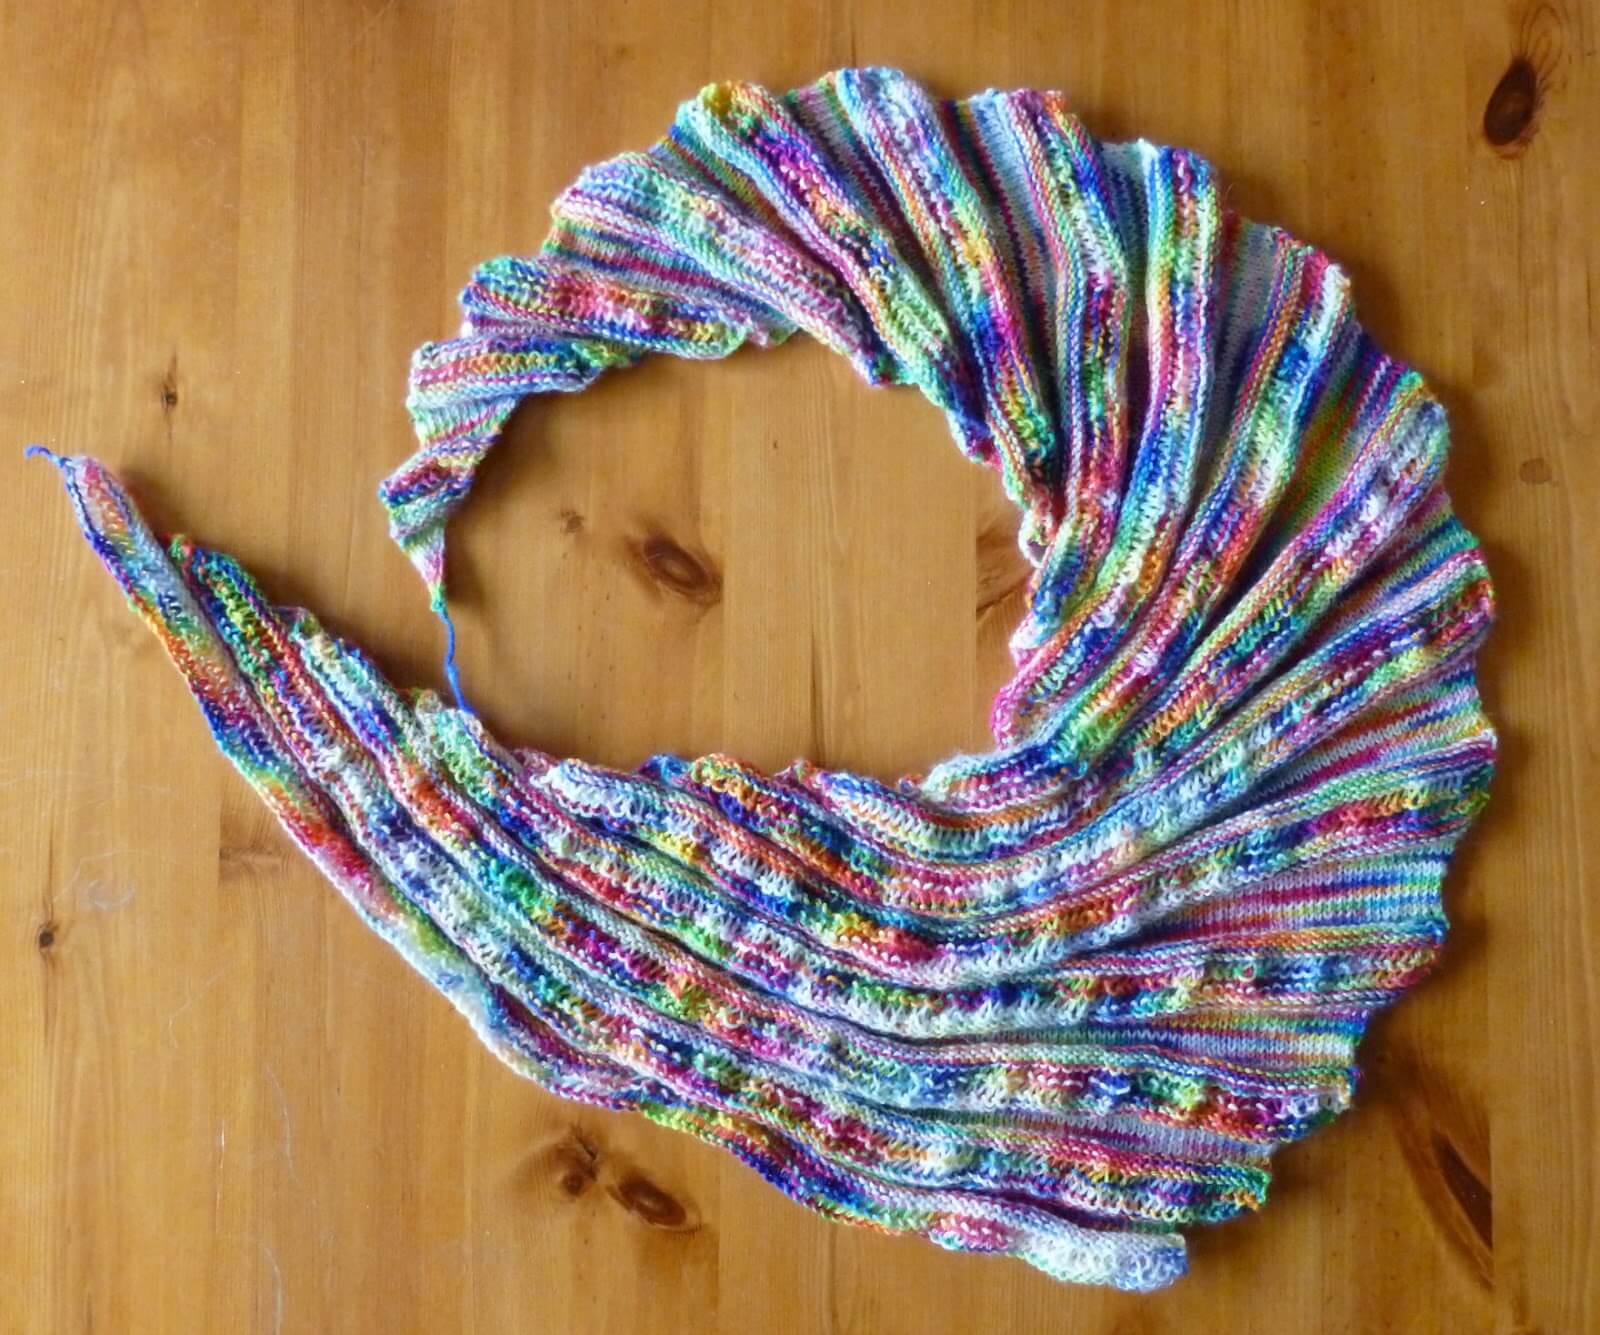
Blocking is simply the process of soaking your shawl and then pinning it out to dry in the shape that you want it to dry in. You can also pin it out first and steam it depending on your yarn and your project. This is a good article if you want to read more.
I don’t block things on a regular basis so I just use regular pins and a towel on the floor to block my projects. It works just fine for my occasional one-off blocking requirements, but if you’re going to be doing a lot, it makes sense to buy the proper kit such as T-pins (which won’t rust when they get wet and damage your knitting), blocking wires and foam mats to pin onto, and I really should at least get myself some of the pins as I know I will be making more of these shawls.
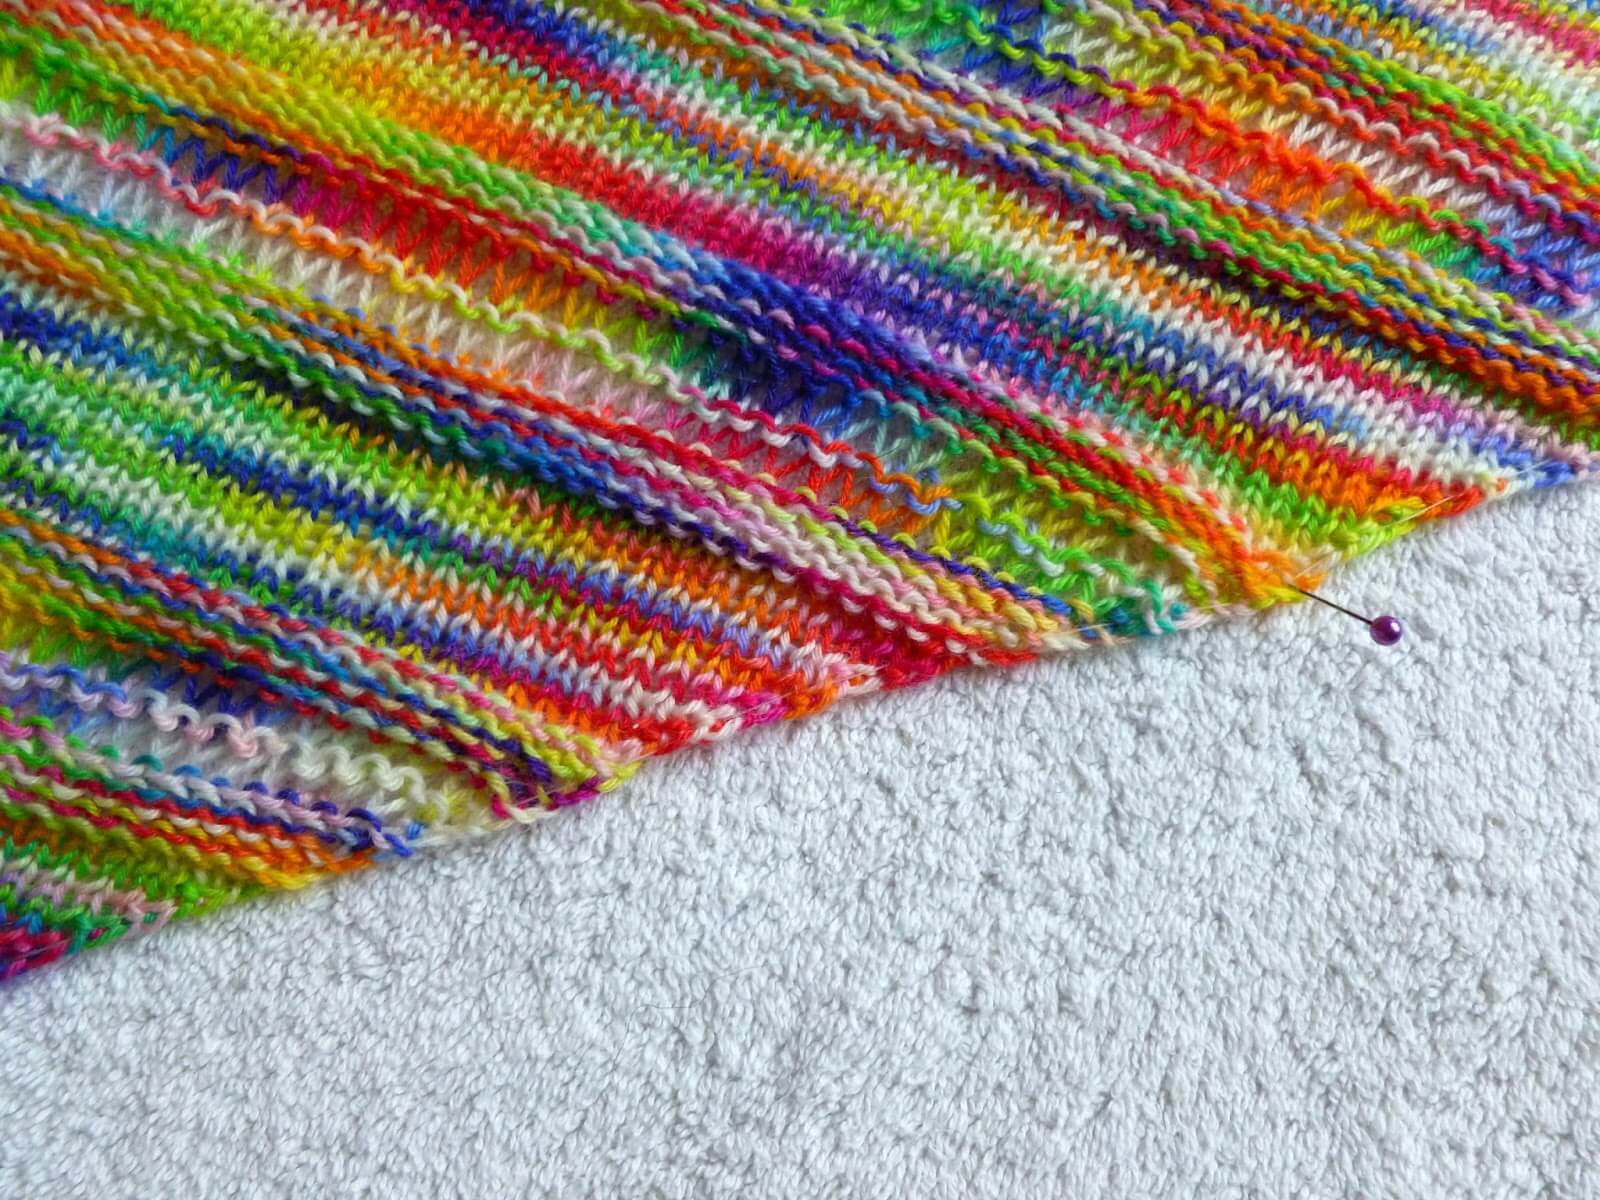
In the absence of blocking wires which hold the edges of your project straight, I run a length of quilting cotton along all of my edges and then use the cotton to pull the edges straight whilst I am pinning. It’s best to do this before you wet your knitting!
Roll your knitting in a towel to get rid of the excess water. Don’t wring it or squeeze it out as you could end up felting your yarn. I use an old towel just in case any dye comes out.
Then all you have to do is position your shawl in the shape that you want it to dry. It’s surprising how big it is when it’s all stretched out! I really like this bit. It’s a kind of magic to see it become what you imagine in your mind’s eye, and after the magic we’ve already created with our pointy sticks and yarn, there’s a seriously big dollop of the feel good factor in there!
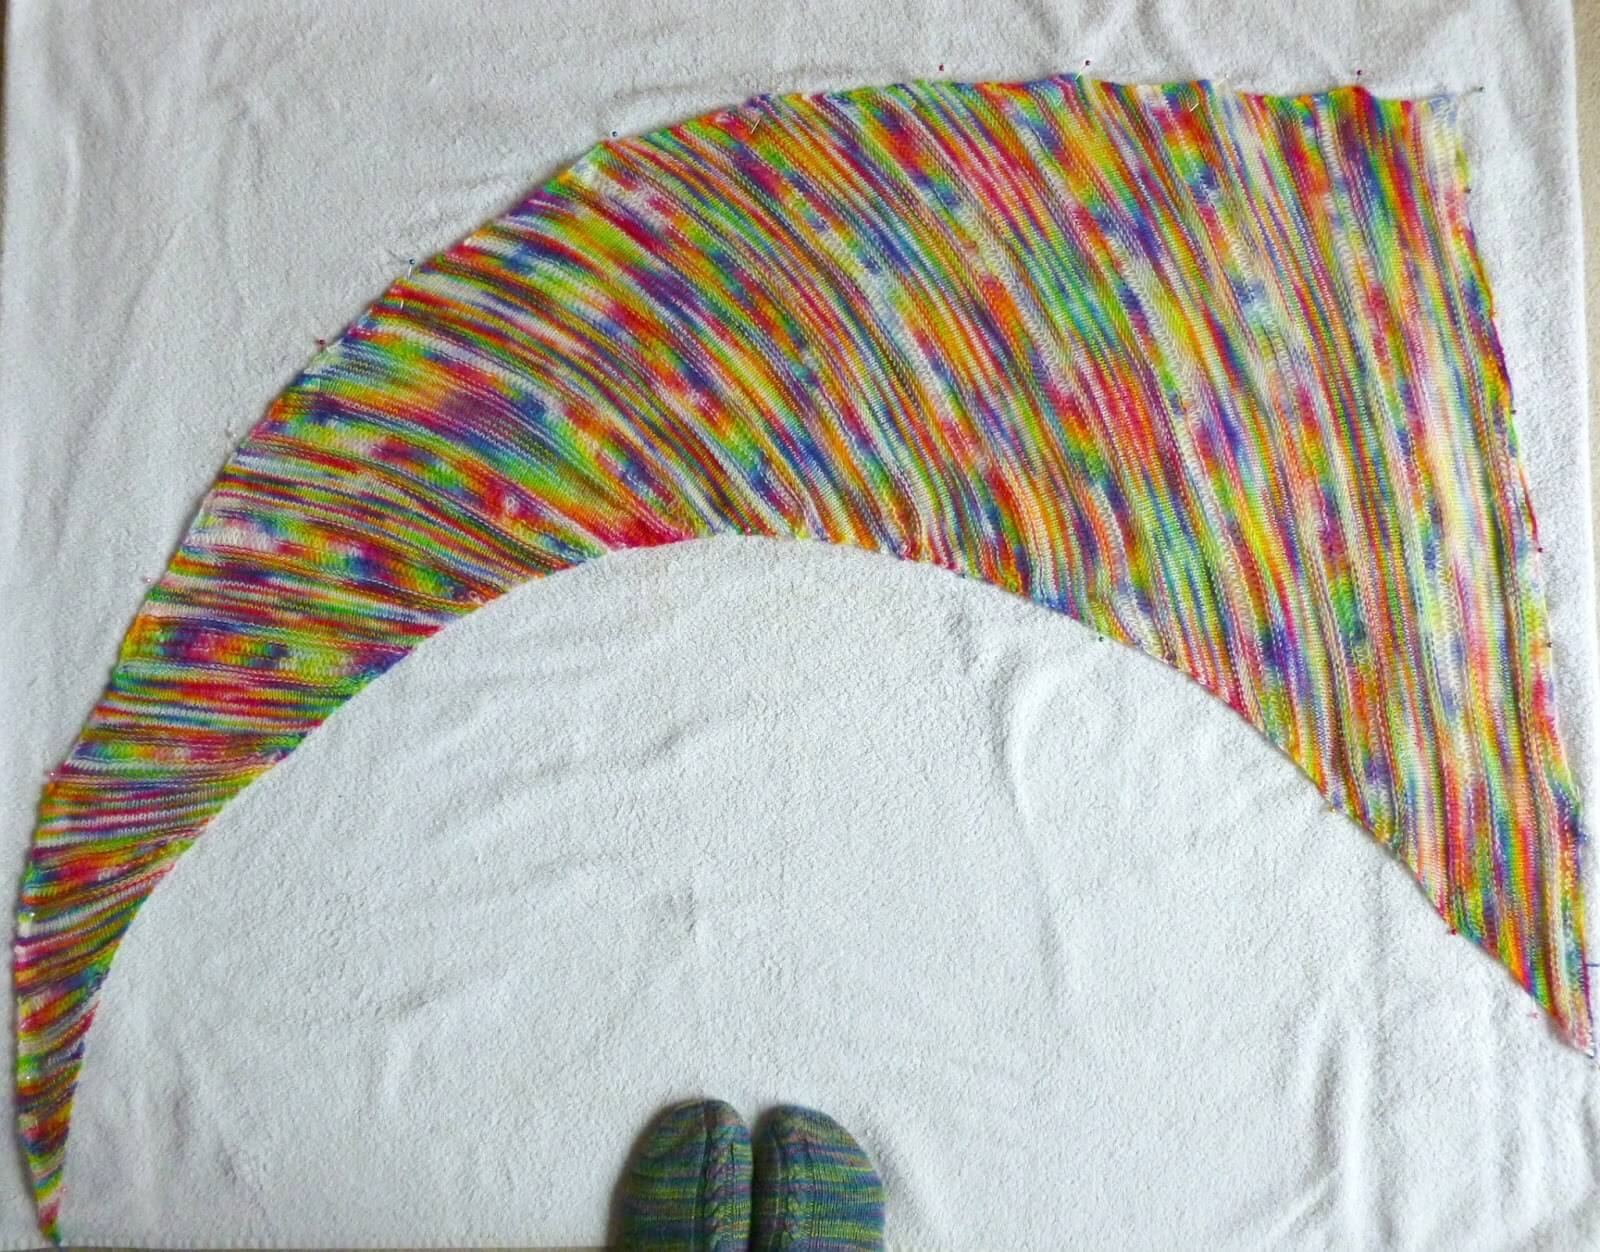
Use your pins and threads (or blocking wires) to gently adjust the shawl, pulling the edges carefully so that the drop stitches are stretched to their full extent. Blocking is ideal for lace projects that you want to show off to their best advantage, and some people are far more ruthless in how far they stretch their knitting than I ever am – at the end of the day, it’s your shawl so you can choose how far you want it to stretch. And don’t forget that if you wash it, you’ll need to block it again as it dries because the blocking only holds until the shawl gets wet again.
That’s pretty much all there is to it. Once your shawl is dry you can remove the pins and threads (or wires) and then artfully wrap yourself up in knitted cosiness.
If you want to add more skeins to make a bigger shawl, there’s no reason why you can’t do that. This is a wonderful project for mindful (or mindless!) knitting and knits up quickly enough to make last-minute presents (as long as you don’t need it within an hour!).
Don’t worry, I haven’t abandoned the socks and have already got some samples on the needles for more tutorials later in the year. It is nice to find other ways to use beautiful yarns though, and I’ve had a lovely time creating the Couthie shawl. I hope you enjoy knitting it as much as I have! If you are on Ravelry, I’d love it if you added your shawl to the project page (Ravelry link) so that I can see – I do enjoy seeing what other people create!
This pattern is free on this blog and will always remain so. If you’ve enjoyed using it and would like to support my work so I can keep blogging and designing, you can browse my shop for patterns and books or buy me a brew – both are very much appreciated. Thank you! xx


This pattern copyright © 2016 Winwick Mum All rights reserved.
Not to be included in any collection or used for profit without written consent of Winwick Mum.
If you would like to stay in touch, click the link below to join the Winwick Mum mailing list to hear about the latest blog posts, pattern updates, tutorials and more … but no spam, I promise!


It's gorgeous Christine thank you so much for sharing X x
You're very welcome, I'm glad you like it! xx
This is beautiful . Just have to decide which sock yarn from my stash I want to use
That's easy – the one you can't bear to cut to make two socks! 🙂 xx
It's really lovely. I like these kind of projects where you can just continue knitting until you run out of yarn.
It's really quite liberating to just keep knitting without having to think about using the rest of the yarn for something else! xx
What a pretty shawl, and the shape is really unusual! Thank you for making such a detailed tutorial. I think I might try this with a ball of sock yarn which I bought but have never used.
Cathy x
I'm hoping this shawl will have a lot of unused sock yarn brought into the light of day! It seems a shame to me to have beautiful yarns unused it your stash when they should be shown off to the world 🙂 xx
It is beautiful Christine. I have just finished a Spiral Staircase shawl and was going to make another but think I'll do your Couthie shawl instead. Thank you for being so generous with your patterns. X
Thanks, Annie, and you're very welcome! I'll look forward to seeing your shawl! xx
I love your shawl and can't wait to make one!!! I'm wondering if maybe you could make written directions, too?? Thanks!!
Thanks! I'm really glad you like it! I've added the written rows to the tutorial and hope that helps. You might find it easier to to download the tick-off row chart as the coloured rows indicate which row you should be knitting without you having to follow a chart – have a look at it and see what you think xx
Thanks!!
Beautiful Christine love sock yarn scarves and yours is exceptional keep up the good work!
That's really kind of you to say, Kerry, thank you! xx
Love it. Instantly ordered some Cuddlebums to knit it with. Thankyou.
You won't be disappointed, it's really lovely yarn! xx
Thank you so much for that, I'm quite excited to get started despite having two projects on the needles.
Only two? You need more! 😉 xx
How generous of you to share the pattern for free! Thank you!
You're very welcome! xx
This pattern (and finished shawl) is amazing! I love the color and the pattern stitch. You have gone to so much work to make up the detailed charts. I'm going to add this to my list of projects I want to make. Many thanks. Pat xx
I'm glad you like it! xx
Absolutely beautiful!!! I love the shape and the colours of the yarn too. Isn't it amazing to see what blocking can do for your yarn projects – although I do kind of like it all curled up!! xx
Yes, I was quite tempted to keep it in the ammonite shape but it doesn't do much for you when it's wrapped round your neck! xx
Hi Christine…..is there 28 rows on repeat? For the written pattern part there's only 25. Getting confused in the middle….
Hi Andrea, yes there are 28 rows, I just couldn't seem to count to 28 when I wrote it down! All fixed now, thanks for spotting it 🙂 xx
Hi Andrea, yes there are 28 rows, I just couldn't seem to count to 28 when I wrote it down! All fixed now, thanks for spotting it 🙂 xx
Thanks for the tutorial on kfb. Needed that.
You're very welcome! xx
Hi can't find the place to download the pdf?
Thanks
Hi Liz, if you scroll past the first two pictures to where the pattern starts, there's a link to the PDF there 🙂 xx
I’m just starting this lovely pattern and have a question. On the chart for rows 17,19,25,27 and maybe more(?) the block color is red indicating kfb increase and there is also a black dot indicating purl stitch. Which do I do? Is there a purl f & b increase?
No, just do the usual Kfb increase and it will work out fine. It’s too fiddly to try to do a purl version! 🙂 xx