
Contrast cuff, heel and toe socks – free tutorial
One of the things that you quickly discover when you’ve knitted a few pairs of top (cuff) down socks is that you’ve got leftover yarn. Toe-up knitters will tell you that they rarely have leftovers as they can keep knitting until all the yarn is gone, but that doesn’t work for top-down as you’d end up with sock feet the size of small canoes.
What you can do with the leftovers, though, is use them up for other projects. Some people like to make blankets from them, hats, toys … even socks. Oh yes, leftovers are perfect for combining with other colours to make a new and unique pair of socks! Ta dah! This tutorial uses my Basic 4ply Socks pattern and you can download your copy for free here.

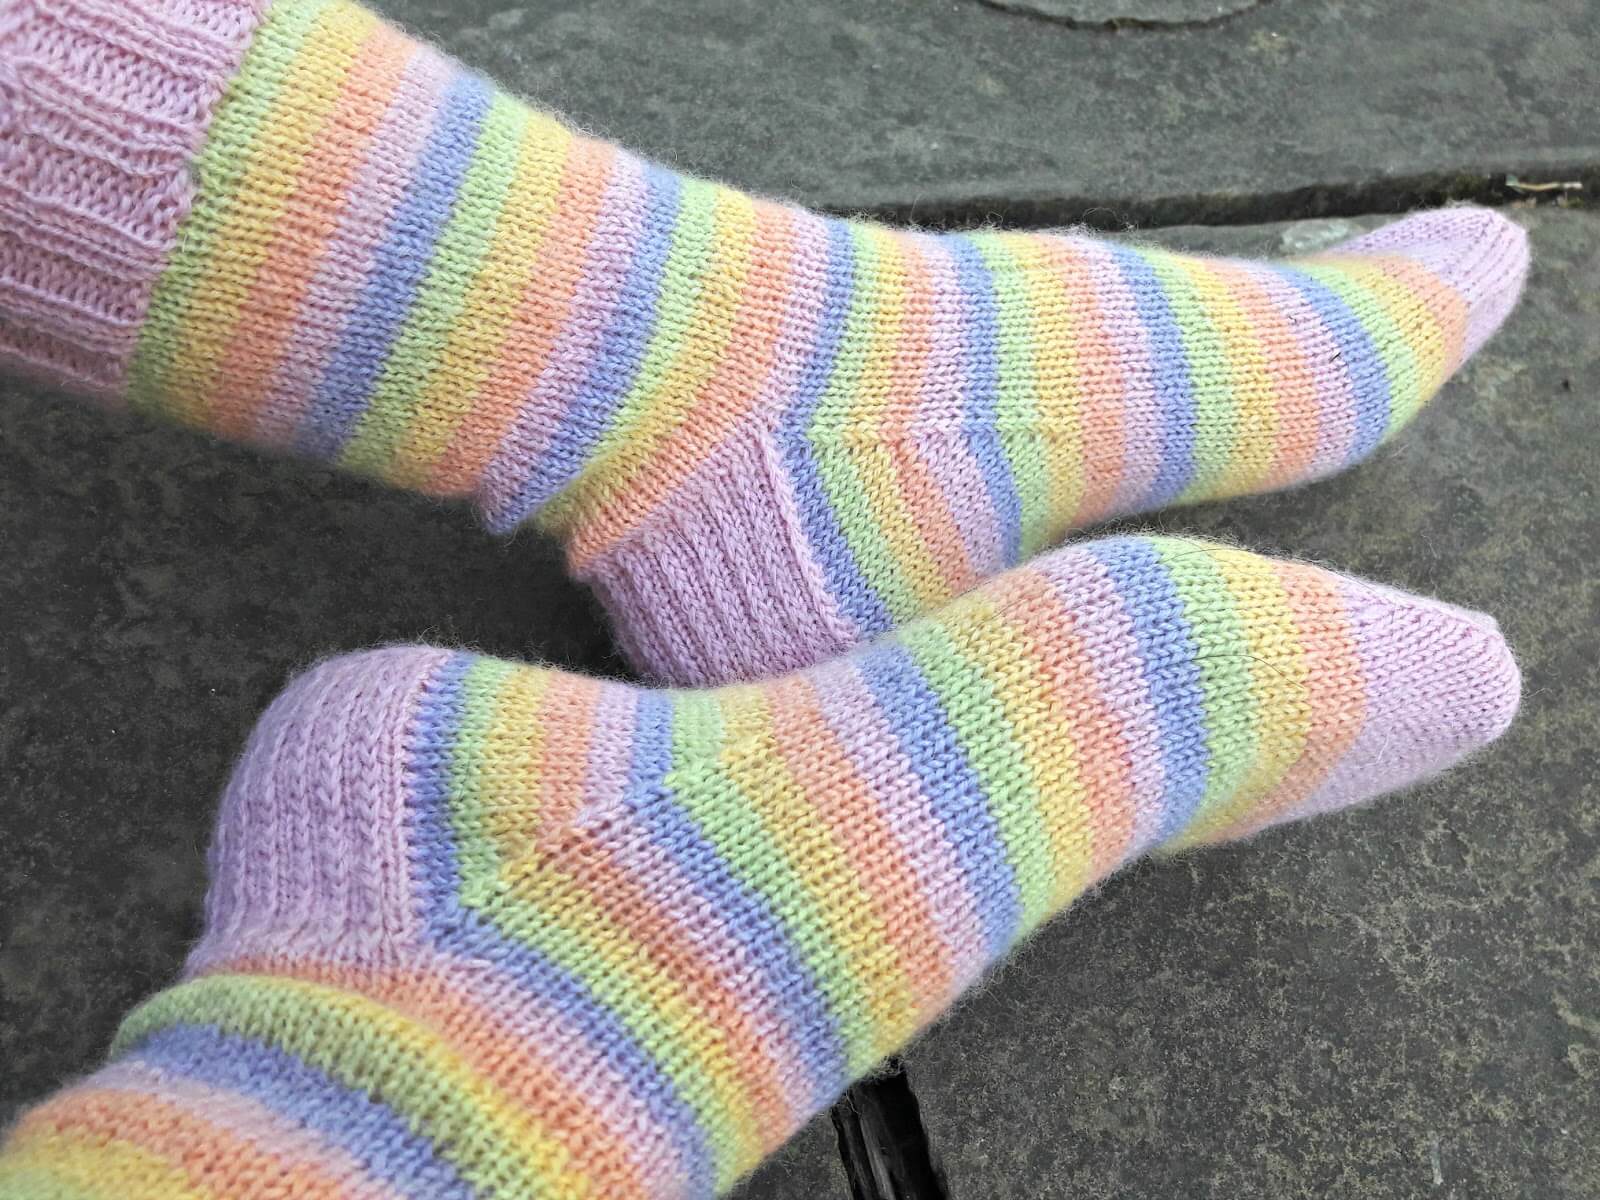
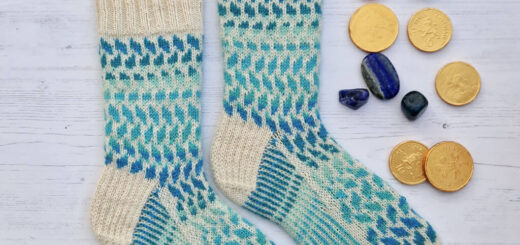
You can mix and match the yarns to make scrappy socks like these, either making bold stripes that don’t come in any bought colourway …

Source: Michelle Bilton
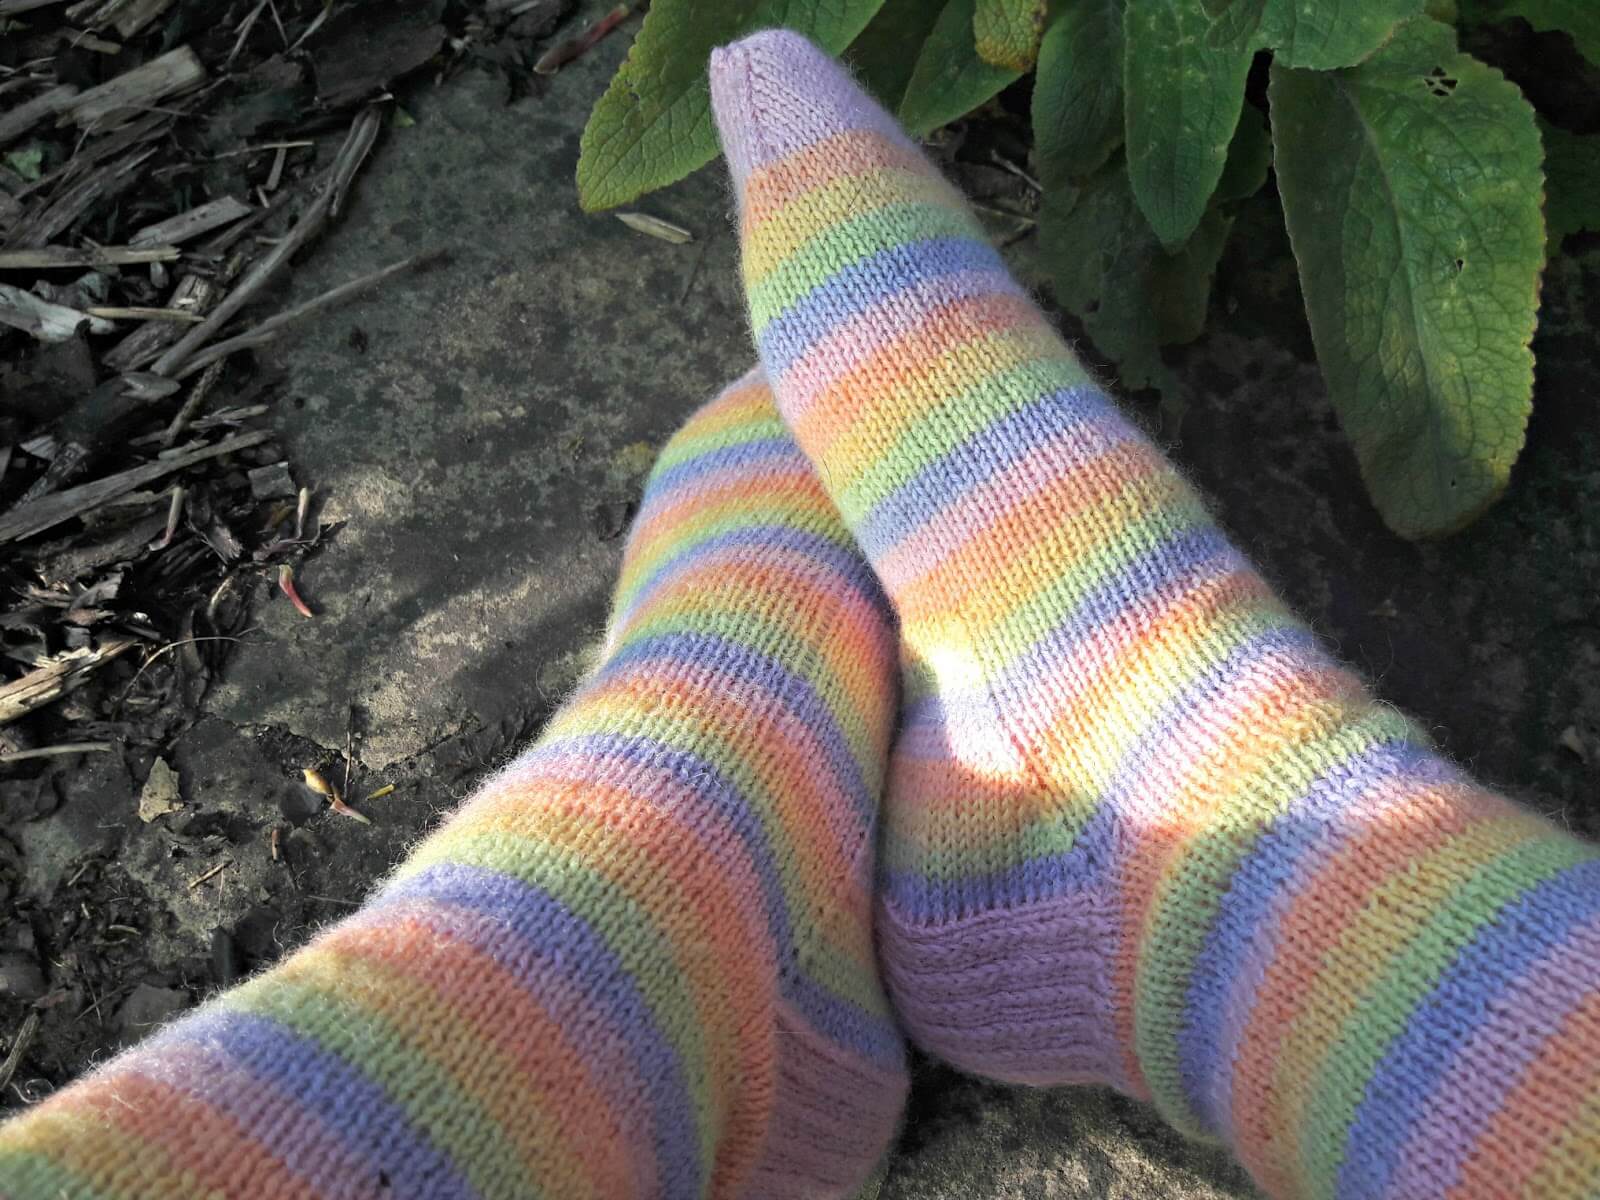
or you can blend the colours together so that they could be from a single ball of yarn …
Source: Rhianon Hitchcock
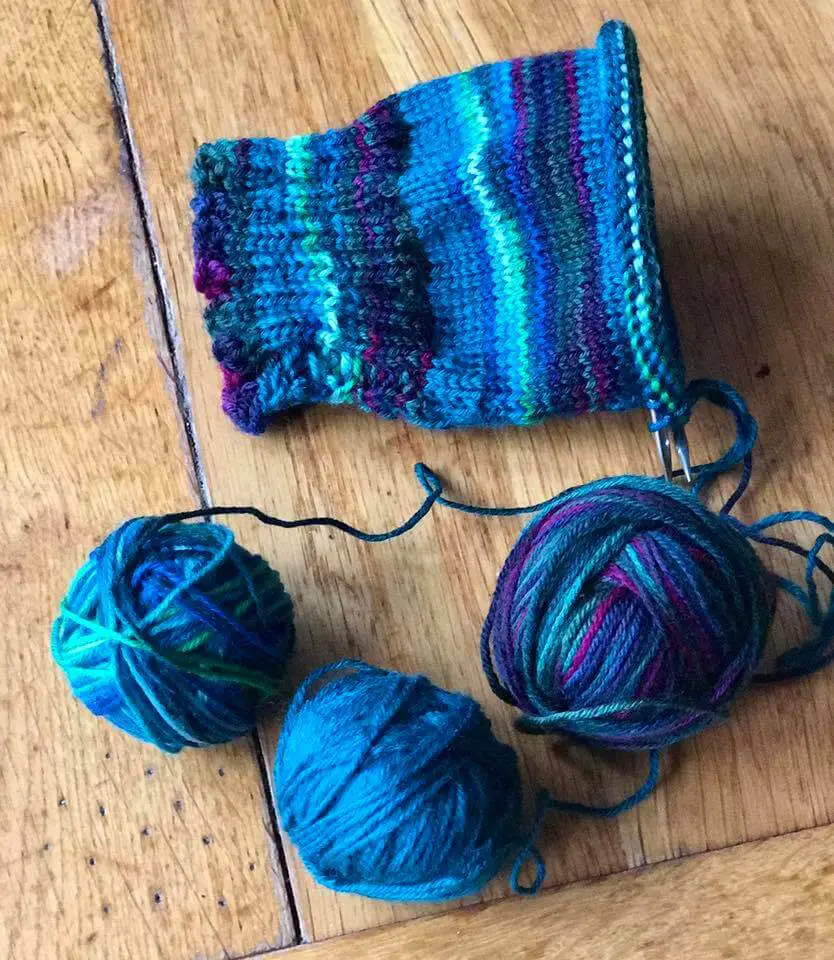
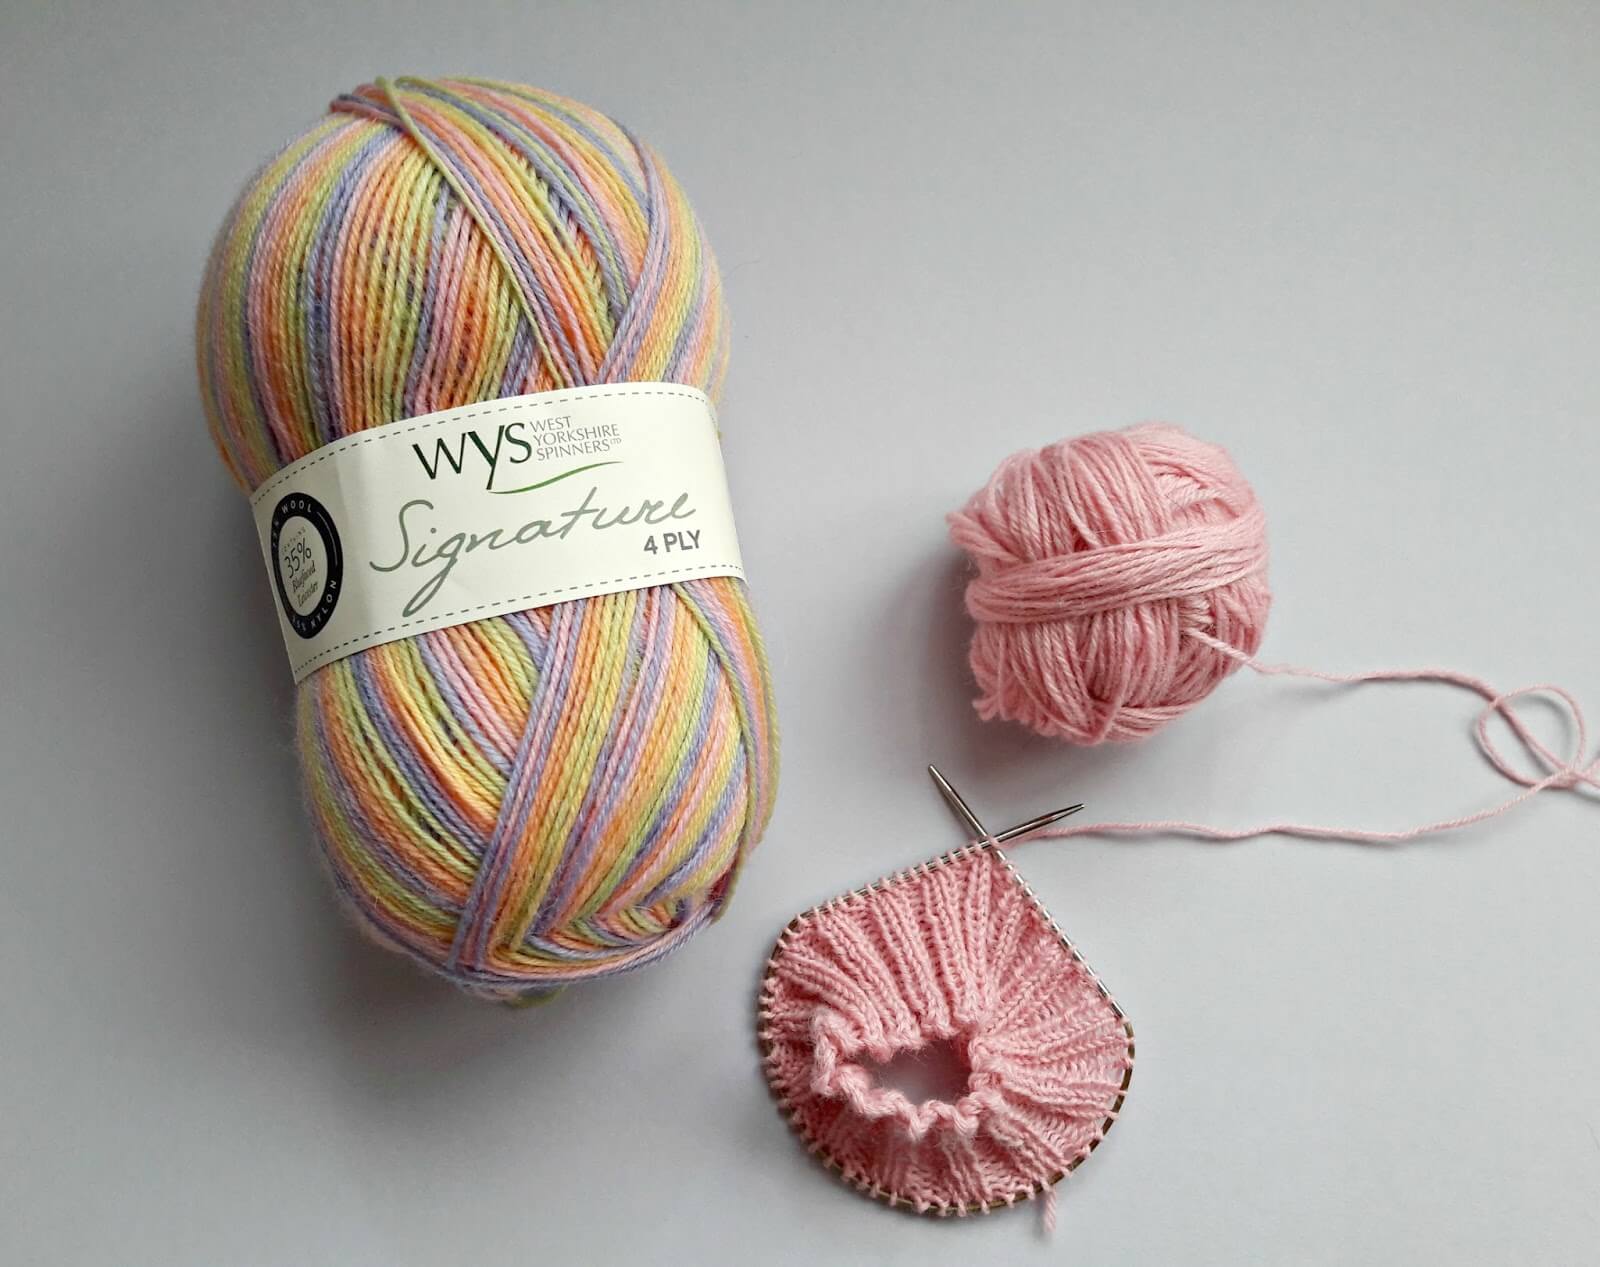
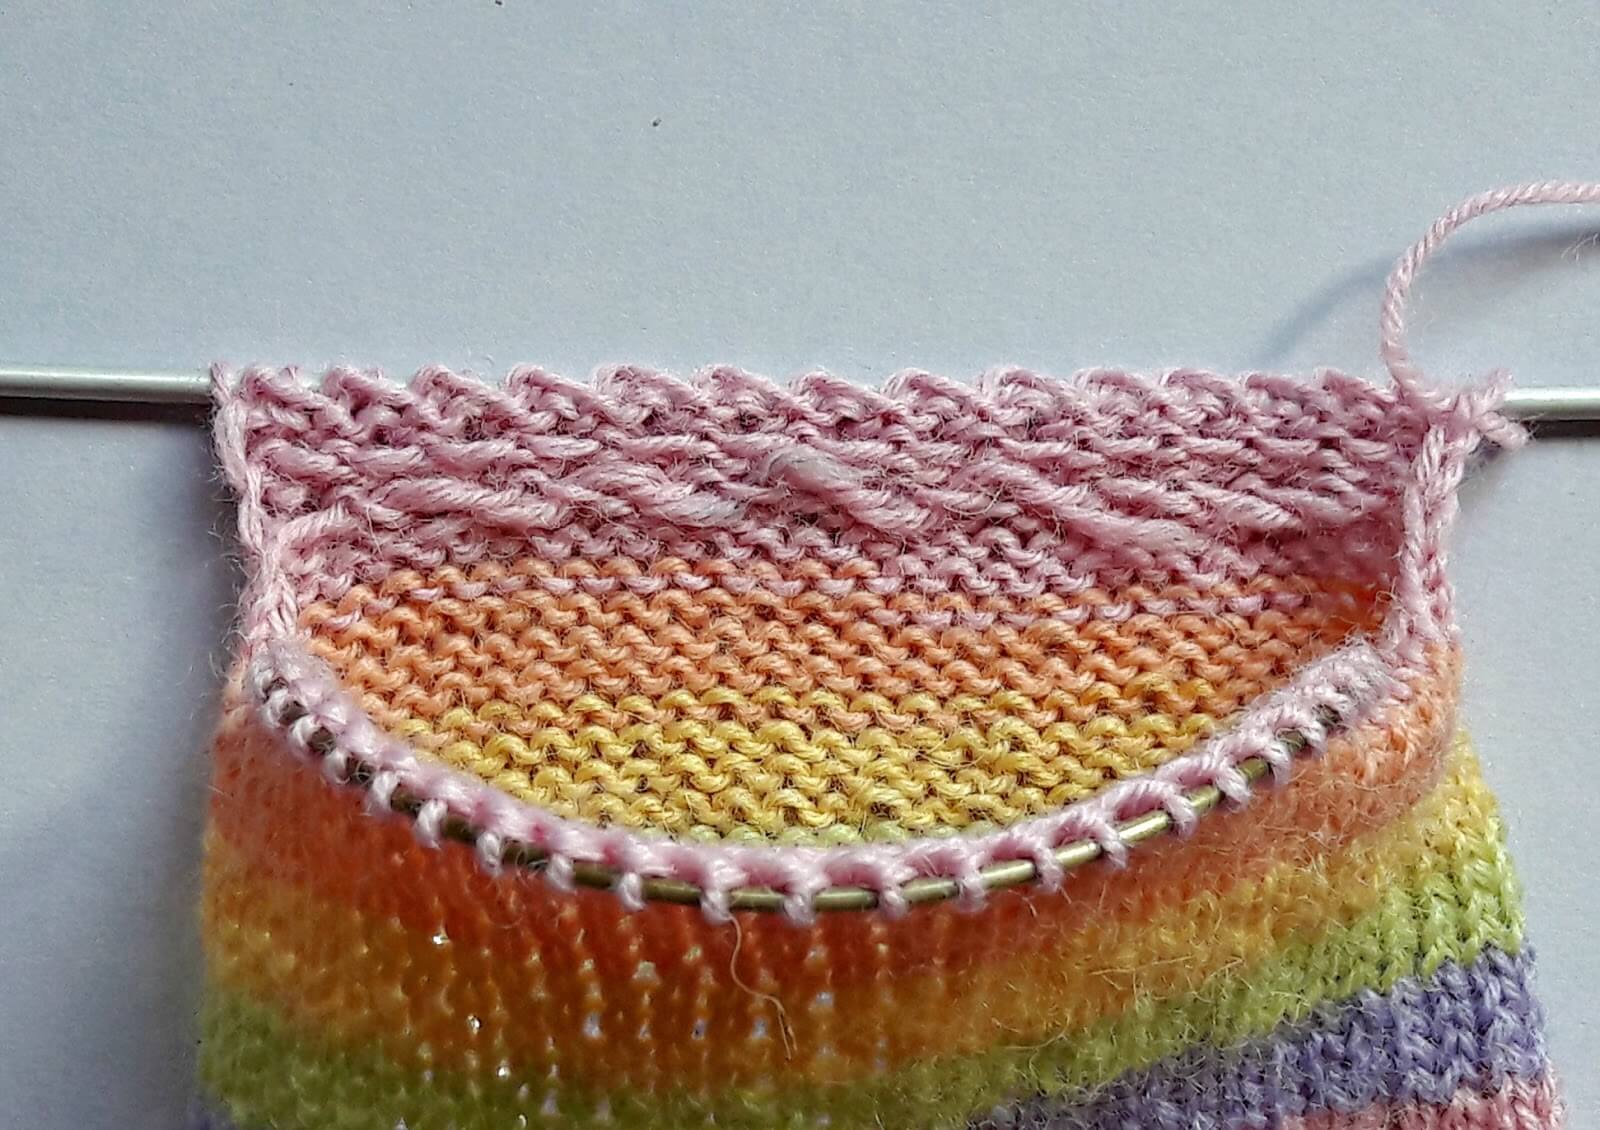
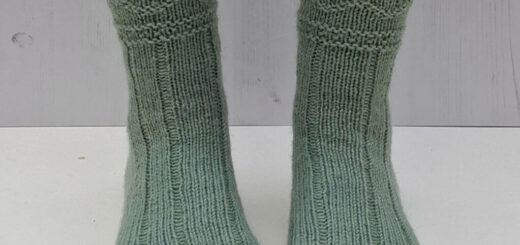
or you can just change the colours in particular areas of the sock, like these ones. These are the socks that I cast on over Easter after finishing the “catnip” socks, and I love the way that the solid pink cuffs, heels and toes pick out the pink in the striped main yarn.
You’ll be pleased to know that it’s really easy to work all of these effects into your socks, and I’m going to show you how I do it. There is, of course, more than one way of joining yarn when you’re knitting – and isn’t it wonderful that there is always more than one way of doing these things, so that if one way doesn’t suit you there’s always another? – and I choose to join yarns by weaving the ends in as I knit. It looks like this on the inside of your sock …
The ends are securely held by the working yarn and as the socks are worn and washed the woven in ends become part of the fabric. I’ve never really managed to get to grips with splicing and joining in other ways and often end up with split yarn and a soggy mess at the end (look up spit splicing, you’ll see what I mean!), and I did worry that weaving the ends in would mean a lumpy bit that I could feel in my socks, but that’s not turned out to be the case. I am super-sensitive to the slightest lumps and bumps in my socks so if there was going to be a problem with it, I’d be the first to know … just in case you’re also a bit like the princess in The Princess and the Pea and can’t be doing with lumpy socks 🙂 The good news is that if you, like me, have problems with other joins coming apart then this method may well be just right for you too.
I do like the way that contrasting heels and toes changes the focus of the colours of the yarn. If I’d used the purple, for example, the socks would have looked entirely different; you might even have wondered if I’d used the same yarn. It’s an easy way to create beautifully different socks without having to buy lots of different yarns, and you can use this method to join new colours in at any point in the sock.
For these socks, I used a ball of West Yorkshire Spinners Signature 4ply in Sherbet Fizz with the leftover pink yarn from the catnip socks (WYS Signature 4ply in Candyfloss). Just to give you some idea of how far a ball of yarn might go, I knitted one full pair of socks in Candyfloss (UK size 5) and used the rest for the cuffs, heels and toes on two more pairs of socks (including this one) and I still have a small ball of it left over. Not enough for more adult socks but certainly enough to add a stripe in on another pair, or complete a small blanket square. It makes you realise that although a ball of sock yarn might initially seem expensive compared to a pair of shop-bought socks, it stretches far enough to become much better value.
If you only have bits and pieces of leftover yarns that you want to use for contrast socks, you might wonder how much of it you need. I asked this question in the Winwick Mum Knit n Natter Facebook group to see what members thought and the general consensus seems to be that you need at least 20g of yarn for contrast heels and toes (some hand-dyed yarns are sold with contrasting colours in tiny 20g skeins just for this purpose) although some people felt that 50g was a safer option so that you didn’t run out. Paula, a hand-spinner, said that she’d discovered that one row of stocking stitch knitted on 2.5mm needles took about 10″ of yarn (4 times the width of the row) if that’s any help to anyone who wants to work out the maths, although you’d need to remember that the gauge of knitting in the round is very slightly looser than knitting on straight needles. One option if you’re worried that you’ll run out of yarn is to knit both socks to the same point so that you can see how much yarn you have left and then knit heels or toes in yet another colour (or even the main colour) if you need to. The possibilities are endless!
I’m going to assume that you are already familiar with knitting a pair of socks, and if you’re not, you can find the step-by-step Sockalong tutorials to do so here. The pattern on which this pair of socks is based is my Basic 4ply sock pattern which you can find here, and don’t forget that you’re not tied to using 4ply either as you can use this method for any weight of yarn. The Sock Stitch Calculation so that you can work out how many stitches you’ll need for any weight of yarn is here.
There’s no reason why you can’t use contrast yarns even for your very first pair of socks so don’t feel put off if you’ve not made socks before. There’s a video to go with this tutorial of how I’ve joined the yarn and you can find it here – there’s another link at the bottom of the page so feel free to read through the post first!
Are you ready? OK, let’s get started!
Cuff
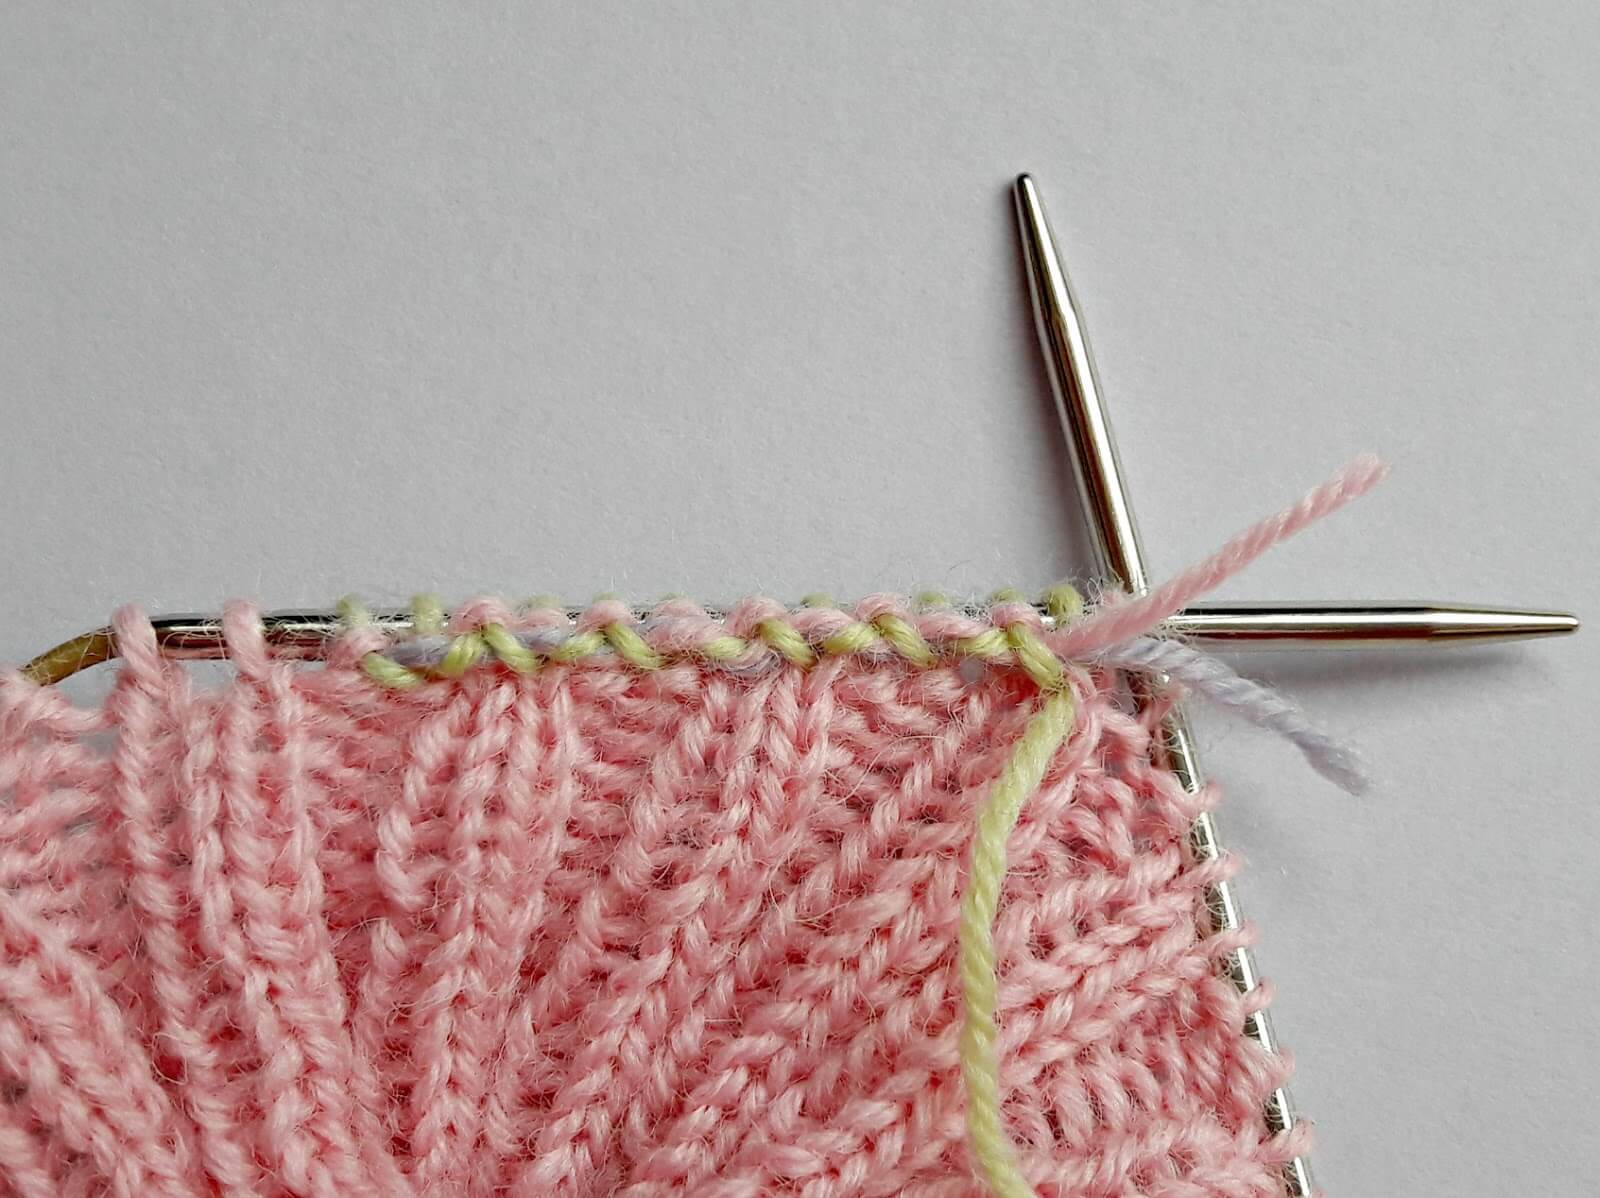
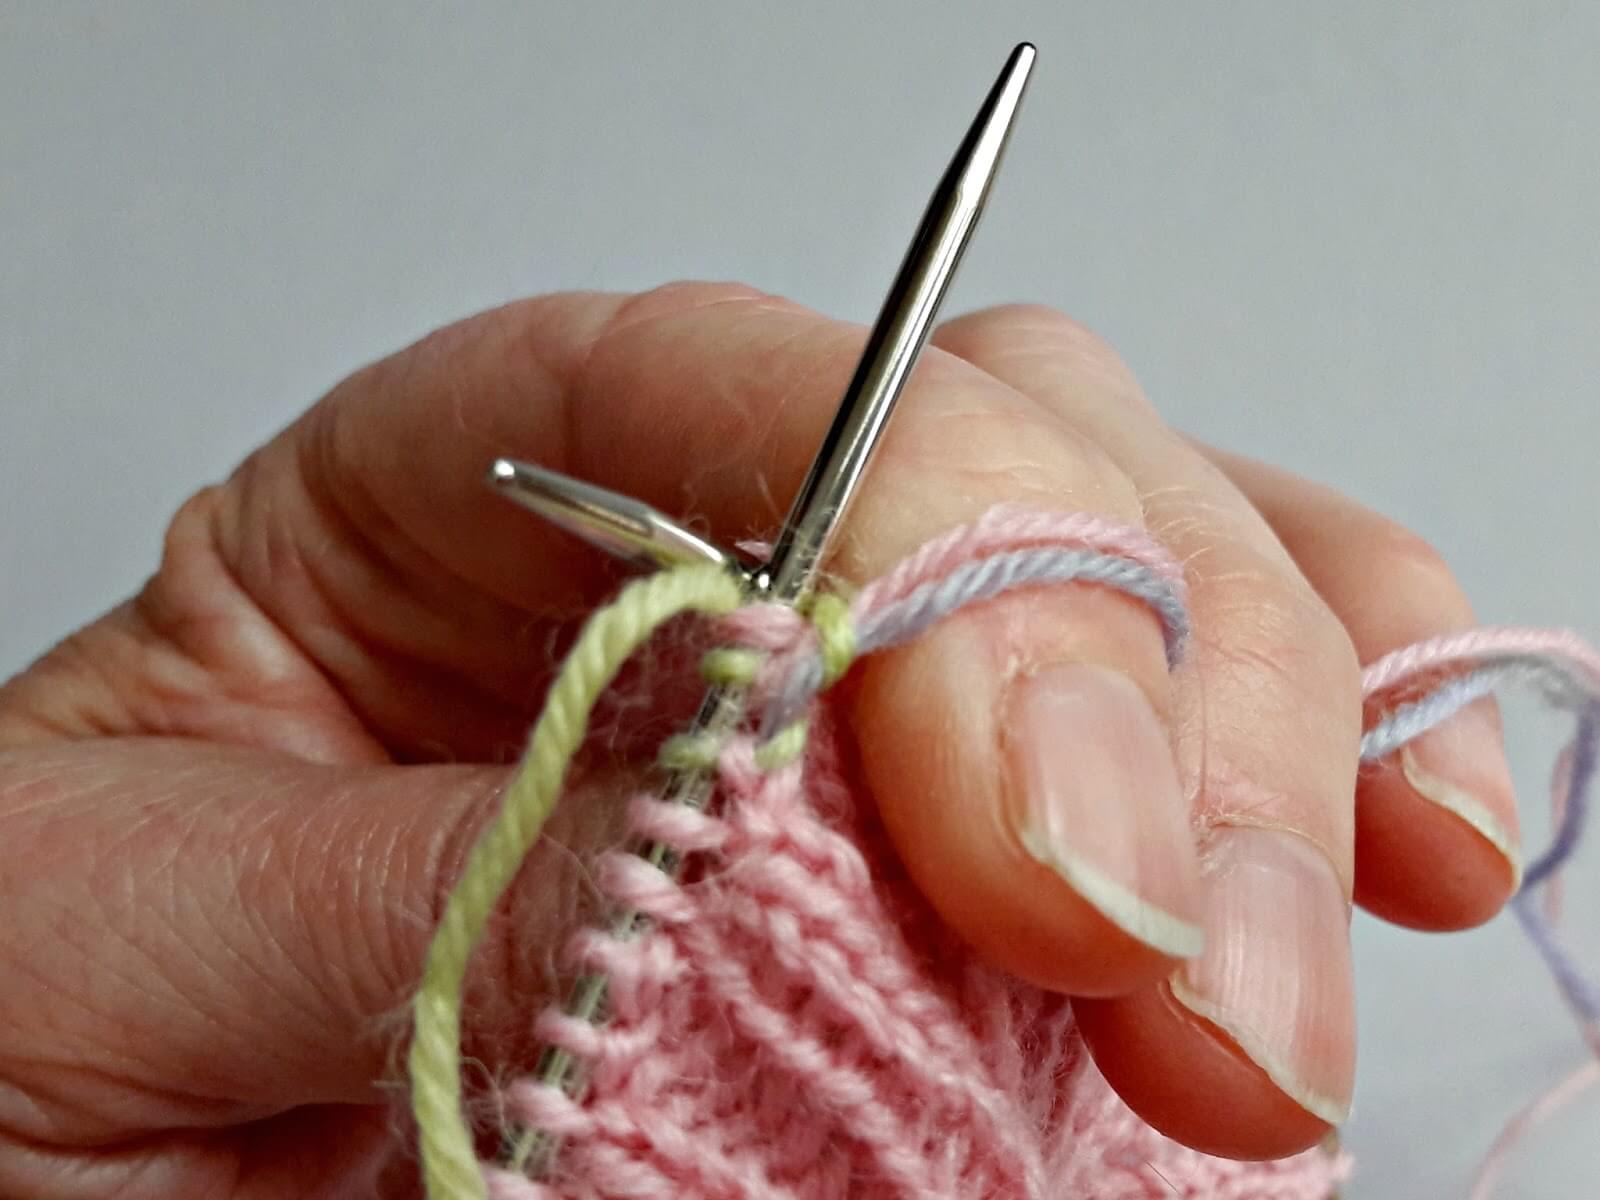
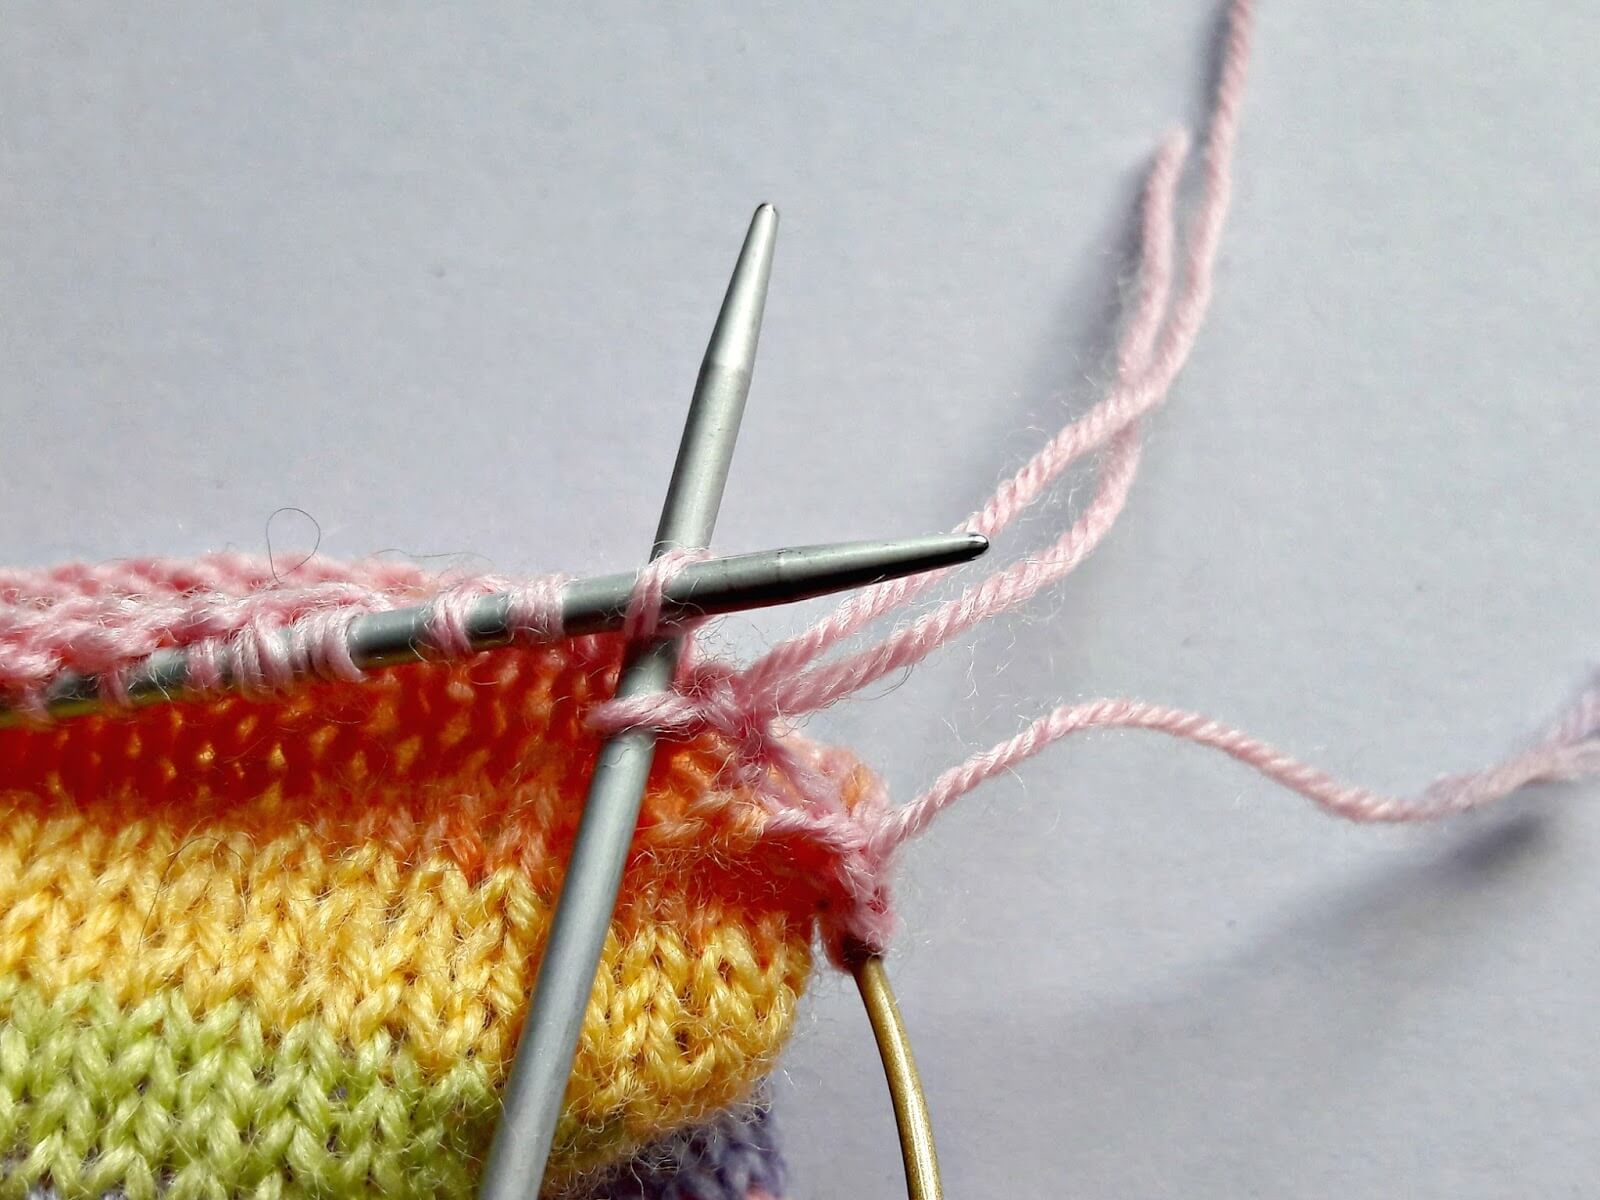
Here, I’ve knitted the cuff of my sock in my contrast yarn and I’m ready to join in my main yarn.
Holding the contrast yarn that you’ve been using out of the way for a moment, knit the next stitch with the new main yarn (that’s the slightly fuzzy green stitch in this photo). You can see the new green working yarn on the right and at the top of the picture is the contrast pink yarn and the purple end of the new yarn. If you’re using a brand new ball of yarn such as the Sherbet Fizz that I’m using and you want your socks to match, make sure that you start knitting with the second colour out of the ball not the first, as there’s no way of knowing whereabouts in that first colour the yarn was cut to start the ball – in my case, the purple was first out of the ball followed by the green.
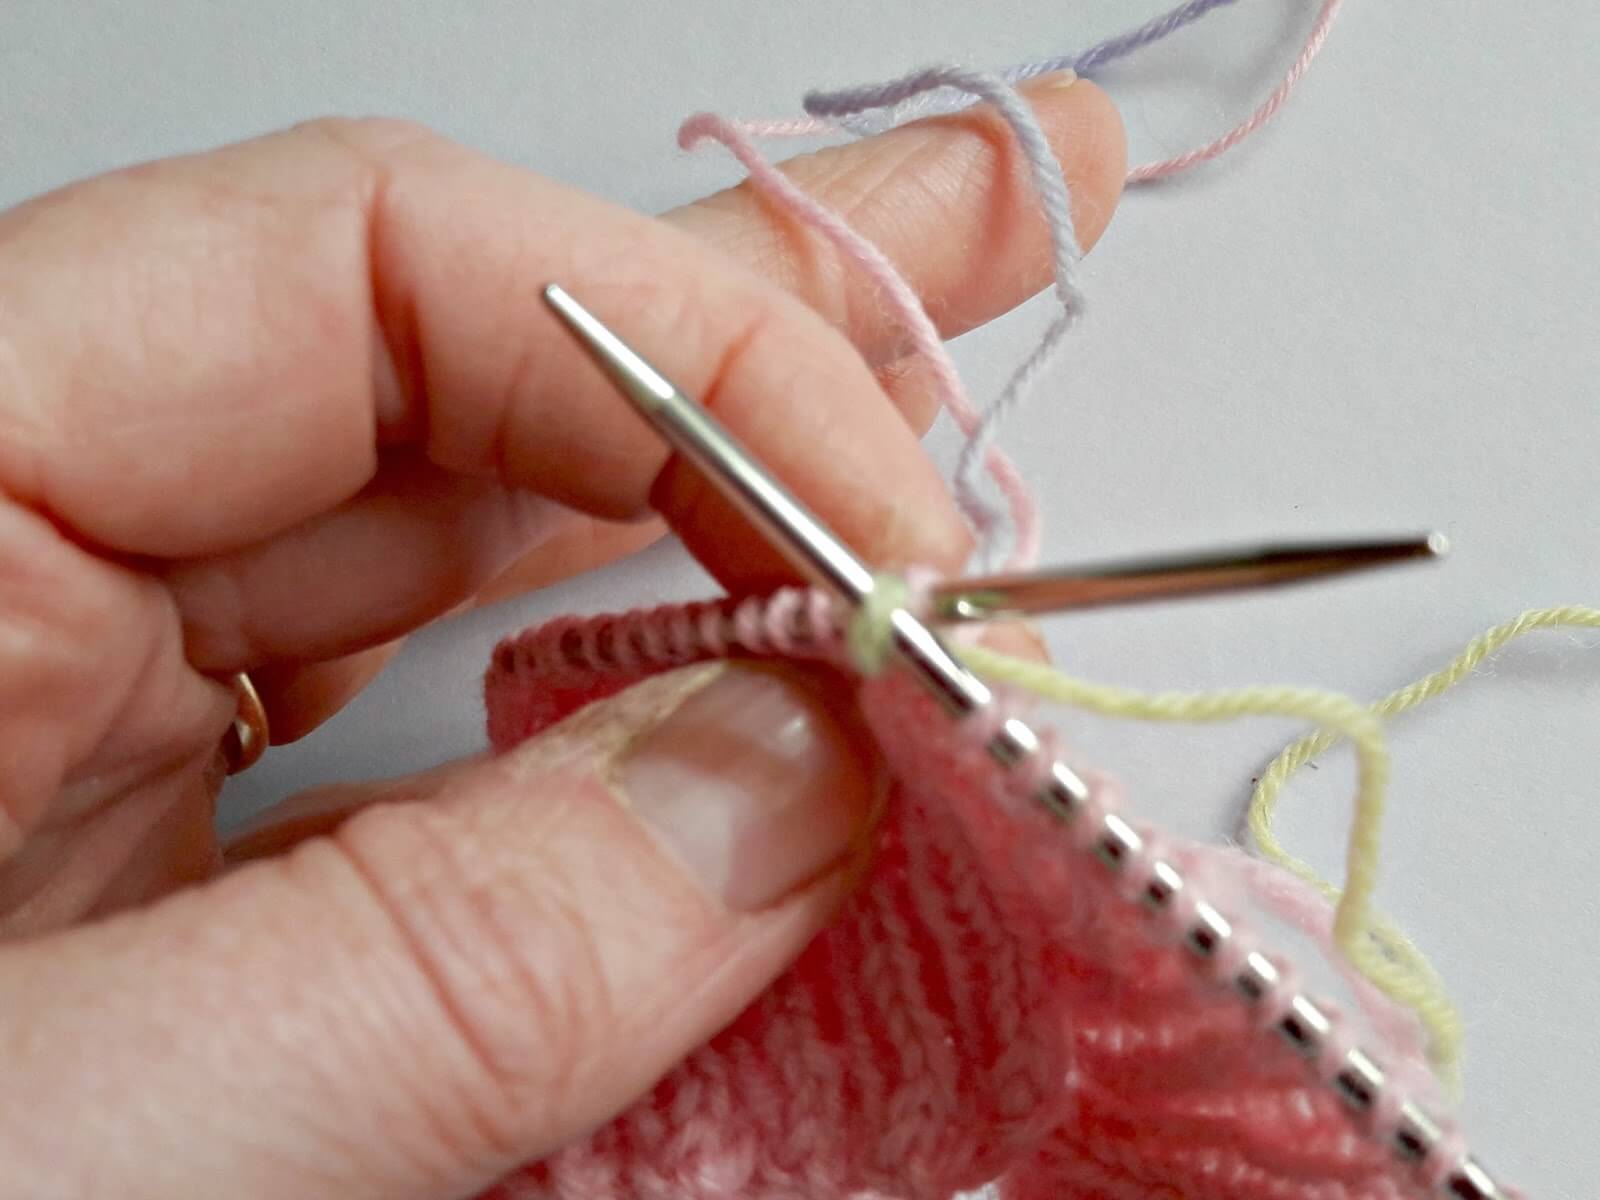
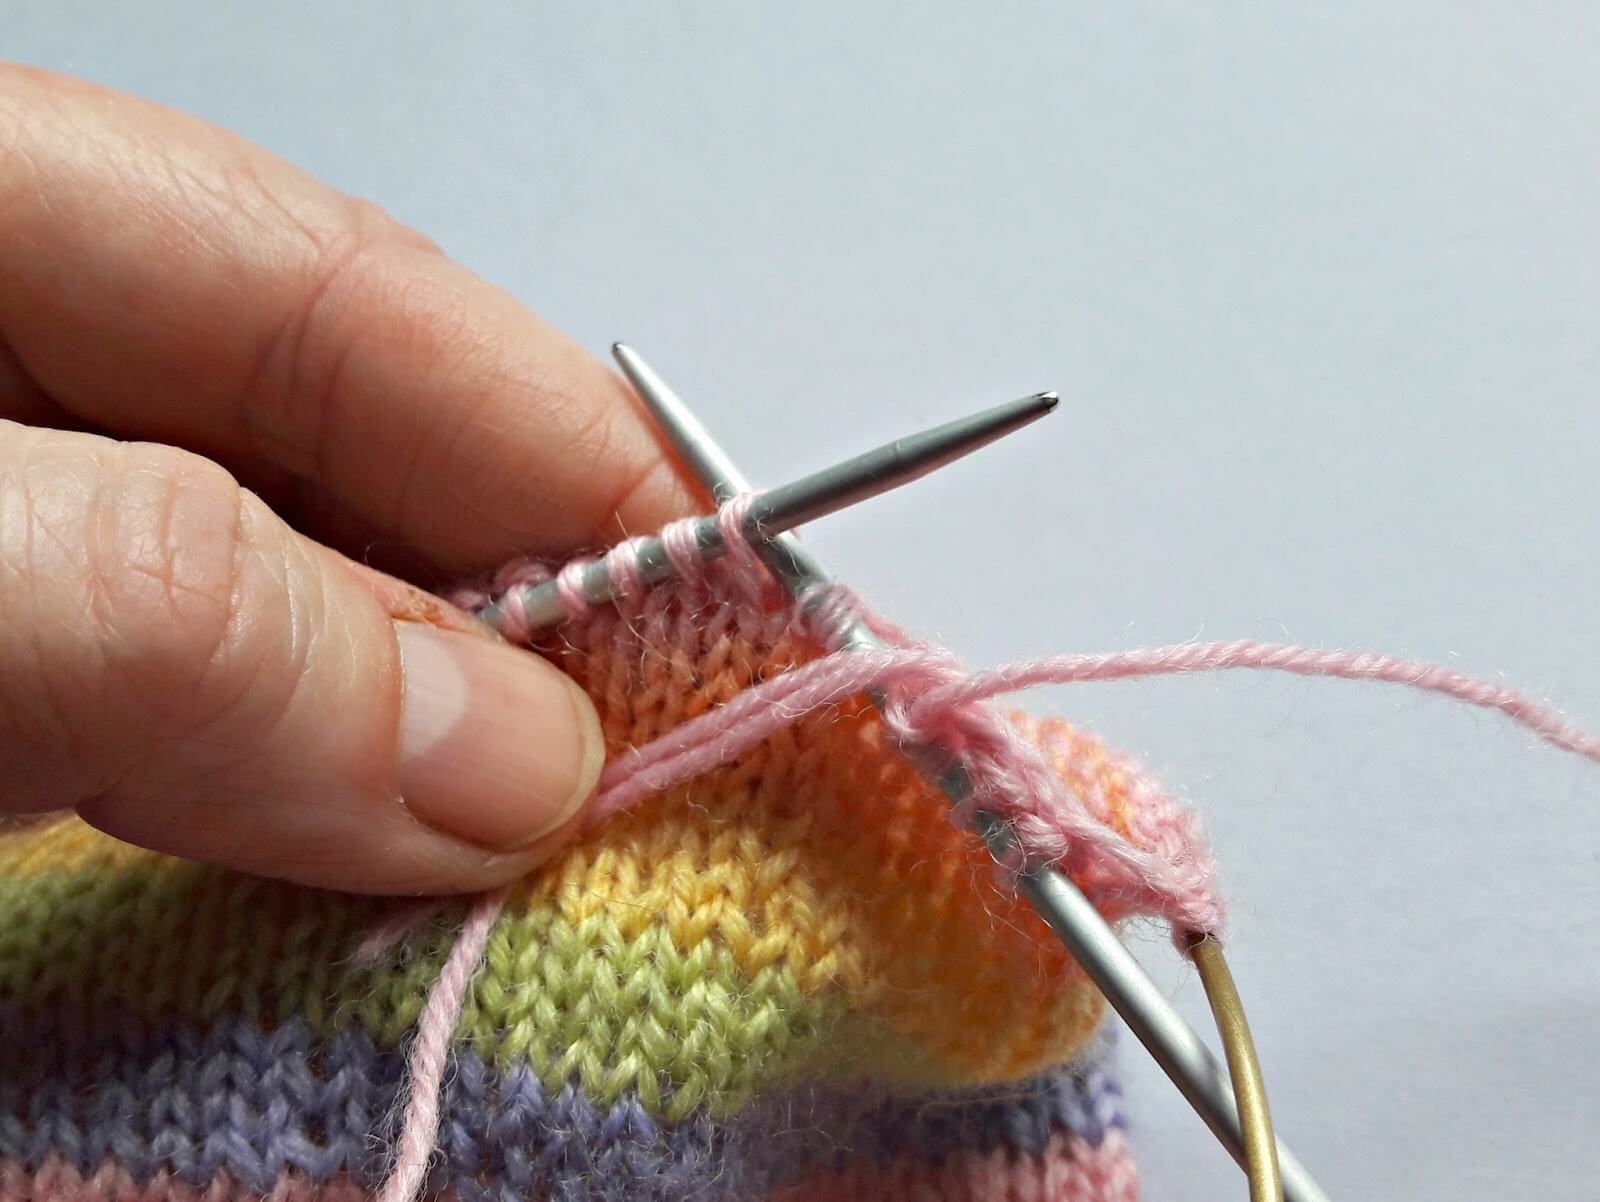
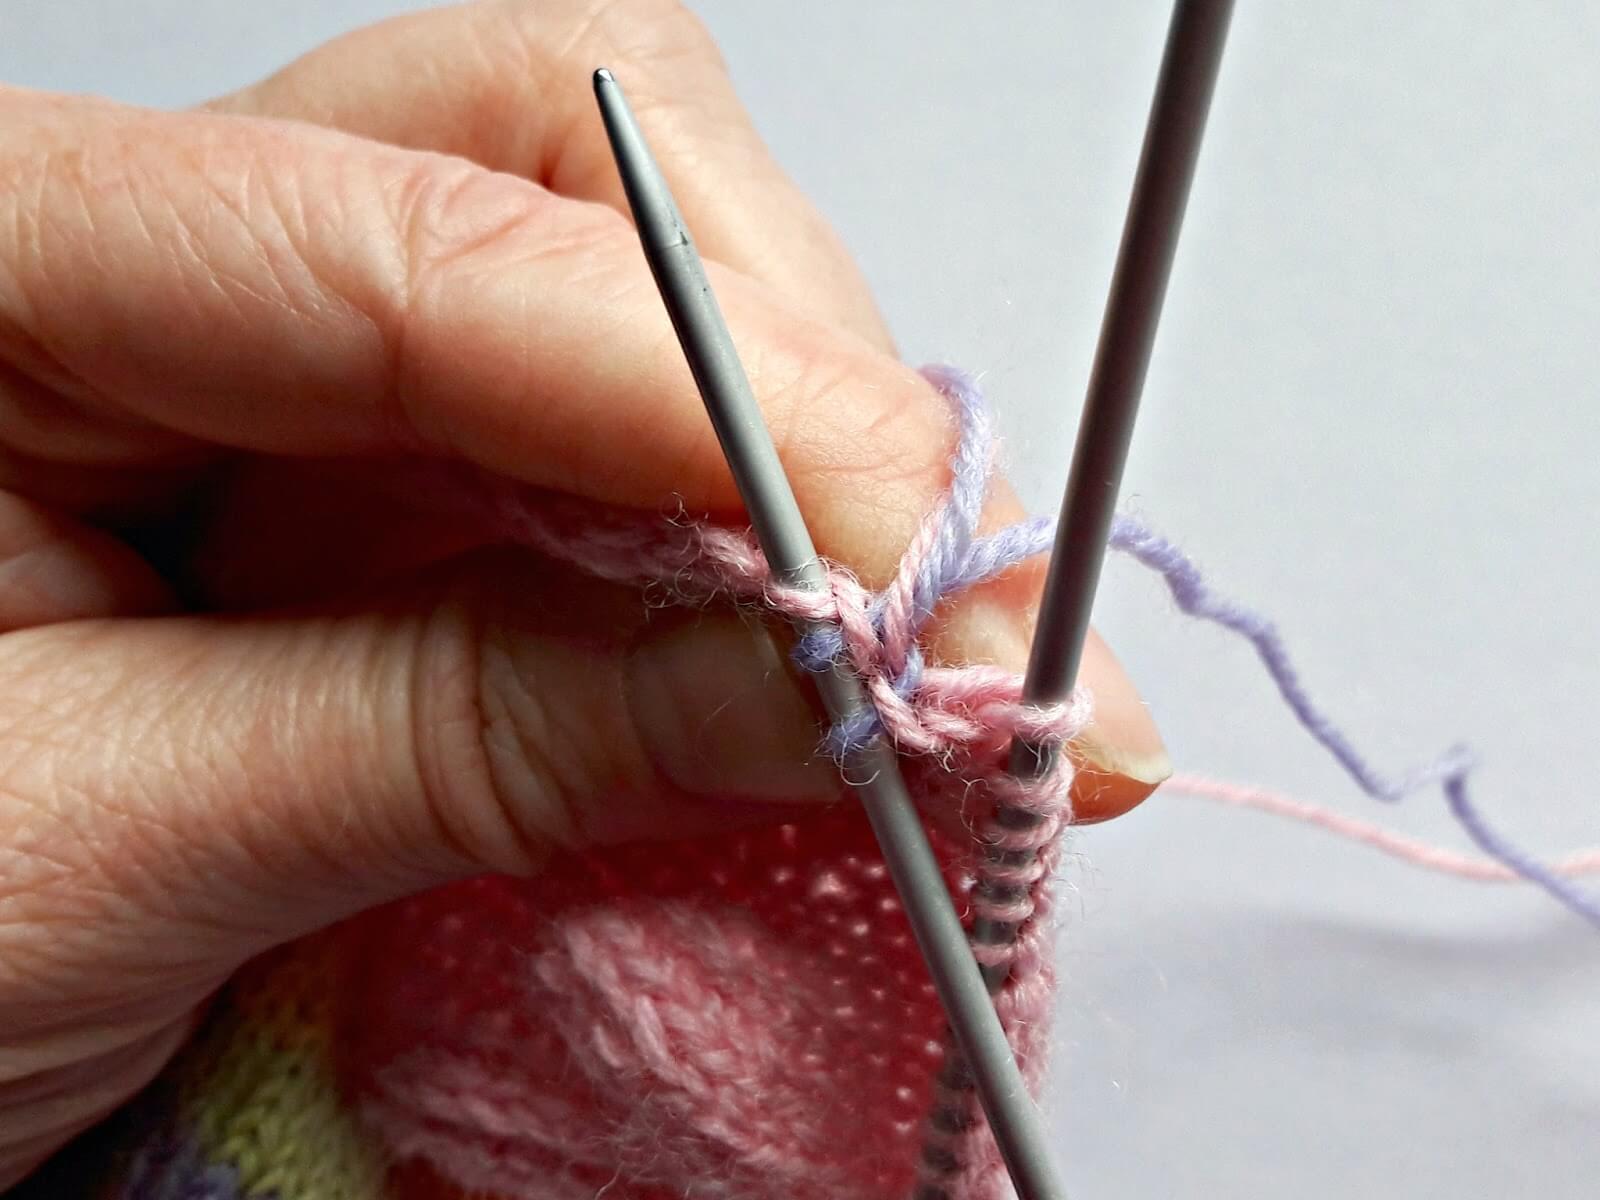
Now we’re going to start weaving the yarn as we knit the stitches. In this next picture, you can see that I’ve got the green working yarn over the top of the pink contrast yarn, and next to the pink yarn is the purple end of the new working yarn. We’re going to weave both of those in together. Don’t worry if it seems a bit confusing at the moment, it’ll make sense in a minute!
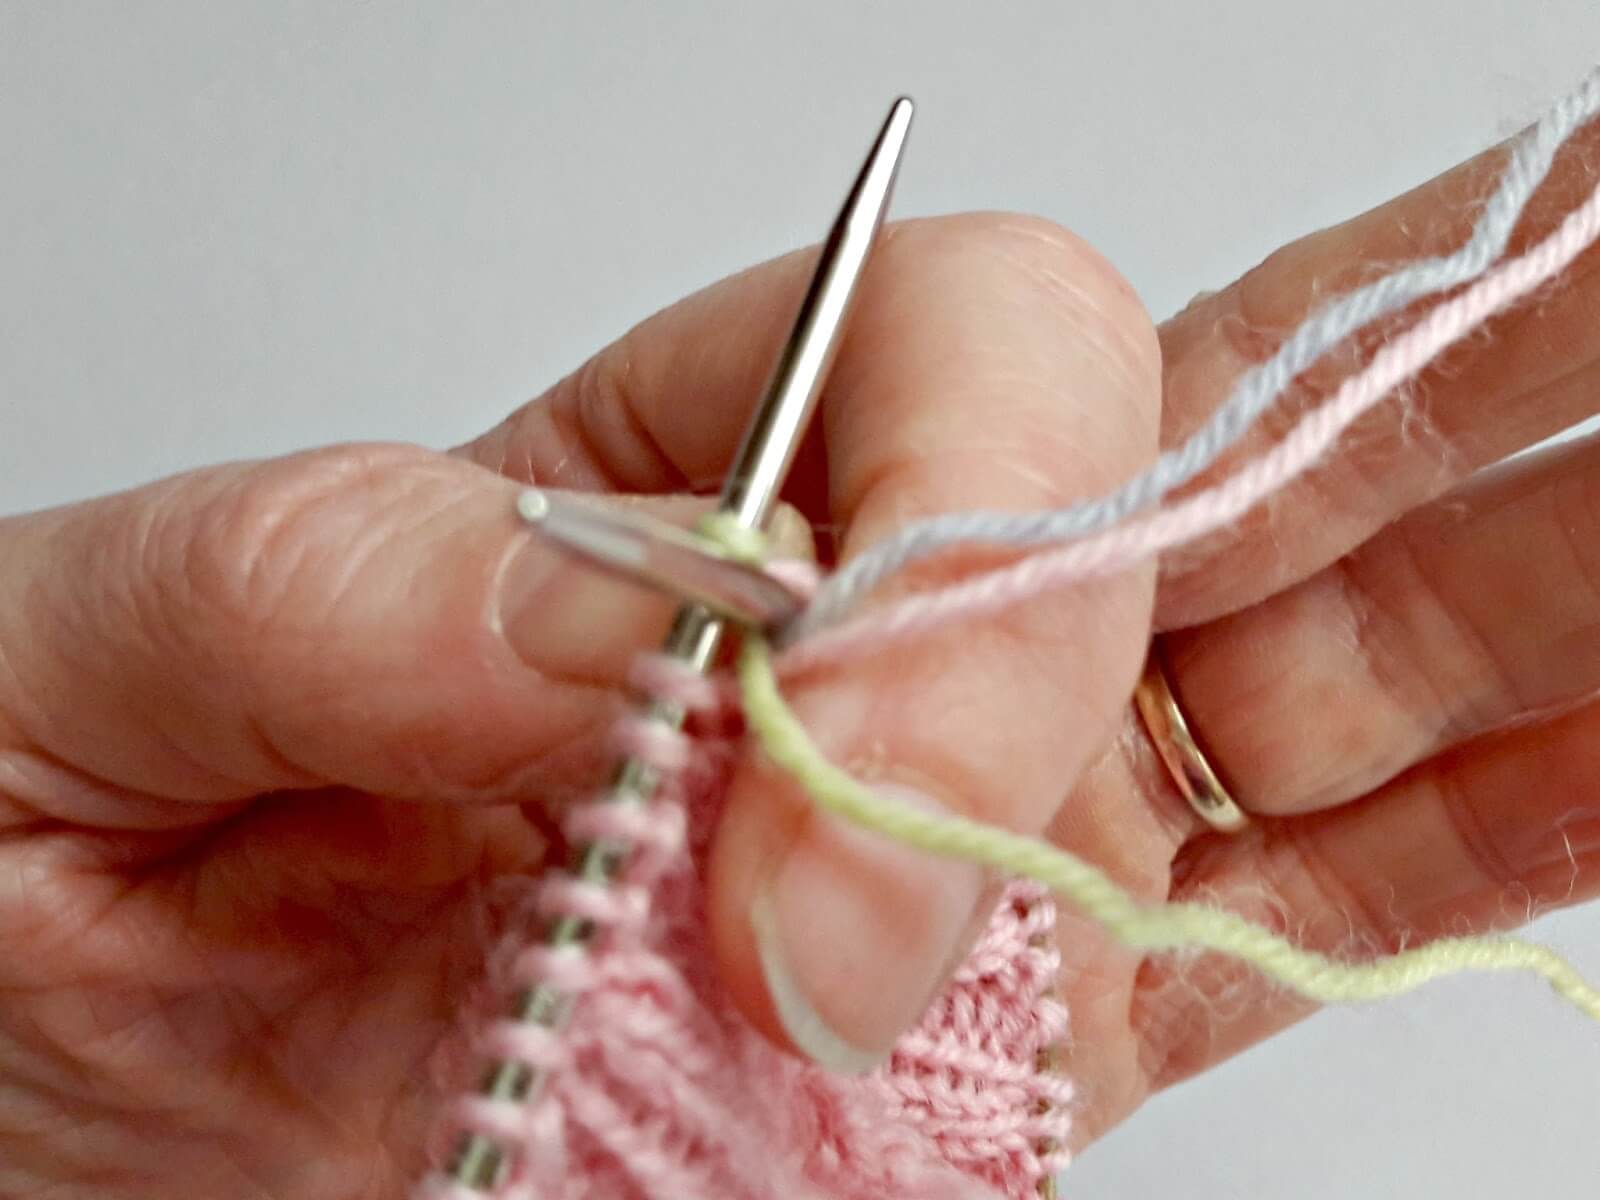
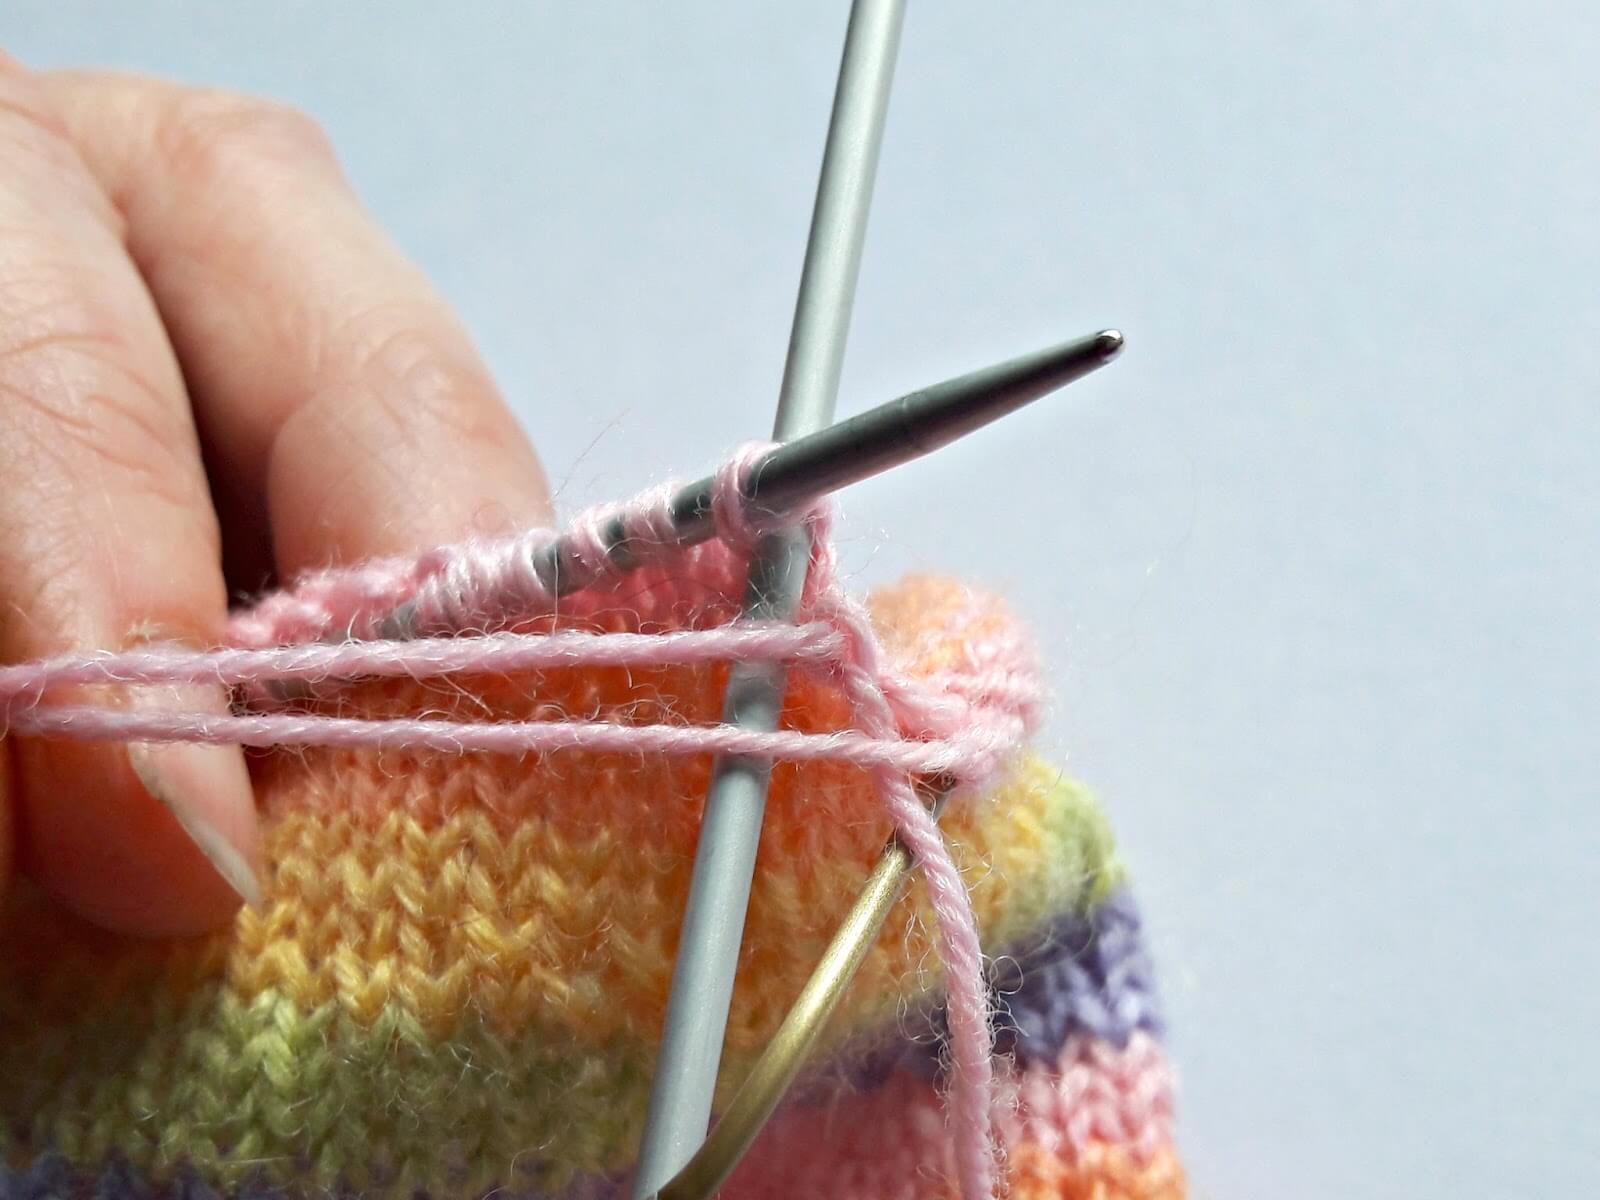
Now bring the pink and the purple “old” yarns over the top of the green yarn so that when you make your next stitch, the green yarn secures them.
You can see that I’ve got two green stitches on my needle now, and before I make the next stitch I’m going to pull the pink and purple yarns down so that they are over the top of the working yarn again.

Can you see how they’re being held securely by the green yarn?
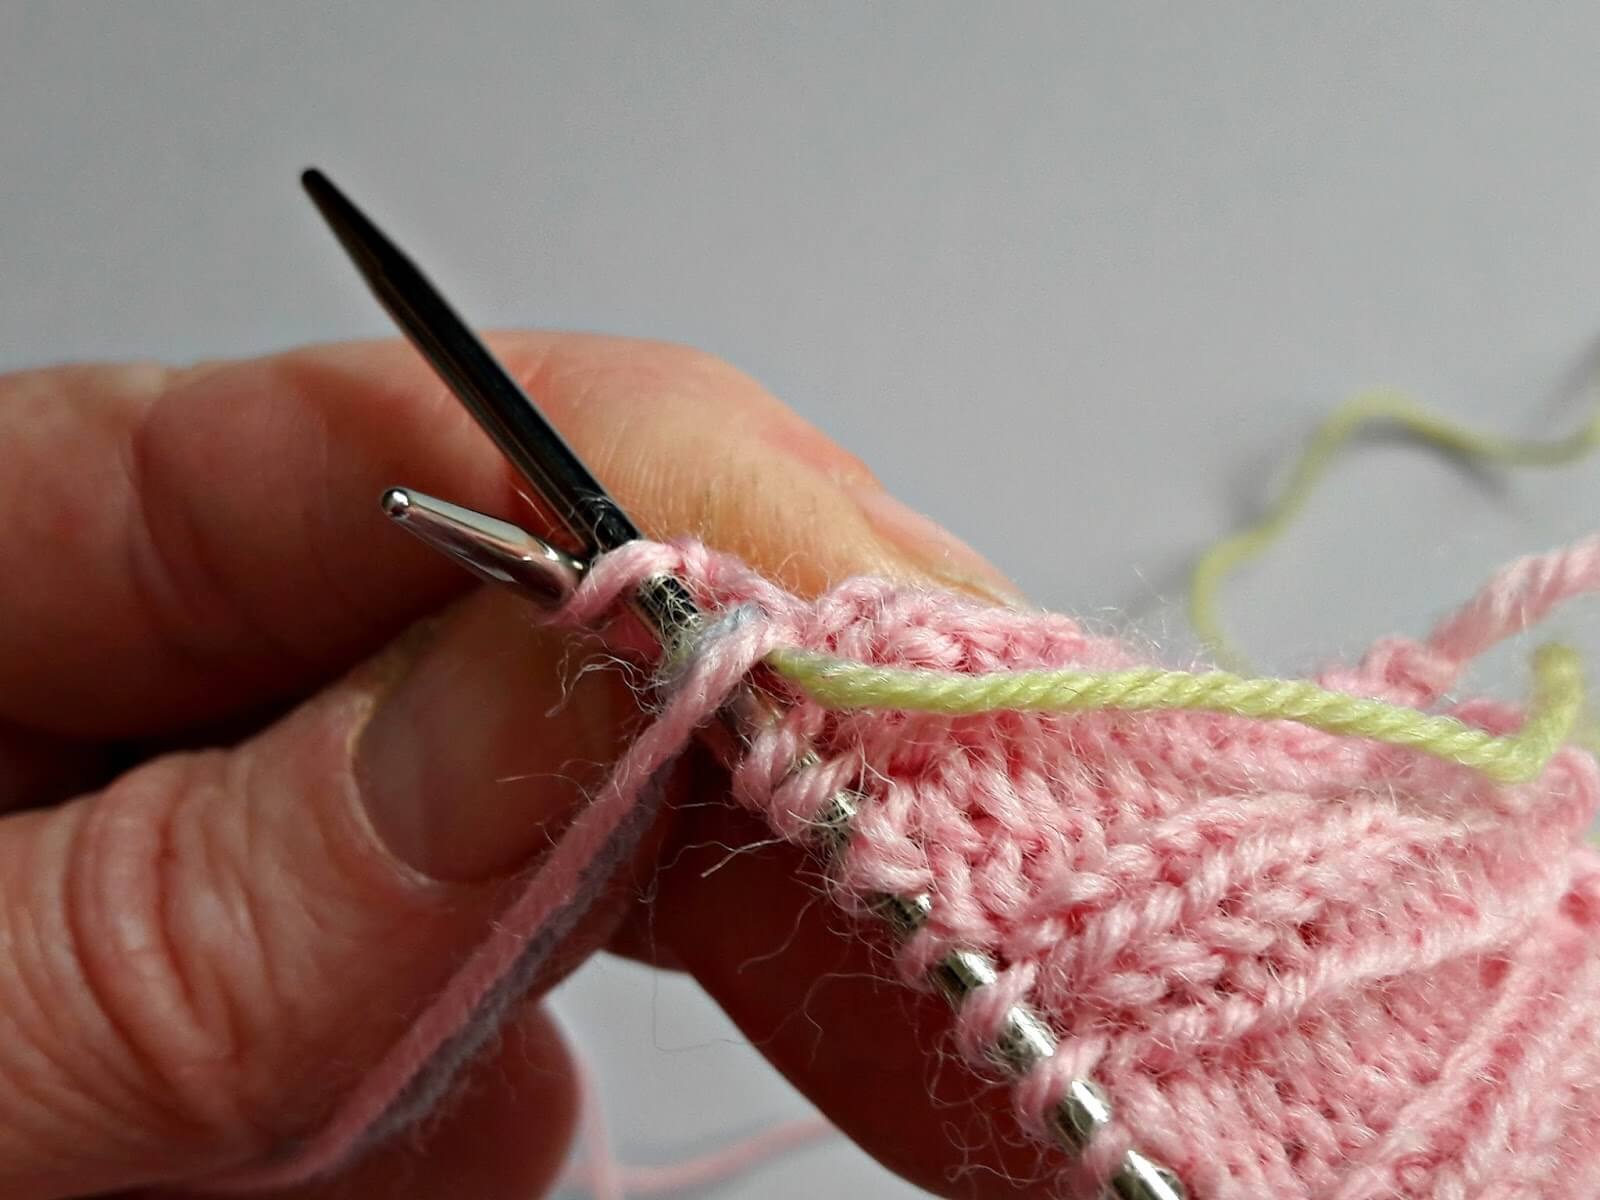
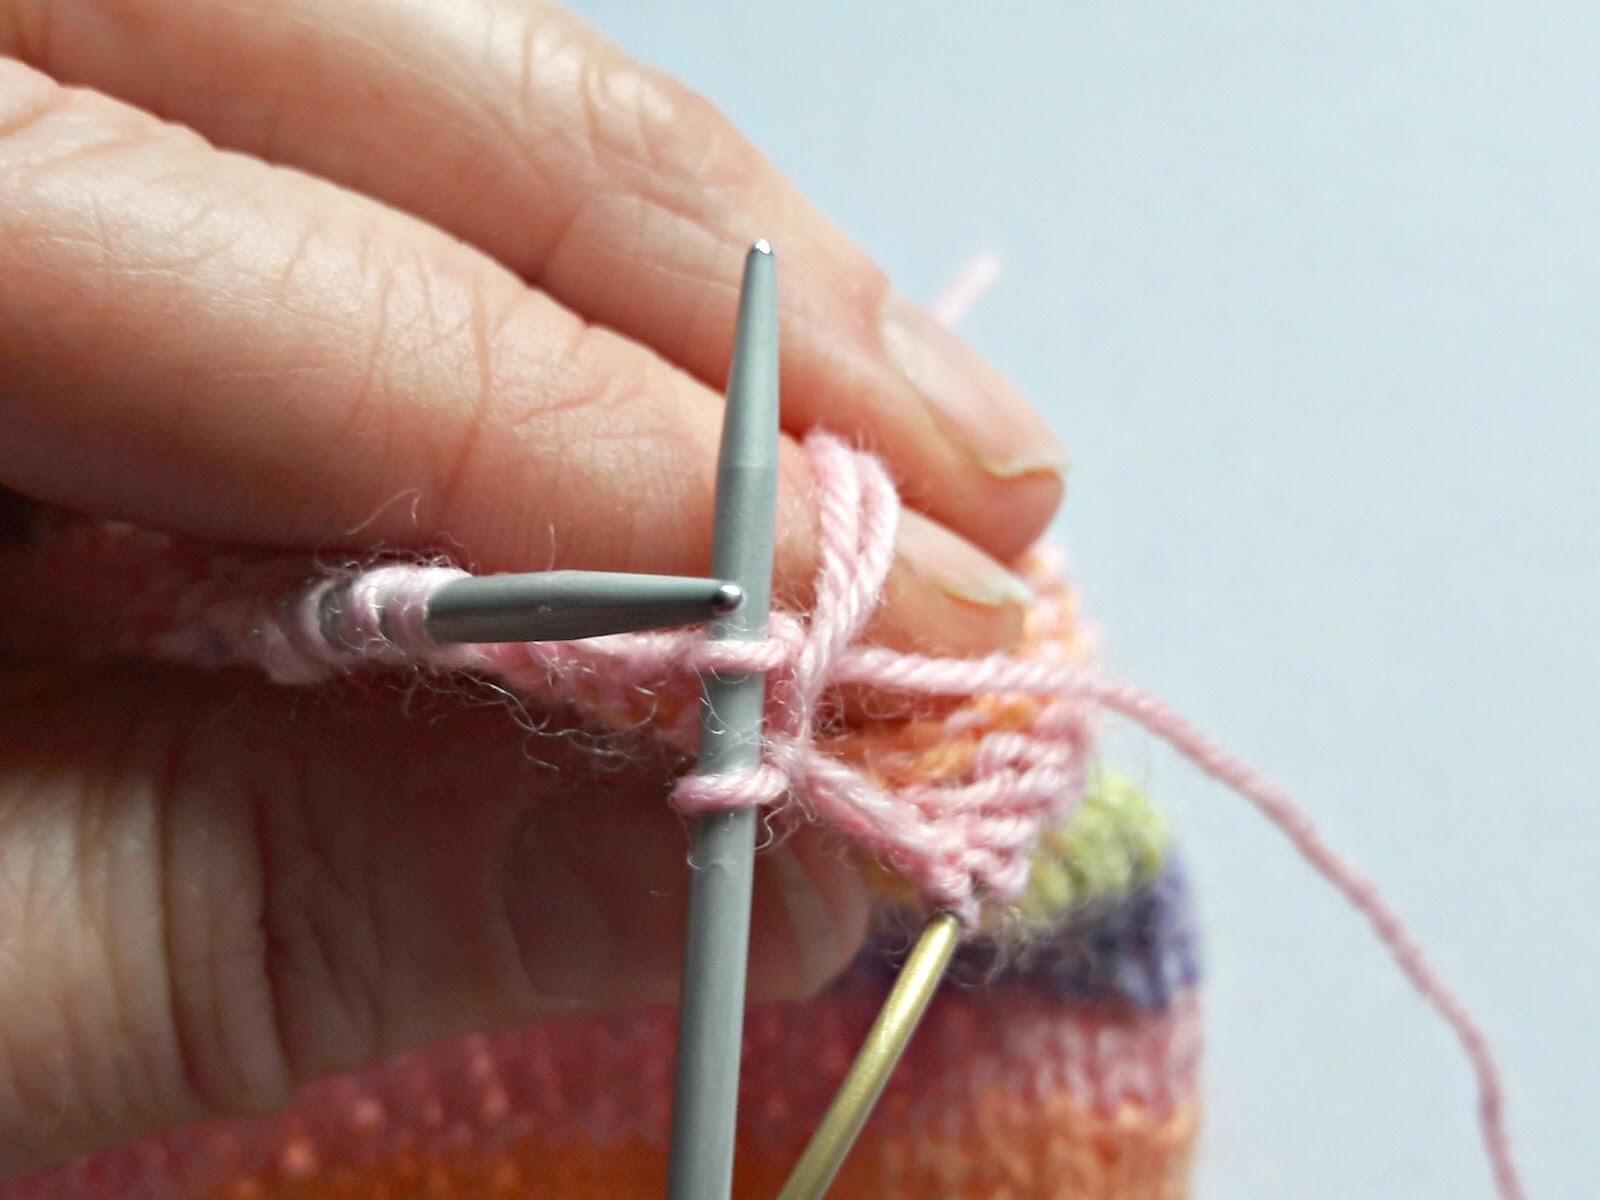
Bring the “old” yarns up over the working yarn for the next stitch …
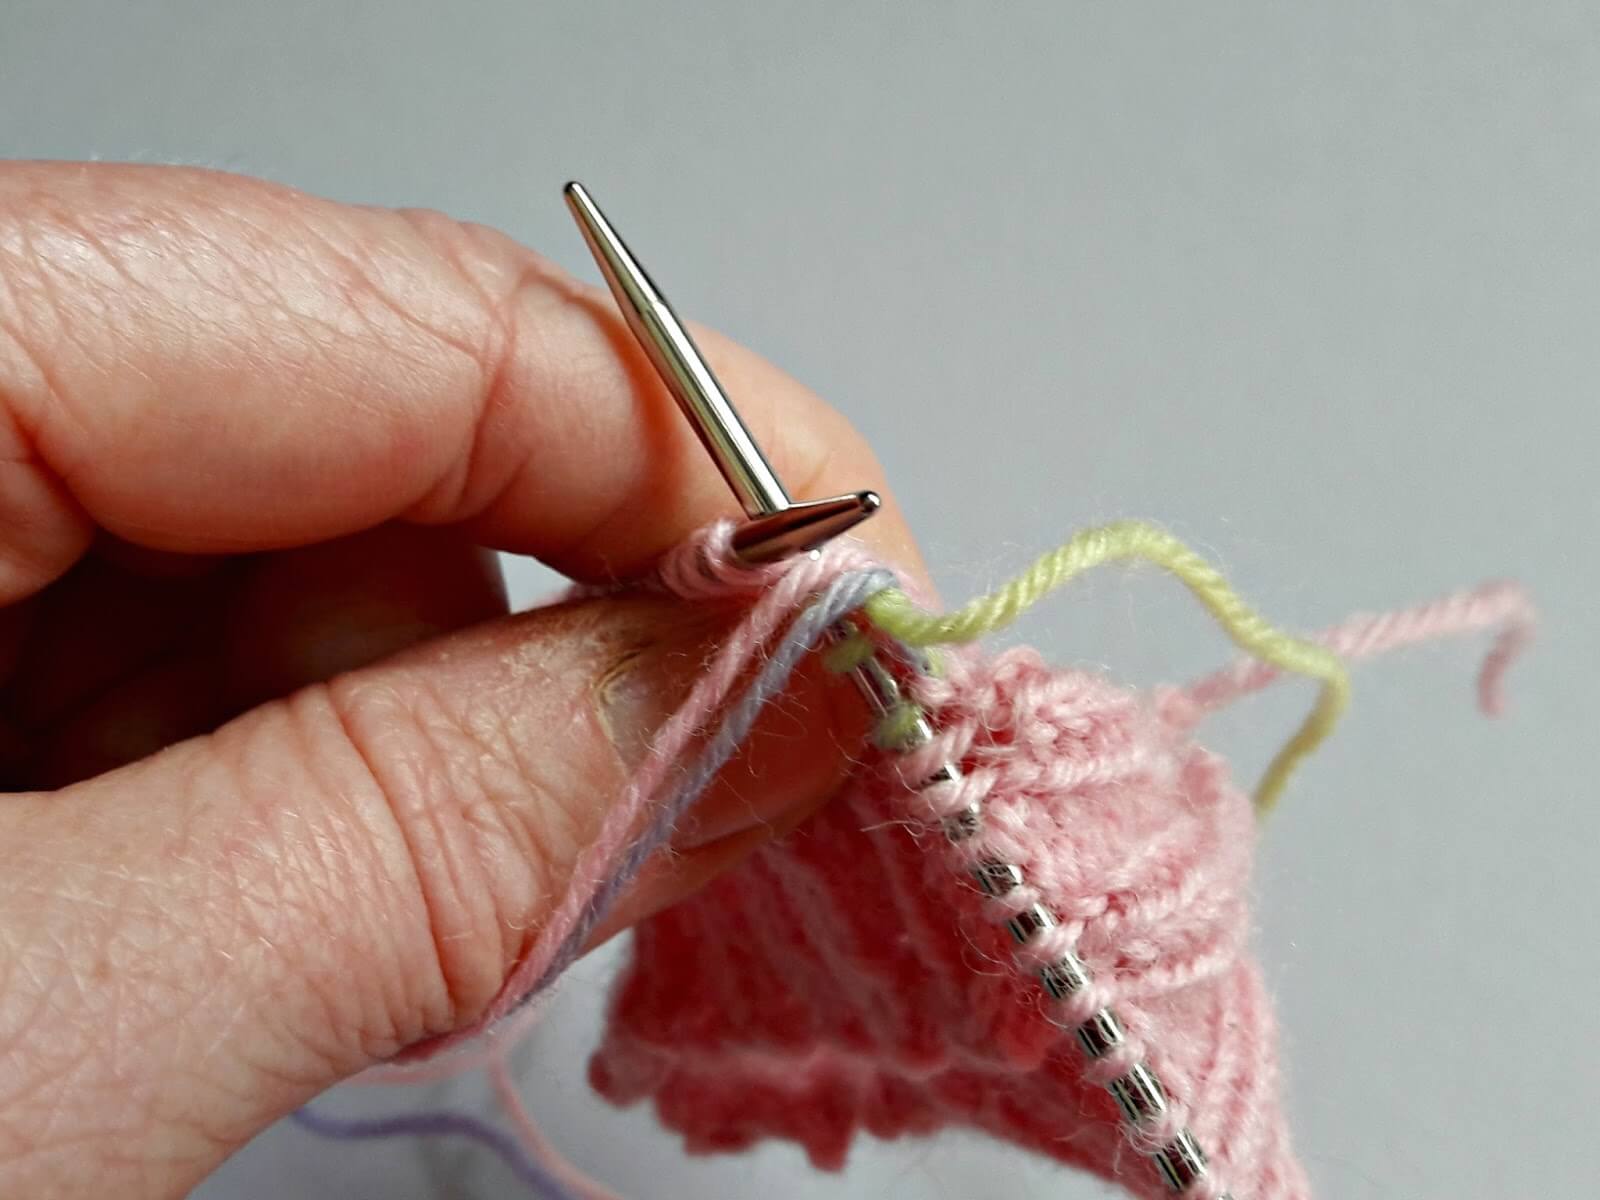
Make the stitch and then take the “old” yarns back down over the working yarn.

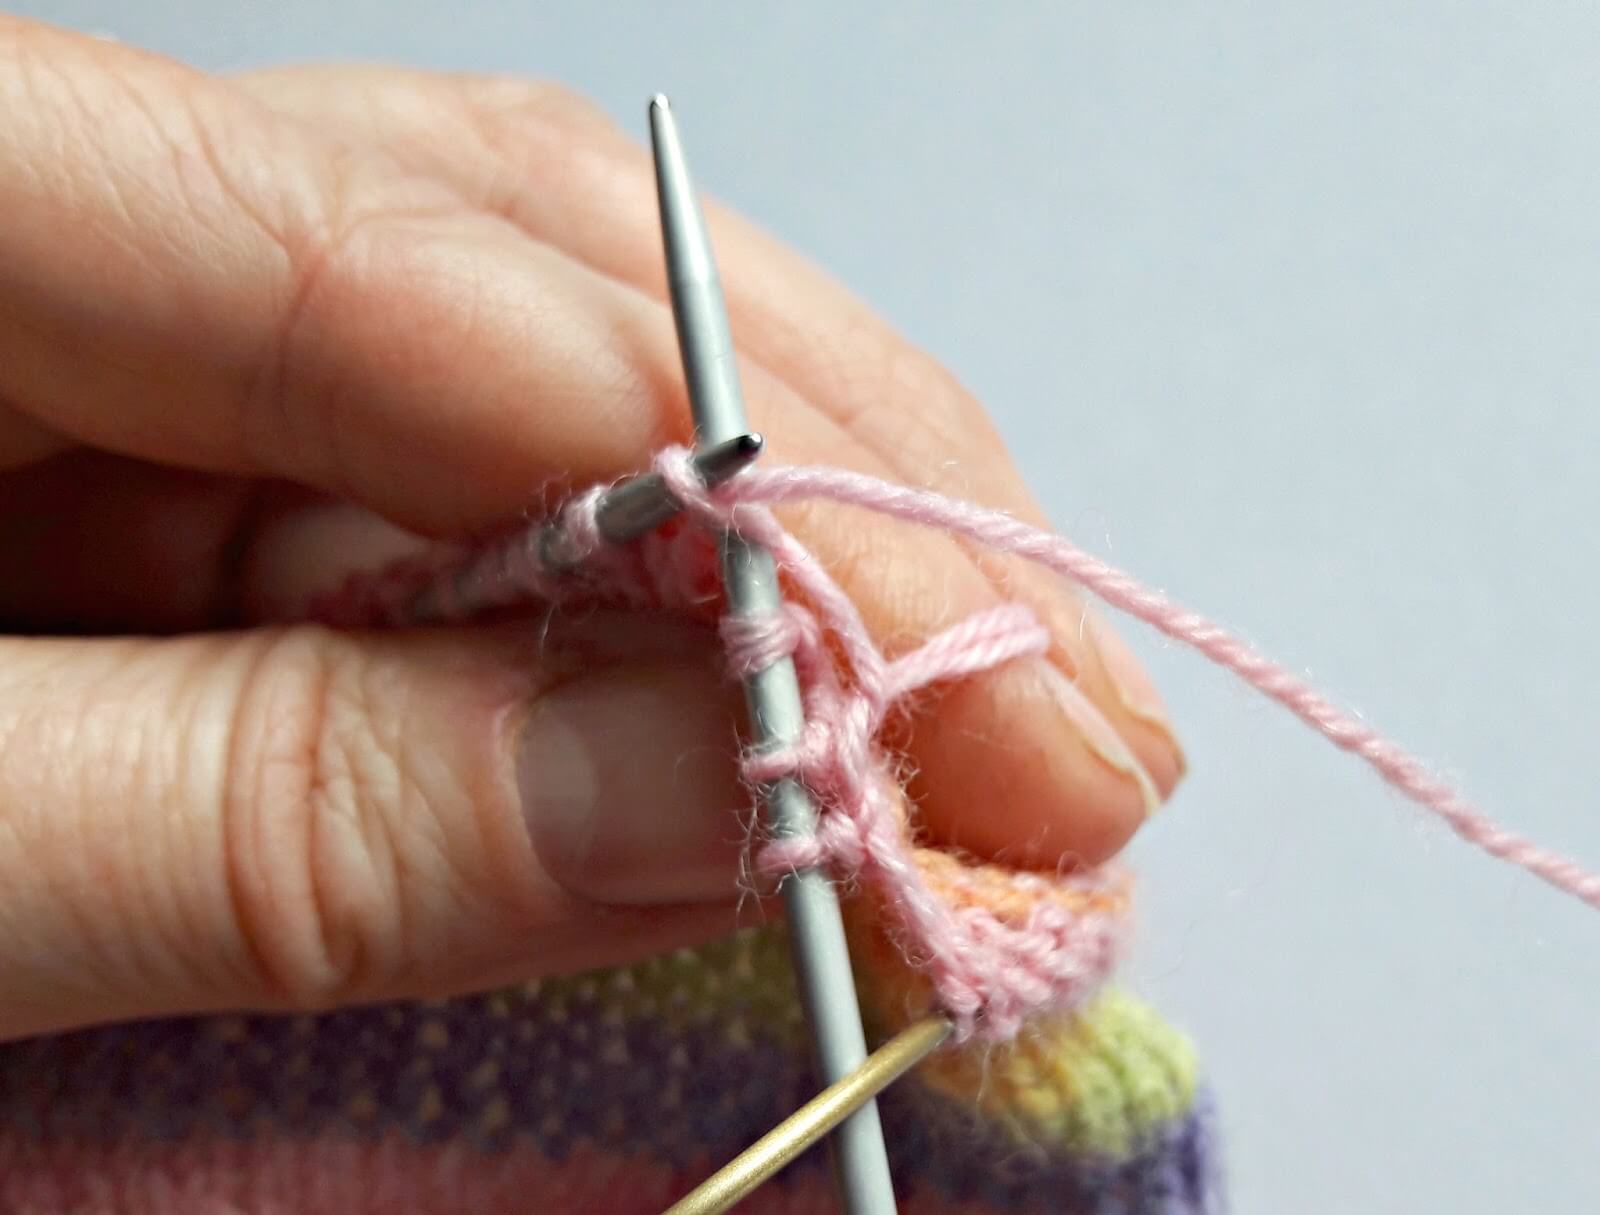
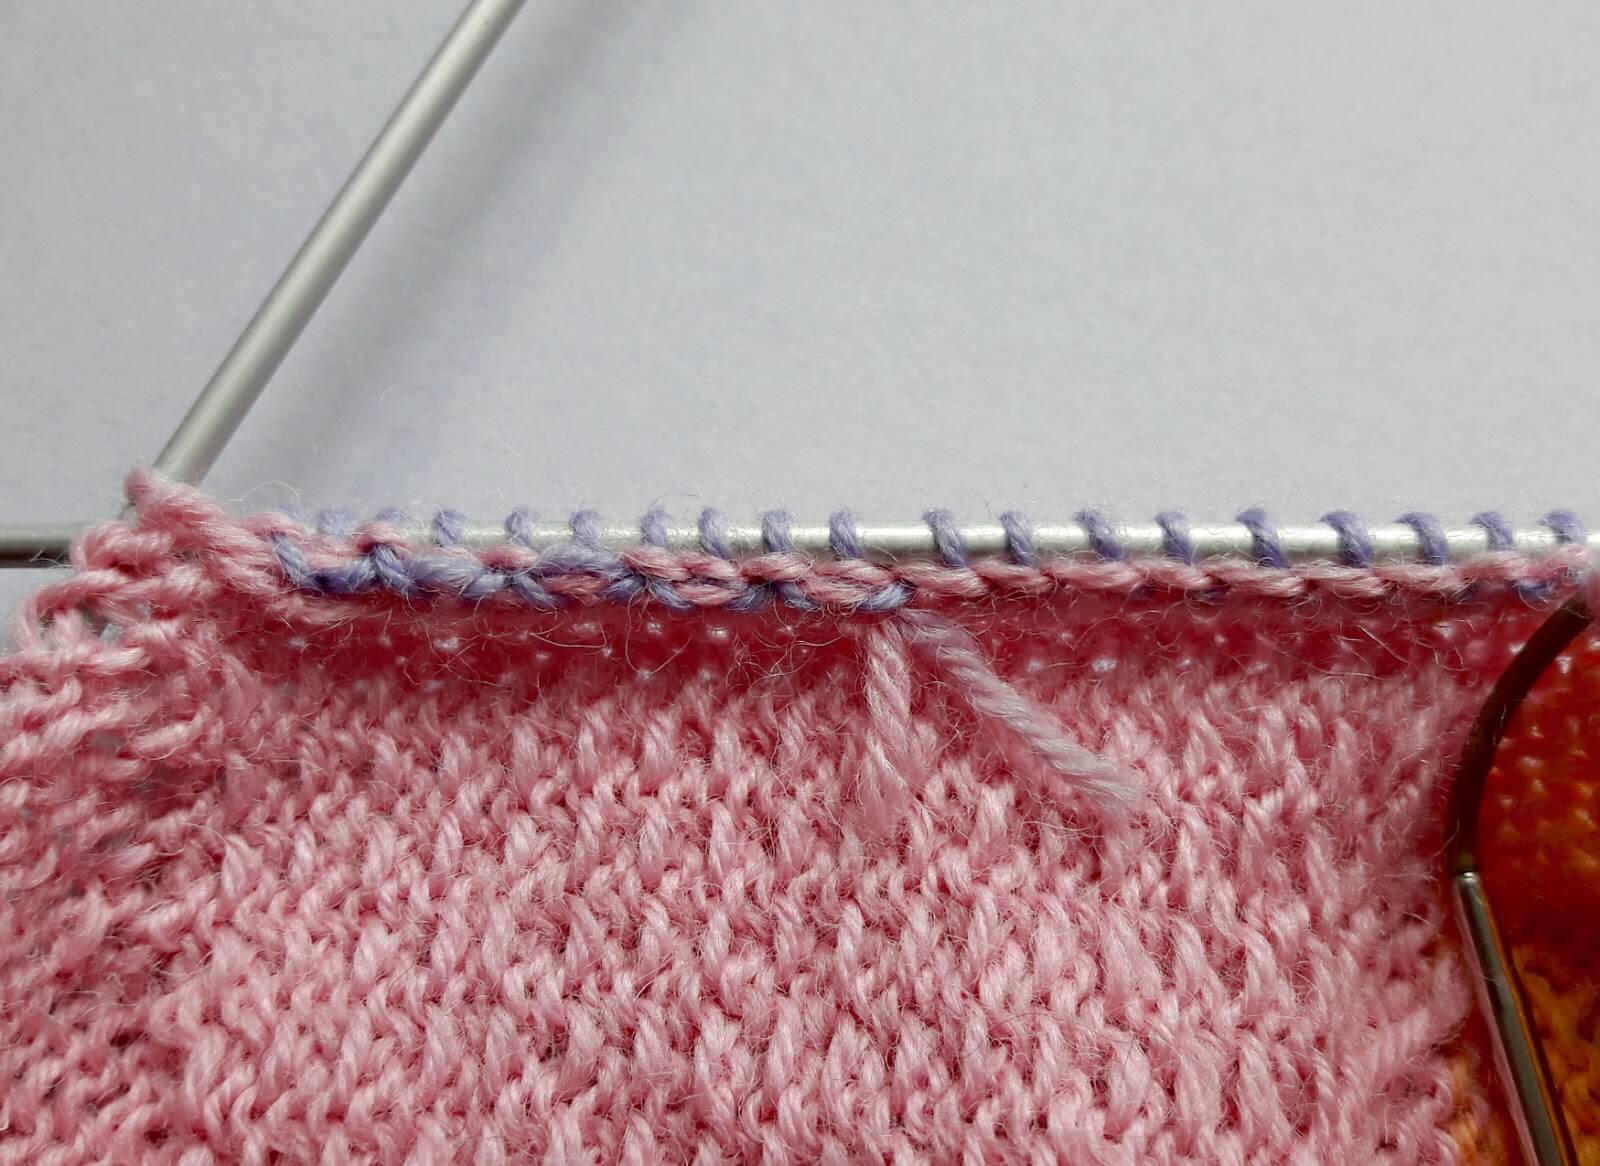
I usually weave the stitches in for about an inch or so – ten or twelve stitches perhaps – so that I know they’re not going to easily work their way out again and create a hole. The working yarn creates a upside-down V-shape over the “old” yarns and by bringing the yarns up and down over the working yarn, the whole thing sits much flatter and is much more secure than if you were to just keep bringing the “old” yarns over the top or underneath in the same direction all the time.
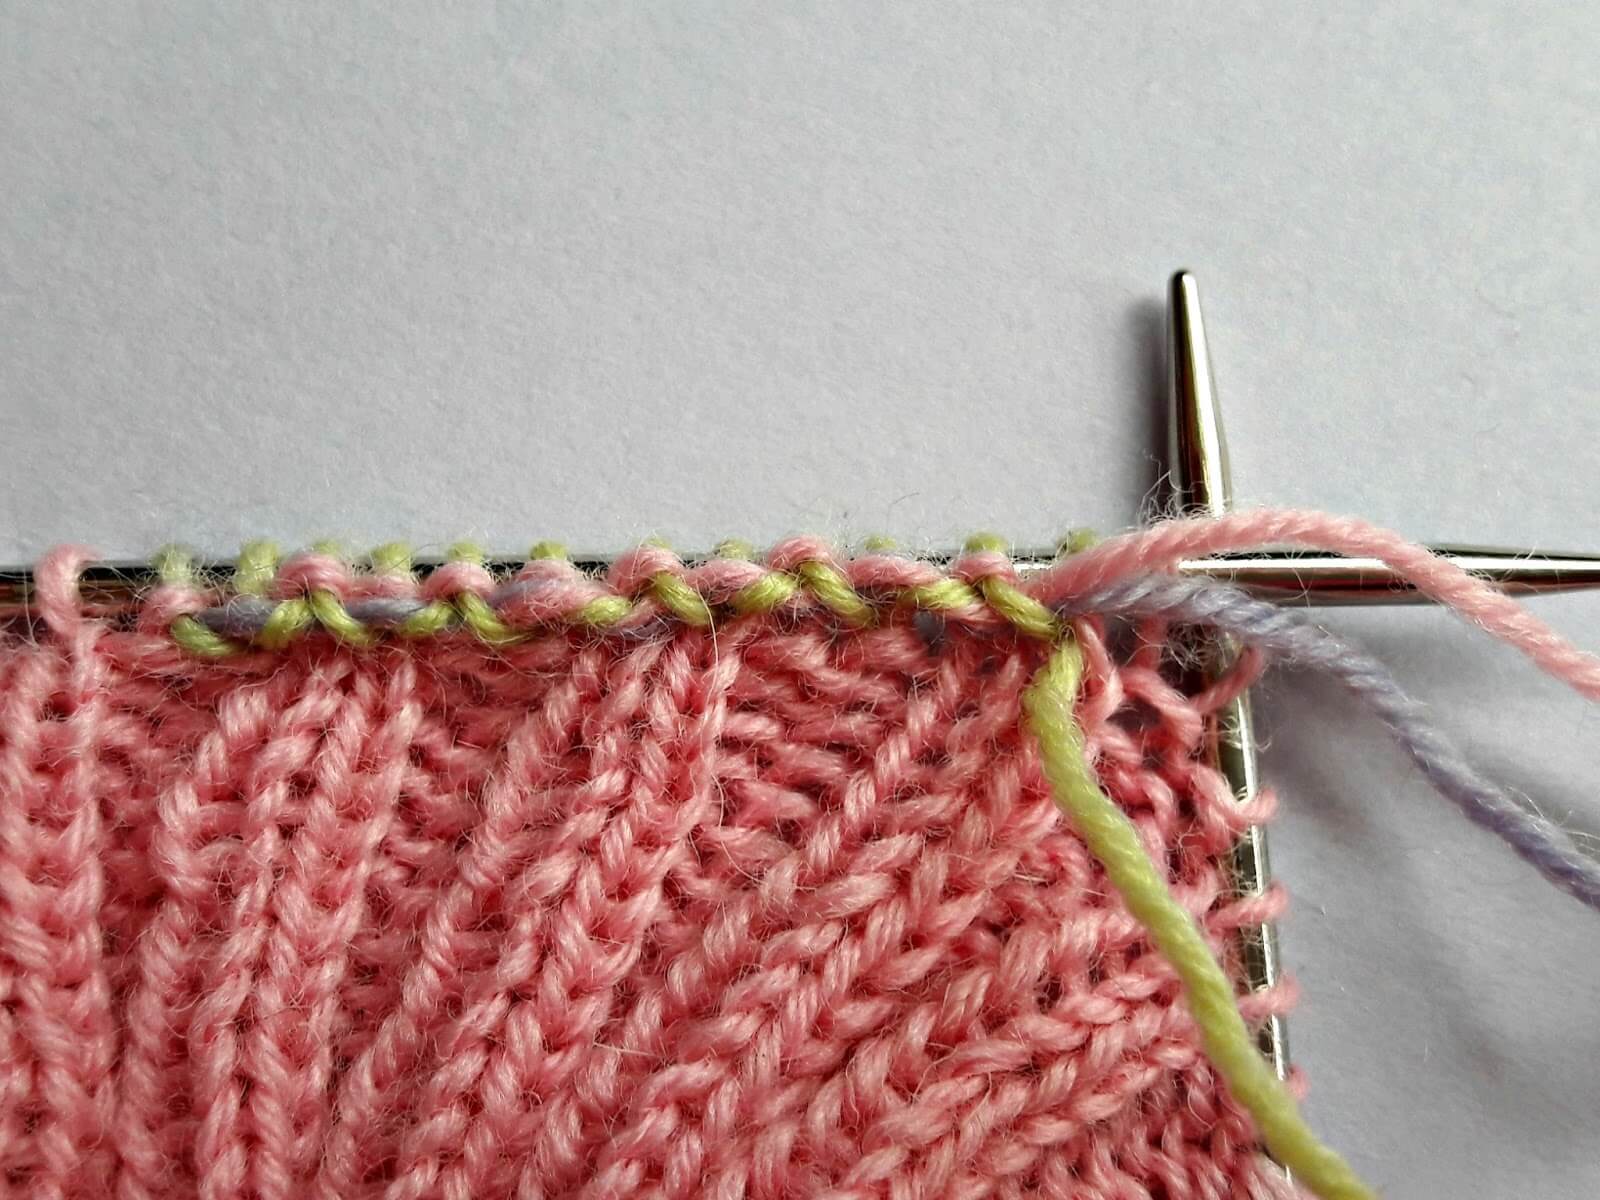
When I cut the yarns, I leave a short end so that I can tighten the stitches up if I need to by pulling the ends. The stitches that are circled sometimes look a bit loose as you continue with your sock but by pulling one or more of the ends you can easily tighten them up. I don’t tidy up that short end until I’ve finished knitting the whole sock, then I can make any last-minute adjustments to the look of the stitches before I cut.
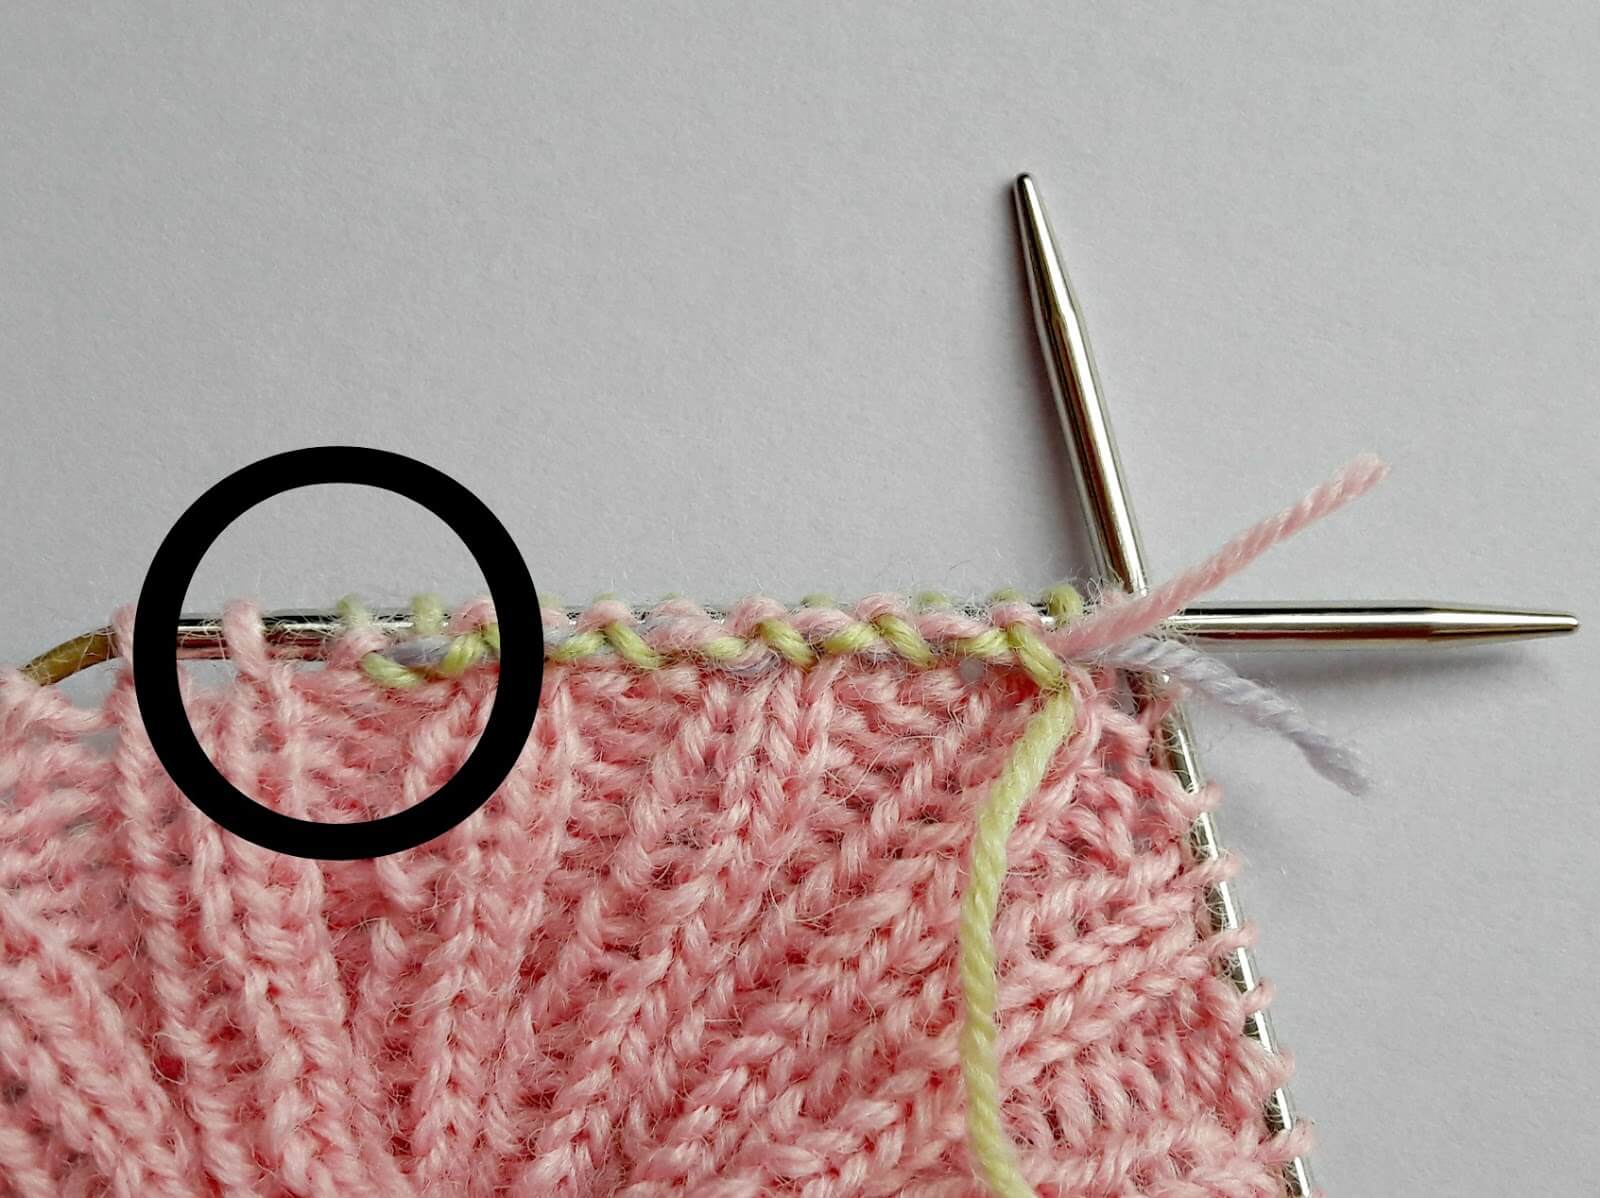
** NOTE ** Depending on the yarn you use, sometimes there’s an obvious “big stitch” where you’ve wrapped the two yarns behind your knitting. Often, you can deal with this by pulling the stitches on the right side with a wool needle to even out the stitches, but if you’re using yarn that just won’t play nicely, you could wrap the two lengths of yarn on different rounds – one on the first round and one on the second round – and that will solve the problem.
Heel flap
When you get to the heel flap, you’ve got a few choices over what to do with your working yarn. At the moment, the yarn is at the right hand side of what will be your heel flap and when you start to pick up the gusset stitches you’ll need it at the left hand side. You can either:
- Leave the yarn where it is ready to pick up the second set of gusset stitches, but if you do that then the first set of picked up stitches and the top of the foot stitches will be knitted in the same colour as your heel flap until you get round to where you can pick up the main colour again. That wouldn’t be a problem on the sock I’m making as it’s all the same pink colour, but if you’re using a completely different colour then it might look a bit odd.
- Leave the yarn where it is and pick up what would usually be the second set of stitches first – you can choose then whether you start your decreases on the SSK stitch or whether you work an entire round so that you work the decreases as per in the Sockalong instructions.
- Carry the yarn across the bottom of the heel flap, weaving it in as you have done for the new colour so that it’s in the right place for the top of the foot stitches, but it means that you’ll need to pick up the first set of gusset stitches in the contrast yarn and again, if you’re using a completely different colour for the heel you might not want to do that.
- Cut the yarn and re-join in once you’ve completed the heel turn ready to pick up the gusset stitches so that you’re using the main yarn for all of the leg and foot sections.
All these choices! Because I’m working this in conjunction with the Sockalong tutorials, I want to keep everything the same in terms of how you actually create the sock to try to keep everything less confusing. I’m going to cut the yarn and re-join it to create the gusset stitches, so I’ll show you how I do that. First, though, it’s time to make the heel flap. Just as for adding the yarn at the cuff, you need to start by knitting the first stitch in the new yarn (remember that you knit the first stitch of the first row of the heel flap instead of slipping so that you don’t get a hole at the join).
Then it’s simply a case of carrying the “old” yarns over and under the working yarn as you did before.
However, this time, because you are slipping every other stitch then you won’t be able to catch the “old” yarns under the working yarn for every stitch, but it will still hold firm if you work it under every other stitch. Just slip the stitch as you would normally …
and then catch the “old” yarns under the working yarn for the next knit stitch.
This is what it looks like on the inside of your heel flap. I weave in for a few more stitches on a heel flap than I would do for elsewhere on the sock to compensate for the slip stitches, but the yarns won’t work loose as long as you knit them in despite being across slip stitches.
Gusset stitches
Once you’ve worked your heel turn and you’re ready to pick up your gusset stitches, you just join in the main yarn again as you have done on the other sections. In this picture, you can see that my new working yarn is purple (which will keep my stripes in order) and the pink contrast is now the “old” yarn. Put your needle into the stitch ready to pick up and knit the first stitch using the main colour yarn as the working yarn.
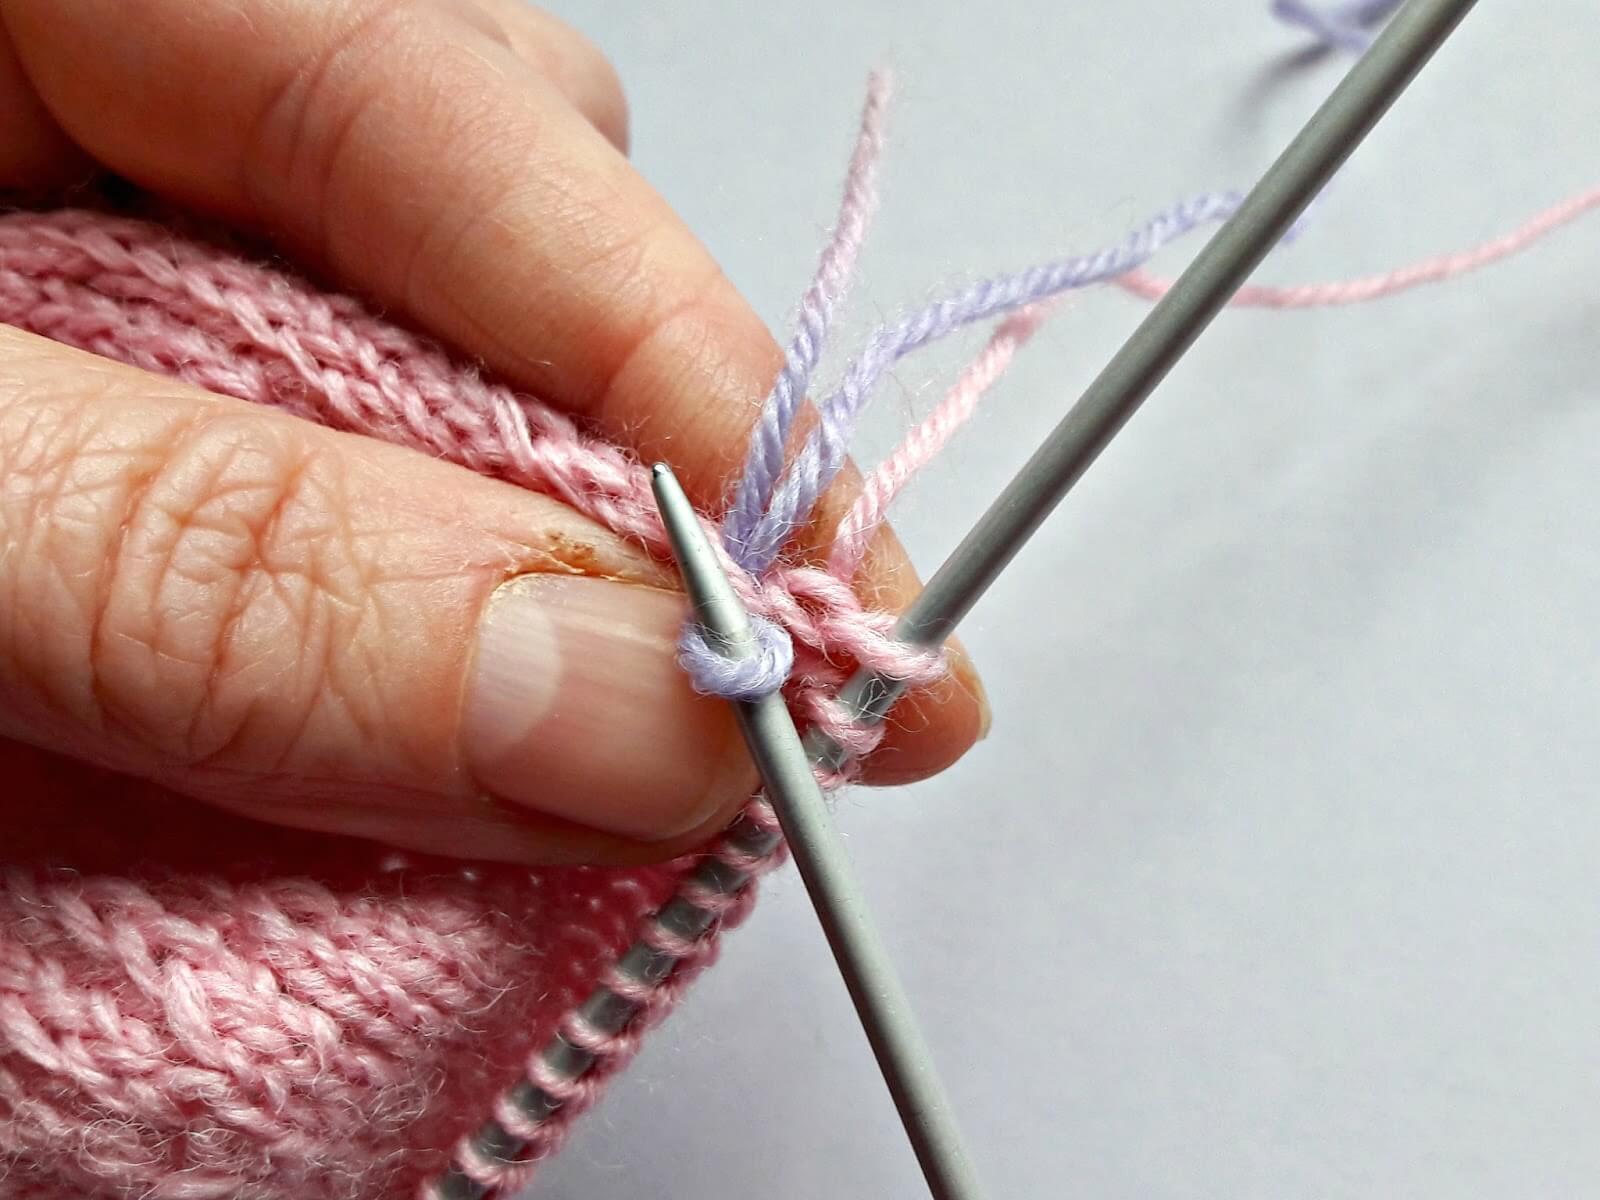
Bring the “old” yarns over and under the working yarn just as you have done before – picking up and knitting stitches is no different to knitting other stitches …
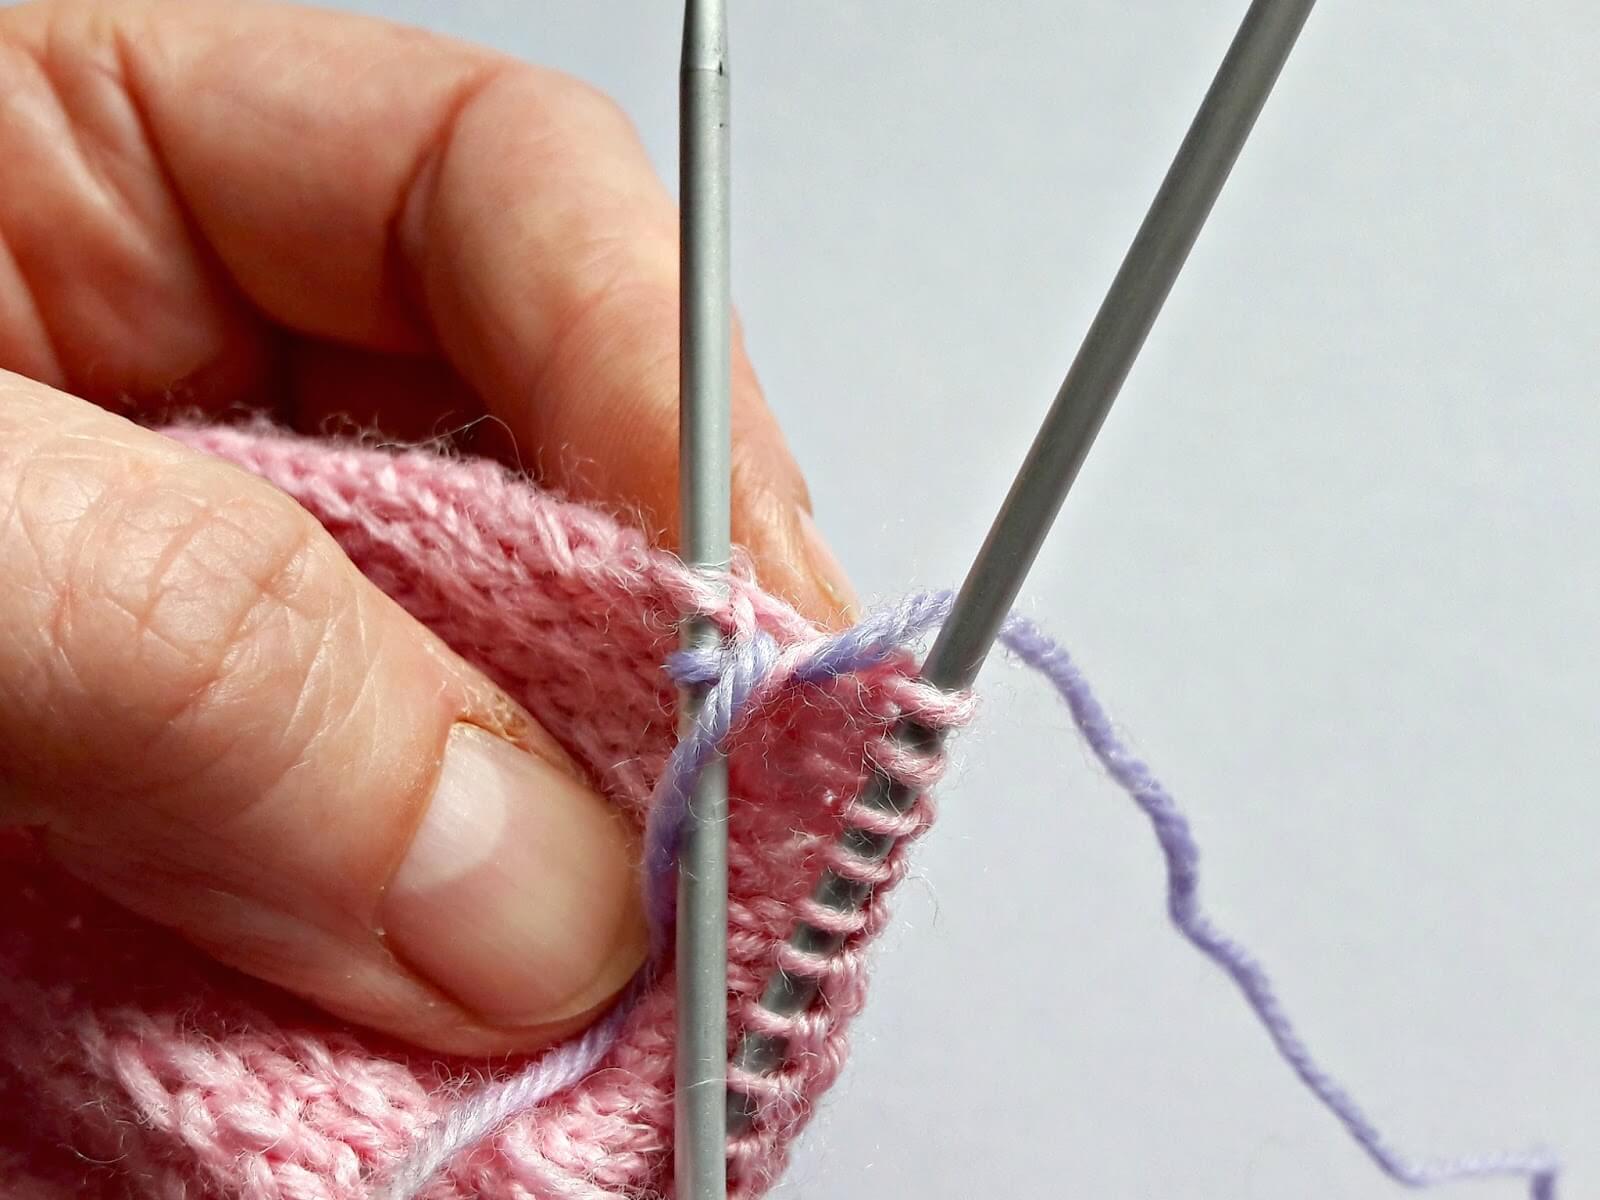
This is what the yarn looks like along the gusset once you’ve woven the “old” yarns in. Just as before, I always leave short ends so that I can pull the stitches tighter if I need to.
Toes
When you come to change the yarn at the toes … you’ll know just what to do! It’s exactly the same process as you’ve used in every section, weaving the “old” ends in for about an inch or so to make sure that they’re secure as you change the colour. If you’re worried that you’ll feel the ridge where you’ve woven them in across the top of your foot, either join the new yarn in a few stitches before the end of the last round (you’re unlikely to feel them if the stitches are in the gap where your big toe joins your foot) or work one more round and weave them in on the bottom of your sock – one extra round really isn’t going to make any difference to your sock.
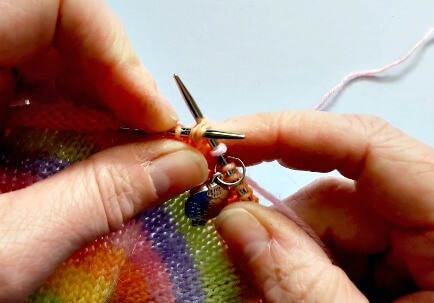
You can see in this next picture that I’ve knitted the first stitch and am now about to make the first decrease stitch (remember it’s an SSK stitch on the toes!). Nothing changes about this other than that you’re going to be weaving in the “old” yarns at the back of the work; you knit the decrease in exactly the same way as you would do normally.
And that’s all there is to it! Just by bringing in different coloured yarns you can make endless pairs of unique socks which you can either match or not depending on your preference. It’s a great way to use up all those odds and ends of yarn which might otherwise be hanging around and taking up valuable stash space 😉
I’ve also made a video of all the sections so that you can see how the yarn is joined rather than just looking at the pictures. Because it’s made by me, it’s not particularly short or concise (another reason to be thankful that I’m a blogger and not a vlogger or podcaster!) but hopefully you’ll find it useful!

Do let me know how you get on with changing colours in your socks, you can always post pictures to show me on my Facebook page as well as in the Sockalong Facebook groups! 🙂
This tutorial is free on this blog and will always remain so. If you’ve enjoyed using it and would like to support my work so I can keep blogging and designing, you can browse my shop for patterns and books or buy me a brew – both are very much appreciated. Thank you! xx


This pattern is based on my Basic 4ply Socks pattern, which means that you can find photo and video help in the Winwick Mum Sockalong tutorials. You can find out more here:
If you can already knit socks but would like to stay in touch, click the link below to join the Winwick Mum mailing list to hear about the latest blog posts, pattern updates, tutorials and more … but no spam, I promise!


This is the way I have always done it , tried different 'clever ' ways but finds this works well for me too. Great to see pics of it. Thank you.
It never hurts to know different ways of doing something, but this way is nice and solid if the others seem a bit too clever sometimes! 🙂 xx
Christine, your video is so helpful! I didn't quite get the idea from the tutorial, but the video made perfect sense. I also figured out a couple of things that I've been wrestling with in the regular sock pattern, just from watching you. We really need a series of "Sockalong" videos, those of us who learn better by watching someone actually knitting the sock. Thanks for all you do!
Oh good, I'm glad it helped! Yes, there are Sockalong videos in the pipeline, I just need to get myself organised to get them finished and uploaded! 🙂 xx
Thank you Christine for the tutorial on joining the yarn, so easy and neat. I will now use this method for other knitting also, it will save time weaving in all the ends. Your book arrived last week and I love it, thank you. Kindest regards. Lenore
Oh good, I'm glad it arrived safely! Yes, this method works with all kinds of knitting projects 🙂 xx
Fabulous tutorial and the youtube videos are great too.I knit back to front ie lefthanded so I presume I just reverse direction when I come to picking up stitches – I usually reverse patterns!Thanks x
Thank you! Yes, I expect that you'd be knitting your sock in the opposite way anyway (I usually knit clockwise around the needle) so you'd just pick up from the other side which would actually be the right side for you 🙂 xx
Just completing sock number 1 for the 2017 Sock Line, Christine. Here it is:
uk.pinterest.com/pin/129267451787753318/
Coming up to the dreaded kitchener stitch!
I have been knitting for 18 years and have never seen anyone else weave in ends whilw knitting. I have picked up crochet and that is one of the things I love about crochet, because I absolutely despise weaving in ends! I have just started knitting aocks and was just wondering if there was a special way to do contrast heels amd toes and happened upon this tutorial. Game changer!!! I will be using this in ALL my knitting now! Thank you, thank you, thank you!!!
That's brilliant, I hope this really helps you! xx
I plan to do a bit more researching but in the meantime, I am knitting 2 at a time toe up socks. I have been struggling with learning to incorporate contrasting colors (toe, heel and cuff) mostly when it comes to the “fleegle “ heel because (I believe) in order to achieve the look, I need to knit with the contrasting color on the gusset side but, knit with the main color on the instep side. Does that make sense? I am trying to adapt your beautiful instructions to my dilema I’ve just described, but if you have insight I would love to hear it. Thank you for your resources! I’ve only just discovered you and I am so at ease with your lovely style of teaching:) Thank you!
Hello! It’s lovely to see you, thank you for taking the time to write to me! I don’t knit toe up socks so haven’t used the Fleegle heel personally, but I’ve just done an internet search to see if there’s anything out there that might help you and not one of the images for the heel are in a contrast yarn, so perhaps it’s not something that can easily be done. Perhaps you could just use the contrast for the toes and the cuffs and not worry about the heel? That seems to be the only way you could do this without having lots of cut ends to deal with! xx
Hi, I’m trying to purchase the August 2016 update of your Super Socks book, but all the listings on Amazon say first edition July 2015. And your link to the updated pages no longer works. Are the ones you sell through your website the most recent version? Thank you.
Hi! I’ve sent you an email. The latest book version which should be on Amazon now is November 2023; there are a few error corrections but nothing substantially different to the August 2016 version.
I have knitted 3 pairs of your basic 4ply sock and a pair of lacy socks. I have had no problems with tension, on those socks. Each pair fit lovely( they were made of wool and nylon except the lacy ones which you were kind enough to help me with). I have bought some Yarnsmiths merino yarn, after 3 tension squares the nearest I can achieve is 30 stitches(28 stitches per 10cm) on 3mm needles. I have also cast on 64 stitches instead of 60. The result is loose and no where near as professional looking as my previous attempts but at least I can get it over my foot which wasn’t the case when I used 2.5mm needles. Do you have any suggestions as I am u happy with the result so far.
Hi! I’m not quite sure what’s happened with the Yarnsmiths yarn for you – I’m sorry if this is a daft question, but you definitely have the Yarnsmiths Merino Sock yarn there and not the DK, don’t you? It seems strange that the tension is so far out for 4ply. Do you want to drop me an email with some photos and I’ll see if I can help further? Alternatively, you could speak to Wool Warehouse and see if they have any ideas.
I couldn’t see your email and can’t leave a picture here but it is definitely merino sock superwash. The needles show 2.25-3.25mm and a tension of 28st 36 rows. I made the classic error of starting my sock without a tension square as I had achieved the correct tension on the first 3 pairs ( i dont count the lacy ones as those stretch) so had just dived straight in. Obviously this is when I found out they didn’t fit. I had reached the heel flap and found I couldn’t get it over the heel. first count I had 17 st to 5cms on 2.5mm needles. Next I tried 2.75mm straight needles to knit a tension square, I don’t have any other needles in that size. I got 16st to 5cm. I checked 3mm after that on double ended pins and got 15st. My square was 25 St wide and I knitted enough rows to be able to follow your tension guide. I put in pins as you did and slid my tape measure under them and used a tapestry needle to count each v. I have tried to work out some sort of conversion by saying that to achieve a correct fit I need to add 6 more stitches ( 17_14=3 two repeats 56st) on 2.5mm needles which I find gives a nice looking sock. As previously stated I did two rib rows on 3.5mm straight needles then changed to 3mm but the results look loose and the knit isn’t as good. I tried on the cuff and even with an extra 4 st it felt tight over the heel although to be honest it is more difficult to tell with so little knit. I am going to pull out again for the 4 th time and go back to 3mm and 2.5mm and cast on 68st. if this fails I am not sure what else to do. I have taken photographs. I suppose the learning curve here is not all 4ply is the same. thank you for all your help you are very generous with your time and skill.
Ah, I couldn’t link to my email address through the comments – the contact box is in the sidebar to the left, but I’ve got your message anyway 🙂 The email is [email protected] if you do want to send me some photos.
The yarn is definitely 4ply – 28sts per 10cm (4in) makes 7sts per inch. If you got 17sts to 5cm, that’s 8.5sts per inch (1″ = 2.5cm) on 2.5mm which is a little bit looser but should actually be fine. Industry standard is 7.5sts per inch for 4ply but as you’ve noticed, there are differences between yarn brands – it’s just how it is with different sheep fleeces and spinning processes.
When you tried your sock on and couldn’t get it over the heel, had you started the gusset at that point? It can be near impossible to get a sock leg over your heel without the heel itself as it won’t stretch properly, so I generally recommend that people wait until that point before trying to get it over their foot. Whether or not you had completed your heel, we need a plan for this yarn! What I would suggest now is that you pick the fabric that you like best (probably the one on the 2.5mm needles) and then we’ll work out what number you need to cast on. It needs to be a number divisible by 4 so that you don’t run into problems with the heel flap and later on, the toe decreases, but I can help you do that. Do you have the measurement of the ball of your foot and we can use the 8.5sts per inch to work out the cast on number that you need?