
Easy Cable socks tutorial … getting started
I’m nearly ready to share my new sock tutorial with you, but before I do, I want to talk a bit about what my tutorials are going to be about this year.
It’s been nearly two years now since the Sockalong started, and the idea behind the Sockalong tutorials was always that they would be a springboard to other patterns. Not just the patterns that I write from time to time, but the thousands of other wonderful sock patterns that are available online and in print because I firmly believe that once you understand how a sock is constructed and have knitted a basic pair, you can pretty much tackle any pattern that takes your fancy.
It’s been fascinating to be able to see first-hand through the Winwick Mum Knit n Natter Facebook group just how well this has worked, and I’m truly delighted to have been involved in setting the wheels in motion for new sock knitters to discover the many talented designers out there and seeing so many patterns being tried and shared. However, I’m also aware that for many people, taking that step away from the basic sock is a big step out of their comfort zone, and that sometimes a tempting-looking pattern assumes a certain amount of knowledge that some might worry they don’t have.
My plan for this year’s tutorials is to try to bridge some of that knowledge gap. I’m going to assume that you’ve already knitted a basic sock so you will have some idea of what I’m talking about (and if you haven’t, you can find the step-by-step Sockalong tutorials for a basic sock here – it’s worth looking at those first). In these new tutorials, I’m going to look at various knitting styles and see how they can incorporated into socks and I’m going to start at the very beginning with each tutorial – just like the basic sock in the Sockalong – so that you can use the pattern to practice and then go out and explore other patterns that are available. Once you understand the basics, the world is your oyster – and once you can knit socks, you can do anything! I’m also stepping out of my comfort zone in that for the first time, I’ve recorded short videos to go with the tutorials to illustrate points along the way – why shouldn’t the learning process be a two-way one?! 🙂
I’m going to begin this year’s tutorials with a cabled sock. An easy one, one that should help you to see that cables are nothing more than knit stitches placed in a particular order – and you can already do knit stitches so there’s nothing new to learn there. It’s all good! And there’s a reason why I’ve chosen cables to start off with …
I love cables!
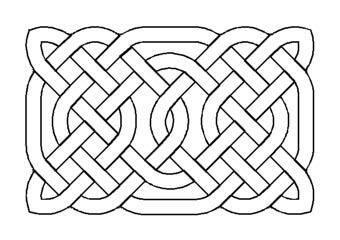
There’s something about the way that otherwise straight up and down stitches move and curl around each other that really speaks to me. The patterns swirl in ways reminiscent of Celtic and Viking spirals and make me think of myths and legends, remote windswept islands and hardy sheep on craggy rocks. These pictures are taken from one of my favourite design books – The Celtic Collection by Alice Starmore. I love looking at the atmospheric photos featuring cables and knotwork and perhaps you can see why. I find cables the most romantic of all the knitting styles and never grow tired of looking at pictures of the different motifs that it is possible to create with pointy sticks and yarn.
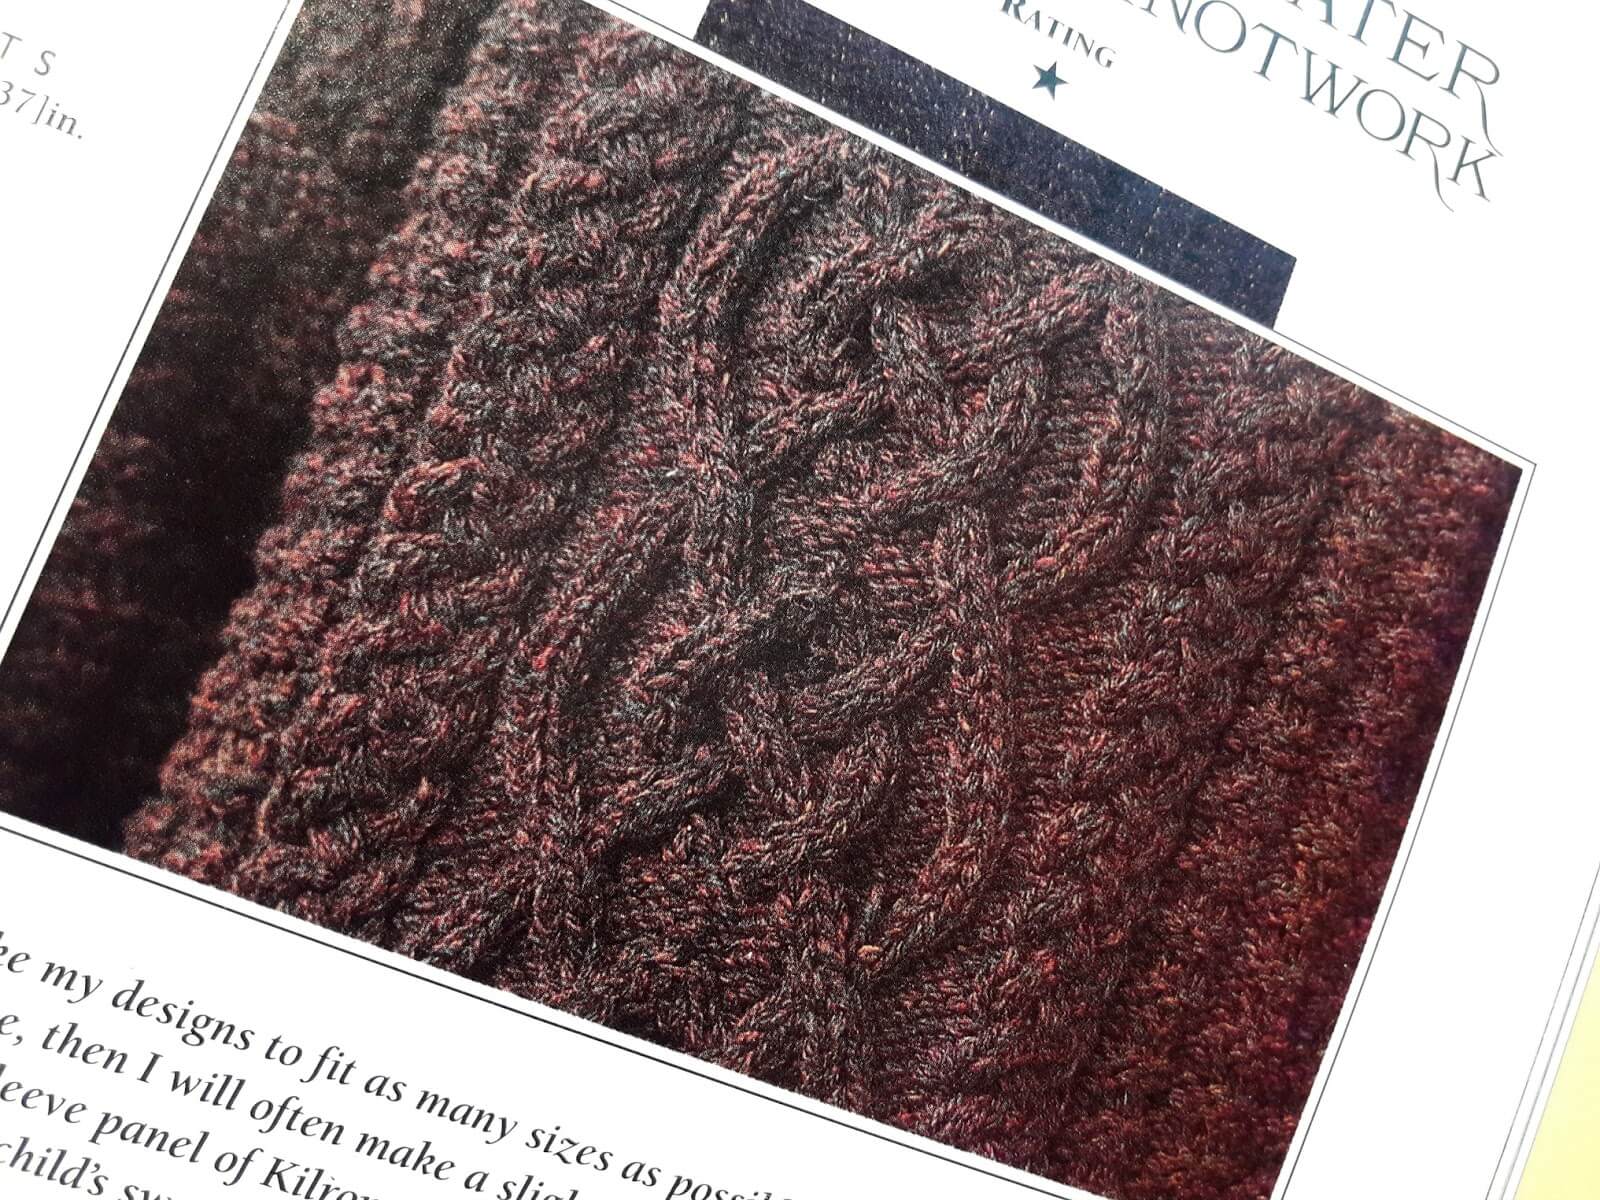

It’s easy to see where the inspiration has come from when you look at Celtic design, and there’s even a suggestion that an Aran cabled jumper appears in the Book of Kells, which makes the tradition very old indeed. More recently, cables had a specific purpose as they were incorporated into fishermen’s sweaters in styles particular to each community to help them be identified in the case of an accident.

Source: https://www.dltk-kids.com/world/celtic/celtic_art.htm
Source: http://www.clanbadge.com/tutorial.htm
Just like socks, though, many people feel that cables are too hard for them to knit.
Charts are involved, and if not charts then there are written instructions that often seem like another language – but just like socks, it all becomes clear if you take it slowly and start at the beginning. And then who knows, you could be looking at patterns like these in no time …!
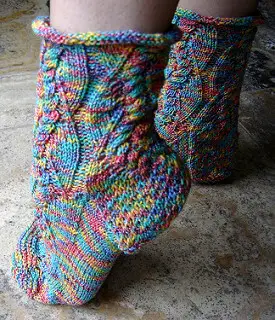
Source: Crooked Cable by Sockbug via Ravelry

Source: Rectify by Rich Ensor via Ravelry
For now, though, let’s not get ahead of ourselves. If you’ve never knitted cables before then hopefully this pair of socks will help to get you on your way. We’re going to go through the basics of the pattern and how the cables work today so that it won’t seem too unfamiliar when you look at the main tutorial.
This is what the Easy Cable socks look like …
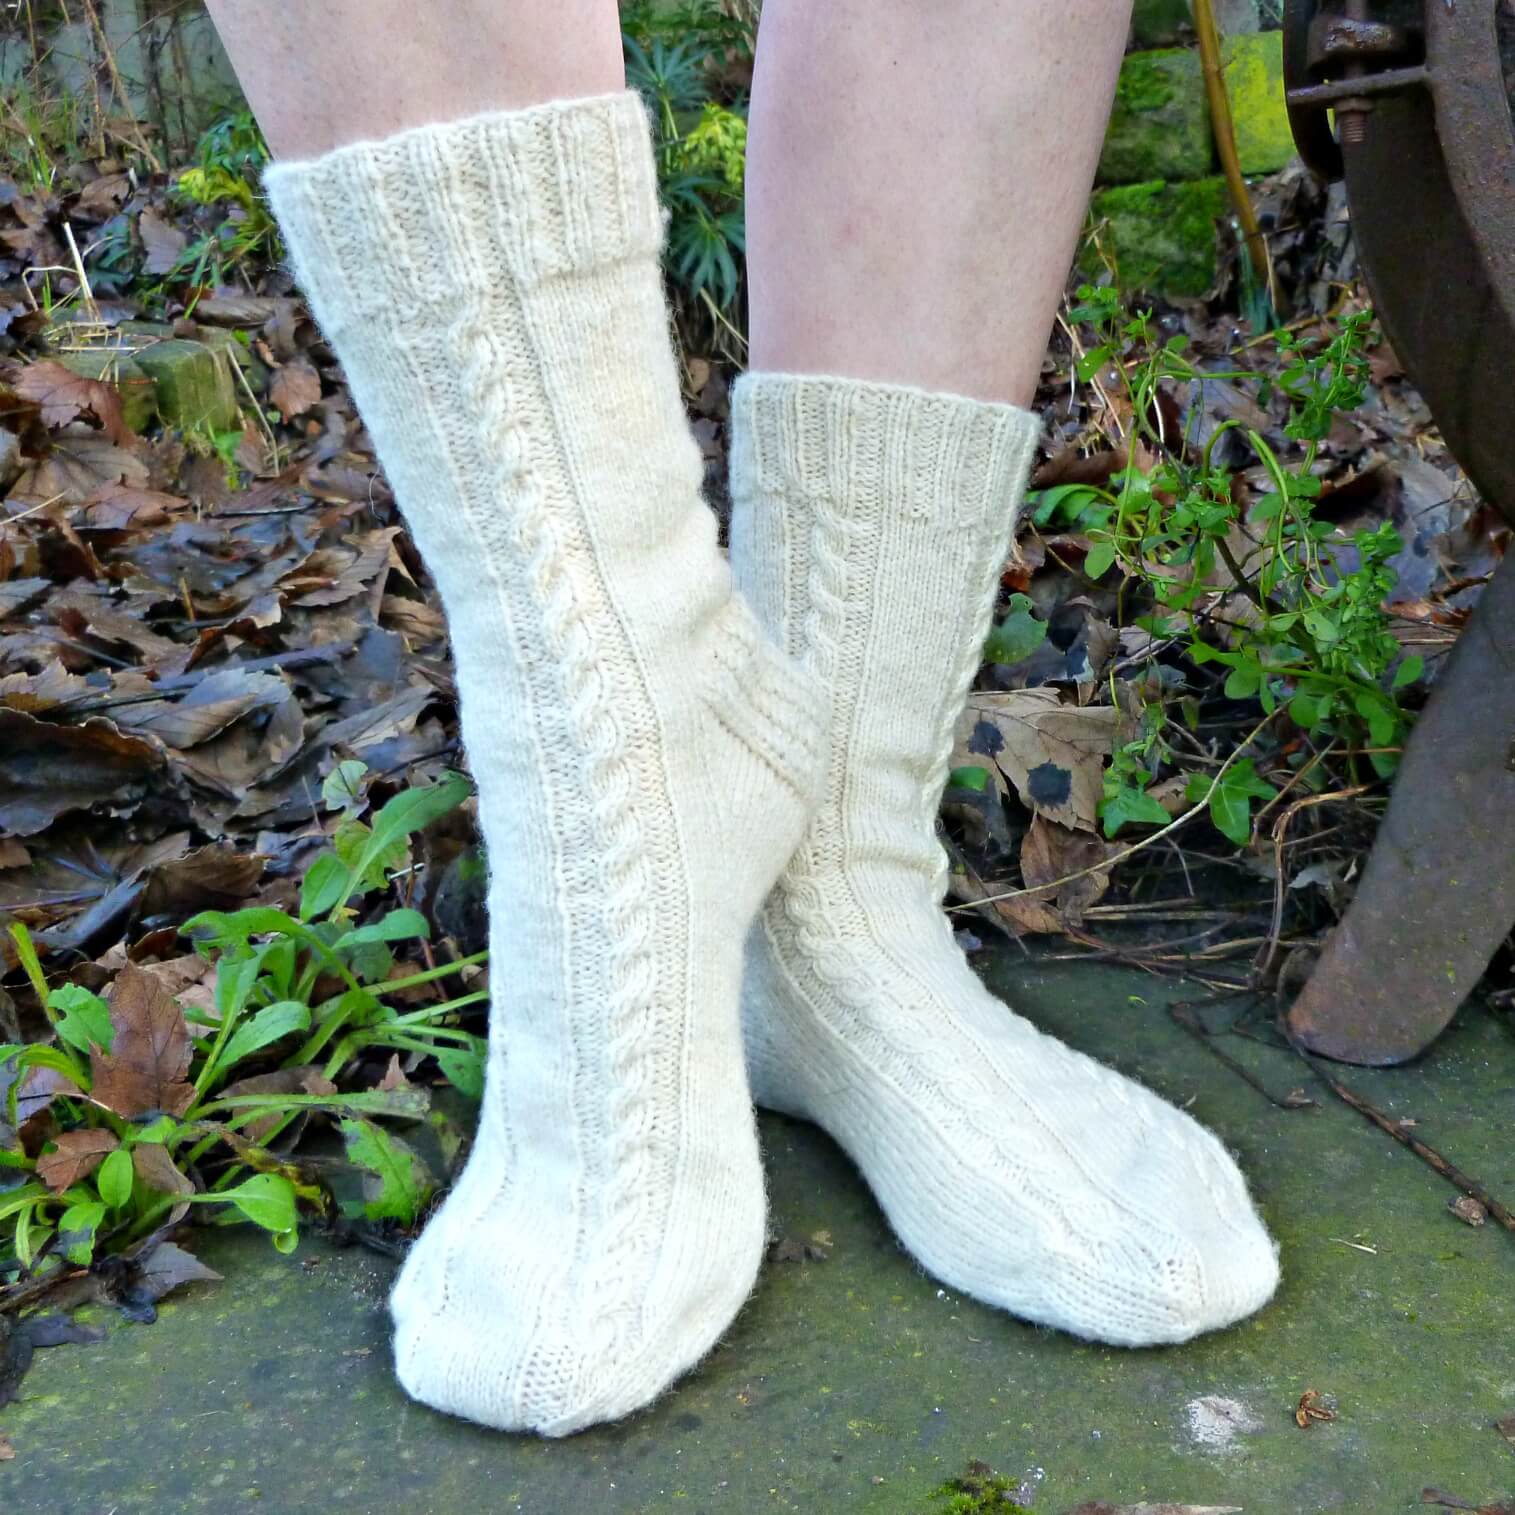
There are two cables which run down the front of the sock; they twist in opposite directions so that they look as if they’re twisting towards each other, but that’s easy to do, I promise!
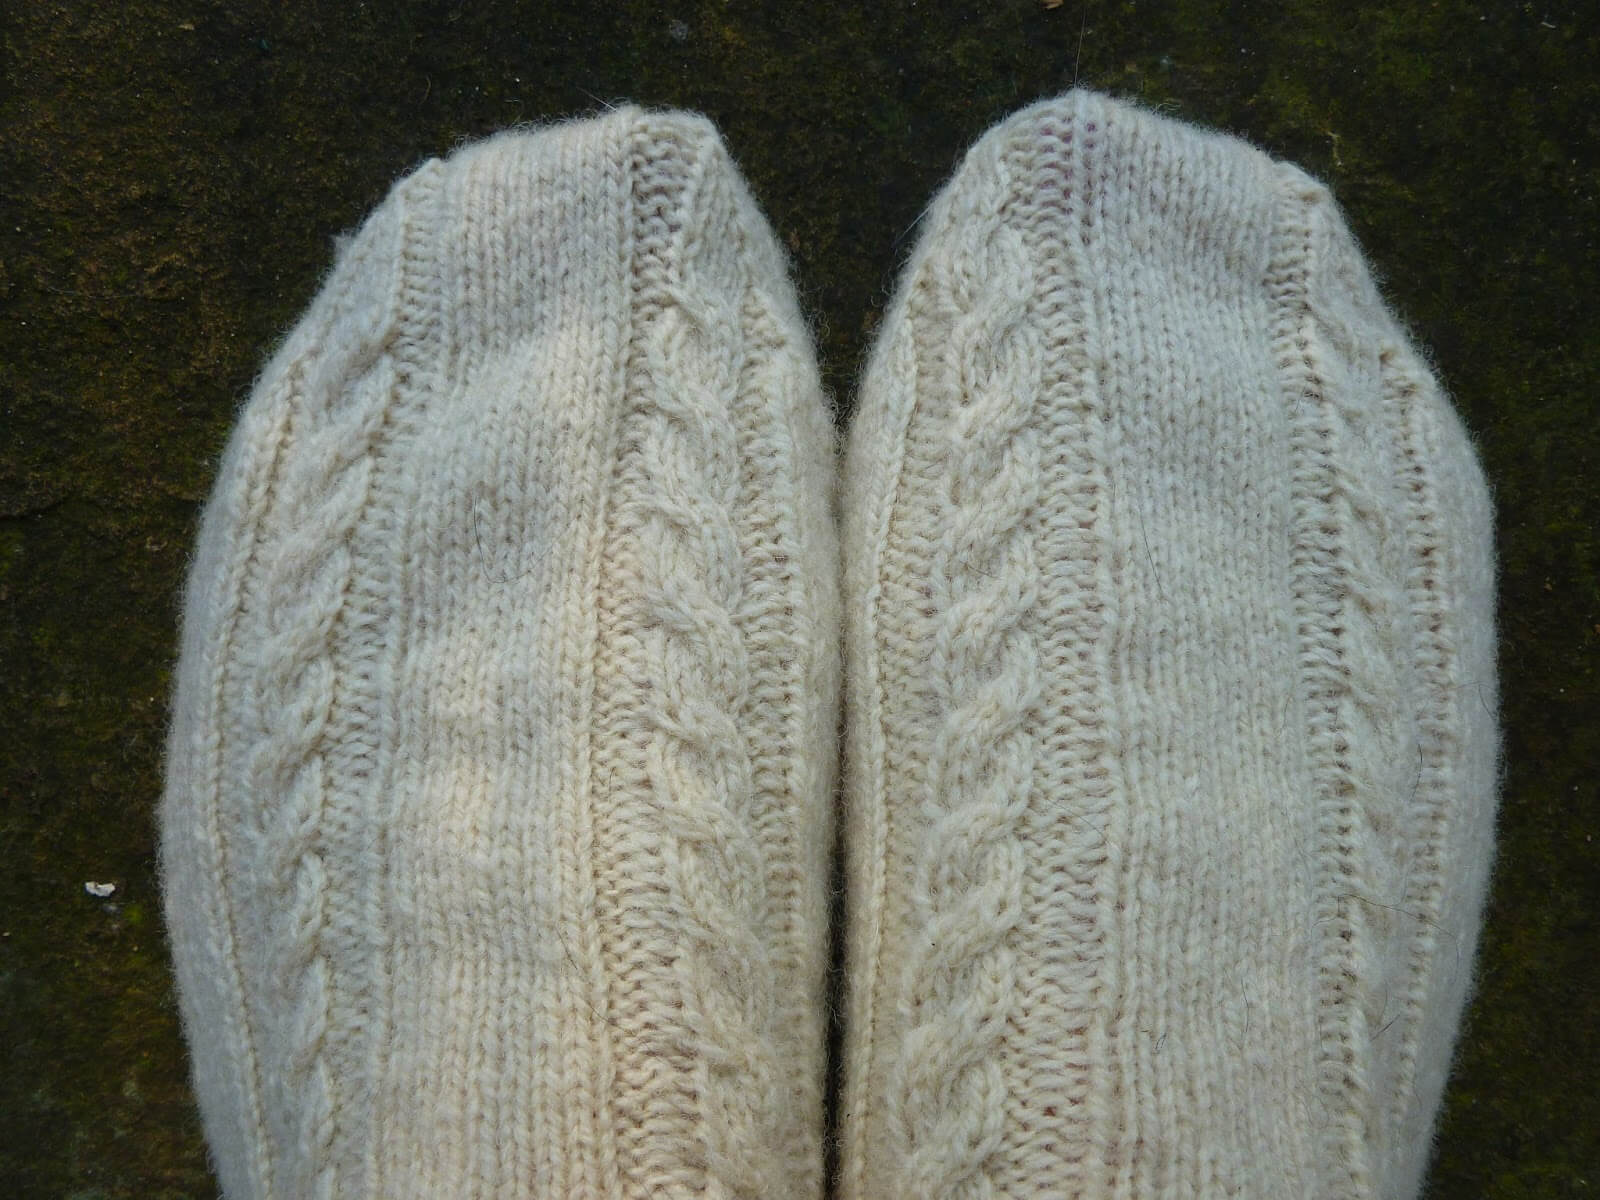
I’ve also created a cabled heel – although the good news is that you don’t need a cable needle for this – which compliments the cables on the front.

The pattern is based on the basic Sockalong sock, so if you need help with the main structure of the sock then you’ll be able to follow along with those tutorials as well.
Would you like to see what the cables you’re going to be knitting look like? I’ve gone for a simple twisted rope which is just four stitches wide, and you can see how the cables twist towards each other …

Getting your knitting to do this isn’t as hard as you might think. Look at this next photo where I’ve created the cable in two colours and you can see that the stitches are just crossing over each other so that it looks as if they are twisting all the way up … (don’t worry, you’ll just be using one colour for your socks!)

What’s happening is that the stitches on the right hand side are being pulled forward to create a twist and the stitches on the left hand side are being pushed backwards. Let’s have a closer look …
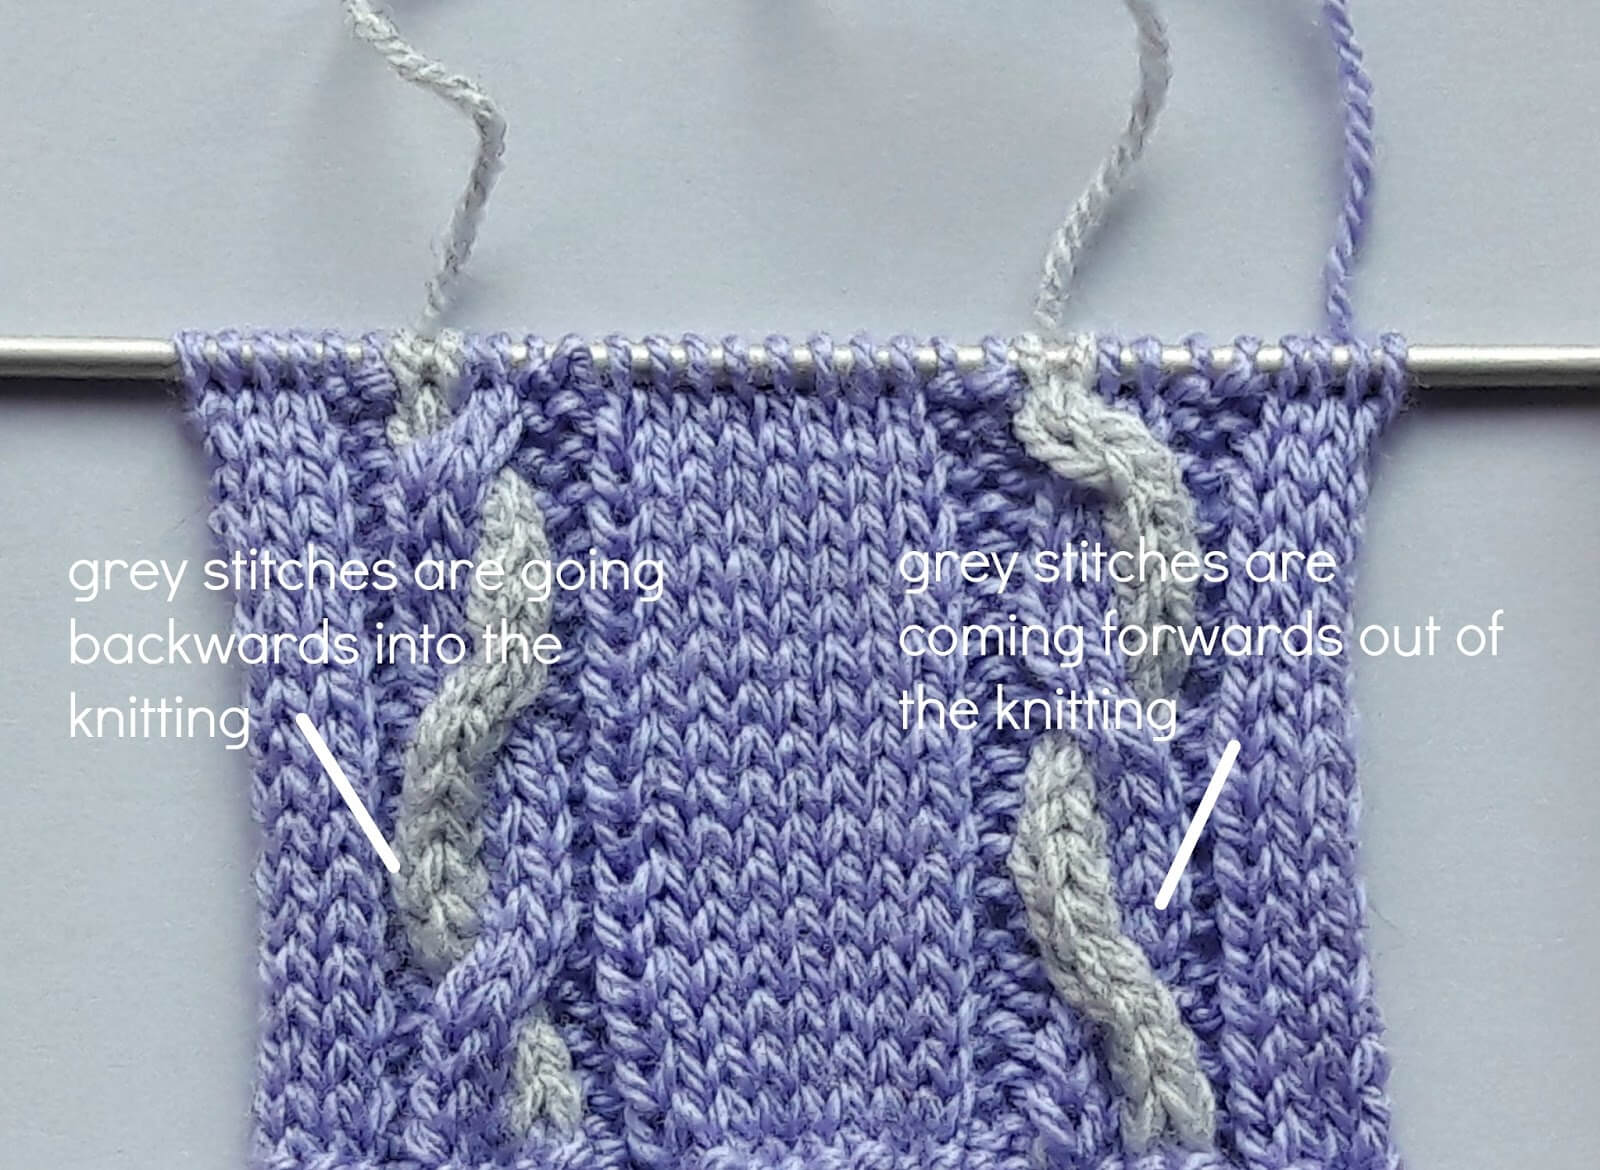
It’s like magic! Straight stitches have become twisted and yarn winds around itself like ivy up a tree.
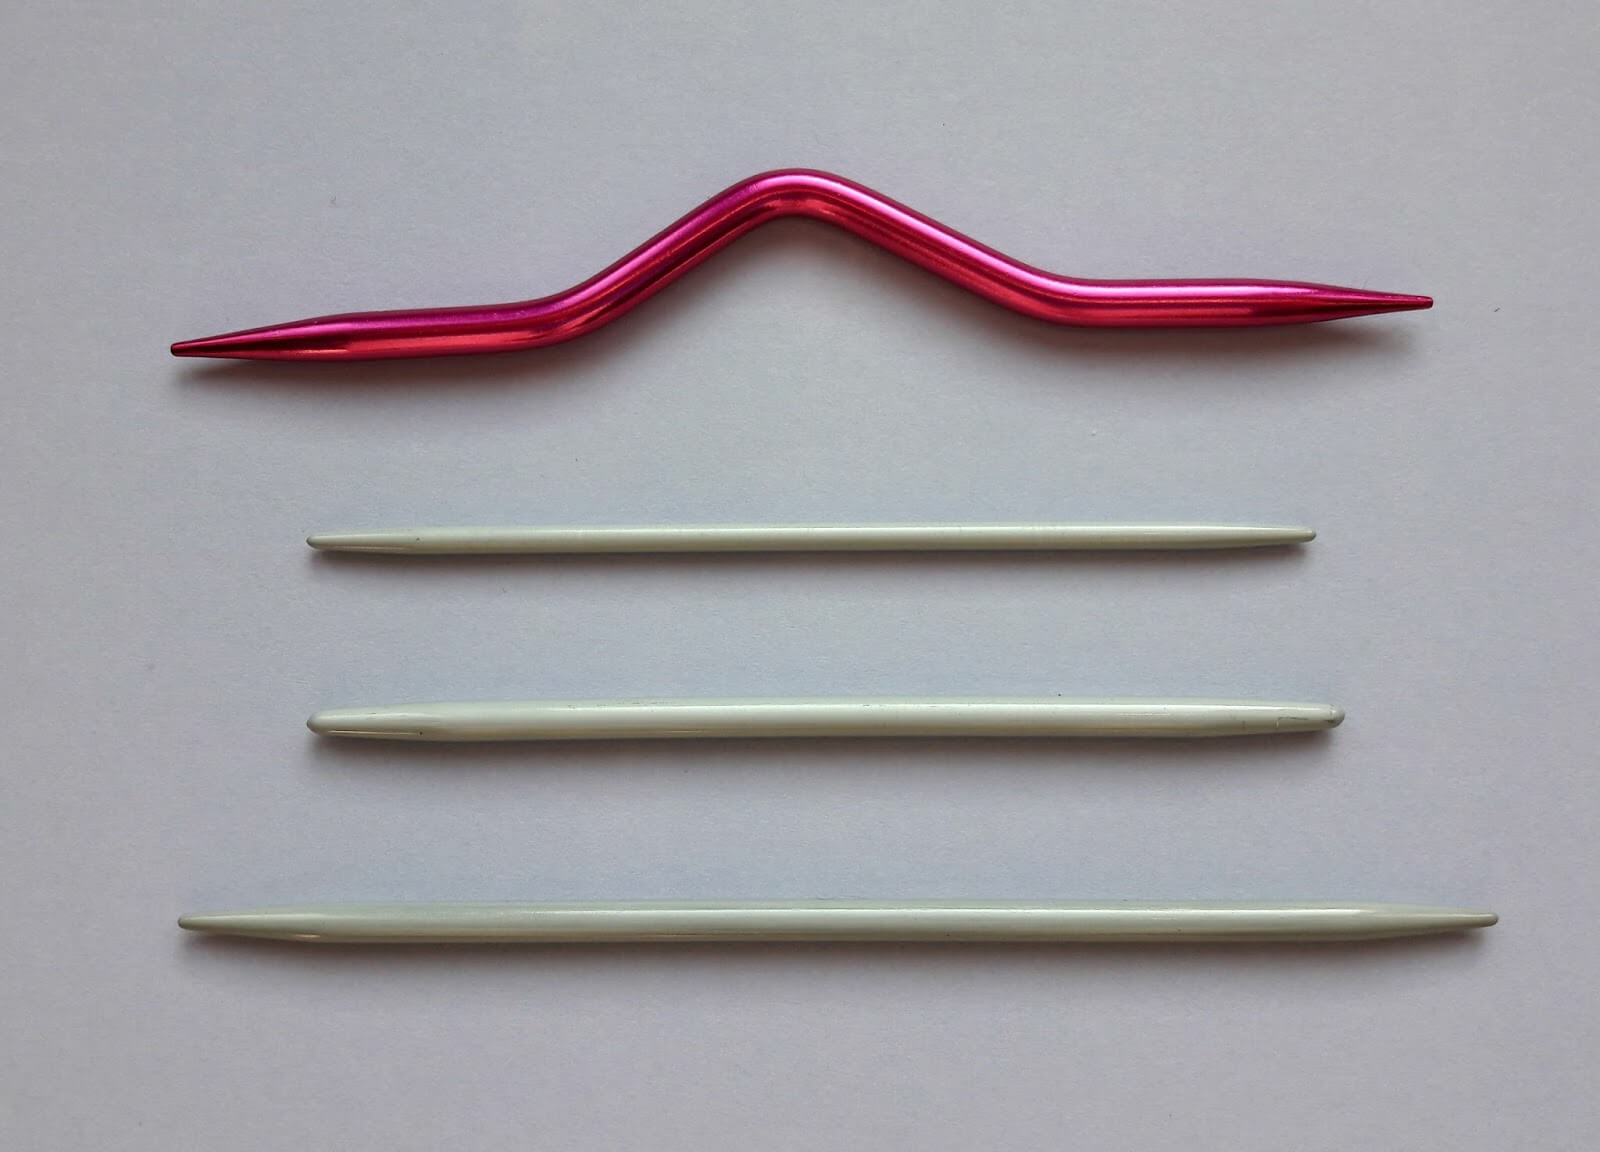
And how do you create this piece of woolly magic? It’s simple … you use an extra piece of kit called a cable needle. This is a short double-pointed needle that is either straight or with a bend in the middle to help to stop your stitches sliding off. It’s best to choose a cable needle that’s similar in size to the needle that you’re knitting with; some people like to use a smaller size but mine is very slightly bigger as I find it easier to pick up the stitches from a bigger needle. Don’t choose one that’s massively bigger or you’ll end up stretching your stitches. If all else fails, you can use a double pointed needle but unless you have short ones, you might find it a bit long and fiddly.
The main tutorial will have the pattern both online and in downloadable PDF form, lots of photos and (have I told you already? J) video clips to help illustrate some of the points that might cause hiccups. I’ll also be showing you how to read a chart which is how many cable patterns are written – it’s really not as hard as you think! I’ll be posting all that tomorrow, but in the meantime, I’ve tried to think of some of the questions that you might want to ask before we get started – if I’ve missed anything out, do let me know in the comments!
What size are your socks going to be and can I change it?
The sock will be based on my usual size (my UK size 5 foot) but it’s easy to adjust that to fit your own foot. Don’t forget that the size of a sock is based on the width of your foot, not the length, so I recommend that you look at the sock stitch calculation in the Sockalong tutorials which will help you work out the size based on the width of your own feet. Cables do pull the fabric of the knitting inwards because of the way the stitches twist, so you will need to add extra stitches to accommodate this – I’ve added 4 extra stitches to my sock and that’s been just right so if you change the number of stitches, I would start by adding 4 stitches to your new stitch count and take it from there. Don’t forget you can try your sock on during the knitting process to make sure it’s comfortable.
Can I use any yarn for these socks?
Yes. The pattern is written for 4ply yarn so any 4ply should work, although I always recommend a quick tension swatch just to be sure that your size will work out right.
I’ve used Northern Yarn Poll Dorset Lambswool 4ply because (as I may have mentioned once or twice!) I’m really interested in how British breed no-nylon sock yarns hold out for socks that get a lot of wear. One of the things I love about the British breed sock yarns is how they change after being washed and worn and although this yarn wasn’t super-soft to knit with, it has started to change and soften already just after being washed to block them. You can read more about the yarn and where it comes from in this post. The stitch definition is fabulous; those cables stand out beautifully, and the sock feels as if it’s going to be very sturdy and long-lasting. I’m very happy with the way the socks have turned out and would definitely recommend that you check out the yarn if you are also interested in yarns that are a bit different from regular sock yarn.
(Just as a point of interest, the softer your yarn, the less well your cables will stand out so be aware of this if you want to use something like 100% alpaca or merino.)
I’ve never used a cable needle before, will I be able to do it?
Yes! All you’re going to be doing is transferring stitches onto your cable needle whilst you’re knitting your round – it’s not hard and if you’ve already knitted a sock, you’ll be able to master a cable needle with no problems!
Can I adjust the size of the pattern block for a bigger or smaller sock?
Yes! It’s very easy to do that with this particular pattern. I’ll show you how to do that in the main tutorial.
Do I have to knit the cabled heel? It looks hard!
It’s not as hard as you might think and there are photos and a video in the main tutorial. However, if you would prefer to use heel stitch, you can follow the instructions here in the Sockalong tutorial.
I’m not sure about continuing the cables down to the toe decreases.
That’s fine – you can knit your toes plain if you’d like to, but it’s actually very easy to knit the cables to the end of your toes as you’ll see when you get to that point – you’ll be a cabling expert by then!
Right then! I think that’s everything for now … I hope that’s been useful as background information and tomorrow I’ll share the pattern with you. Do ask if you’ve got any questions, but I hope that now you’re all ready to grab your yarn and needles (not forgetting your cable needle!) and prepare to cast on!


Looks like my next pair are Cabled socks! Brilliant!
Brilliant indeed! 🙂 xx
Thank you Christine, I'm looking forward to your series of new sock patterns. I've got a cable needle at the ready, Just need to choose some yarn 😊
That's a nice sort of decision to make! xx
Oh wow can't wait for the pattern these sock tutorial pictures look fab Thankyou Christine
Oh good, I'm glad you like them! xx
These look interesting! I knit lots of plain socks and always thought that cables on a sock would be too fiddly but I will delve into the back of my stash for some 4 ply and needles and join you on this. I will be using something rather unsuitable – self patterning cheapish yarn – but it will be fun to learn a new pattern.
These cables aren't as fiddly as you might think as you only need to cable every 5 rows – I'll be interested to see what you think! xx
I will be joining in Christine, it's about time I was a bit more adventurous, can't wait. 🙂 x
Fantastic! xx
I'm so inspired to try these Christine, for the first time you might just pull me out of my Basic Sock pattern infatuation!!! xxxxxxxxxx
Well, you've knitted enough pairs now to be able to tackle something more adventurous, i think! 🙂 xx
I have four knitting projects in the go at the moment but it looks like I may soon have five!
It's always good to have plenty of projects to work on 😉 xx
Wow! Well, as someone still knitting her first pair of socks I think that I am a little way off this yet, but it is good to know that there will be more to aim for once I get better at plain vanilla socks! Good luck with it all, I am sure that it will be fabulous and that lots of people will enjoy knitting lovely socks.
Thanks Amy – and it won't be long before you're ready to move on from the basic sock! xx
I am excited to try cables on socks! So far mine have all been plain, from your wonderful book, Christine
Oh they look very exciting! I had planned to stick to plain socks as they are most comfortable in my splint but now I've seen your fab cables…… They could always be a pressie for someone I guess or ultra smart bed socks!
Have only done the basic sock so really looking forward to having a go at these – thanks Christine.
Fabulous, can't wait even though we are sweltering with 40 degree heat.
so exciting to think I might be able to create these!!
OMG!!!! I'm almost finished with my first "pair" of sockalong socks, so will be so ready for these new ones. Thanks Christine! Raven
Soooo looking forward to this! Since making socks with your brilliant instructions I've tried a couple of other patterns, but always come back to yours. I've wanted to make a cable pair but not been game enough to to try. Thank you!
More wonderful sockness!! Thank you so much for all you do for the world of socks! You have even finally got me at it!!
Very cute and funny woven socks, the tutorial is very detailed, thank you for sharing these interesting and useful information