
Help, there’s a knot in my yarn!
“Help, help, there’s a knot in my yarn!”
Anybody who has ever bought a ball or skein of yarn, whether commercially produced or hand-dyed, has probably come across a join, knot or a dye fault in the yarn at one time or another – it’s one of those “occupational hazard” things about being a knitter!
I was part-way down my second Emergency Sock (you can read my blog post about Emergency Socks here) when I came across this join …
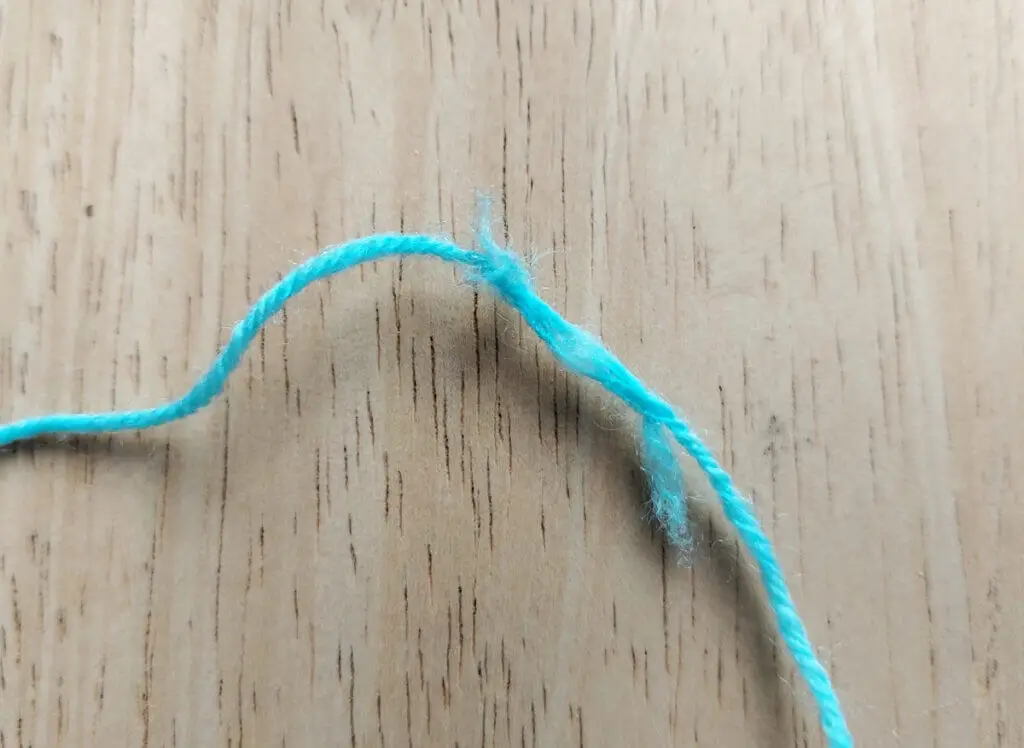
It’s part of the manufacturing process – and I saw it in action at the West Yorkshire Spinners mill from when I went to visit (you can visit the mill with me in this post here). There, one of the machines specifically checks the yarn for slubs and knots and if it finds anything, it will cut the yarn with a laser and splice it together again in the blink of any eye, and this is obviously what has happened to this section of my Winter Icicle yarn.
Other mills will deal with their yarns differently and you might find the same kind of join or a knot depending on the reason for the break and how it is fixed.
A break in the yarn can be very frustrating, especially if you are knitting with striped or patterned yarn, as the break can upset the rhythm of the yarn pattern and you can end up with matching socks not quite matching after all. Sometimes, the joined-on yarn colour doesn’t match and that can be even more frustrating, but a ball of yarn isn’t considered to be faulty unless there are more than three knots in the ball (for commercial yarn; it may be different for hand-dyed) so often you are left in the middle of a project with a dilemma – and a join!
Luckily, you have two options for dealing with them.
1 Do nothing.
It really might not bother you if your socks don’t match, and that’s fine 🙂
- If your yarn is a solid colour, a join won’t make any difference to the colour and you can either continue knitting if the join is spliced like mine above, or you can undo the knot and make a proper join for yourself or weave the ends in as you continue knitting.
- If you’re using a variegated yarn, then depending on the way the yarn is dyed, you might find that there isn’t much change if you simply carry on knitting so unless you can see a clear match in the colours, it might be easiest to keep going and see what happens.
- Striped and patterned yarns are where any change to the yarn will show most obviously, but if wearing odd socks isn’t something that bothers you, or you actively try to mismatch your socks, then working with the yarn as it is will cause you no problems.
2 Do something
If, like me, you want your socks to match then the last thing you want is any kind of break in your yarn which will upset the colour rhythm, but there are options to get around this.
- Start by having a look at the yarn. Does it look as if it still matches the rest of the yarn? If there’s a colour sequence, pull some more yarn out of the ball to find the same point in the sequence and measure the lengths of the colours against each other to see if they are the same length. If so, your fix is easy! If the join is solid and unlikely to slip in any way, you can carry on knitting and only you will know there was ever a join. If there’s a knot, it’s best to undo it and join the yarn, even if it means that section of the sequence might be a few stitches shorter, as firstly a knot won’t feel nice in your sock, but secondly, there’s a chance it may come undone in the wash or through wear and that could create a hole and a bigger problem!
- If, once you’ve looked at your yarn, you know that it’s not going to match up without some help, you need to decide what to do and you can either cut the yarn there at the join and re-join it and carry on knitting (this will work with variegated yarns and some colour sequence yarns depending on where you are in the sequence), or you can pull more yarn out of the ball to find the point that matches where the join occurred and start using the ball from there.
- If you decide to cut the yarn and re-join it where you are, there are a few different methods of doing this so do have a look around and see which one you prefer – there are a few versions of the weaving in method (mine is here), spit splicing (yes, you do use real spit!), Russian join, clasp weft join or you can just leave the ends loose and sew them in later on.
- With my sock, the join meant that the turquoise section in my yarn was going to be too short – Winwick Mum yarn stripe sections are a defined number of rounds and I didn’t want one of them to be shorter than the other – so I chose to pull more yarn out of the ball to find the matching point.
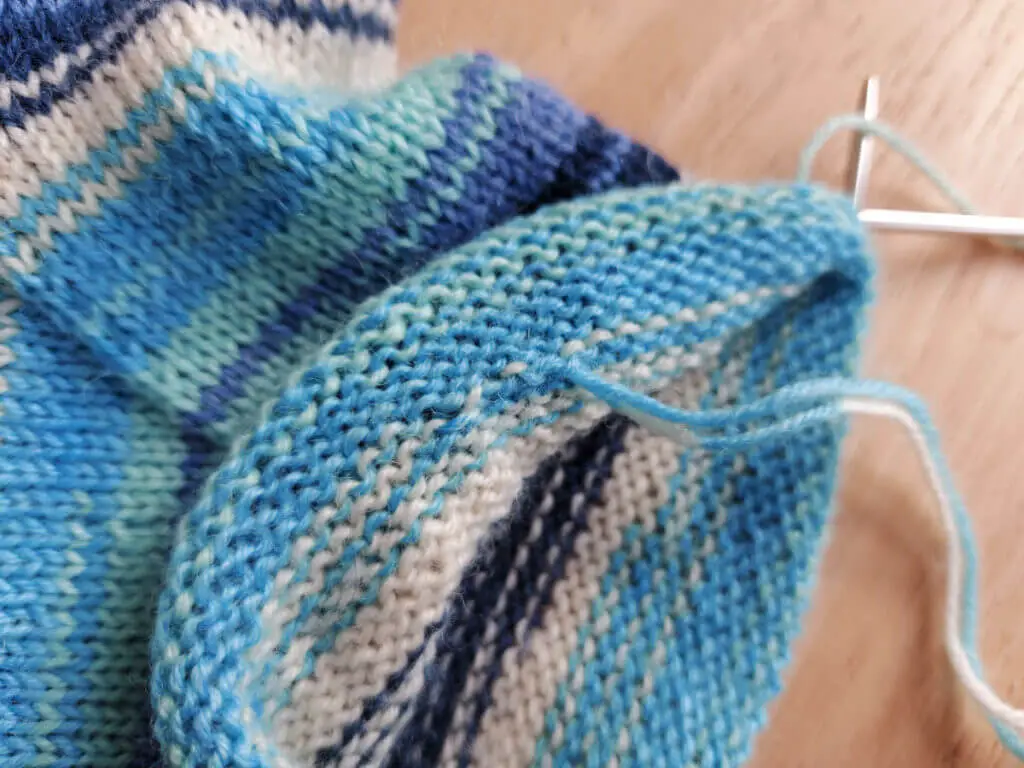
Then, having found that point, all I had to do was start knitting again and the yarn was back in the pattern rhythm. You can see in the photo above that I used my weaving in method – I’ve only done that for a couple of stitches instead of my usual 10-12 stitches because it was on the bottom of my foot and I can feel every lump and bump in my socks so I wove the ends in to anchor them and then when my sock was finished, I cut the yarn and sewed the two ends in separately so that they wouldn’t feel bulky.
You can choose to cut the yarn straight away or just tuck it inside your sock for later. I prefer to tuck it inside my sock just in case I find out later on that I’ve made a mistake and need to take my knitting out – that way, my yarn is still attached if I need to fix anything. It doesn’t happen to me often, but once was enough to make me cautious! 🙂
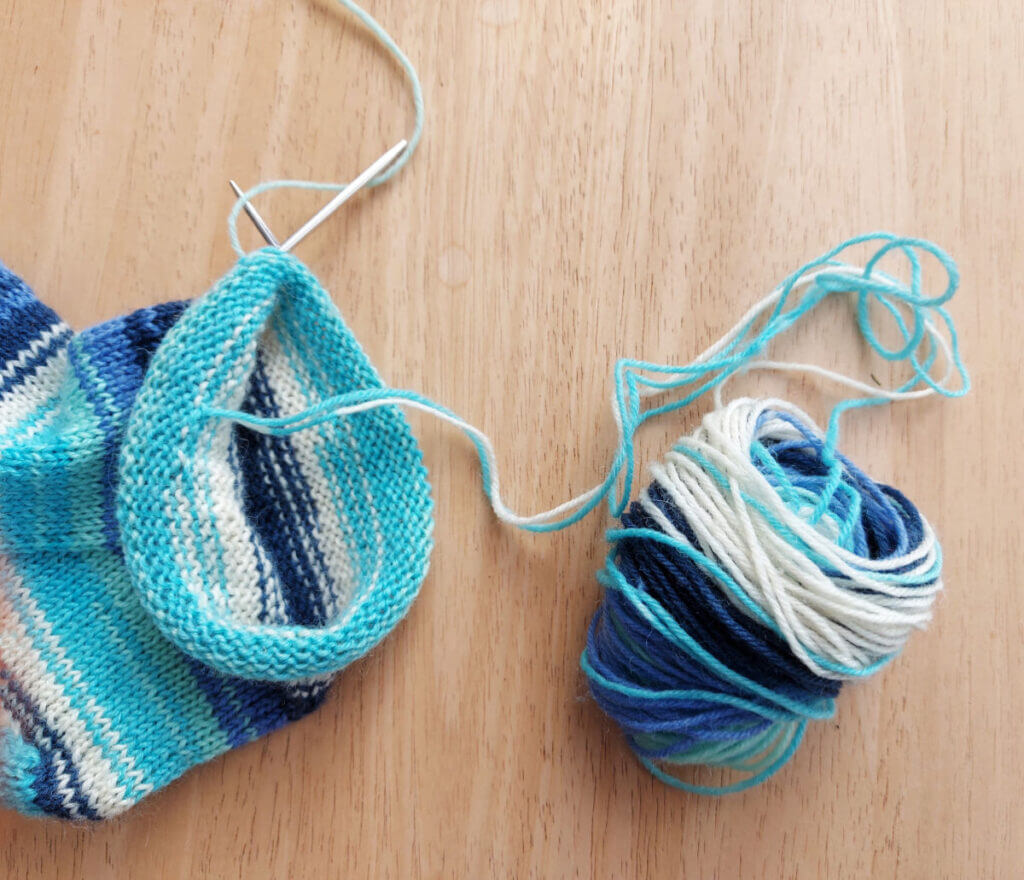
Now, some people will find the idea of doing this uncomfortable because as you can see, there’s a whole section of colour stripe taken out of my ball of yarn and it will leave an odd length of leftover yarn when my socks are finished. My view on this is that I’m going to have leftovers at some point anyway, so it doesn’t really matter to me whether they’re from the end or the middle of the ball. If you’re making scrappy socks, you’ll find a way to use them up, and if you can manage to squeeze another pair of socks out of your ball, the chances are that the extra section will match the yarn you have left over so you’ll still have enough.
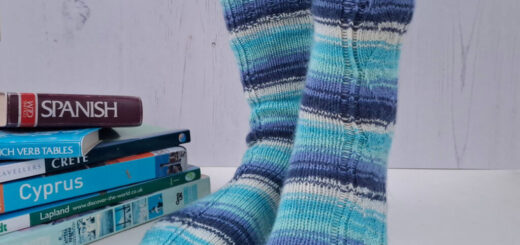
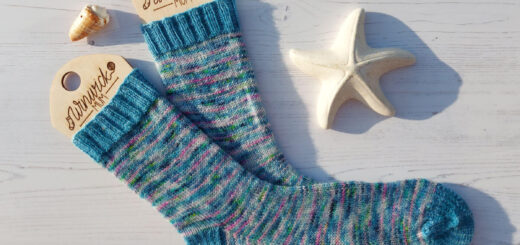
And there we have it. A matching pair of socks despite a join in the yarn, and cosy toes for me!

The yarn used for these socks is West Yorkshire Spinners Signature 4ply in Winter Icicle, available from WYS stockists (you can find a list here), and the pattern is my Basic 4ply Sock pattern.
You can find the free pattern and step-by-step Winwick Mum Sockalong tutorials for beginner sock knitters HERE.


Such a useful post, Christine thank you so much for sharing.
Thank you, I’m glad you think so! 🙂 xx
Very practical – thank you so much! Knots and joins in the wool drive me nuts – I do like to match my socks! Happy Weekend.
Oh I’m definitely a matcher too! 🙂 xx
I had a knot the other day which reversed the pattern and looked like a different dye lot! To be fair the supplier did issue a refund for the yarn, but it was halfway through the sock and very frustrating.
I’ve heard of that happen before, it is very frustrating! I’m glad you were able to get a refund xx
Sounds like a good idea.
Thank you Christine, for another great sock knitting post. I don’t think I could bear it if my socks didn’t match 🙂
Thank you for this post it helps new sock knitters like myself alot xx
Gorgeous socks Christine. X❤️🌺
Great blog! It can get unnerving to find a knot or poor place in a repeated sequence color.
hah i’m one of those that never have matching socks & i love how my knitted socks are the same but still mismatched (same colouring)
wonderful explanation, even i understood it :))
thanx for sharing