
Circular needle organiser
I’ve had it in my mind for a long time now that I need a better way to store my knitting needles, especially now that I have commission projects on the go as well as my own knitting and can never find needles when I want them. I needed a proper circular needle organiser … this is what I’ve made – and I’m so pleased with the result!
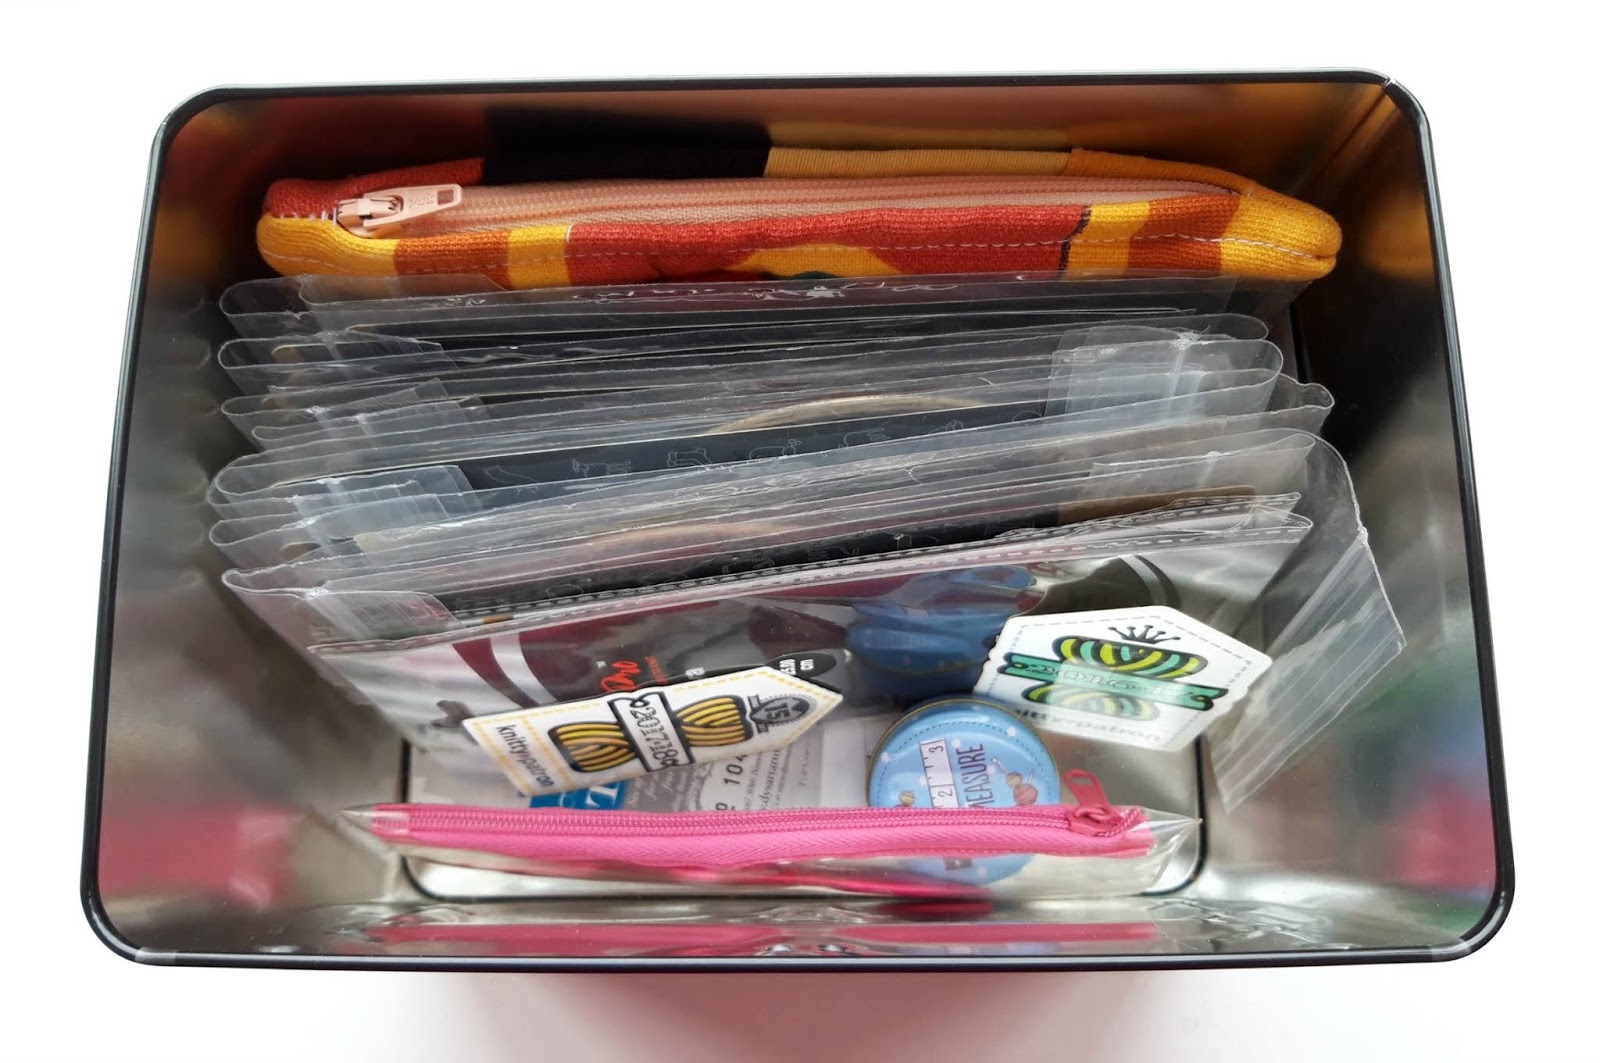
Previously, my needles had been stored in whichever project bags I was using and this tin …
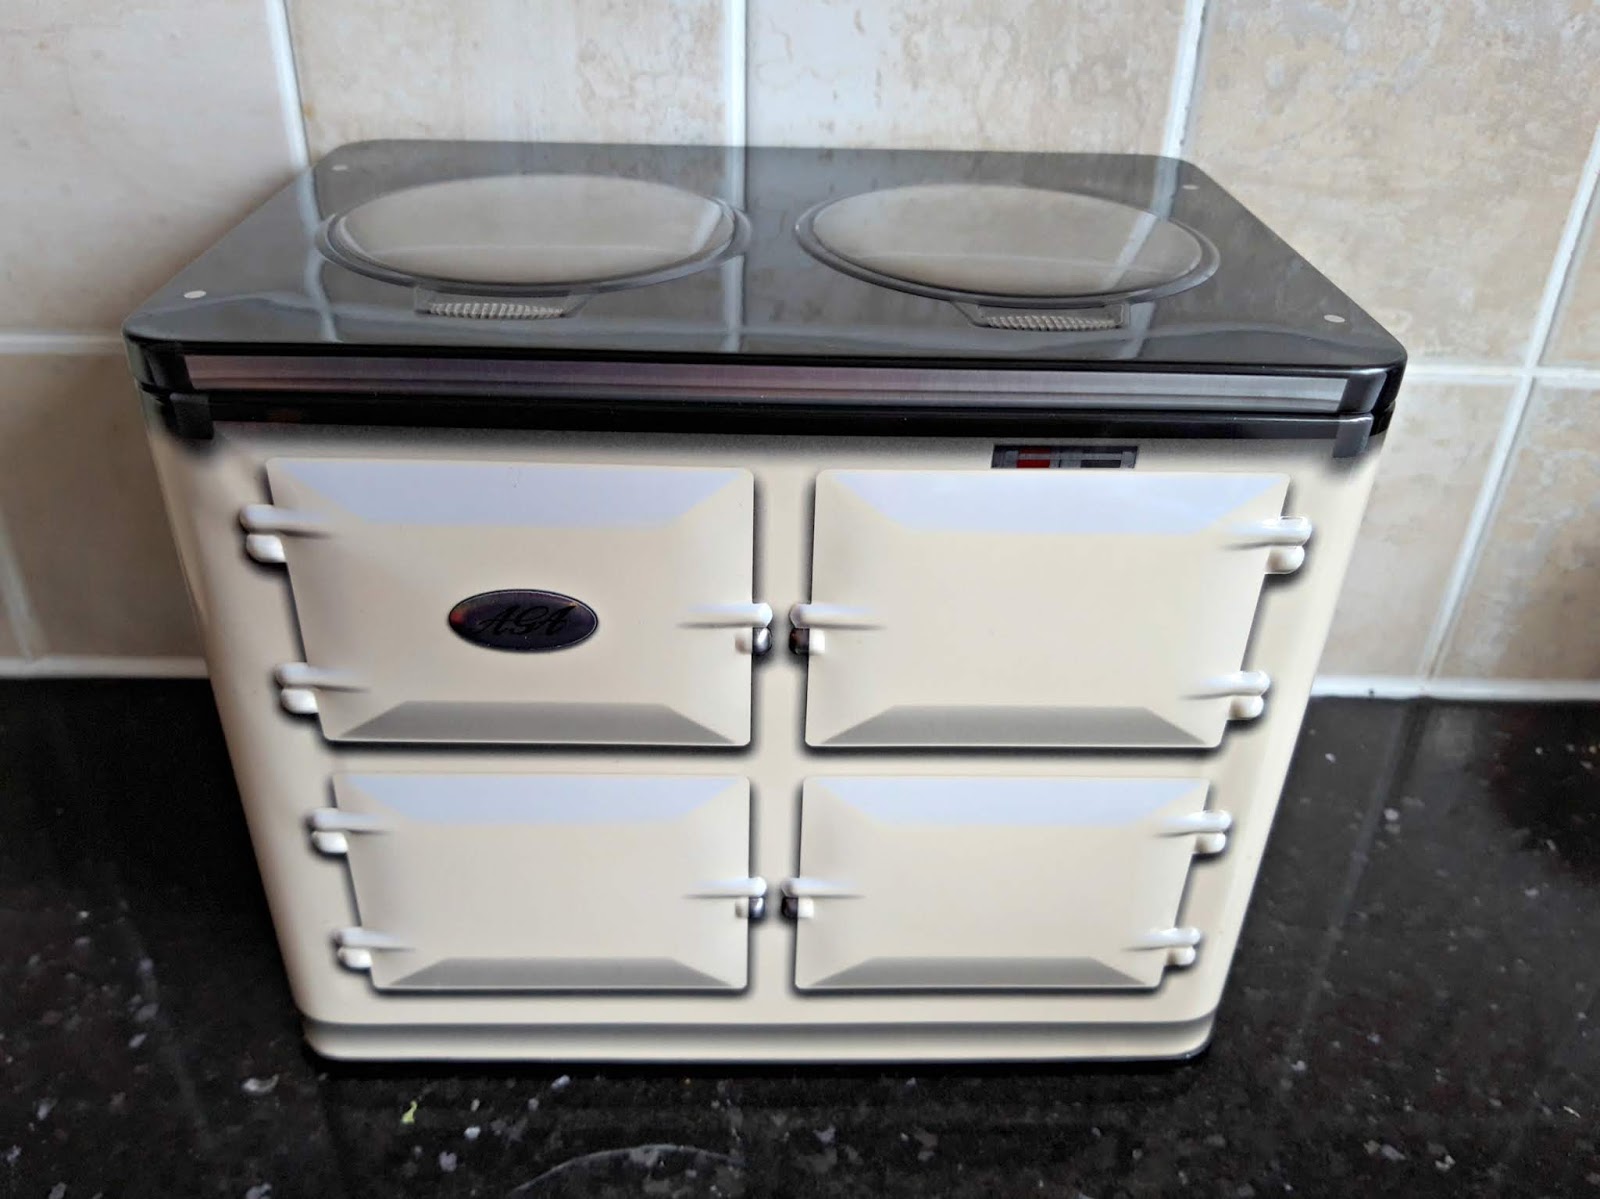
It’s a very nice tin and I like it because it looks like our Aga (albeit the wrong colour and with an extra door) – but as I’ve acquired more needles, it’s become more difficult to see what I’ve got (which is not helped at all by my leaving needles in project bags instead of putting them away). The only good thing is that I keep the needle packets so that I can put them away in the right sized pack to make it easier to find again – although that isn’t always very helpful when I don’t know where the needles are in the first place.
Also in the tin is a little packet that came free with a knitting magazine where I keep my cable needles, and a zipped pouch that small daughter made for which has crochet hooks in it, and my Knitty patron stickers which I’m actually very proud to have and which shouldn’t be stuck in a tin. It’s no wonder I buy more needles because I think I haven’t got enough of the size that I need …
So I decided that enough was enough and I needed a Proper System.
I did a bit of research on the internet and to be honest, I wasn’t particularly inspired by what was coming up. I did think about making a fabric roll, or perhaps looking on Etsy or another website to see if I could see one I liked, but a fabric roll has never really appealed to me and I knew there would be something that would suit me better.
Finally, I found a blog post through a Pinterest search looking close to what I wanted and knew I had found my answer. All I needed was a box, some card and I was off!
The blog post I read uses a plastic box and I looked around for something suitable that we might have had around the house for quite a while before realising that I didn’t actually want to use a plastic box at all, and I certainly didn’t want to buy one! We’re trying to reduce the amount of plastic that’s coming into the house and I wasn’t planning to replace the needle storage box once I’d made it, so why not go for something a bit nicer?
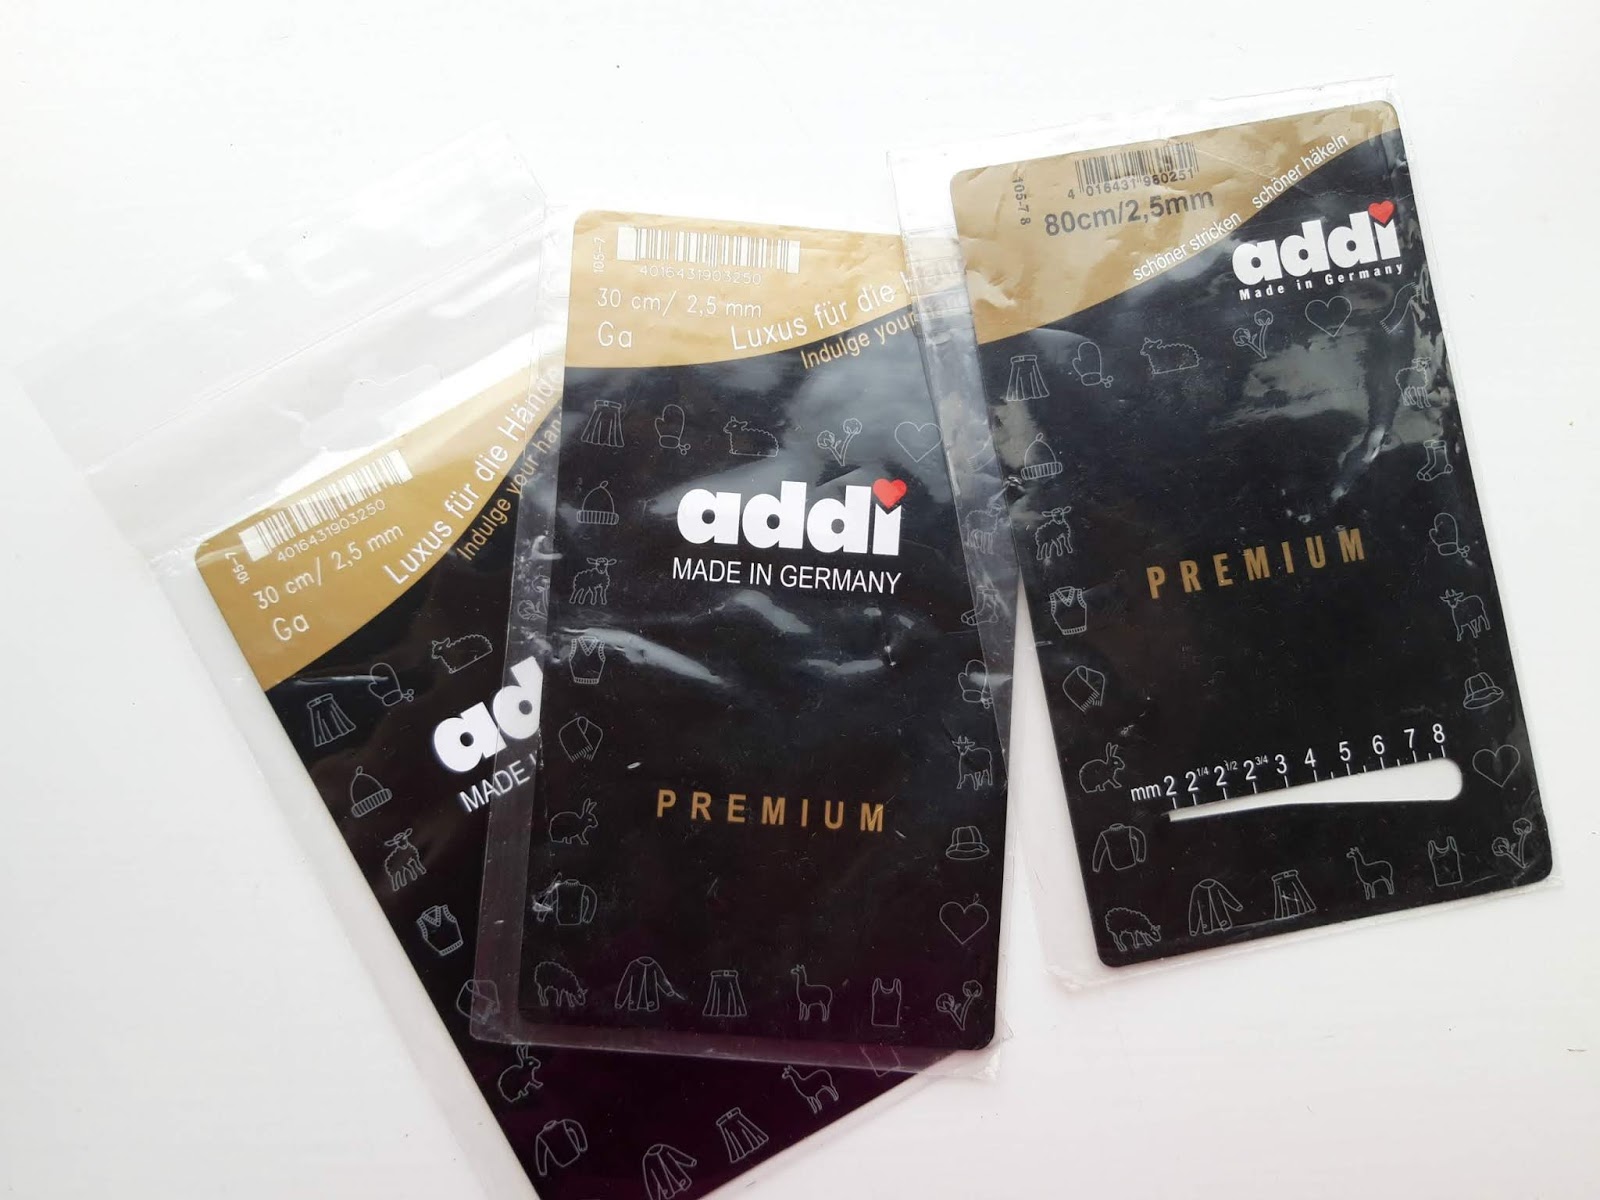
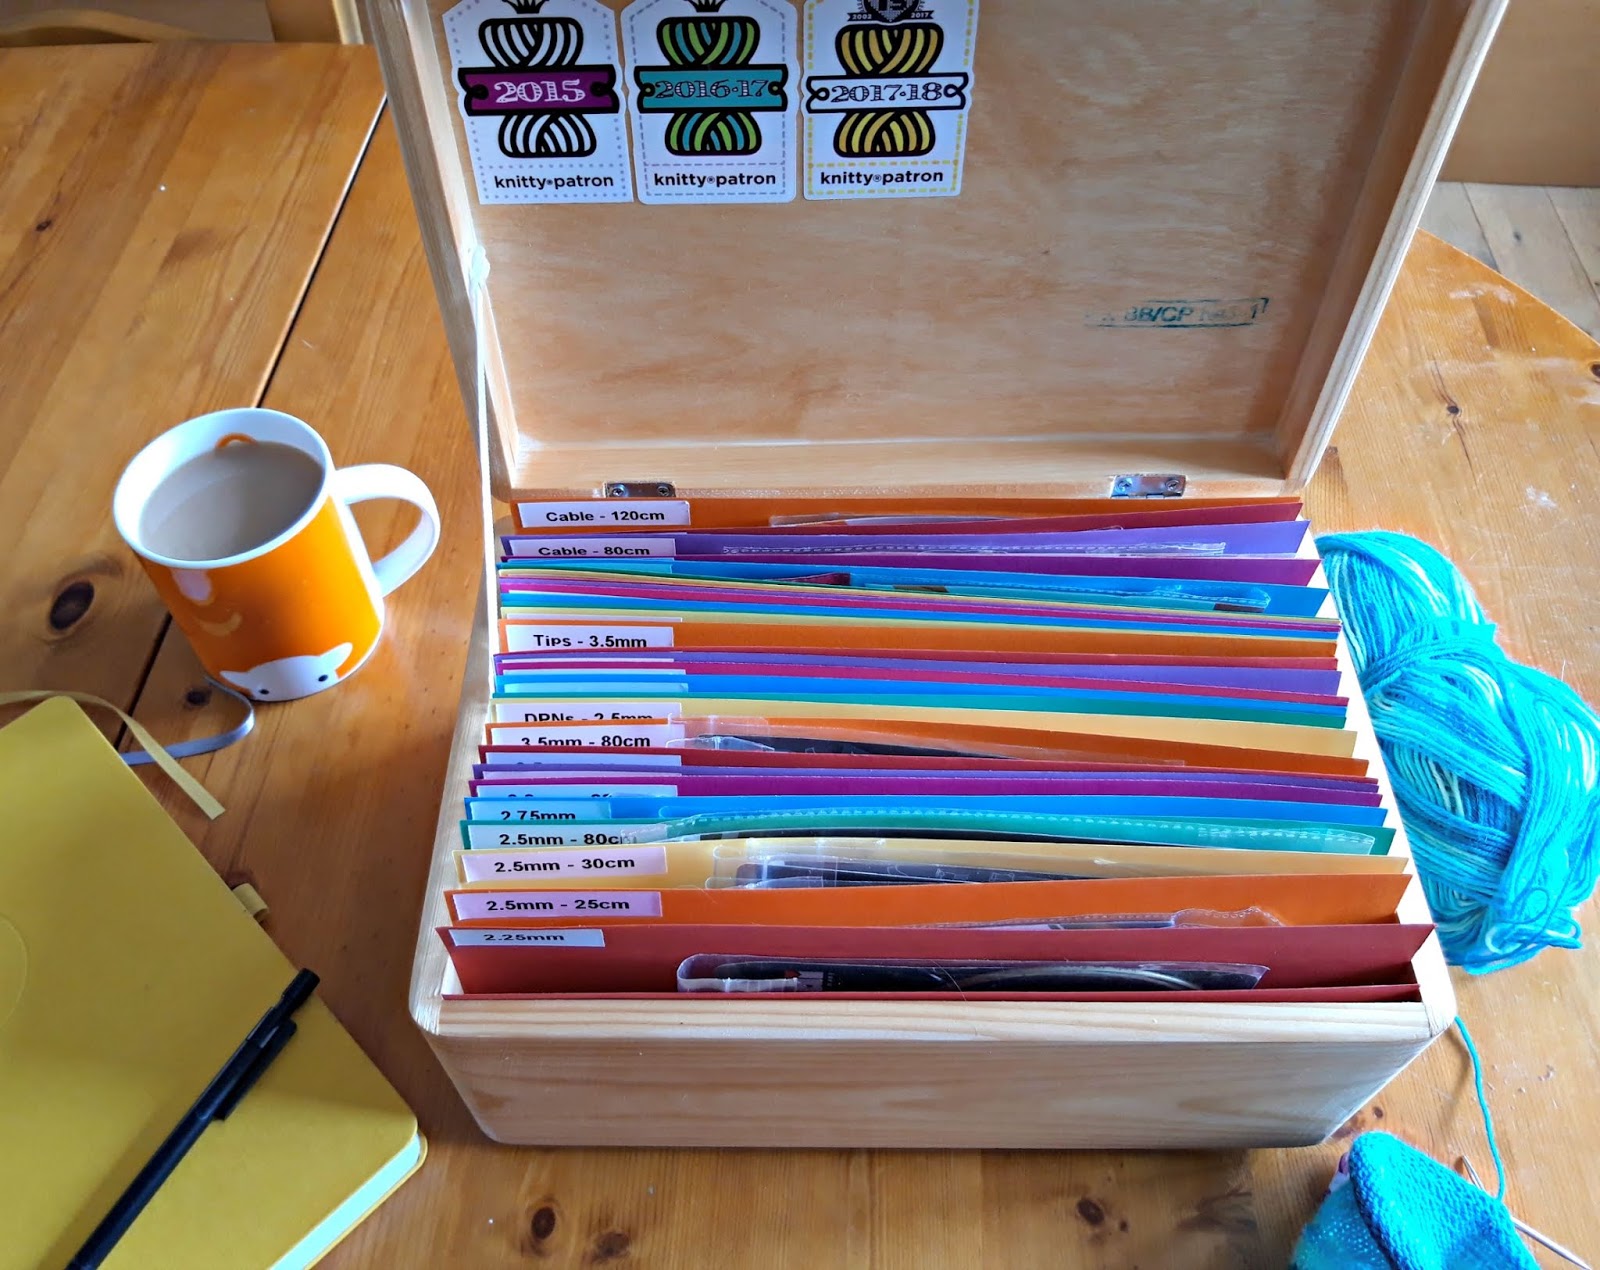
I found this box on Amazon, and it wasn’t as expensive as I had expected – some of the plastic boxes that I’d seen were just as much if not more expensive, and I liked the look of this one much more. It’s 30 cm x 20 cm x 14 cm (12 inches x 7.9 inches x 5.5 inches) and that’s just the right size for the longest packet of DPNs that I have, so I knew that everything should fit in.
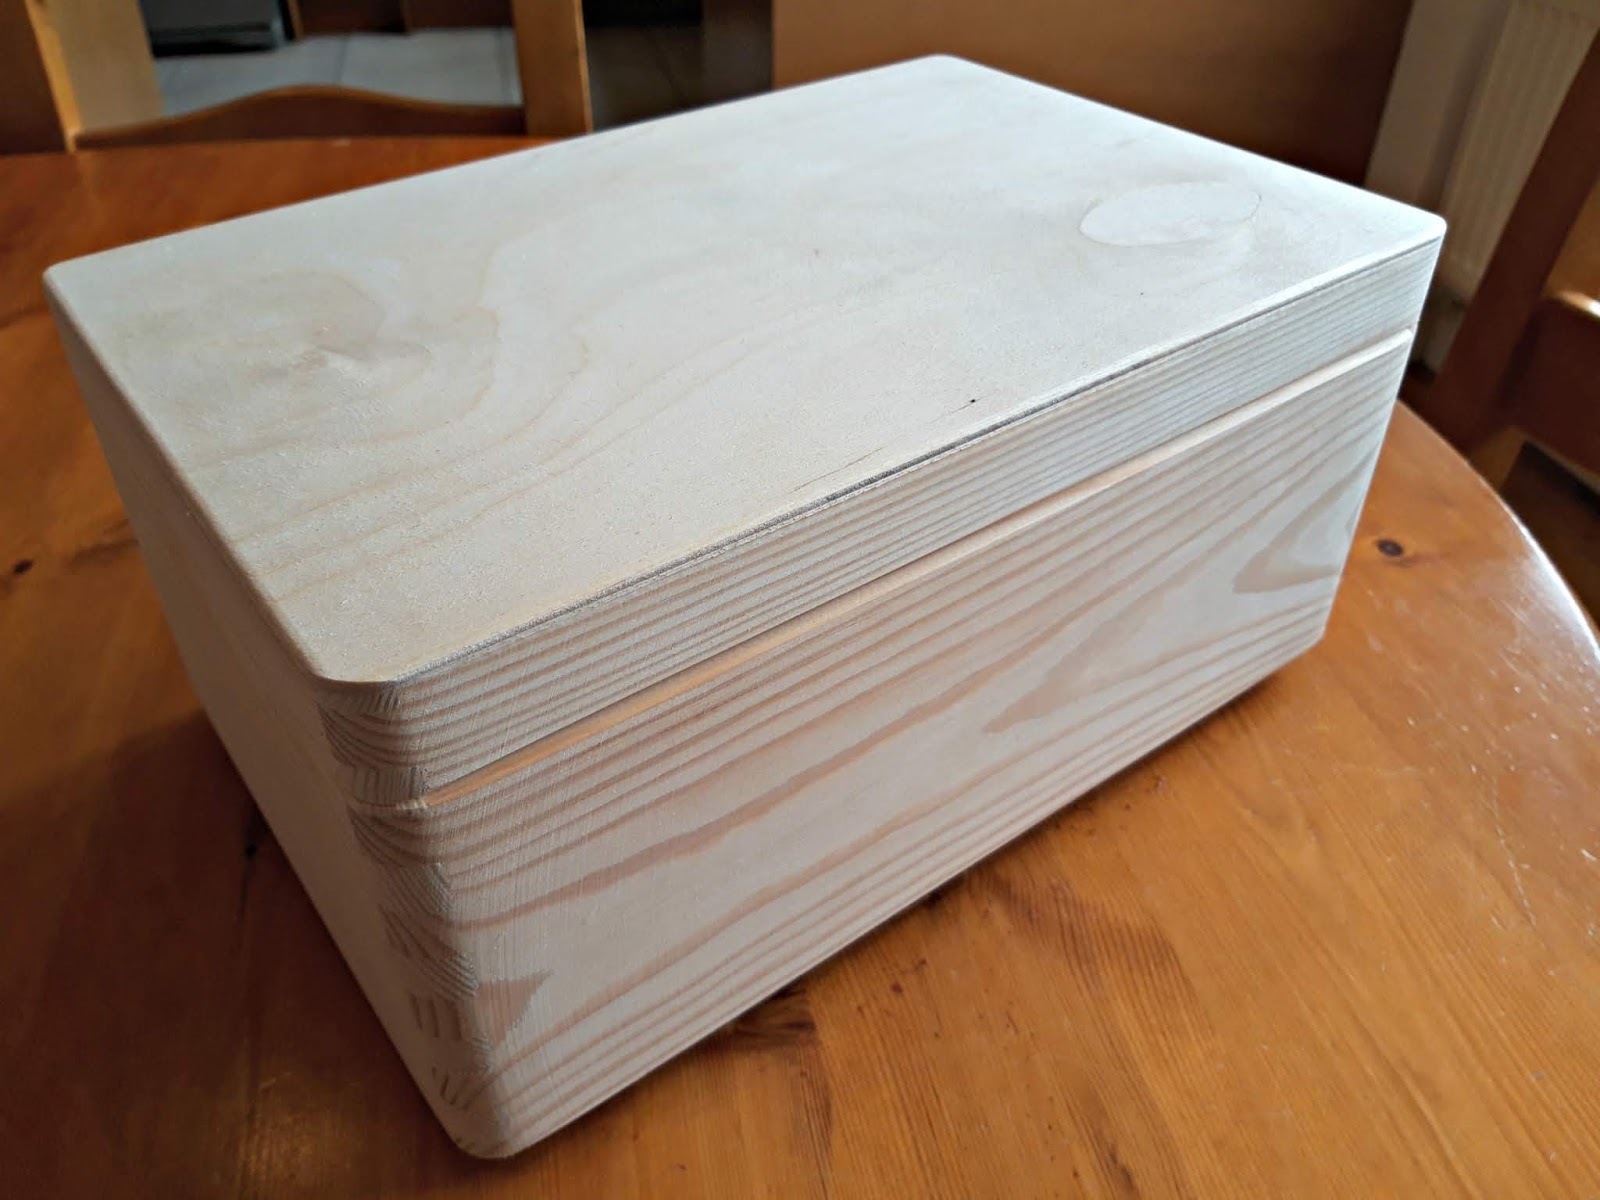
I chose one without handle holes because it sits side-on on my bookshelf and I thought it would look neater without being able to see the contents through a handle hole.
The next job was to stain it. I could have left it in the natural state that it arrived in, but having recently been re-staining our staircase and thoroughly enjoying watching the wood soak up the stain, I decided to stain the box too. I used Ronseal Danish Oil; easily enough bought at a hardware store and recommended by a decorator at one time as an alternative to teak oil. The box soaked it up!
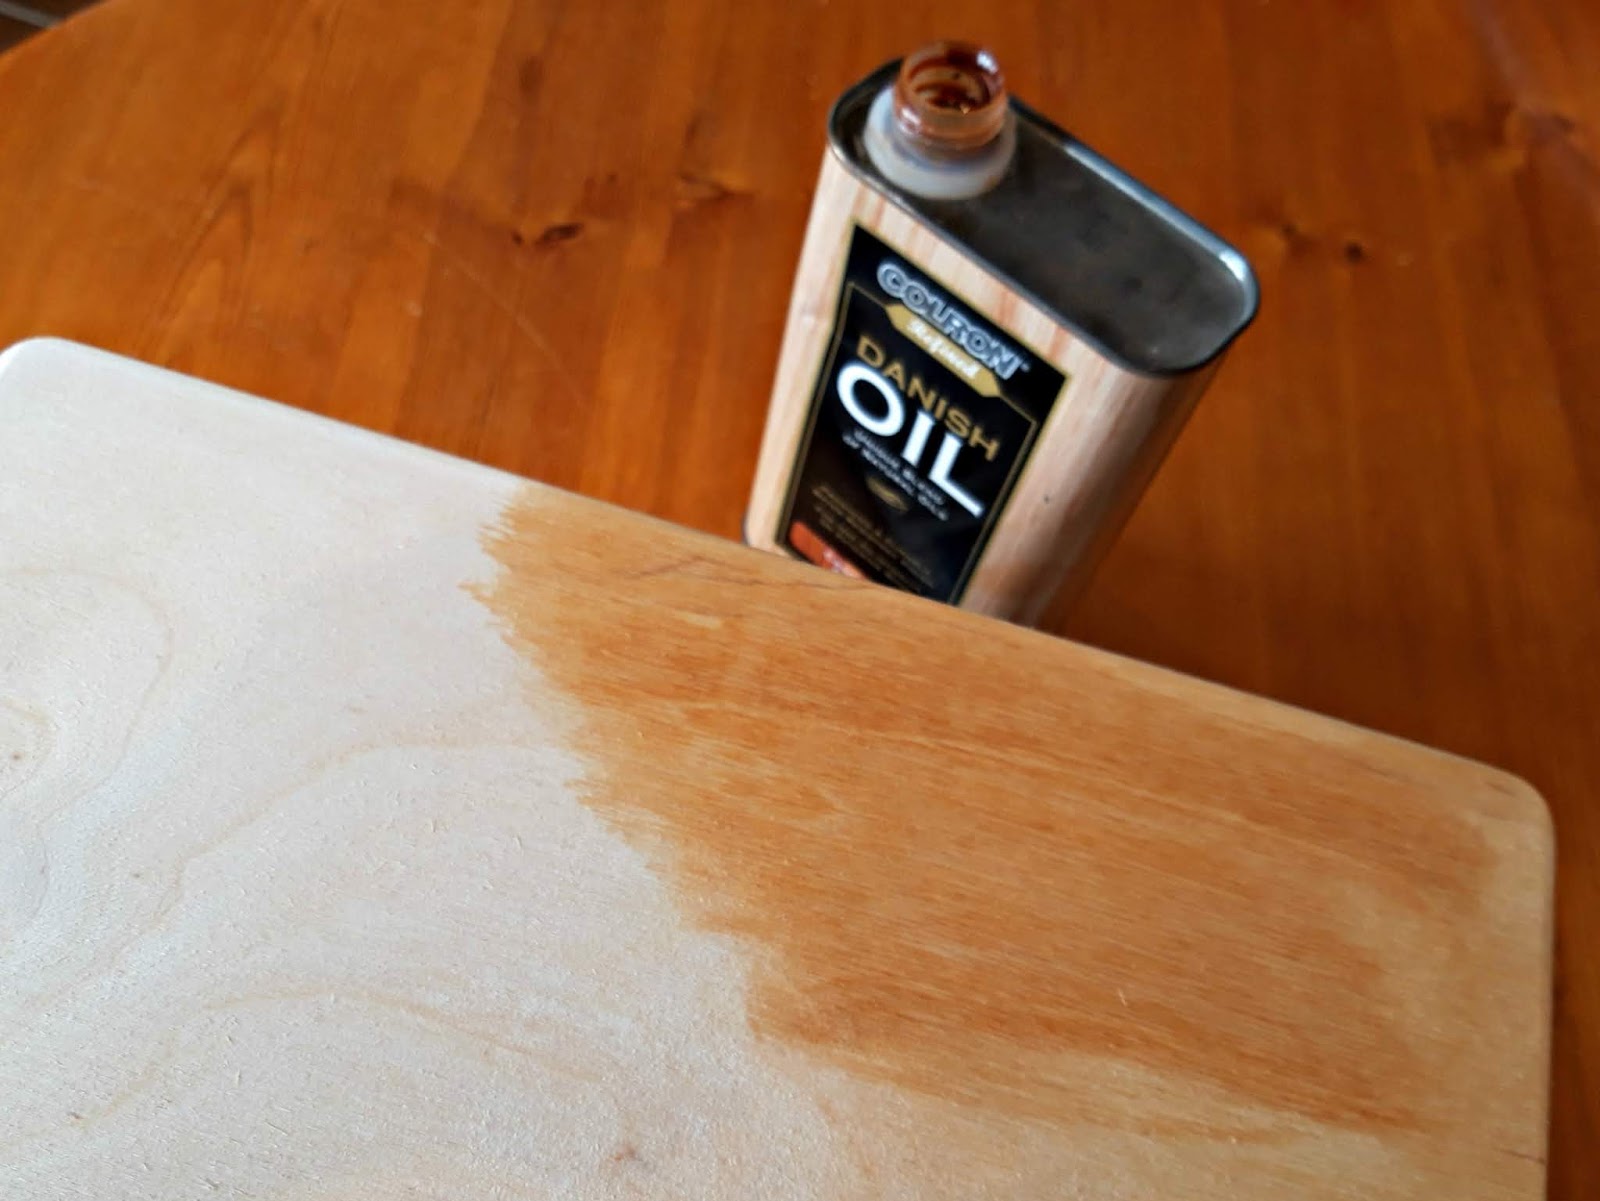
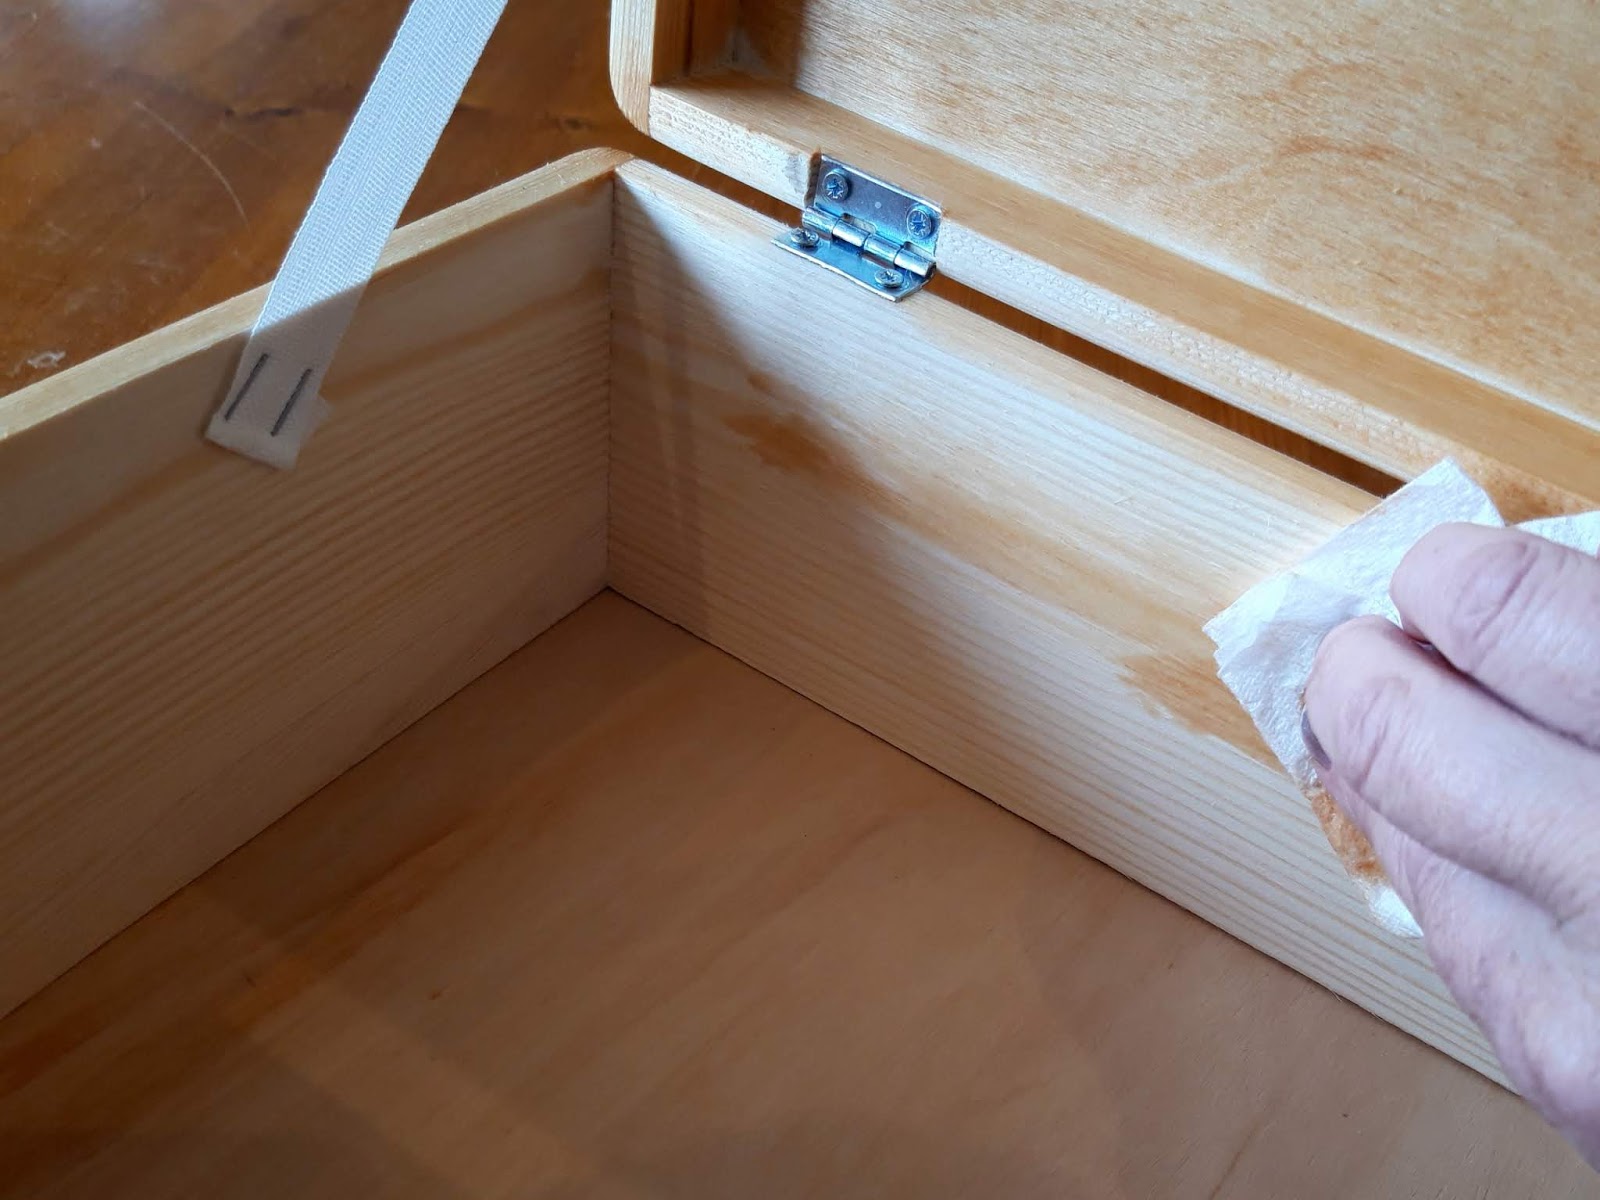
The wood was obviously very dry so I decided to do the inside too.
After that, I added some felt strips to the bottom where it would sit on the bookshelf so that it wouldn’t scratch the wood.
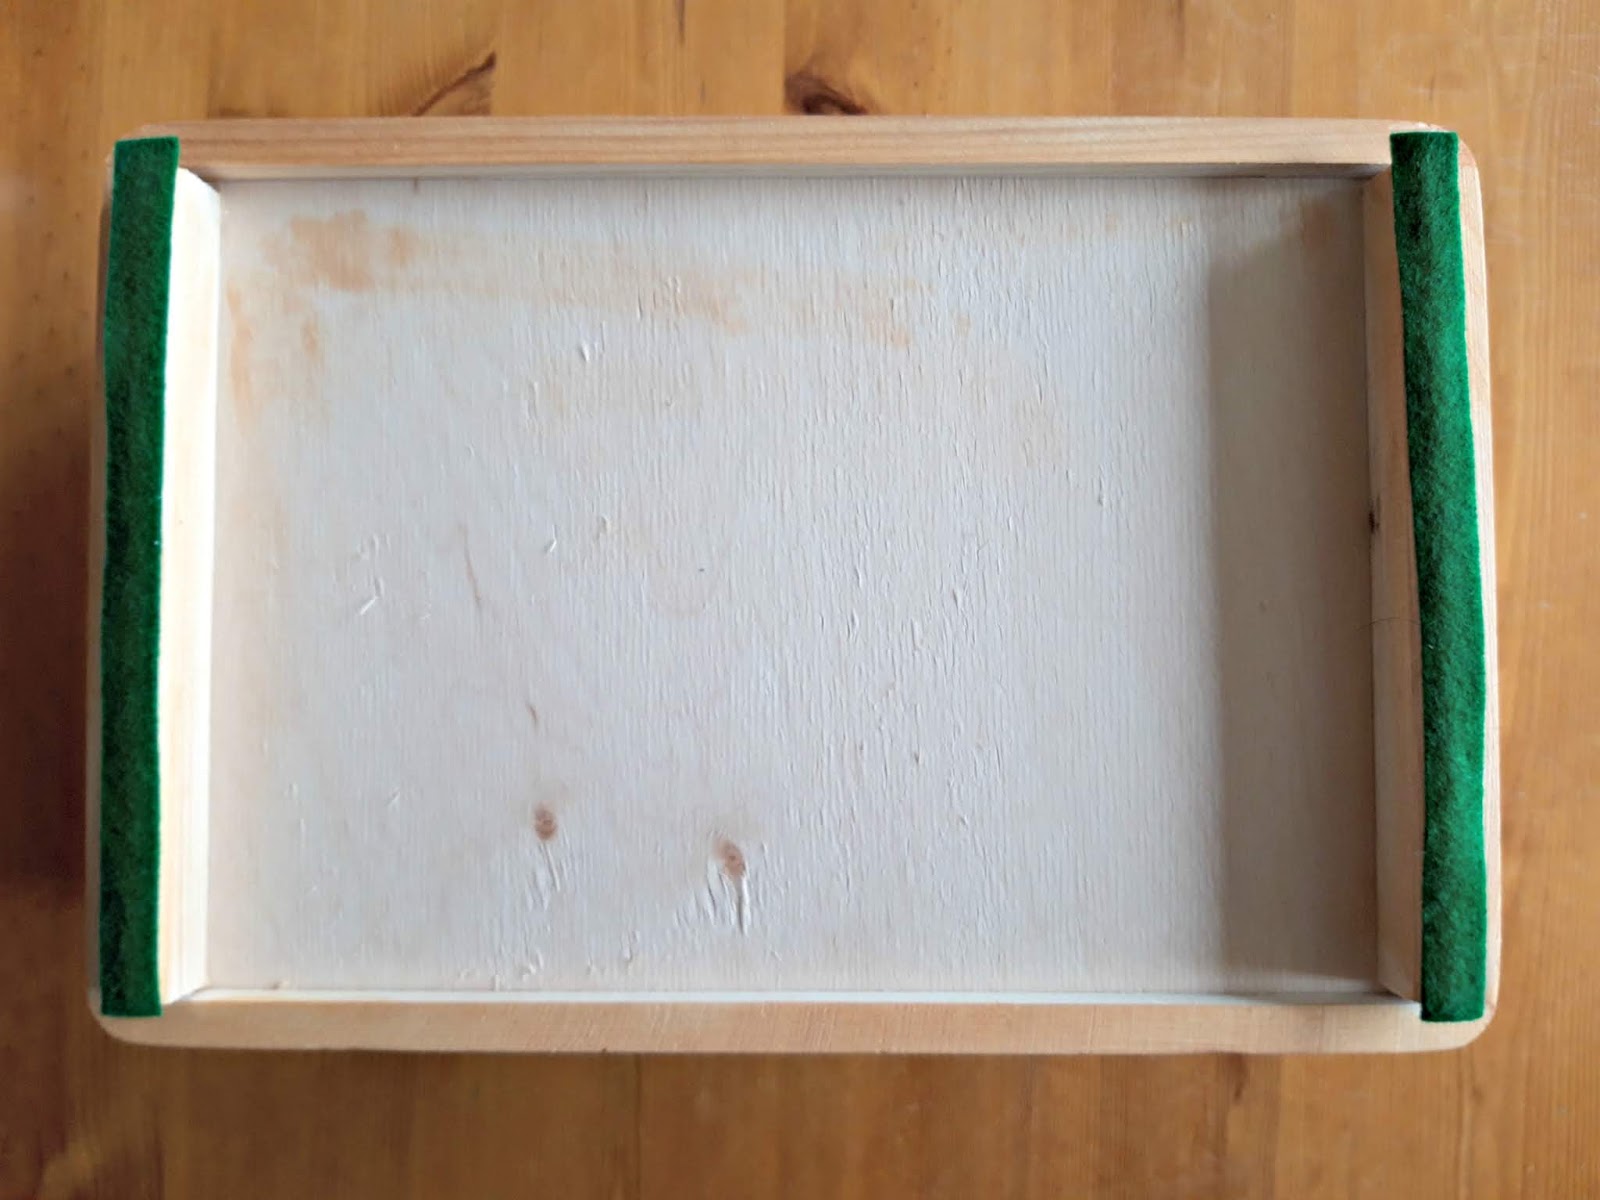
(It looks wonky on the right hand side in this photo but it isn’t in real life!)
After that, it was time to fill the box.
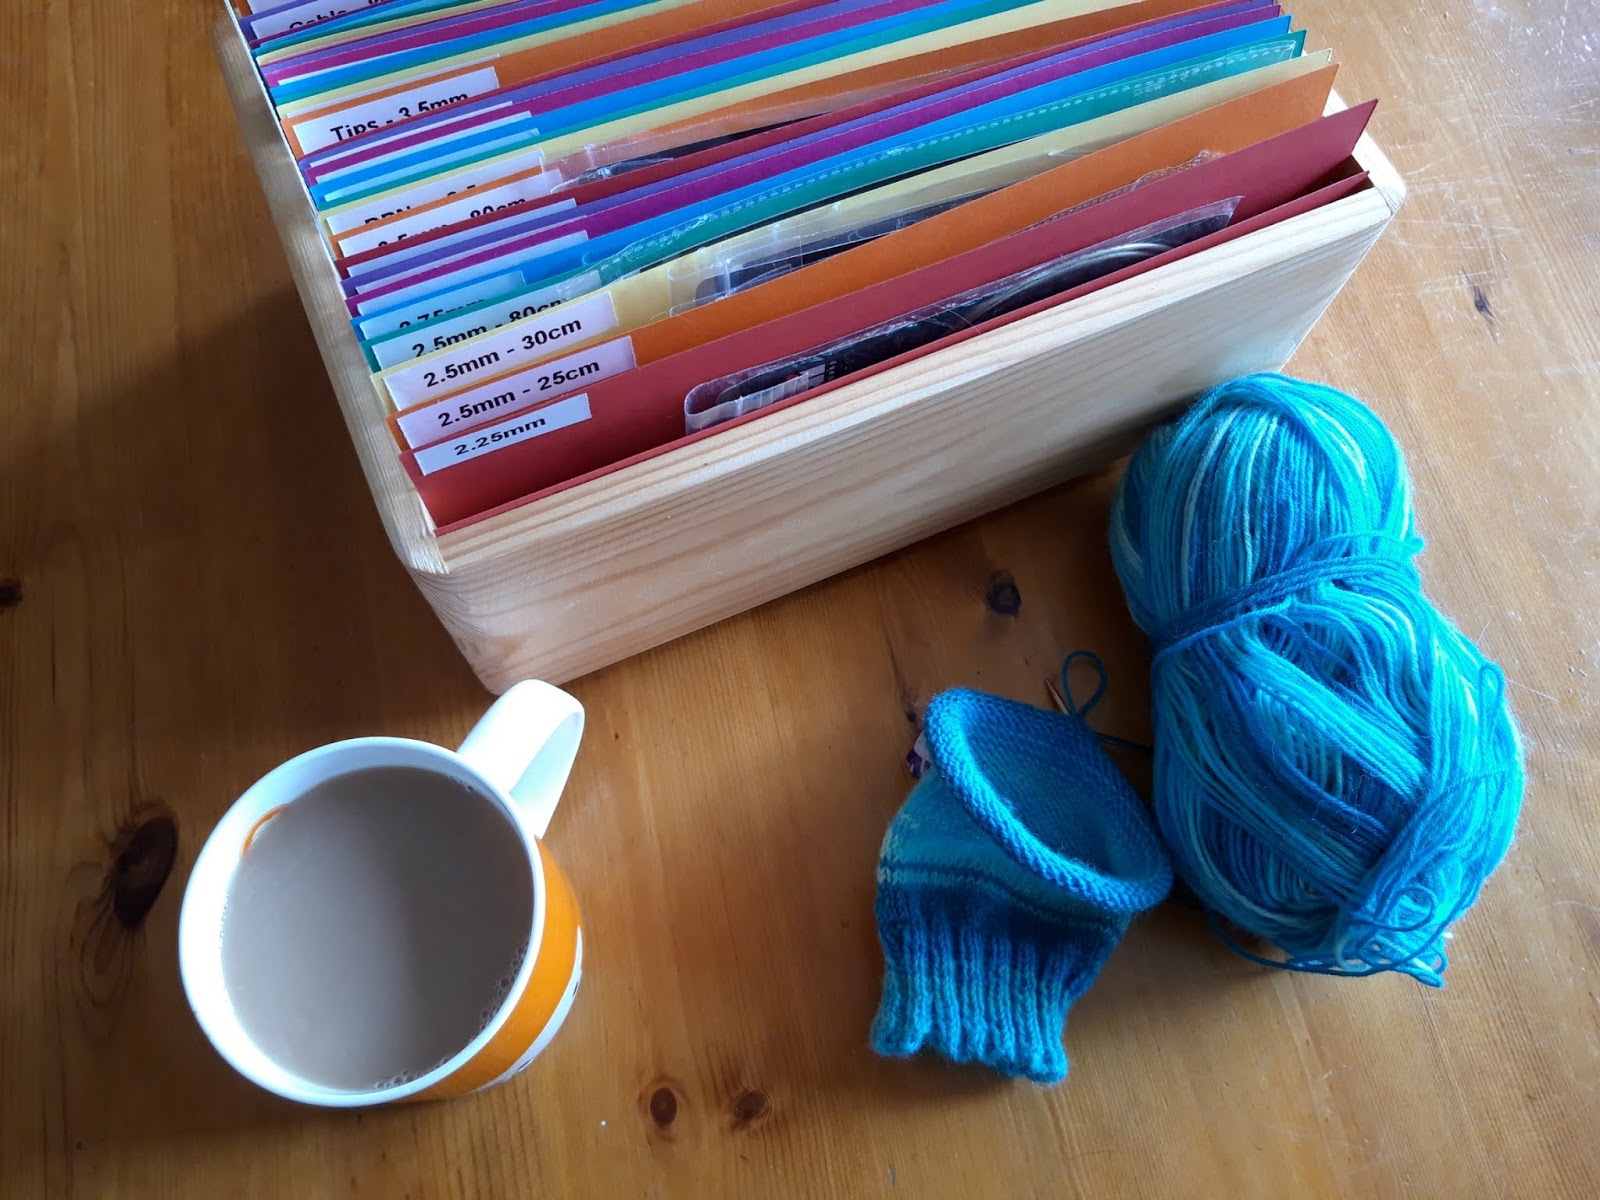
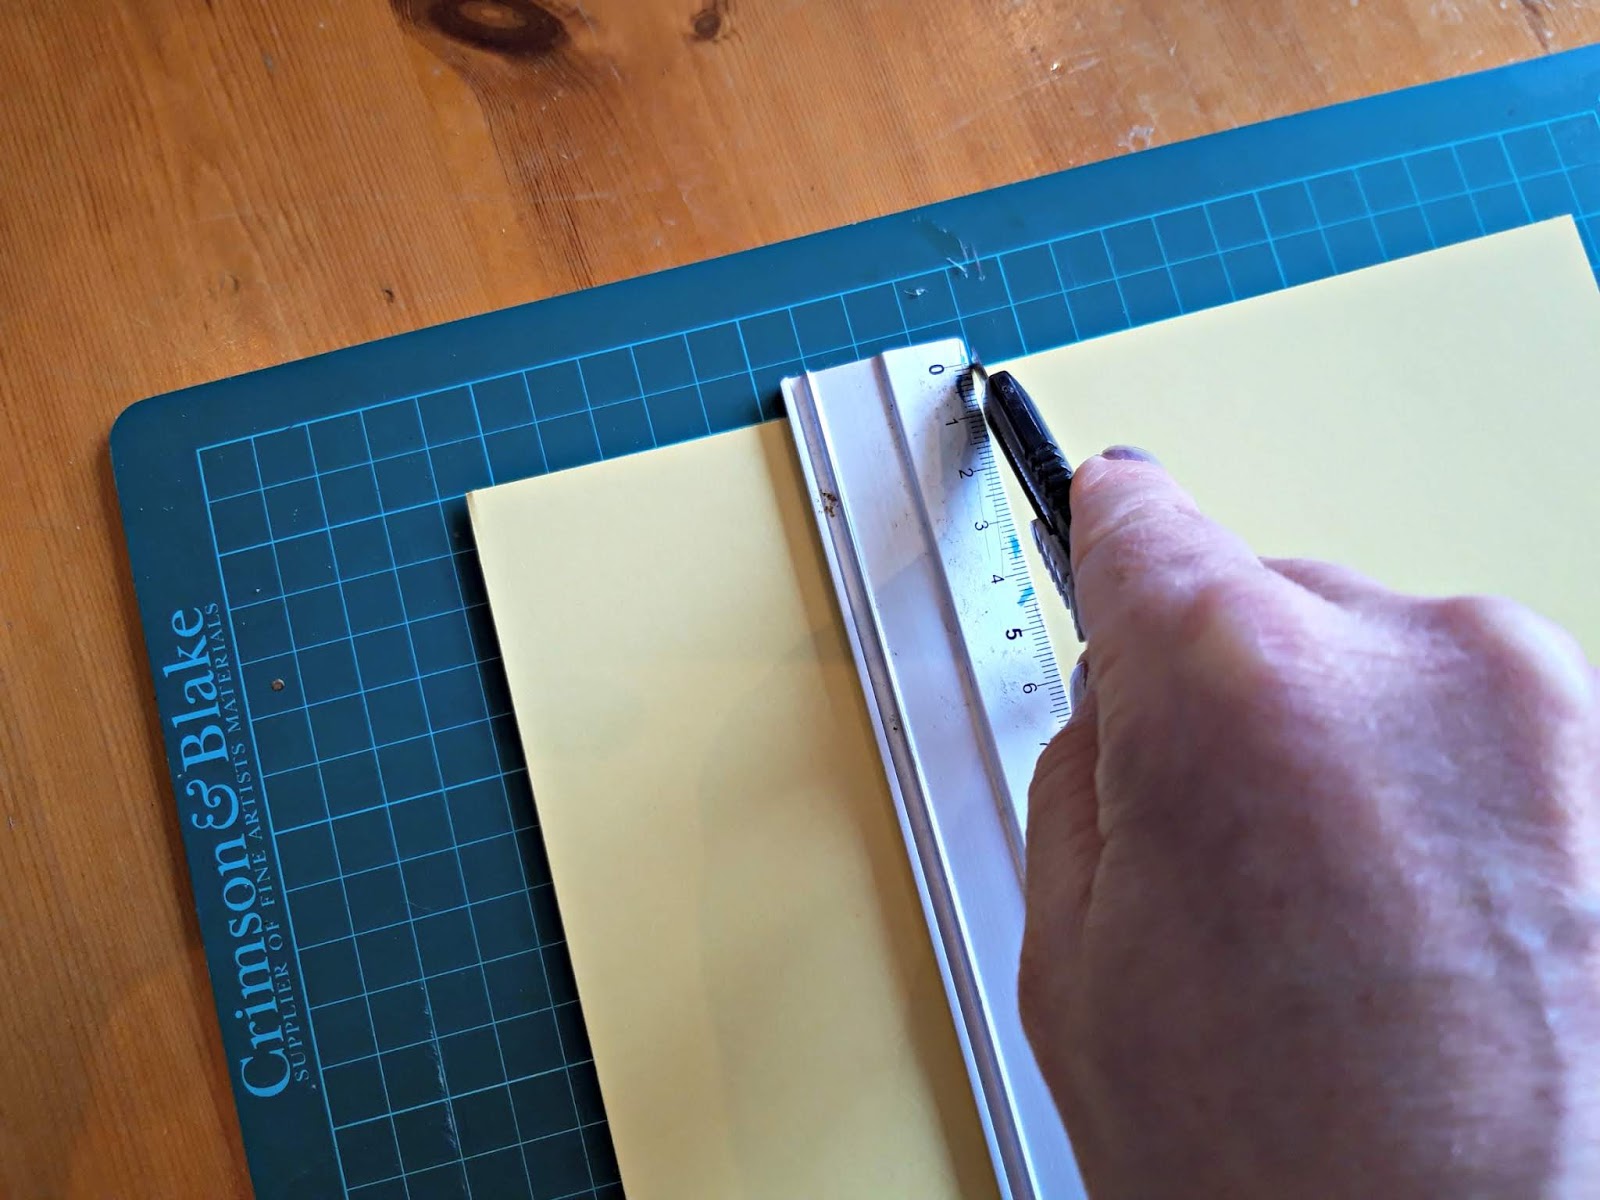
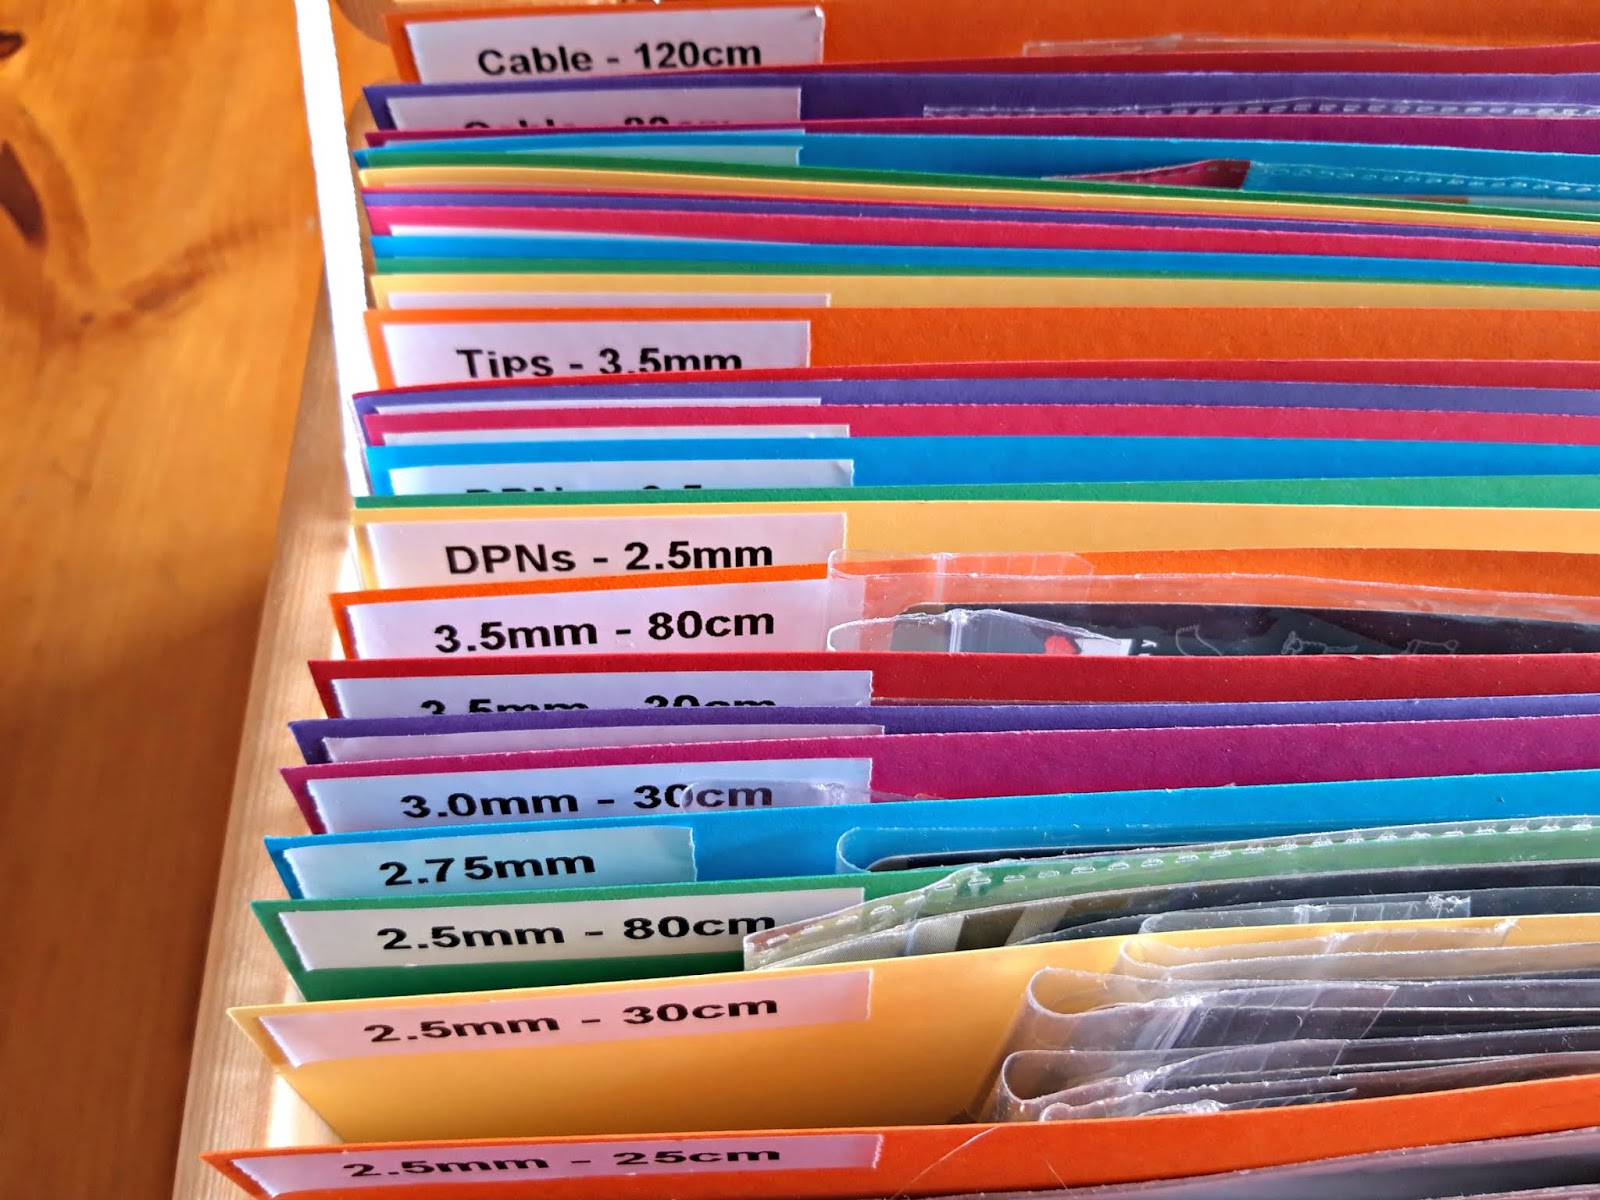
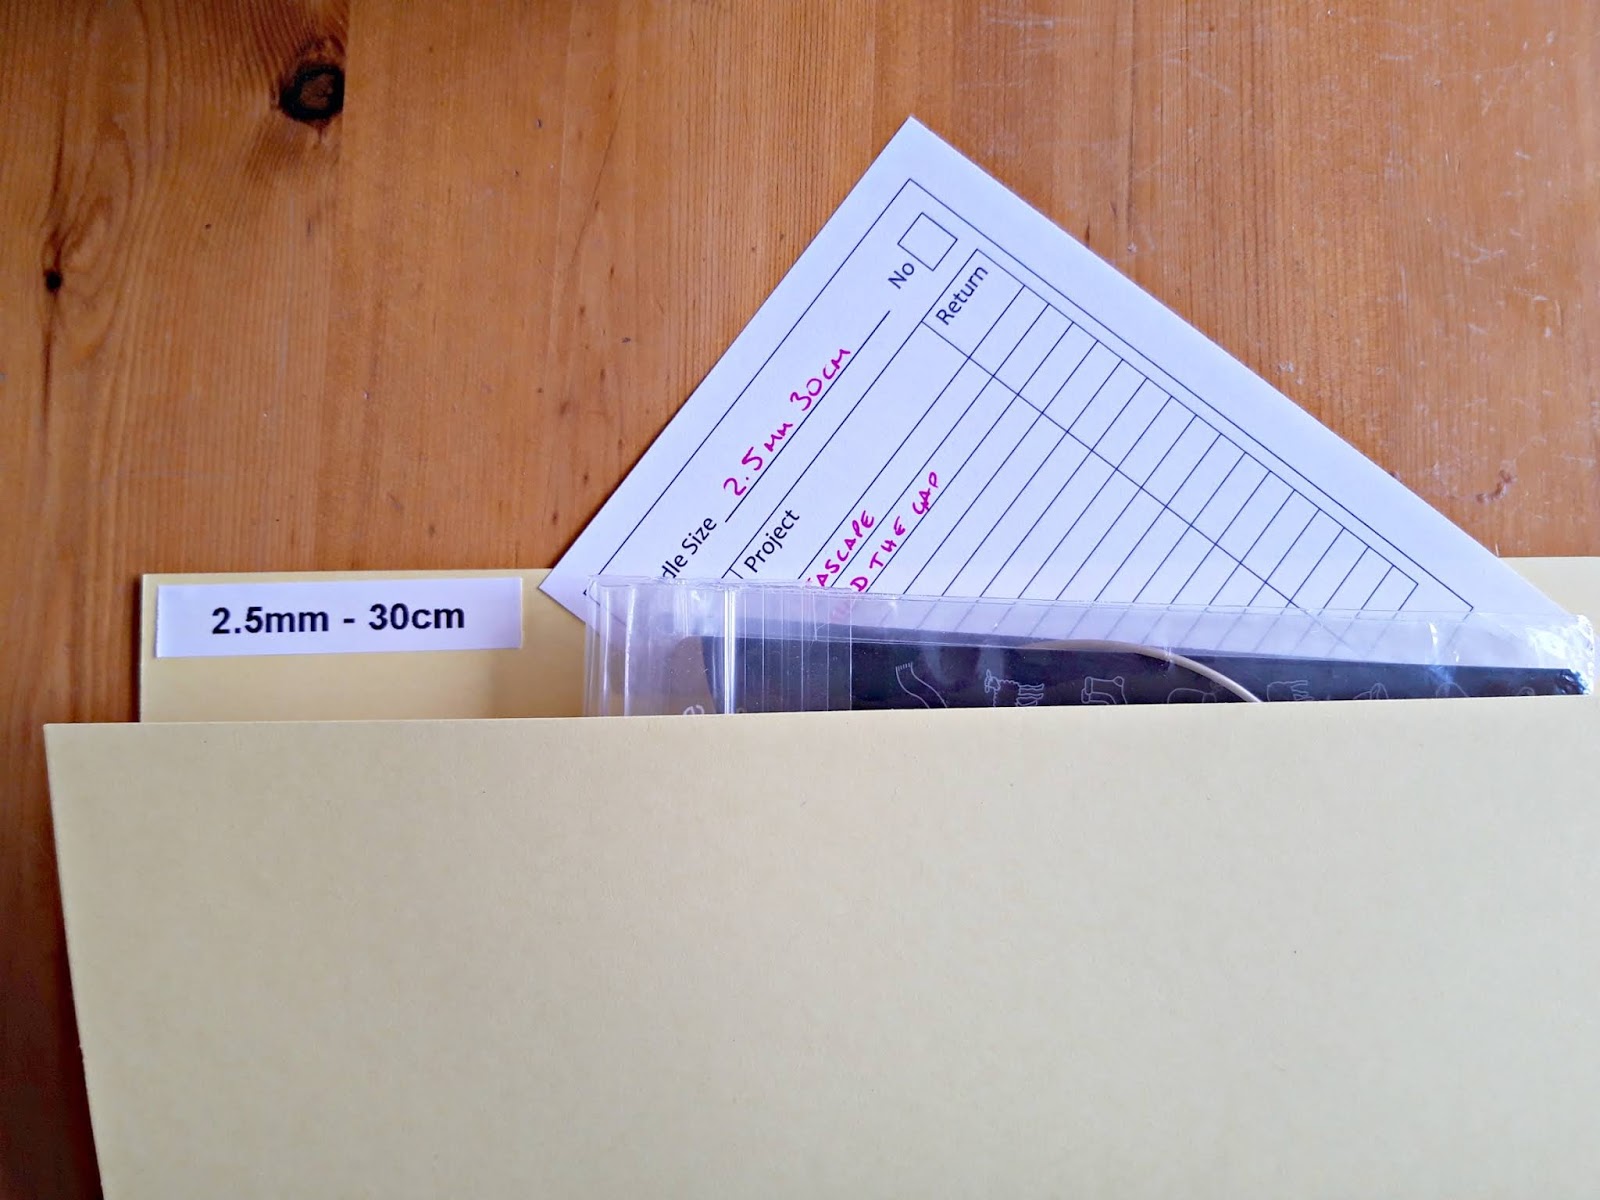
The blog post I read suggested using cut down cardboard folders, but I couldn’t find anything that would be the right size so I decide I would just make my own. I bought some A4 card and cut it to the right size to make a folder that would slot into the box and hold the needle packet. A4 card is 21 cm x 29.7 cm (8.3 inches x 11.7 inches); I measured 11 cm (4.3 inches) across the shorter side and scored down the length so that it would fold and leave a tab for me to attach a sticker, and I took 2 cm (0.78 inches) off the width so that the card would sit comfortably in the box.
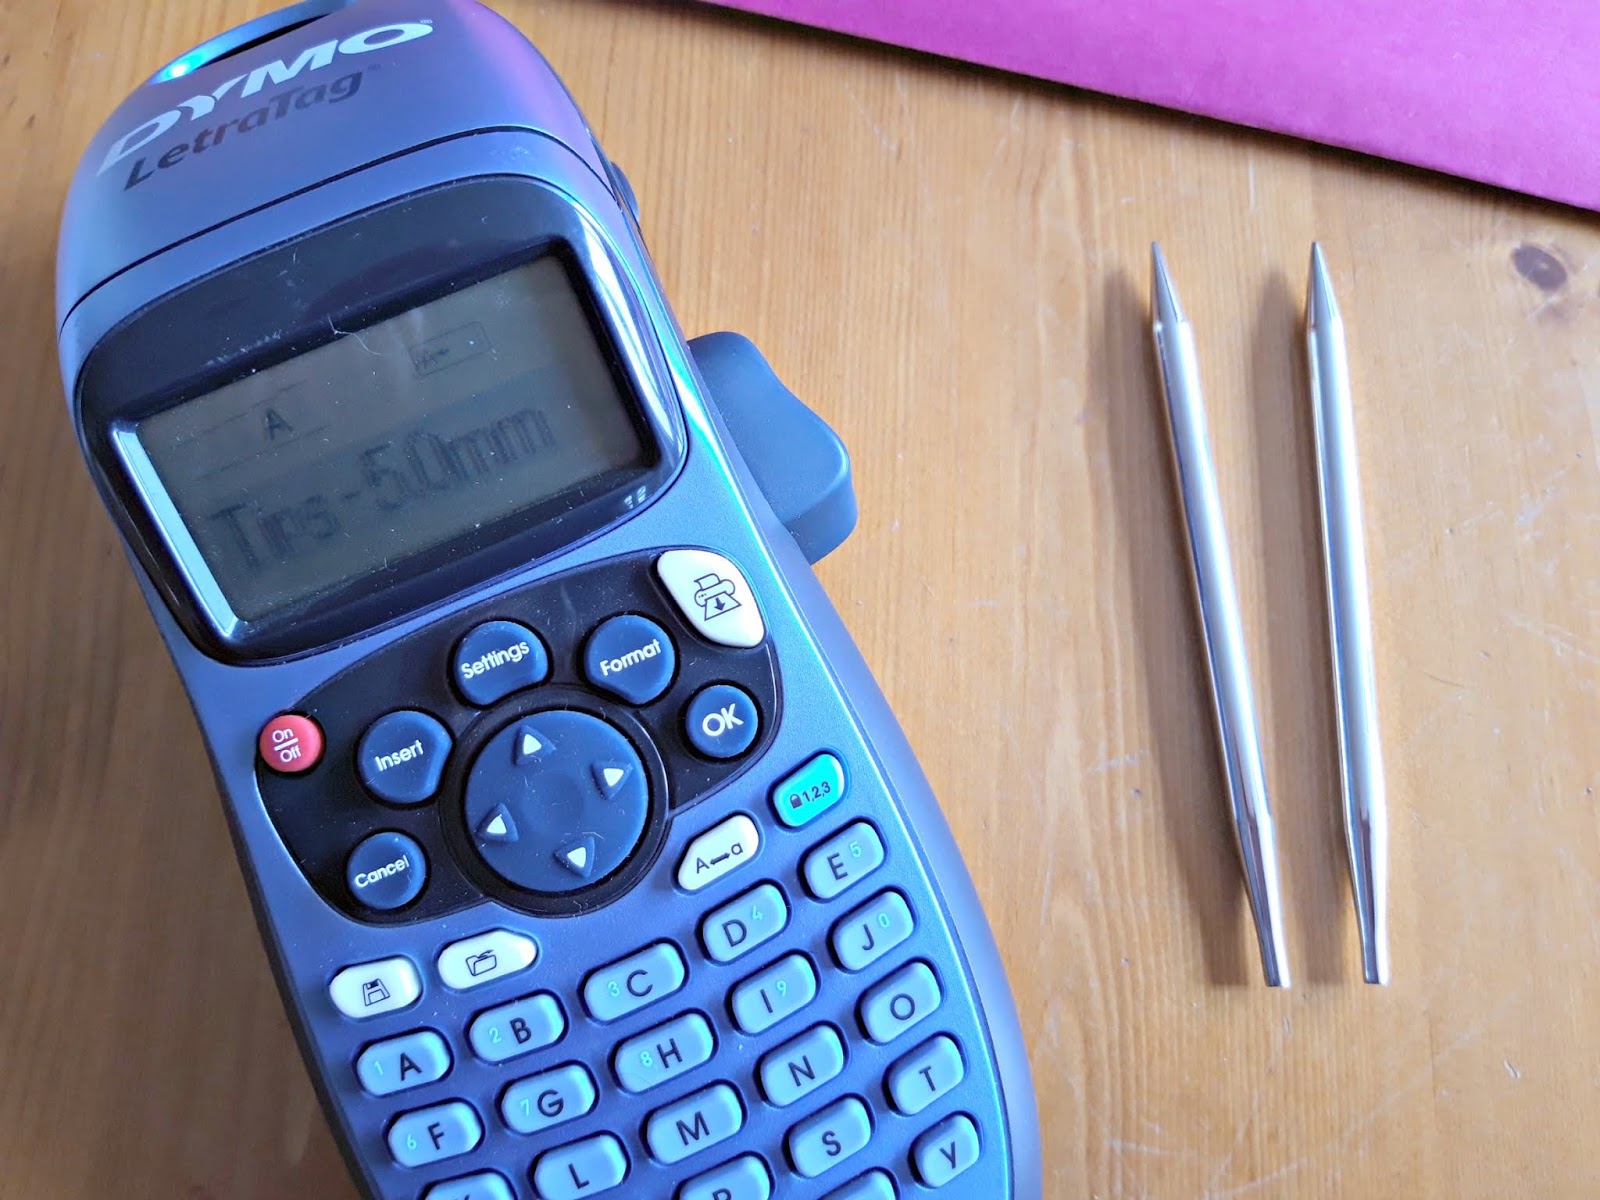
I decided to split my needles into fixed circulars (both short and long), DPNs, cables (for my interchangeable needles) and needle tips, and I was surprised at how many there were! By the time you’ve got a few different sizes of each type (for example, I’ve got 2.5mm needles in 23 cm, 25 cm, 30 cm, 80 cm and 100 cm sizes), there are quite a number of little folders needed!
I had a lovely time with the label maker! I originally bought mine from Aldi a few years ago when it was on offer and it’s had plenty of use, especially since big daughter went to university and felt the need to label everything that moved (and some things that didn’t!). Fortunately, the refill tapes aren’t too expensive!
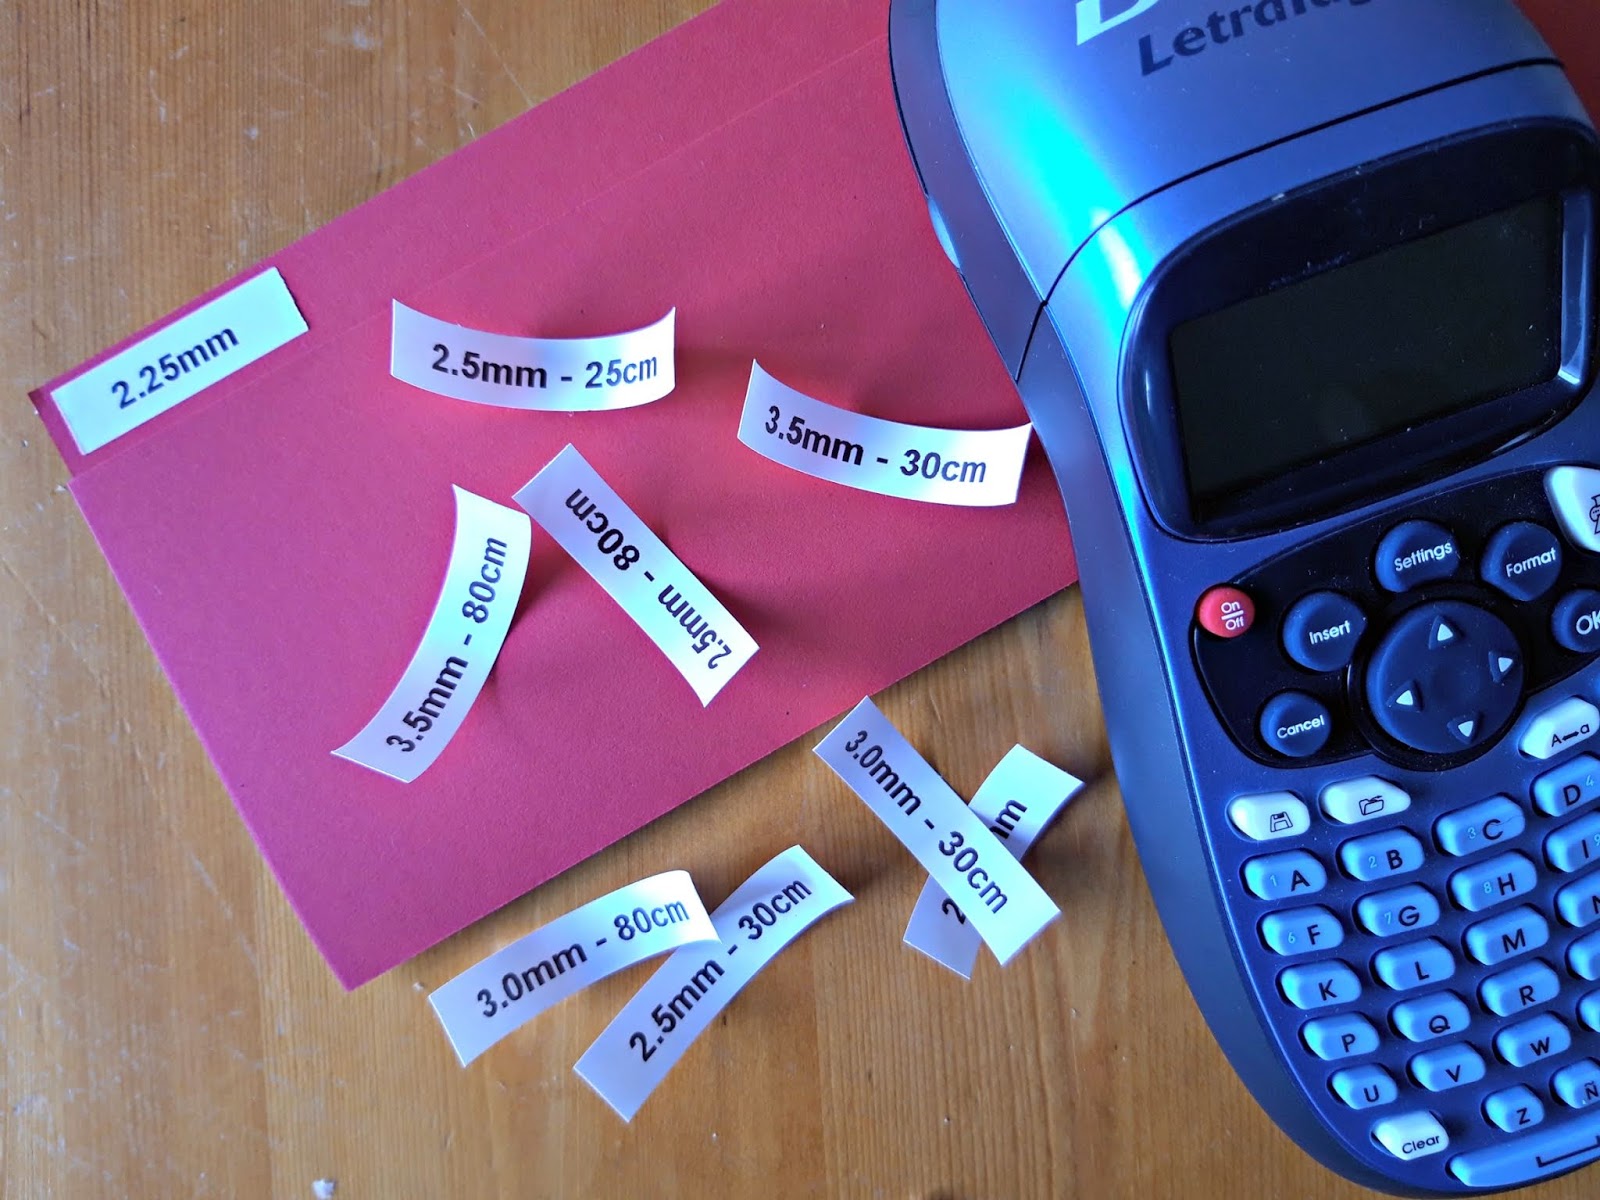
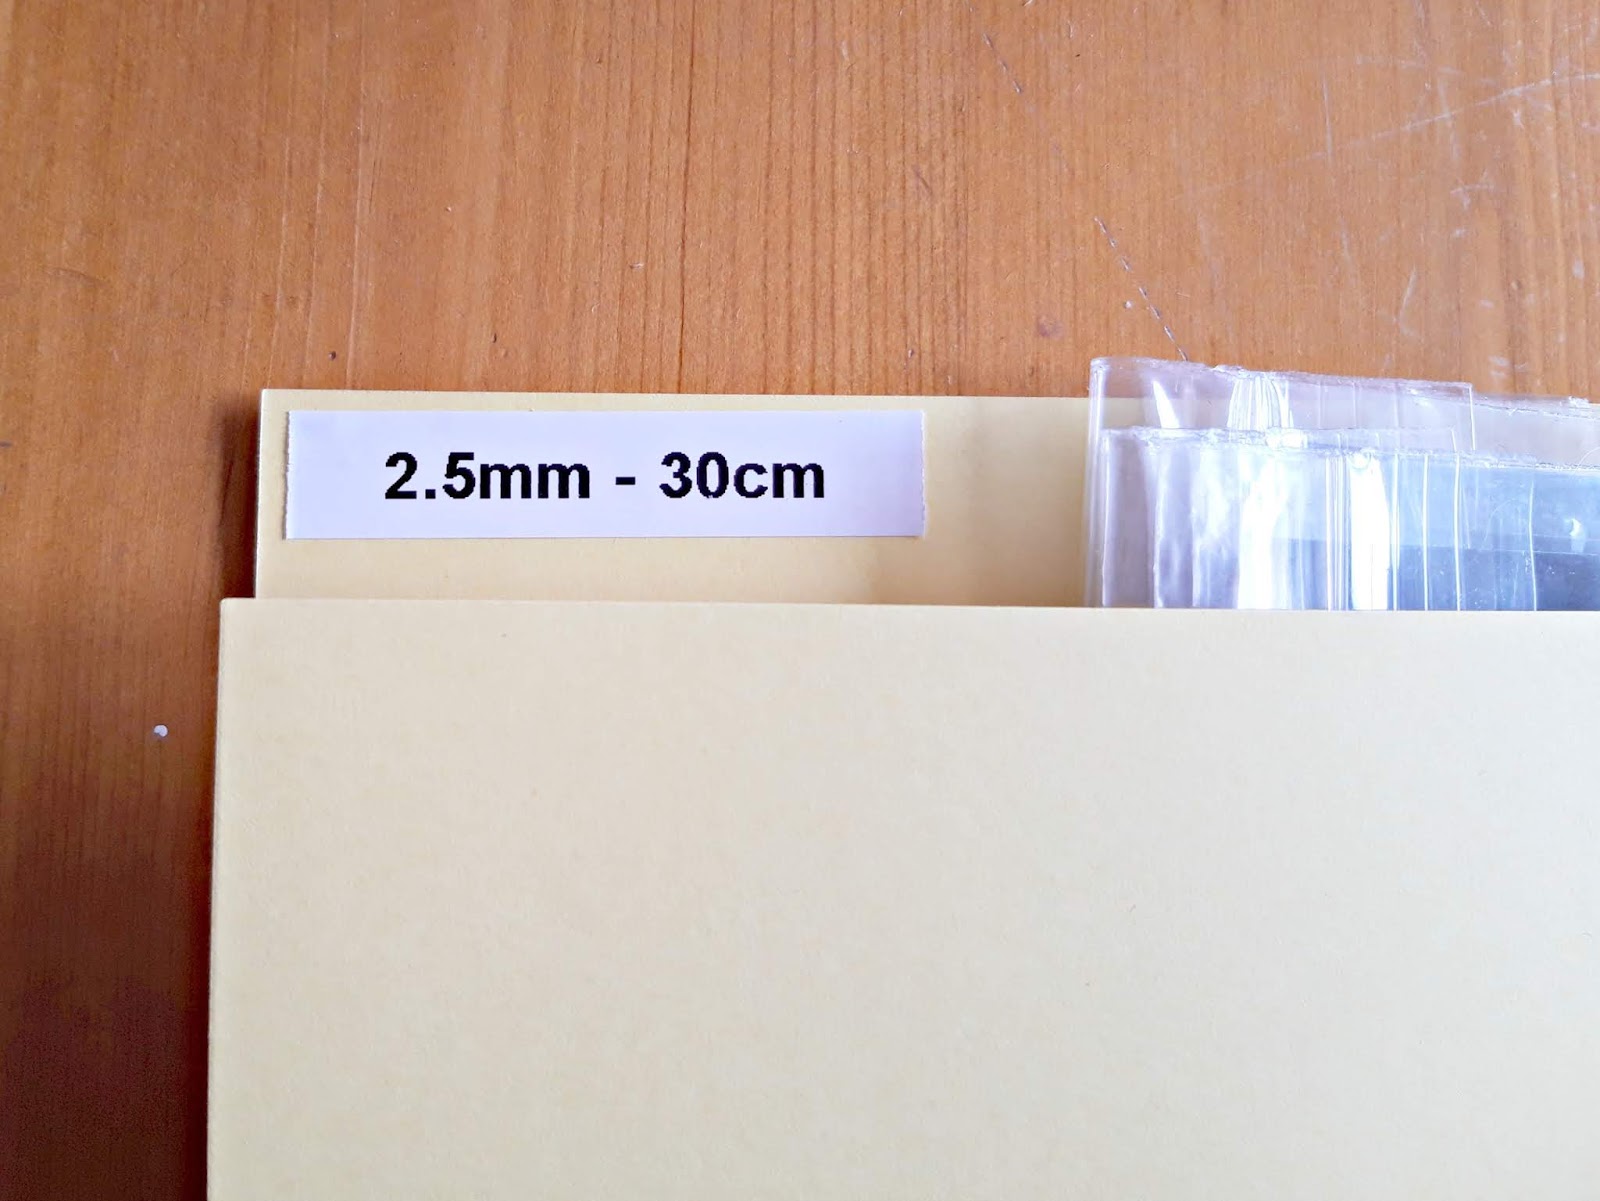
I think these little folders look pretty good!
The next thing to do was to put them all into the box and put the needles into the right folder.
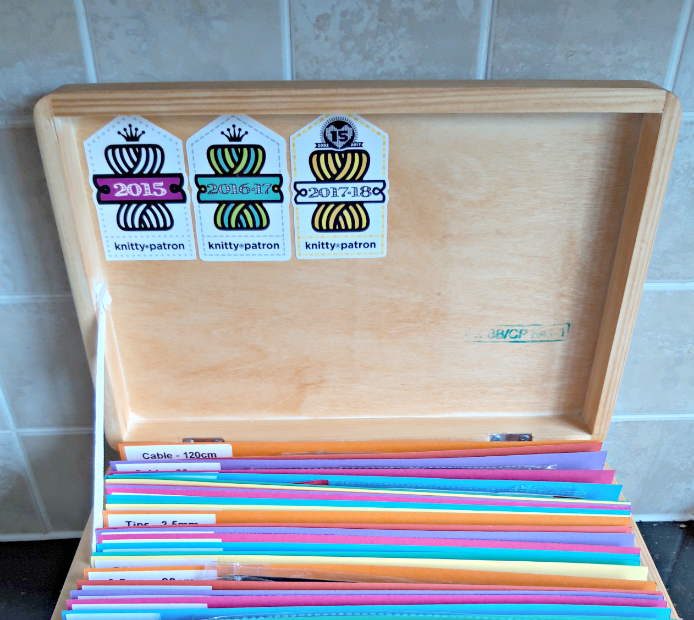
And those Knitty patron stickers? There’s a home for them too!
I was feeling rather pleased with myself, I have to tell you …
and then I remembered that the point of this system was to tell me where all my needles were. I headed off to the computer and made myself these inserts …
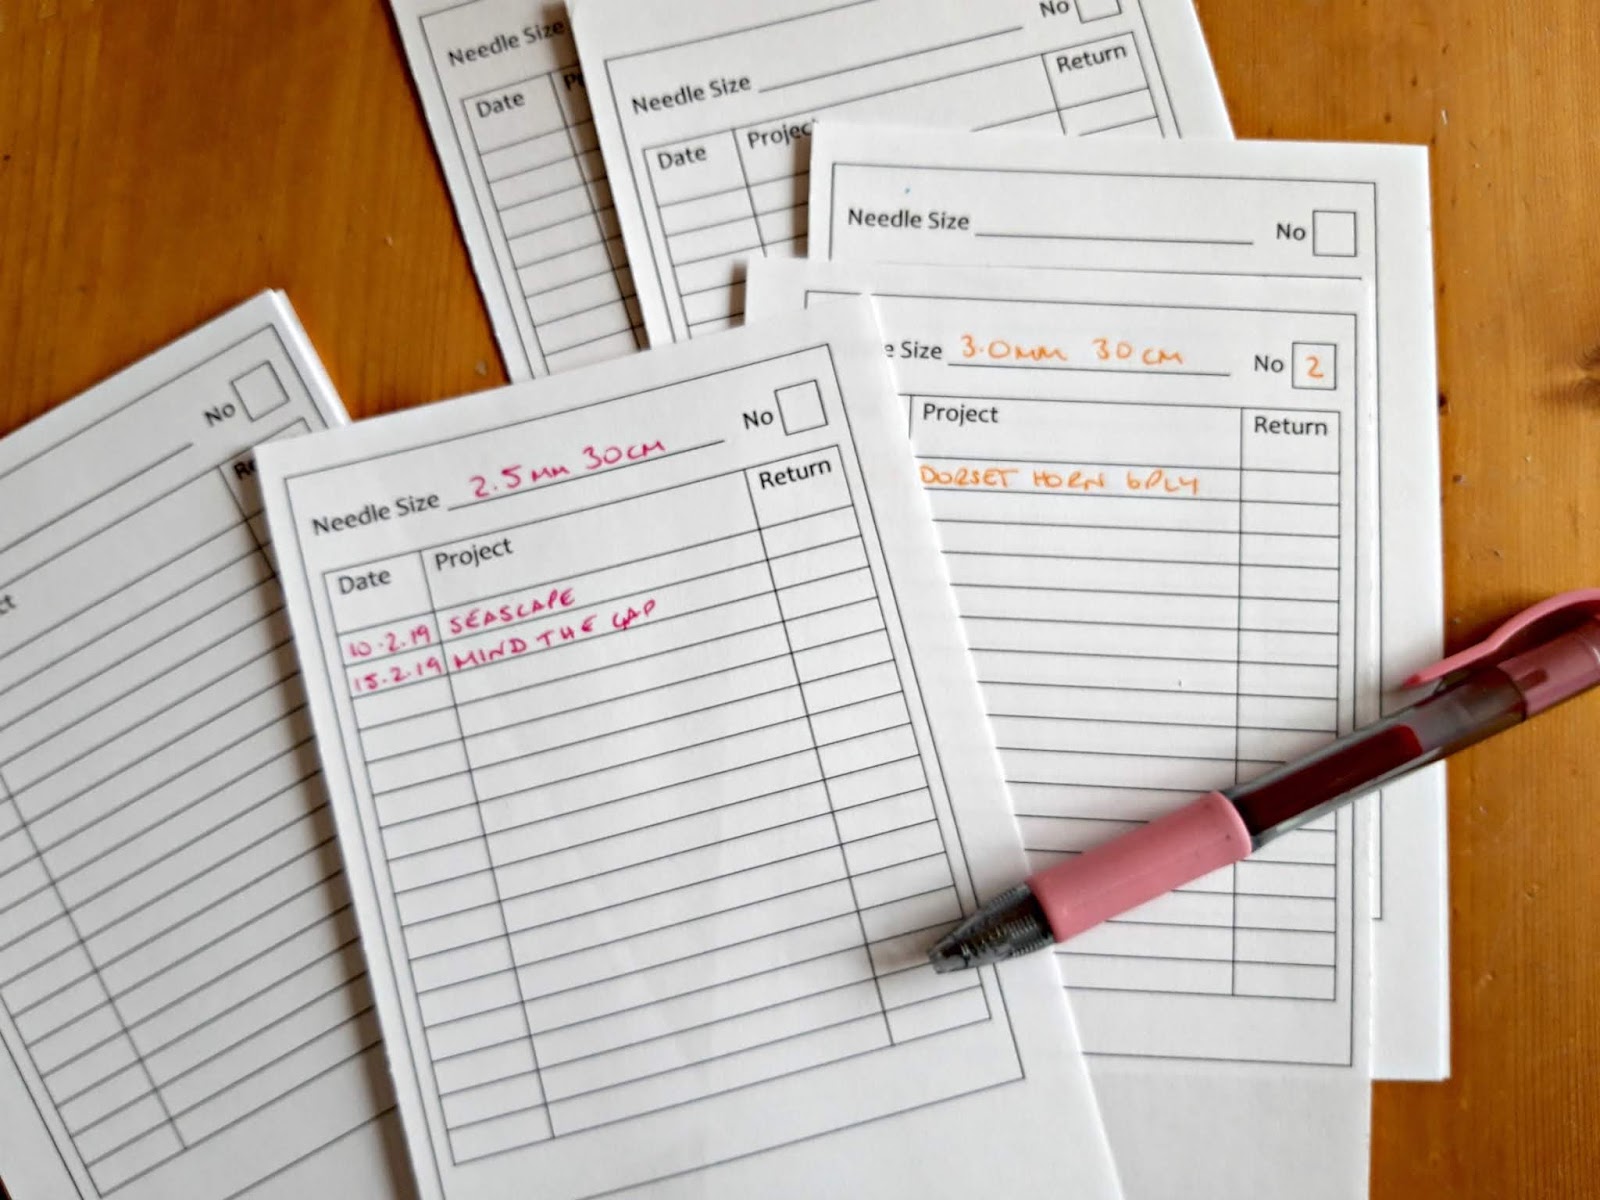
I used a separate one for each of the needles and I’m hoping that they should help me to keep track of which projects my needles are being used for at any one time. I have so many on the go! If you think they’d be useful for your needle organisation system, you can download the page here.
So there is it, my nifty new needle organiser! It’s seen plenty of use already and I have to tell you that it’s such a relief to know where my needles are!
I hope this might be something useful for you to make too
This tutorial is free on this blog and will always remain so, but if you have enjoyed using it and would like to buy me a brew, it will be much appreciated! You can find the donation button on the sidebar on the left hand side. Thank you! xx


What a brilliant idea! Need to do this, I hate being disorganised. Now can you sort my wool storage!
I used to be organised but for some reason that seems to have gone out of the window completely. I know where everything is but its just a bit like disorganised chaos. I keep telling myself that when I am on annual leave in a few weeks I will tackle all these little jobs. Truth be known only half will be achieved if any but I can live in hope can't I.
Mx
awesome idea, the master is bored maybe he could do this hehe
Wow! What a lot of work, but so worth it in the end. You'll never lose your needles now. And what a great idea to put the cards in the folders to tell you where your "missing" needles are. And who doesn't like a nice wooden box? xx
Ooooo I'm doing this!!! Currently my "stuffing the packets in a bag" method isn't as efficient as the name might lead you to believe.
Such an awesome organasation system, I definitly need to try this out. At the moment my circulars are just hanging on my wall!
I just love this! I also keep the packets but in an old project bag so I have to tip them all out if I want to find a pair. Thanks for the ideas
Very nice. A great idea.
Great idea. Particularly like the 'where are they now card'.
I'm currently cataloguing my stash using mini photo albums from Wilko – I record everything on the label & enclose a length of yarn.
i recently organised my wool into storage boxes, now each type has it's own box but i still need to do my knitting needles; my lovely DD1 made me a 'wrap around' for my straights but that won't work for the circulars & your system looks just right! i keep all my new needles in their original packets when not in use & like you i tend to store them in project bags! also i do this as the numbers tend to rub off the needles, wish they would stamp or etch them on instead.
great ideas!
thanx for sharing
What a fantastic idea. I am always organised in my head but it never gets past there lol
What a fabulous idea! I love how everything has it's own place. And, it's so attractive, too! Wonderful.
Where did you get the box?
If you click the words "this box" when I'm talking about it in the blog post, it will take you to the Amazon page that I used, but I'm sure you can get them elsewhere if you don't like shopping with Amazon 🙂
Wow Christine, what an excellent idea. I badly need one of those too, Must see if I can get a box like this one first. Clever Lady. Hugs Rita xxx
What a great idea! That is a great way to organise your needles especially as they are not cheap to replace and you have quite a collection there. I am always losing DPN's but whilst I am knitting a project!
i love this..gonna get me box…but i have a question..need some ideas..i have a lot of needles that are boye..with no case..any suggestions on what kind of bag to store them in..wish they would sell needle bags that you can use for whenever the original packing gets lost…thats one thing i need..
I use the folders in my box to store needles without a package – you could always put them in an envelope inside the folder if you thought they were going to get lost 🙂
I just discovered your website. And I've already shared it with a few of my favorite knitting Facebook groups. And have casted on your basic sock pattern in Ravelry while bookmarking your website tutorial on how to make a sock. Because I'm hopeless and have yet to make one. I can knit many things but not that! Anyways… I LOVE THIS POST ABOUT ORGANIZING CIRCULARS!!! BRILLIANT! I do have a question…. I've now added a few interchangeable circular sets. How do you manage that? Or do you?
I am sure you will find sock knitting a breeze if you're already an experienced knitter, Cindy! 🙂 I have interchangeable sets too – you'll see if you look that some of my folders are for tips and cables so I keep them organised in that way 🙂
I’m late to the party! What a great idea. I’m tired tonight so could you help me out… did you cut the card to size and simply fold it to make like a birthday card with a tab at the top? No glue involved? It seems too simple to be true.
Hello! Yes, I just cut the card and folded it – no tab needed as I used a sticky label to mark the needle size 🙂
Christine, I want to say you are an inspiration to us all with encouragement patience, kindness and inspiring ideas. Thank you.
Sue x
Thank you for this tutorial! I’ve been wanting to organize my circular needles but none of the ideas seemed ideal until this one. I bought the wooden box—love it! Cut my folders and labeled them. Perfect! I was surprised to find I have 3 of one size/length! I think I still must have some needles in WIPs somewhere.😉 Thanks so much! I’m glad I found your site!
I’m really glad it’s just what you needed – I’d been struggling to find the perfect thing for me too, but I love my box! 🙂 xx
Thank you for sharing your needle organisation idea and I have succeeded in making a pair of socks.
That’s brilliant to hear, thanks for letting me know! 🙂 xx