
Split Mittens – free pattern and tutorial
As I’ve got older, I’ve realised that I’m much more of a mitten than a glove kind of person. I don’t deny that gloves are practical and useful and I have more than a few pairs myself, but there’s just something about a mitten that I really like. My hands are warmer, for a start, as my fingers are all together and as I’m out with the dog in all weathers at this time of year, I need warm hands to be able to deal with lead buckles and my pocketful of treats which keep the dog from abandoning me altogether in favour of more exciting smells.
However, there is an inherent problem with mittens in that you can only deal with said lead buckles and treats – and anything else you might want to hold, from cameras to car keys – if you take your mittens off. I got tired of whipping them off to pull them back on over frozen fingers which had only just warmed up by the time I had to take them off again. I’ve never seen the point in fingerless gloves, and those ones where you have a little flap to pull over the top just look too fiddly when it’s freezing cold and you’re trying to scoop unmentionables into a poop bag as tidily as you can. There has to be a solution, I said to myself.
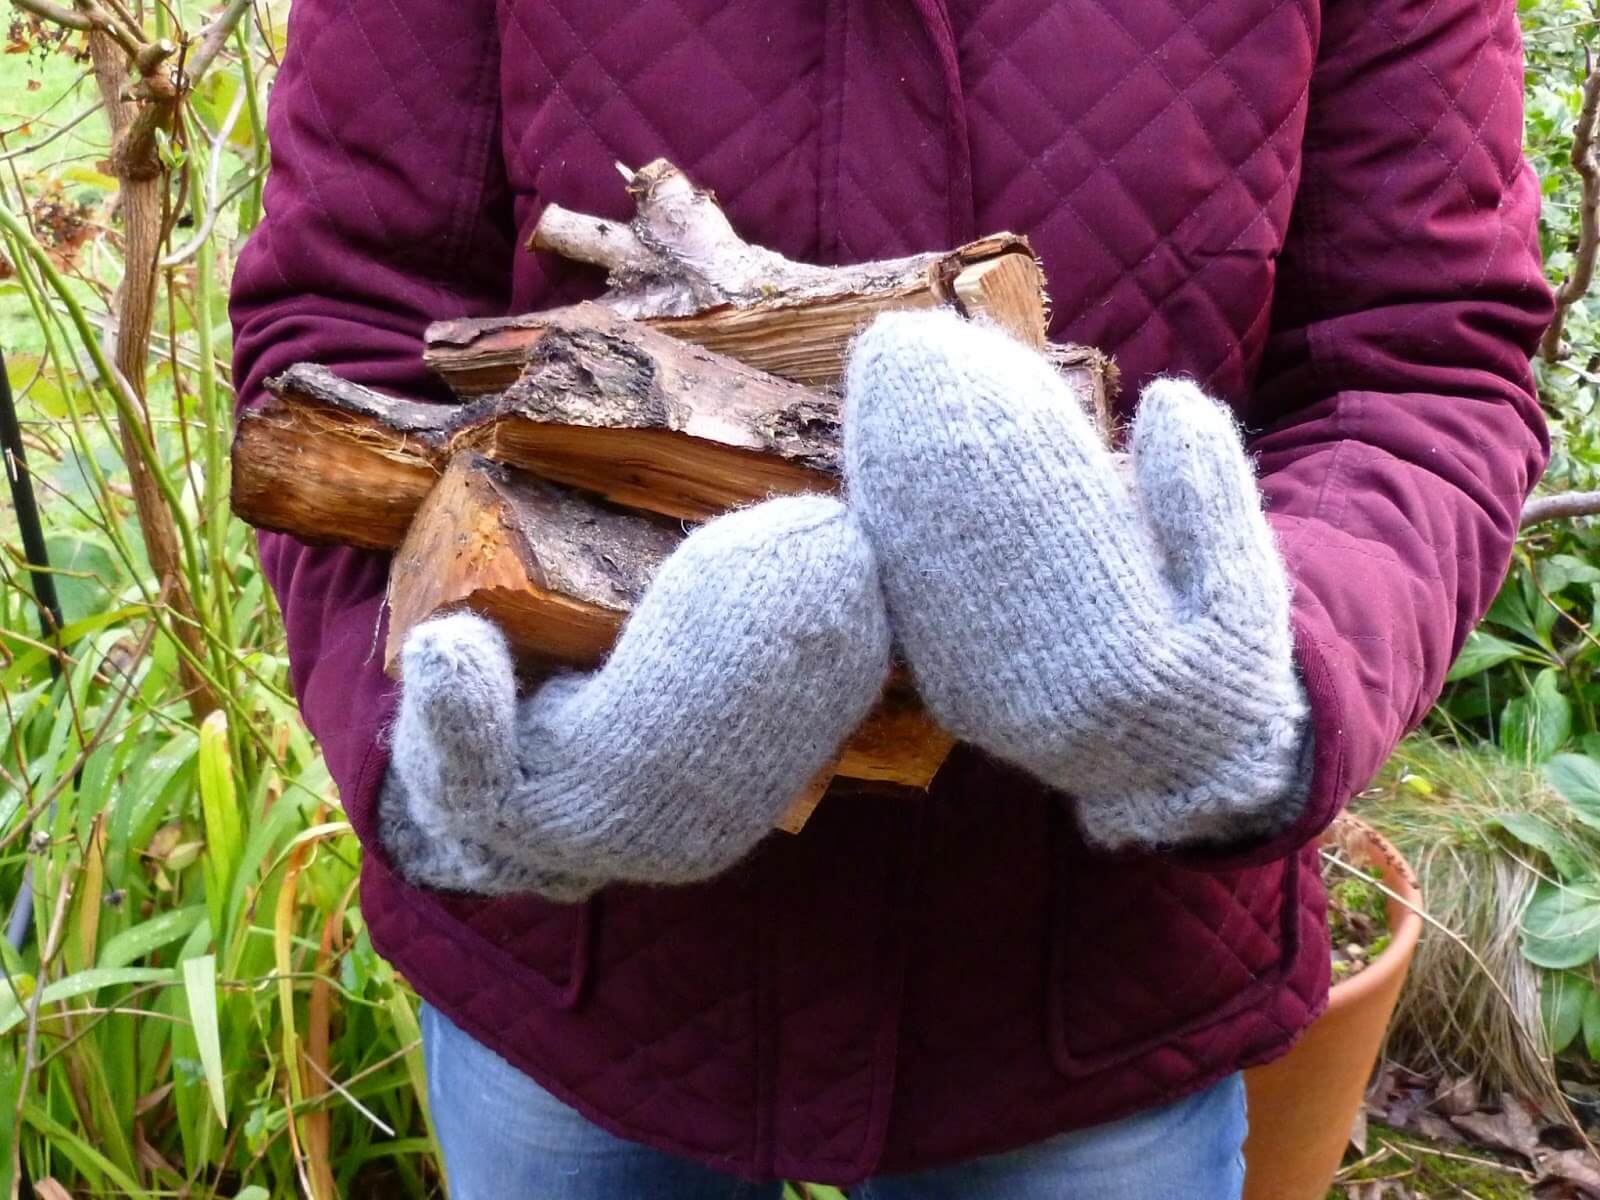
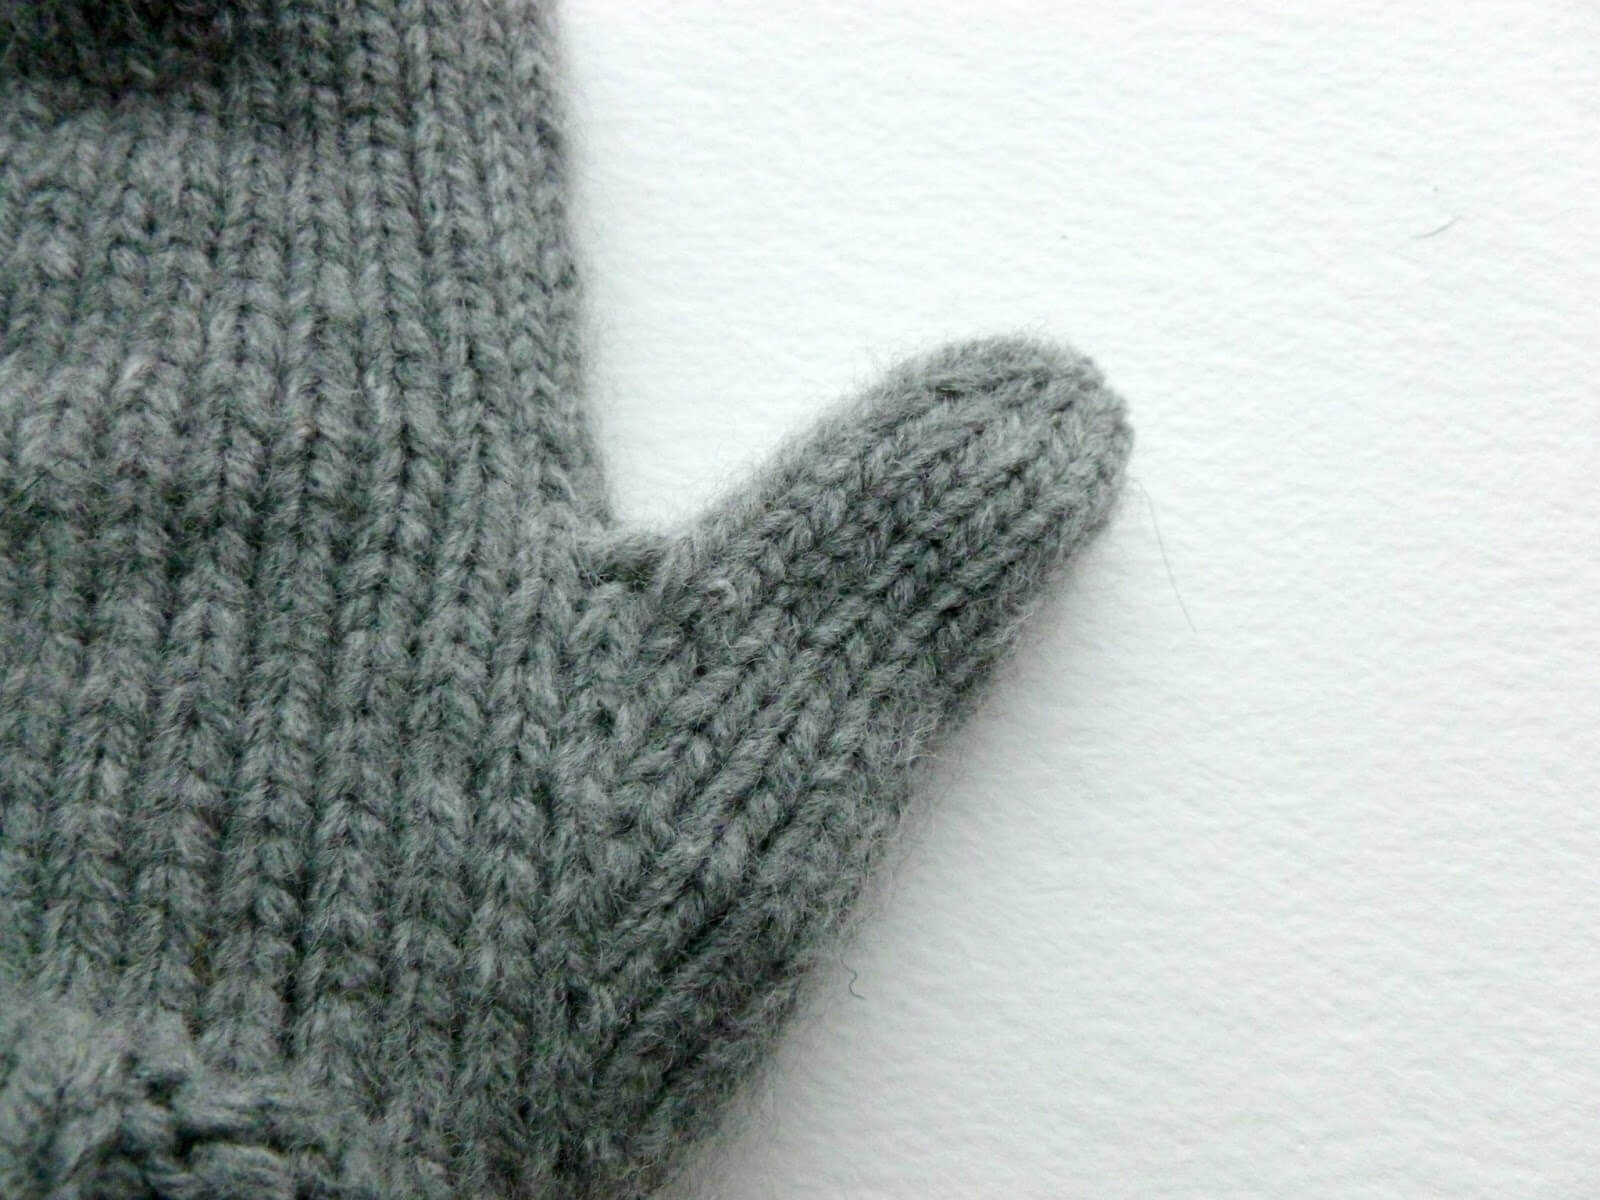
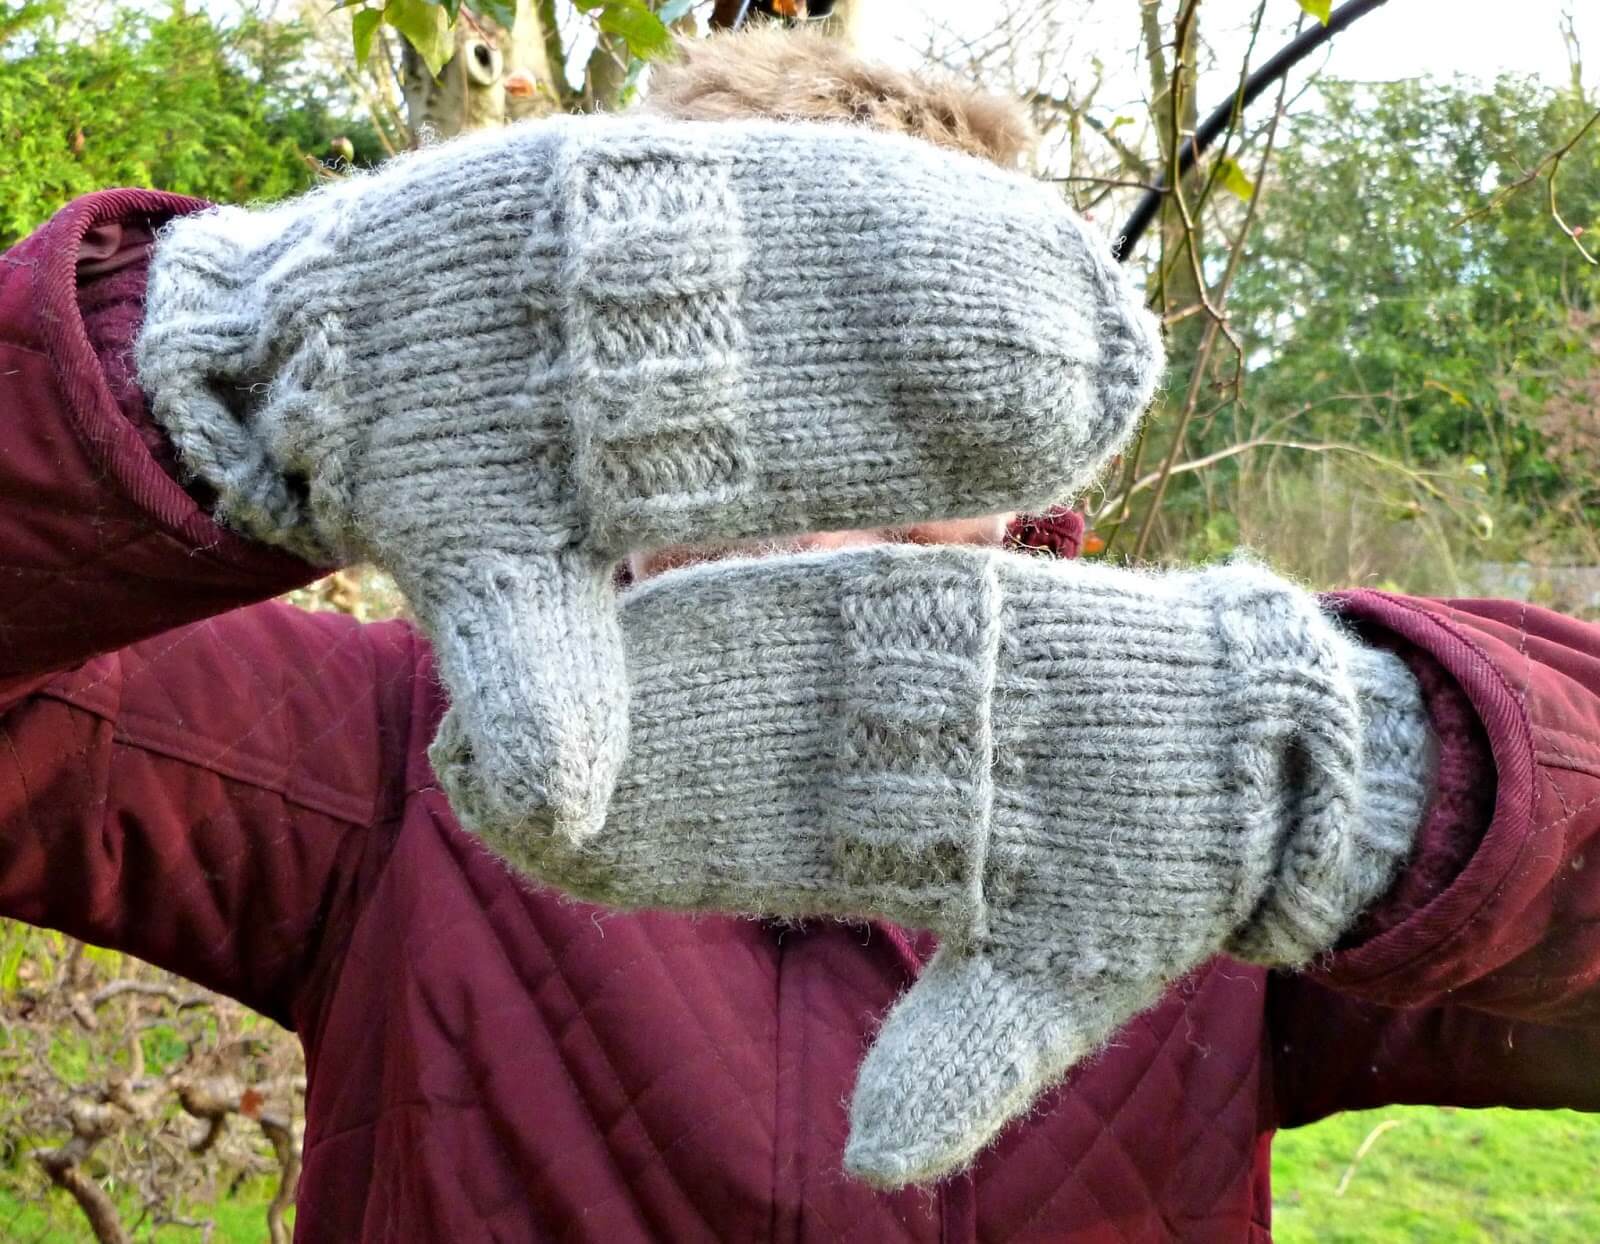
And this is it! The Split Mitten.
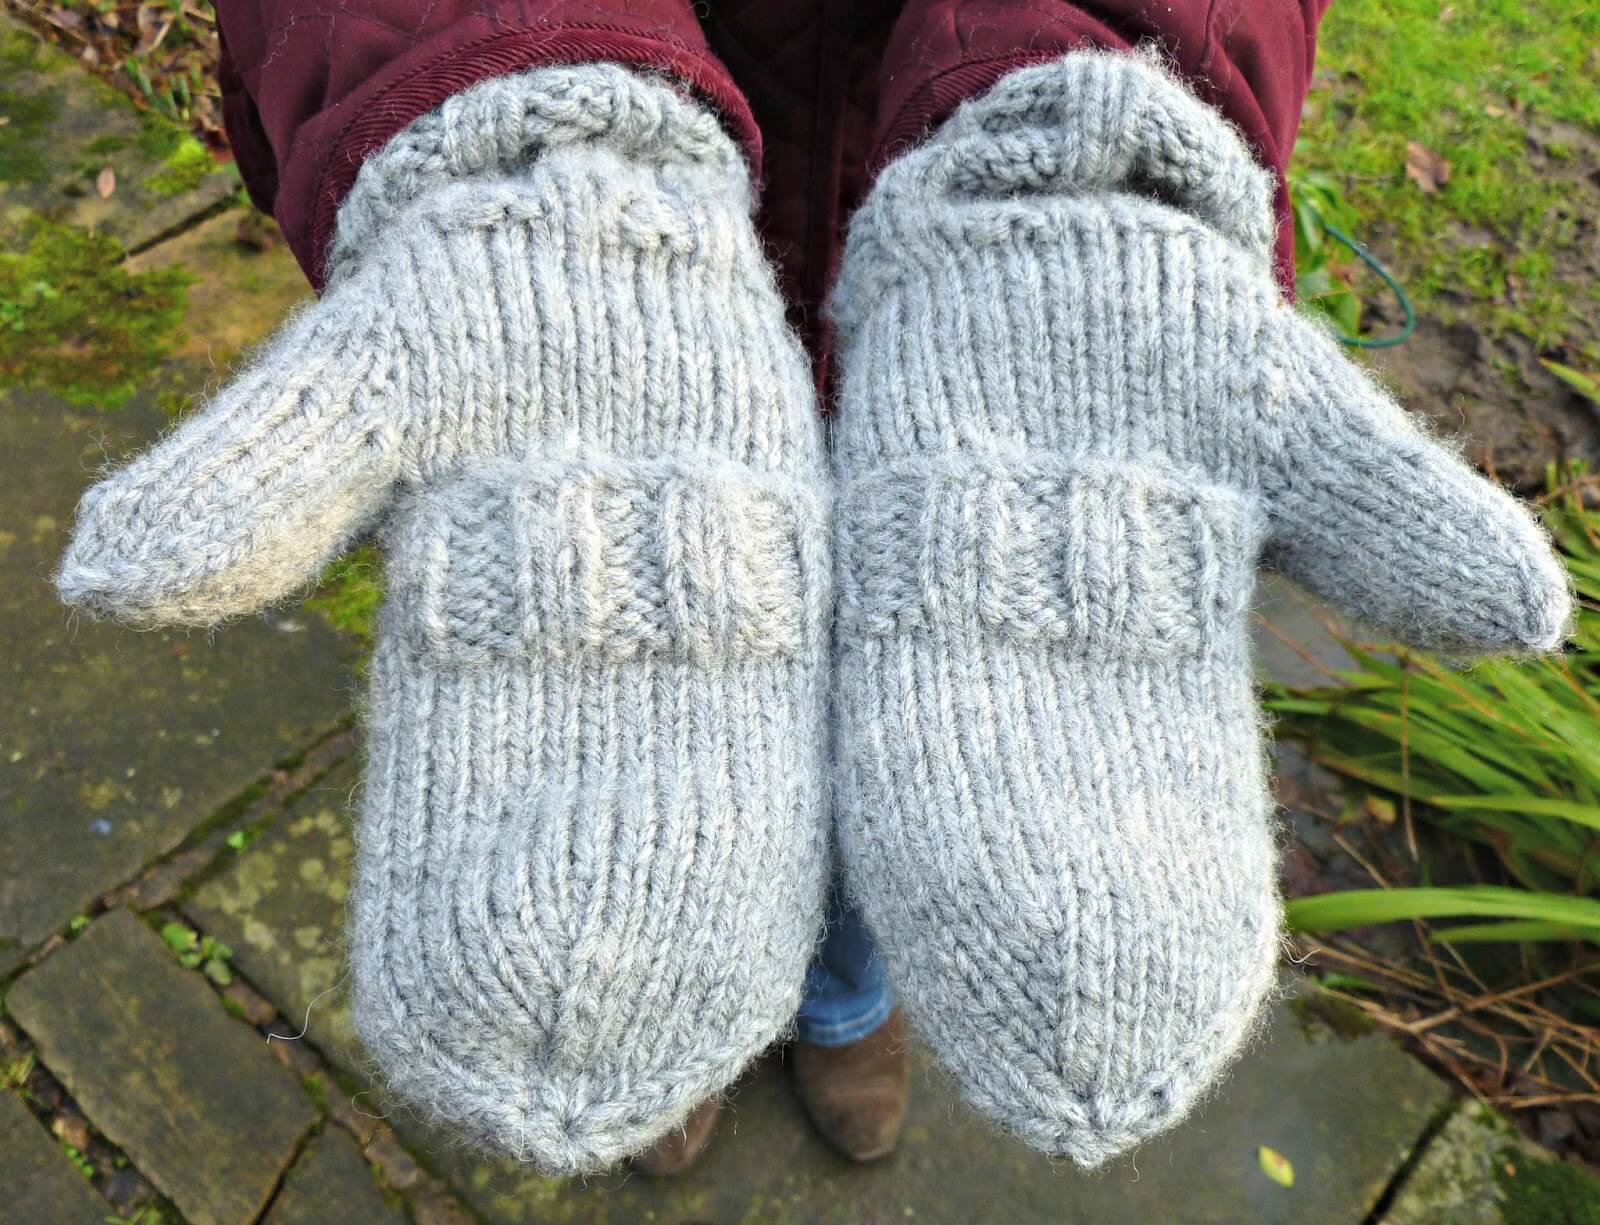
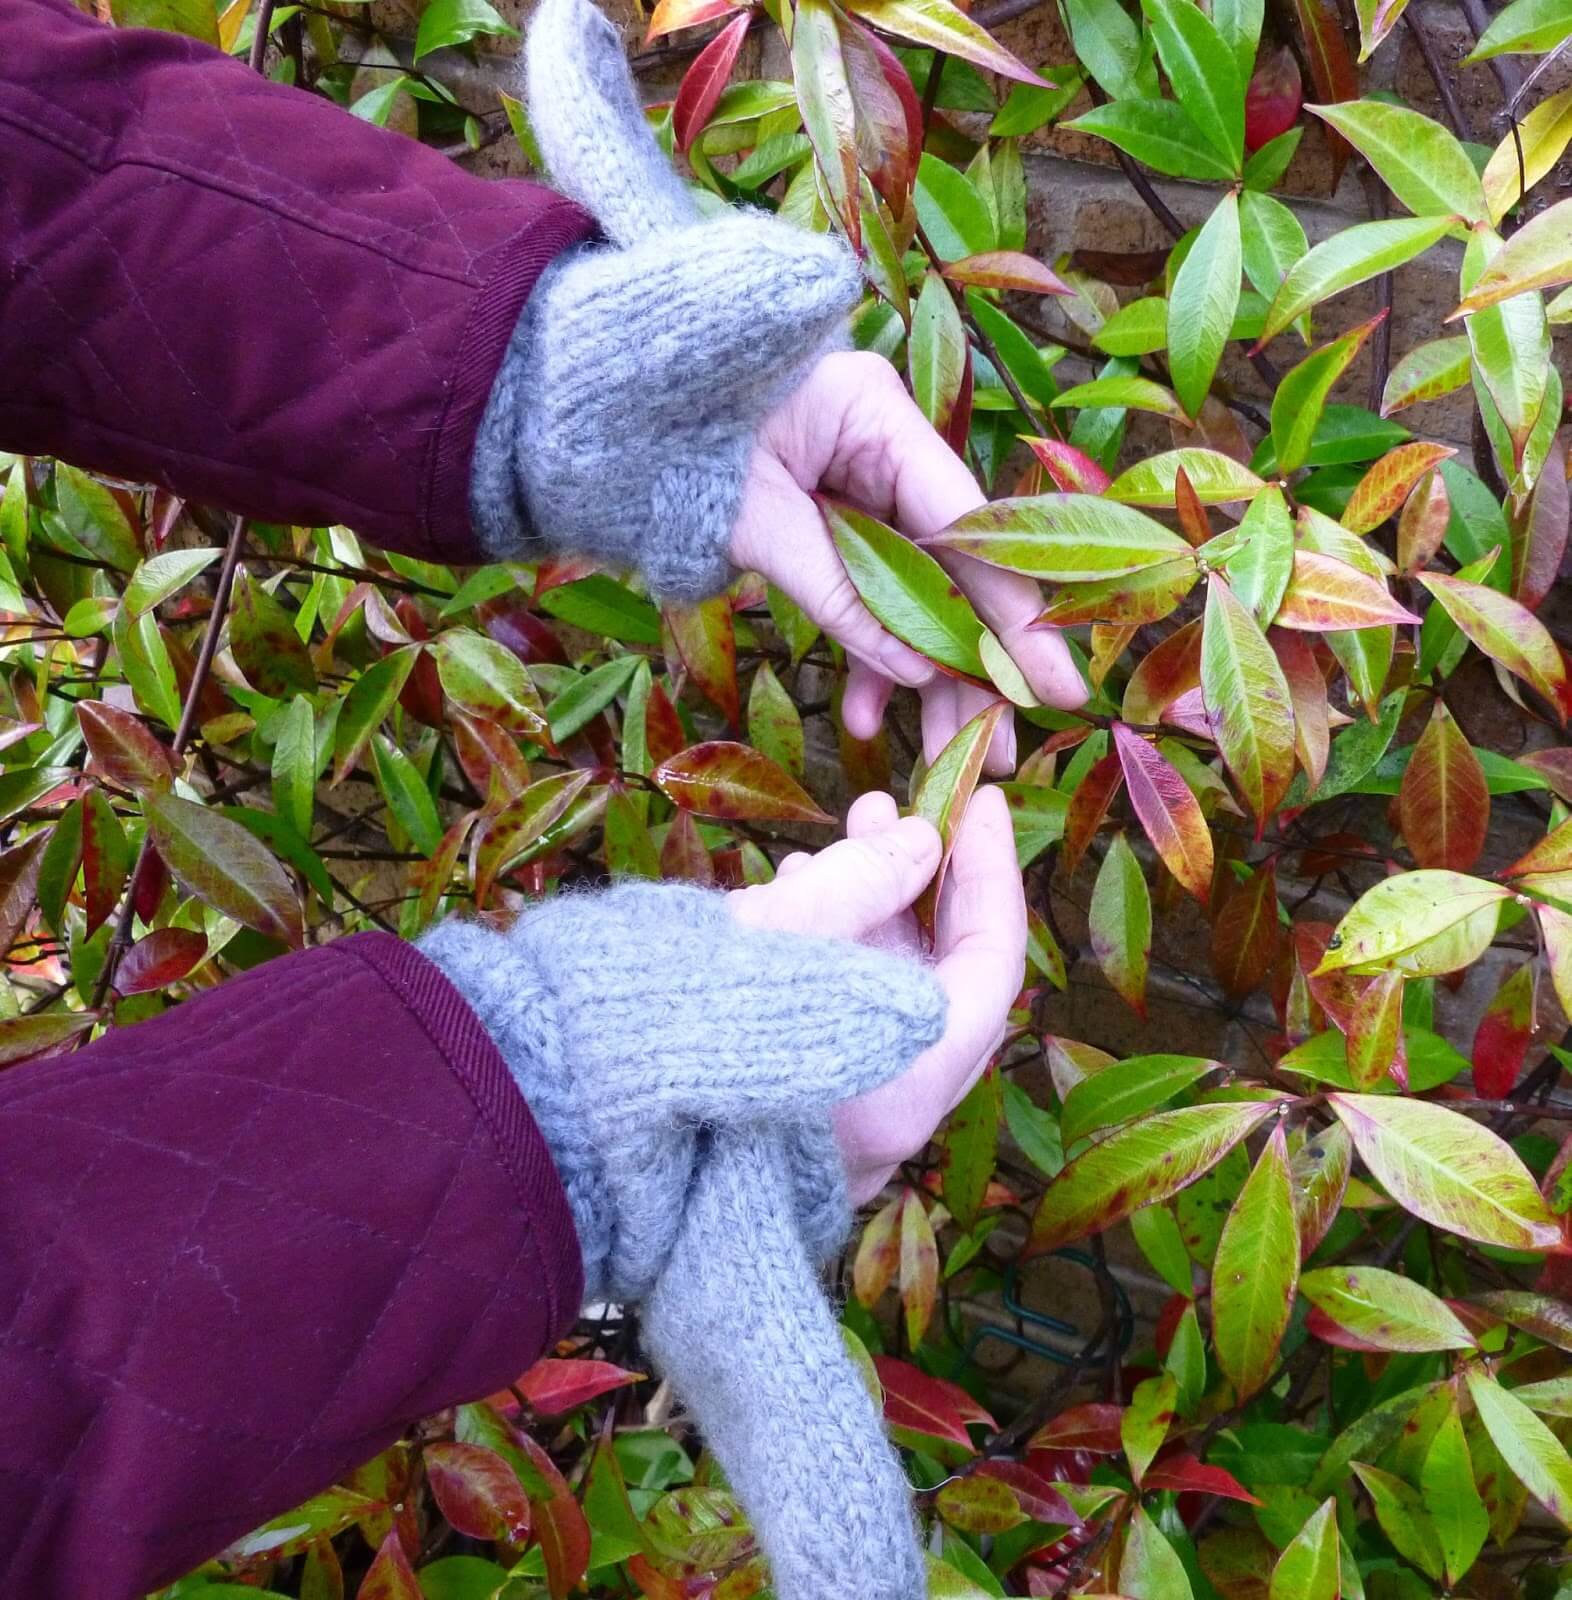
A mitten with a flap in the middle of your hand so that it’s easy to pop your whole hand out, take your photos, pick up the poop or do whatever you need to do, and then slip it back inside where it’s still warm because your mitten never actually leaves your hand.

The long cuff makes sure that the mitten stays put inside your coat sleeves too. I’m not a girl who likes unexpected draughts.
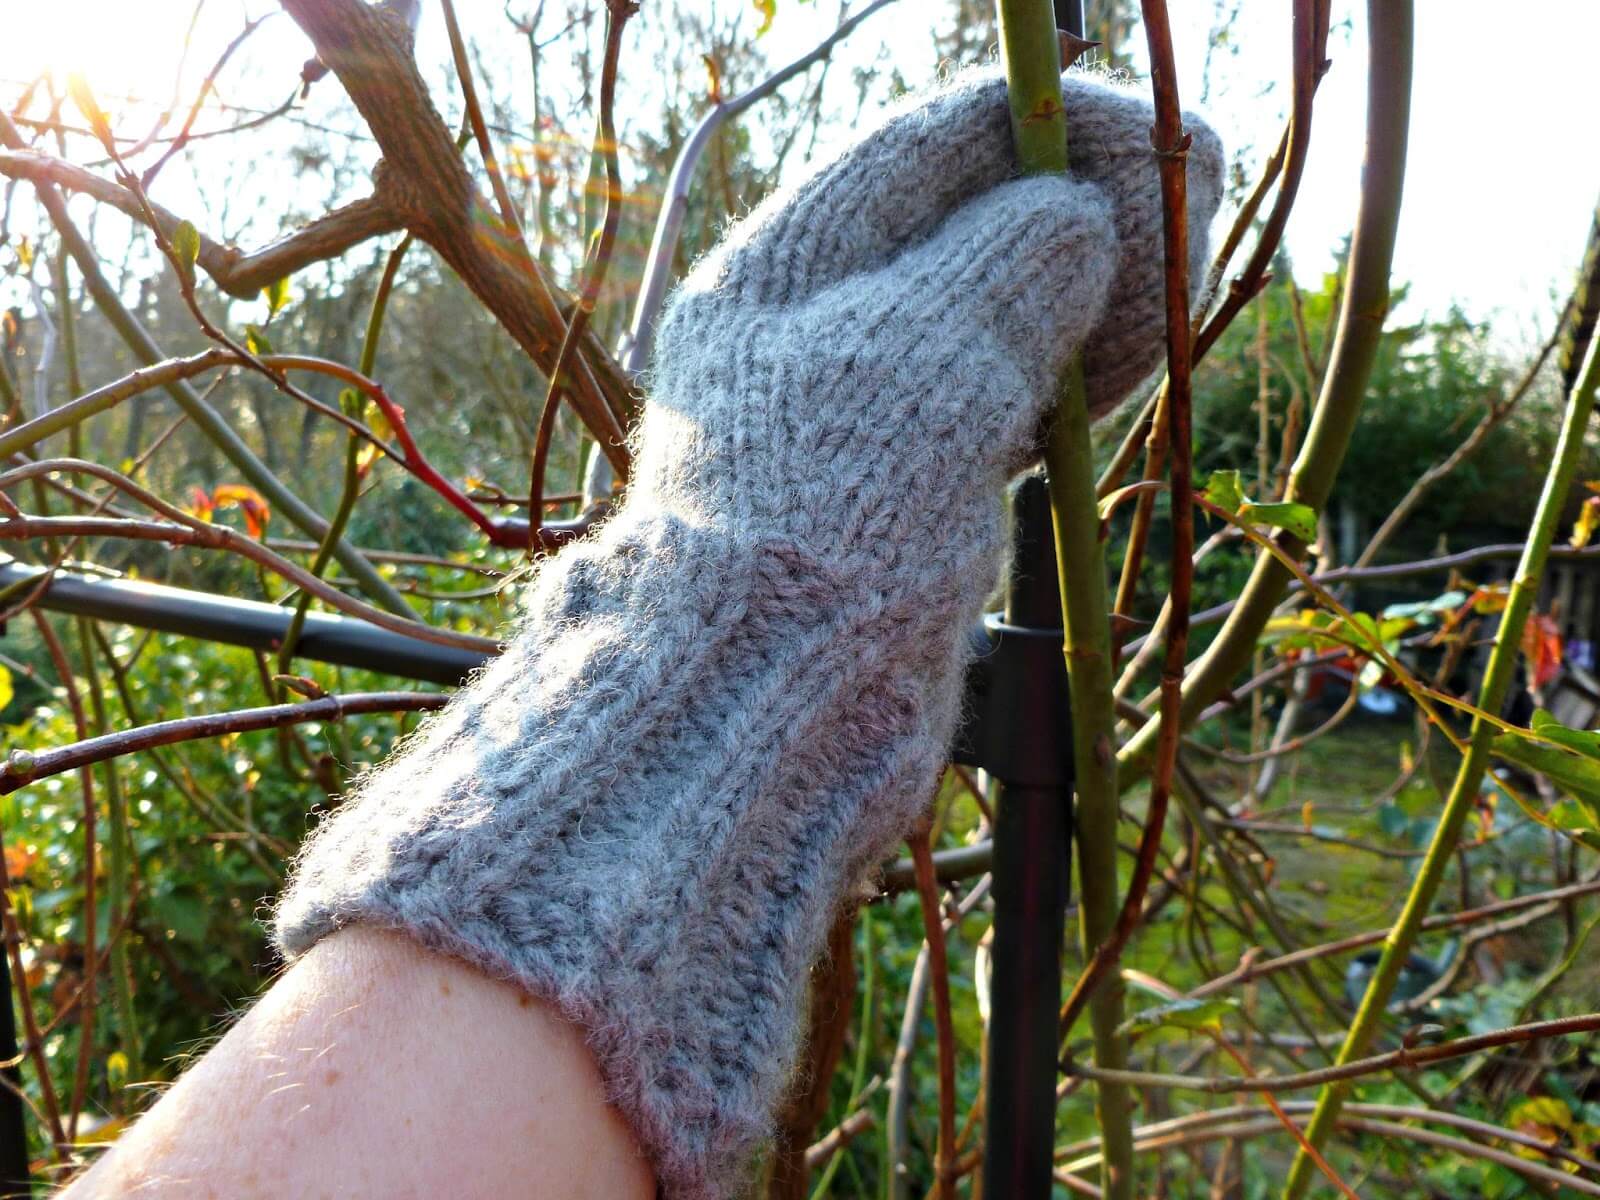
But don’t your hands get cold with that flap? I hear you ask. Surprisingly, no.
I’ve been wearing a prototype of these mittens for about three winters now (I hope you’re impressed with my dedication to mitten research and development!) and I’ve not had a problem with draughty palms. Because of the way the flap is made, it allows your hand out but then keeps your hand warm again once it’s back inside the mitten. I’m not sure that they’d be ideal for an Arctic winter, but you’ll know what sort of outdoor gear is best for your weather and if these would suit you. I am extra-ordinarily pleased with my mitts which work extremely well for what I need them to do, and just in case you would like a pair too, then read on!
If for some reason – gasp! – you don’t want the split, you can just miss that bit out and make a very nice pair of split-less mittens instead. But don’t come complaining to me when your hands are cold 🙂
If you’re going to be using the tutorials to help you knit these mittens, it’s worth reading through all the instructions first!
Split Mittens
you can find a PDF of the pattern here.
The PDF pattern for the Split Mittens has been updated and is now available in four sizes: toddler, child, small adult and large adult. The tutorial below is based on the small adult size.
Mittens with a useful split across the palm to help you slide your hand out easily when you need to use your fingers – without taking off your mitten!
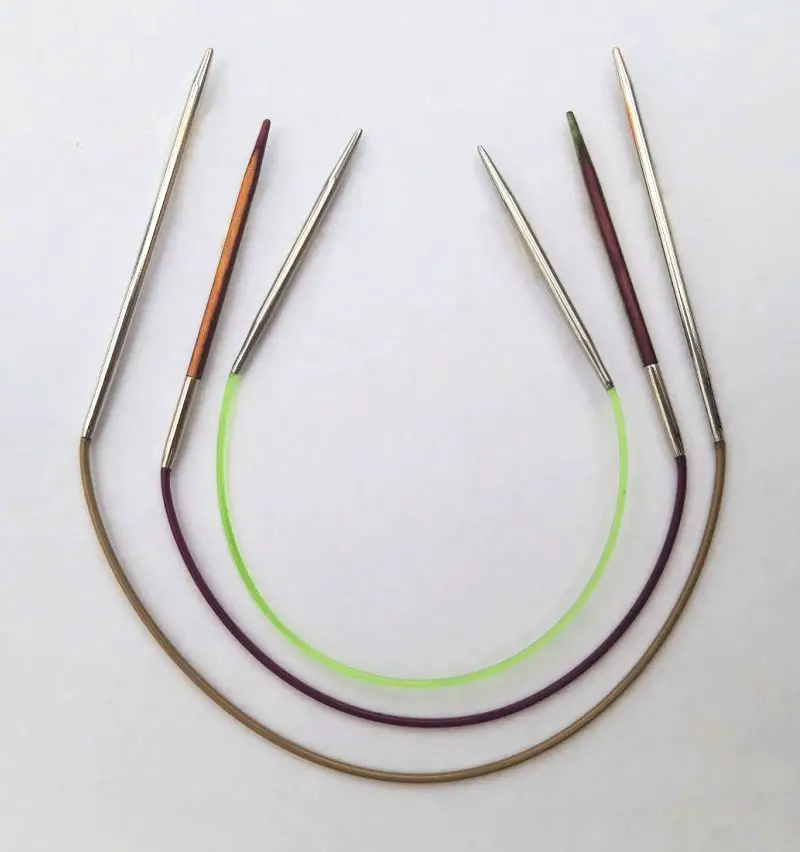
I have used an 80cm circular needle to knit these mittens and this is what the tutorial pictures will show. If you want to use DPNs, this is absolutely fine – I didn’t have any in the right size so that’s why there aren’t any tutorial notes! 🙂
Materials
100g Chunky yarn – I used Hayfield Chunky with Wool (shade used here is 0770) and an alternative is Hayfield Chunky Tweed with Wool
5mm circular needle (80cm length) or DPNs
wool needle
stitch marker
tape measure
spare yarn to hold stitches
Gauge
16 sts and 24 rows to 10cm (4″) on 5mm needles (ball band gauge is 14 sts and 19 rows on 6.5 mm needles)
Size
One size. As a guide, my hand is 19cm from base of palm to tip of second finger (but it’s easy to change the length) and 8cm across the palm.
Want to make the mittens bigger or smaller? I haven’t tested out other sizes as yet, but it should be easy to make a different size by adding or decreasing stitches in groups of 2 (so that your rib section still works). Remember that you may need to adjust the number of stitches in your thumb so that the rib split is across the middle of the palm, and it may also be necessary to cast on more or less stitches across the thumb gap.
Abbreviations
K Knit
P Purl
M1 Make one stitch (instructions in tutorial)
K2tog Knit two stitches together
Notes
I have used smaller needles than suggested on the ball band to ensure a firm, warm fabric. Because I am using magic loop, I have not used a stitch marker except where mentioned – because I have divided the stitches evenly across my needles then each side has been the “front” or the “back” of the mitten. If you want to put a marker on one side to remind you which side is which, then please do so. When you first put your hand through the flap of the mitten it will feel a bit tight, but it will loosen off with use so don’t worry!
Pattern
Cuff
Cast on 28 sts. Make sure that you don’t cast on too tightly so that it will be easy to get your mittens on – if necessary use a bigger needle size for the cast on. If you want to use DPNs, split the stitches across however many DPNs you wish to use at this point.
Work one row in K2P2 rib.

To join into the round, turn your knitting around so that the needle point faces the other way, count 14 stitches and push the cable between the 14th and 15th stitches to divide the total number of stitches evenly between the two needle tips.
Push the front set of stitches onto the tip ready to knit them, and pull the cable through the back stitches to allow you to knit the front set of stitches. This joins the round.
Continue in K2P2 rib until cuff measures 9cm (3 1/2″) or desired length.
Hand
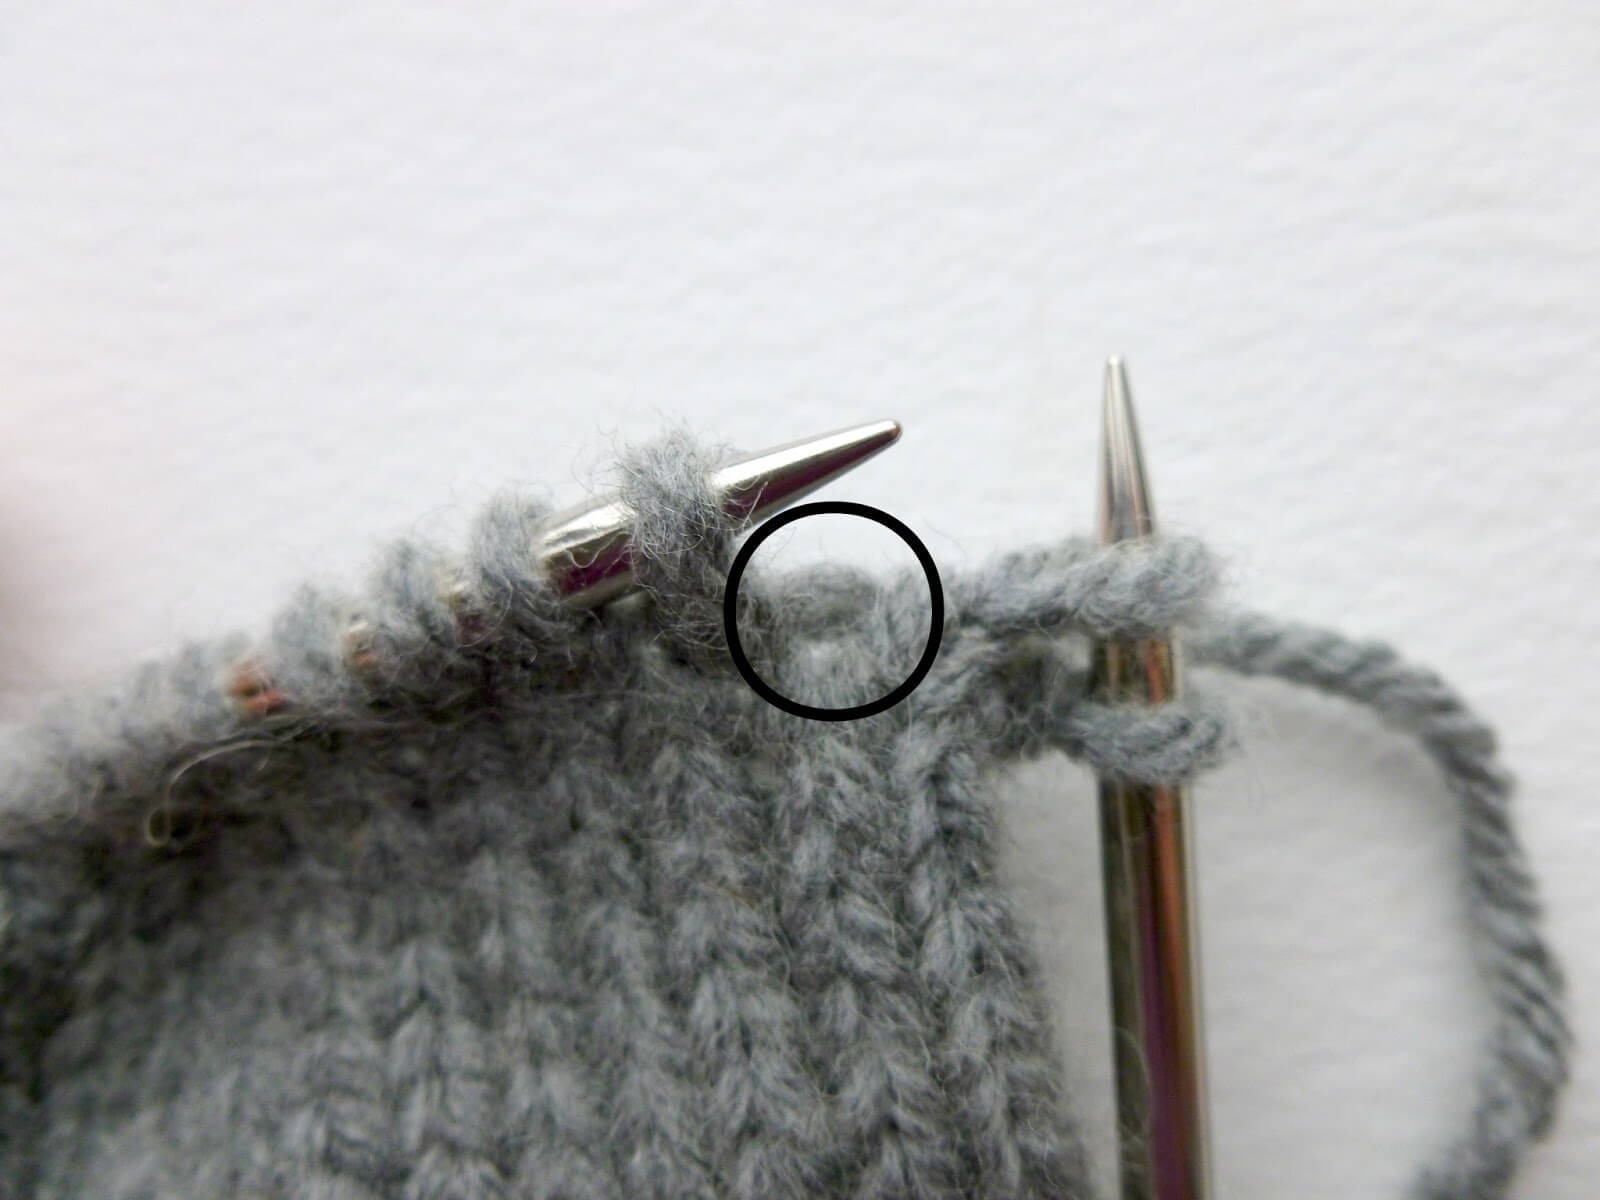
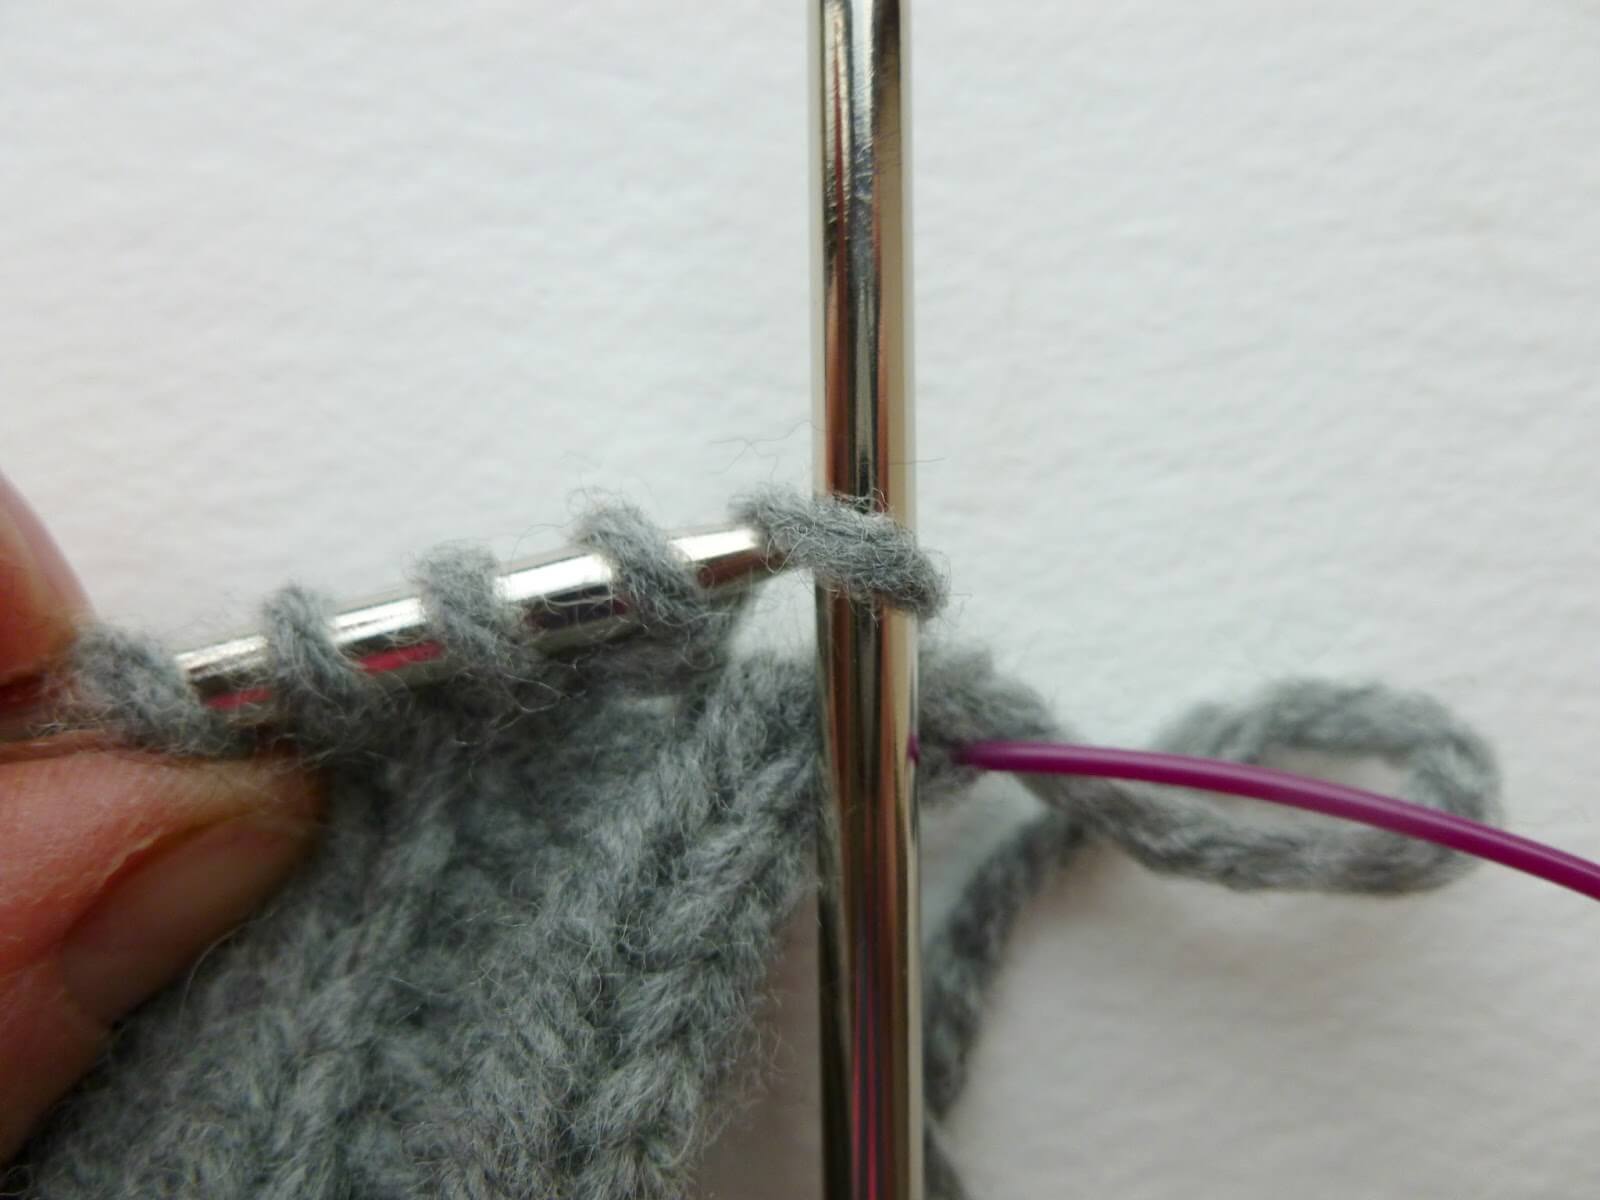
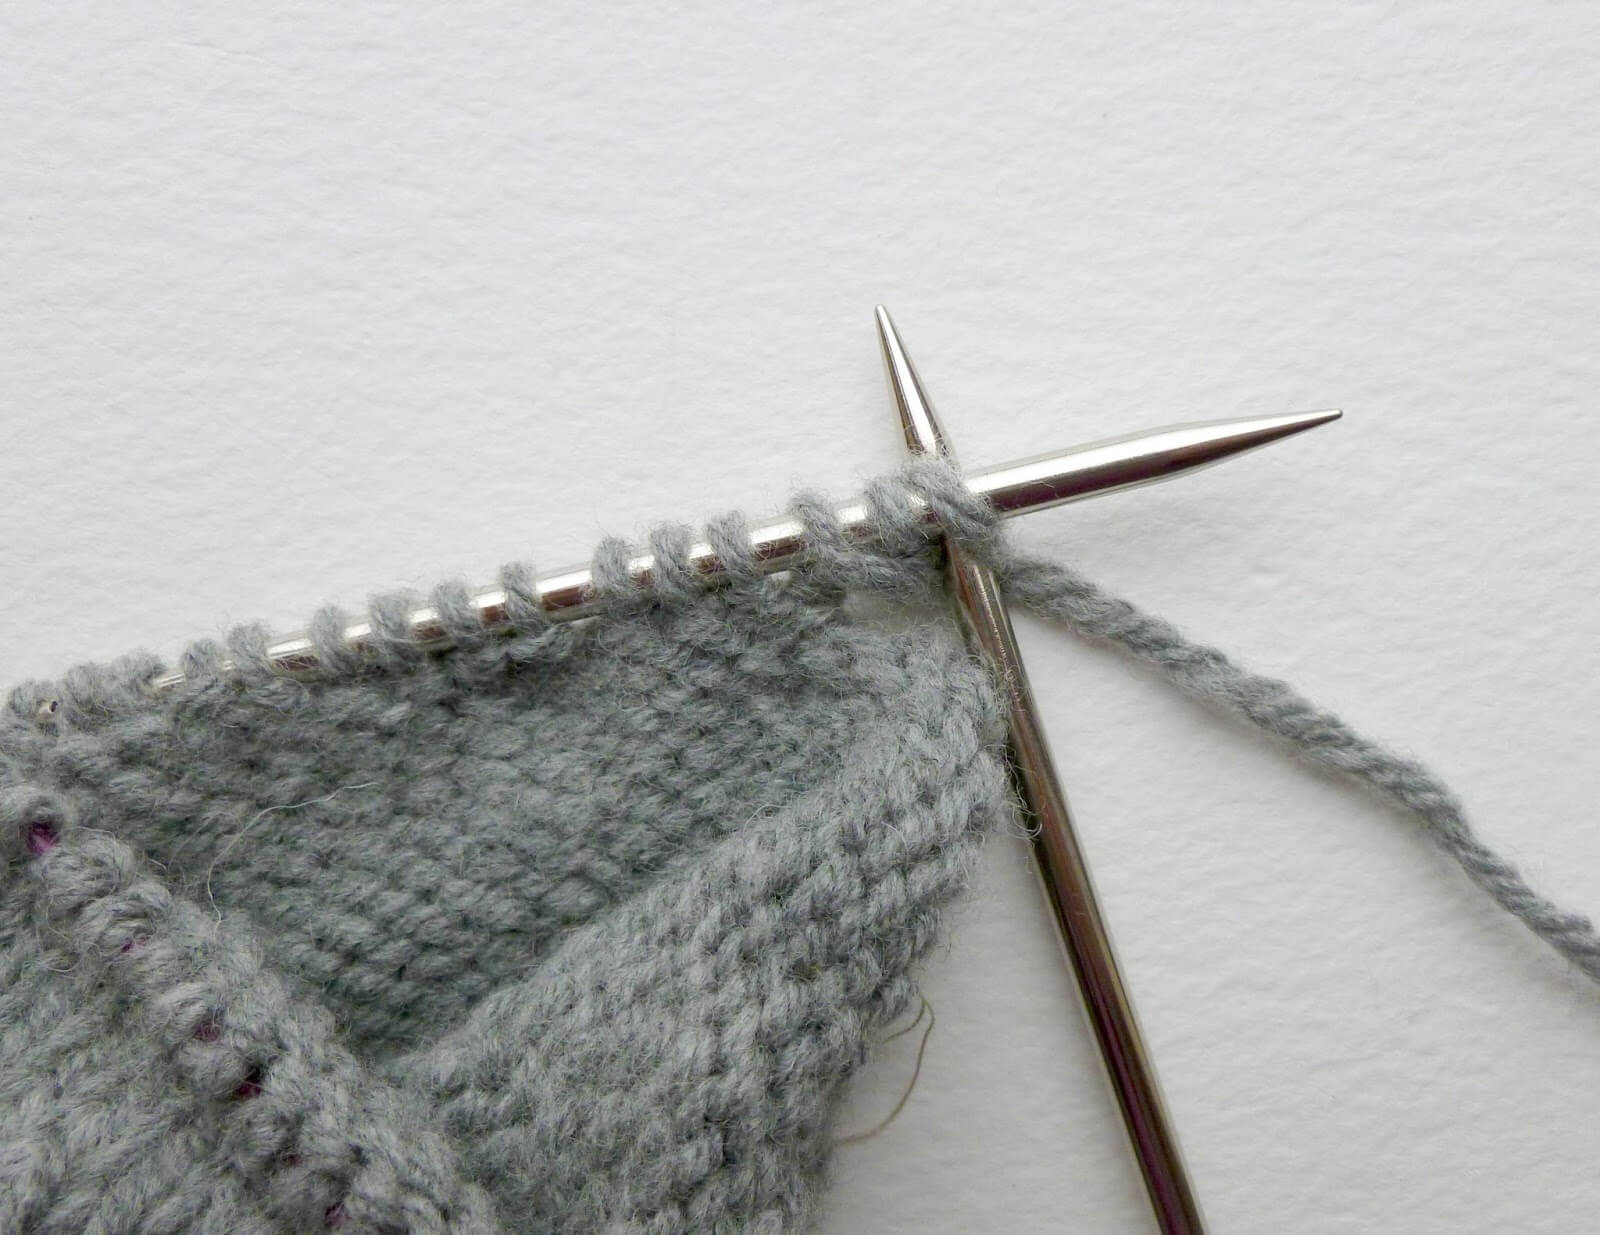
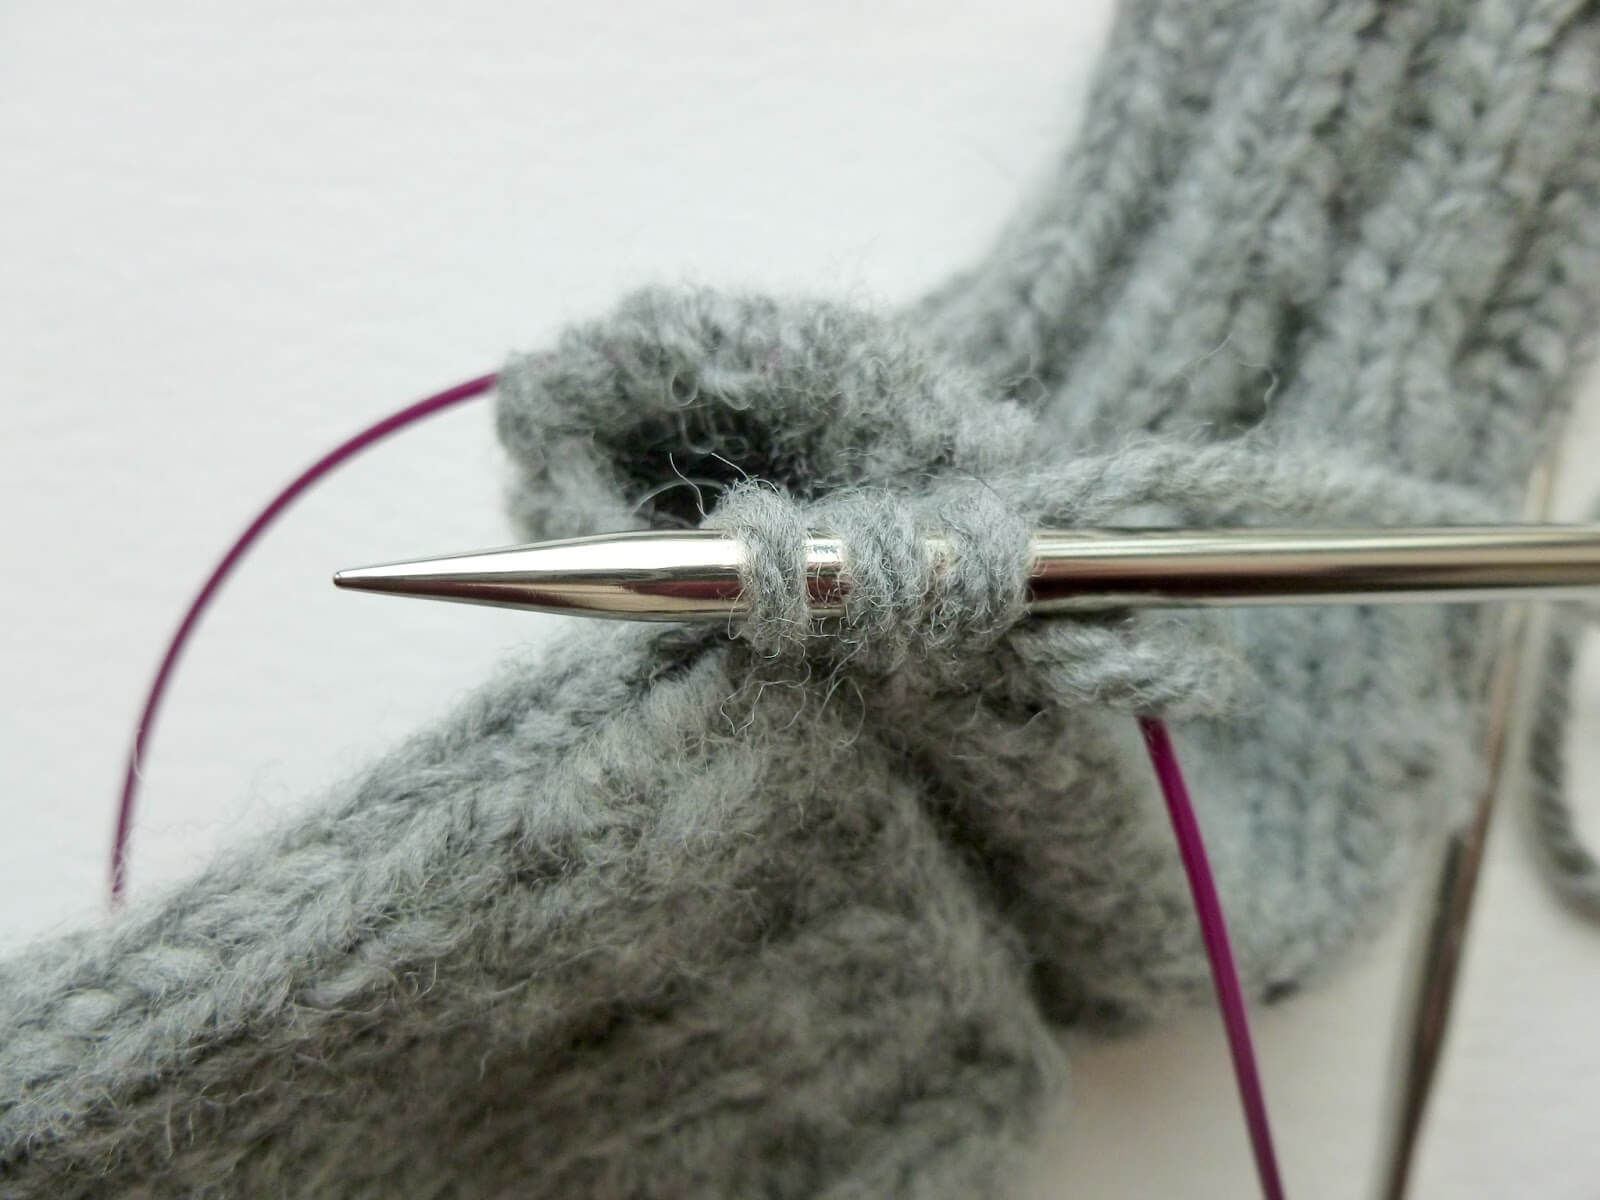
Both mittens begin in the same way by increasing to create the thumb. The increase that I have used is a M1 (make 1) increase which is made by knitting into the bar between two stitches – this stops you getting a hole where your new stitch is made. It’s done like this:
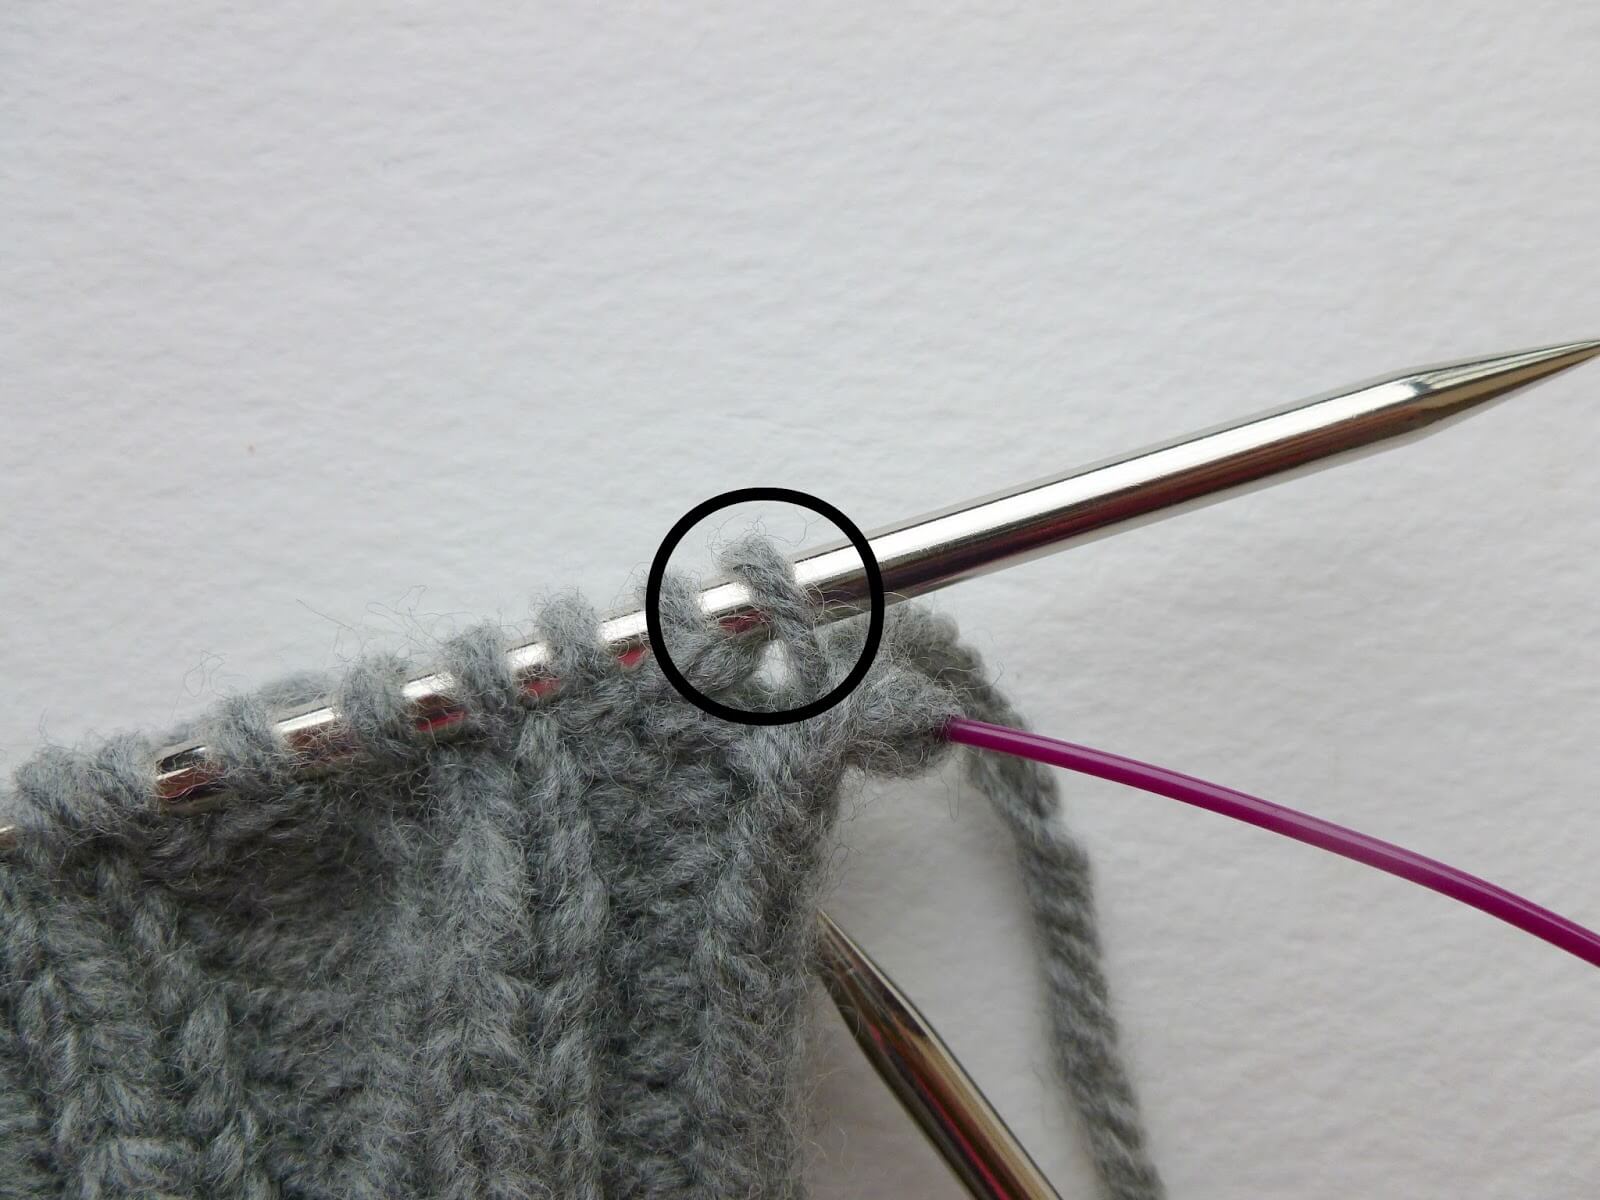
1 If you look, you can see that there is a bar of yarn between every stitch and the next. It’s circled here:
2 Insert your right hand needle into the bar.
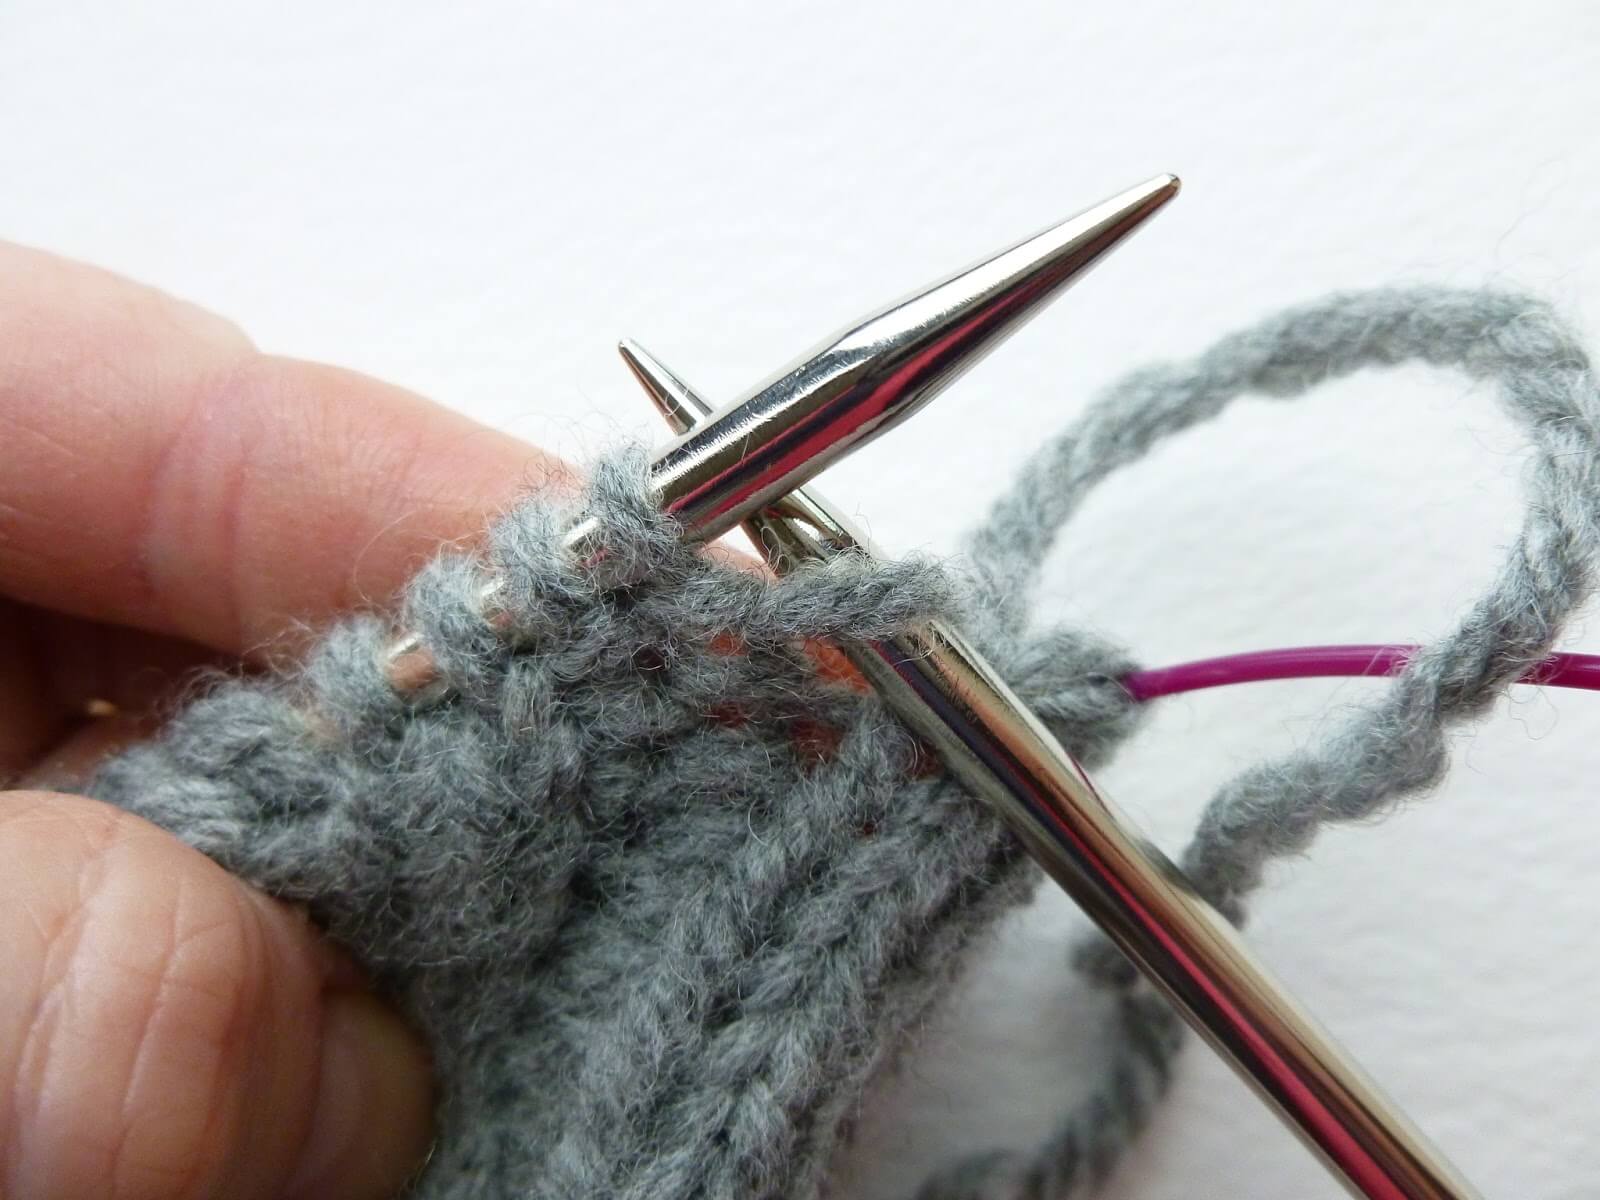
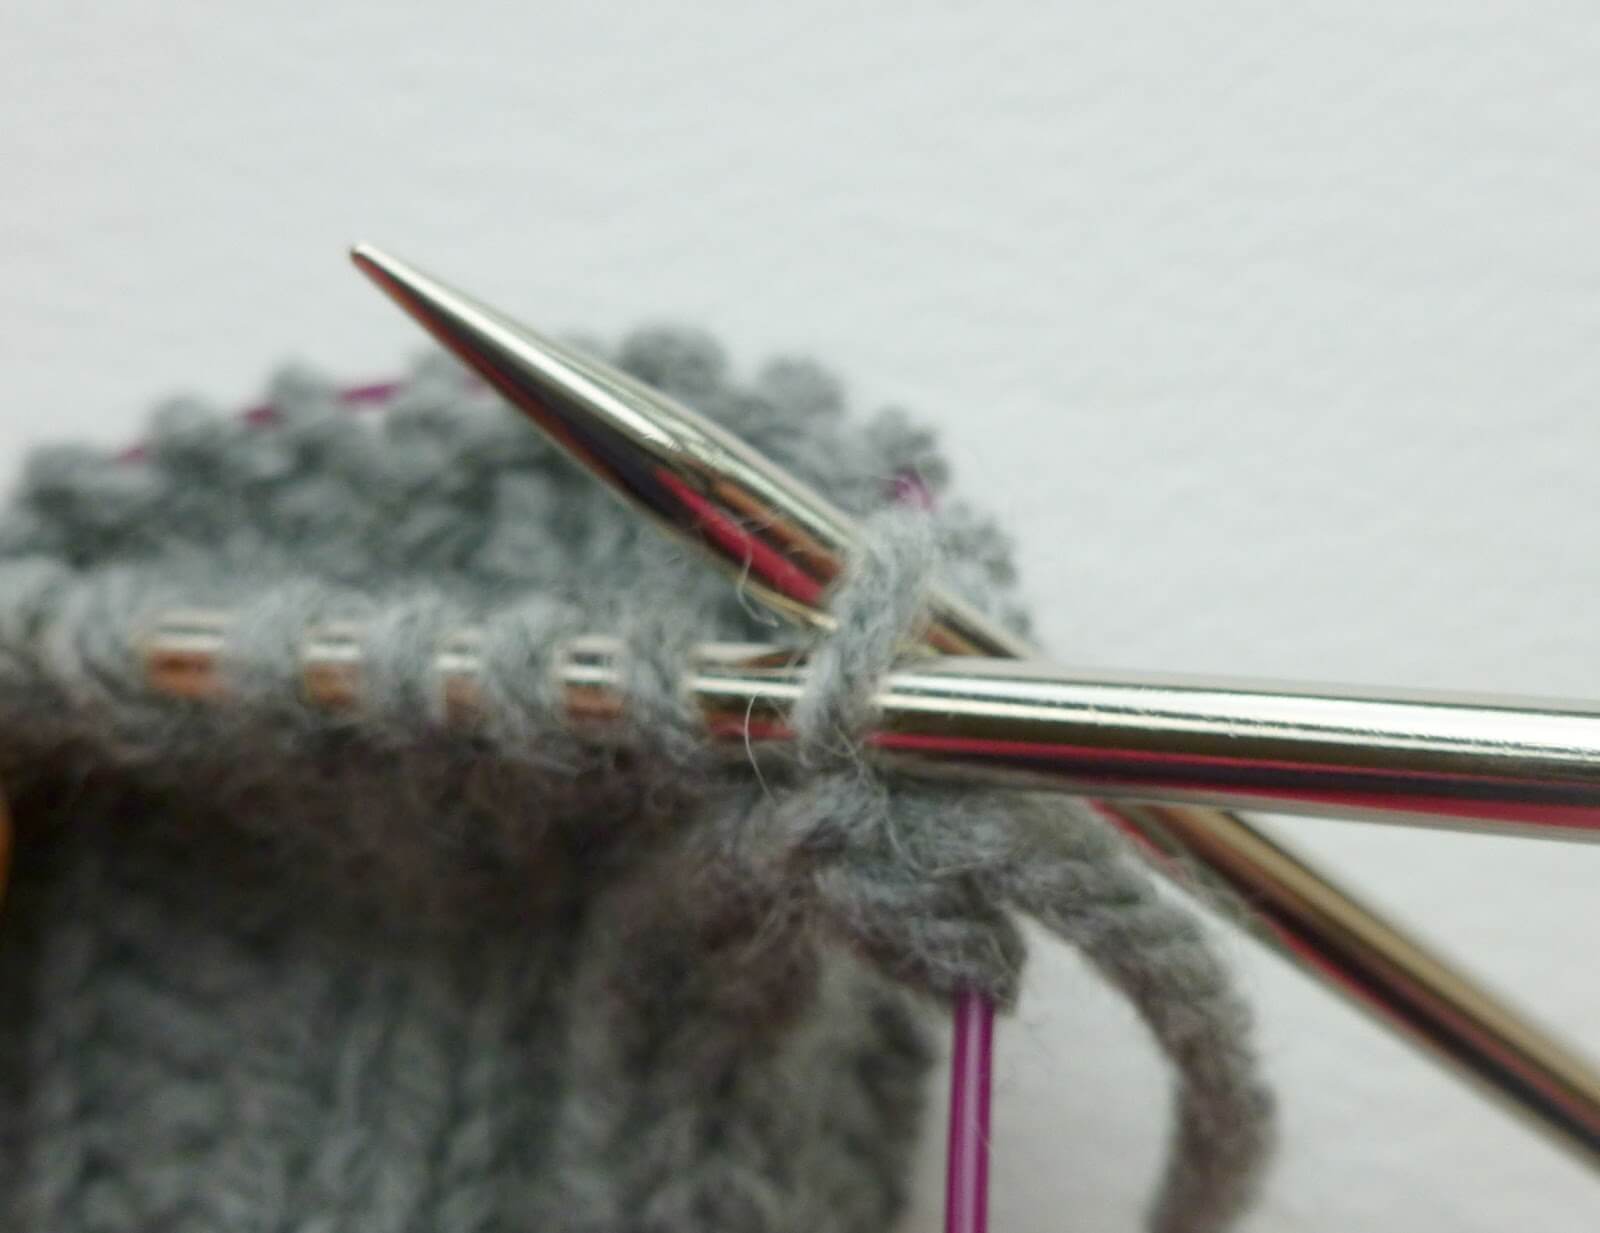
3 Now tuck your left hand needle underneath your right one to slide the bar onto your left hand needle to create a new stitch. If you can do this without using the right needle to lift it up first, that’s fine.
You can see how it sits on the needle here:
4 Now knit into the back of that new stitch so that it twists and that’s how you avoid the hole.
You are going to increase at the start of the round and therefore don’t need a marker which is why you only need to place one to show where your increases end. So the instructions for creating the thumb are as follows:
Round 1: K14, M1, K1, M1, place marker, K13, M1 (31 sts)
Round 2: Knit all stitches
Round 3: Knit all stitches
Round 4: K14, M1, K3, M1, slip marker, K14 (33 sts)
Round 5: Knit all stitches
Round 6: Knit all stitches
Round 7: K14, M1, K5, M1, slip marker, K14 (35 sts)
Round 8: Knit all stitches
Round 9: Knit all stitches
Round 10: K14, M1, K7, M1, slip marker, K14 (37 sts)
Round 11: Knit all stitches
Round 12: Knit all stitches
Round 13: K14, M1, K9, M1, slip marker, K14 (39 sts)
Round 14: Knit all stitches
Round 15: Knit all stitches
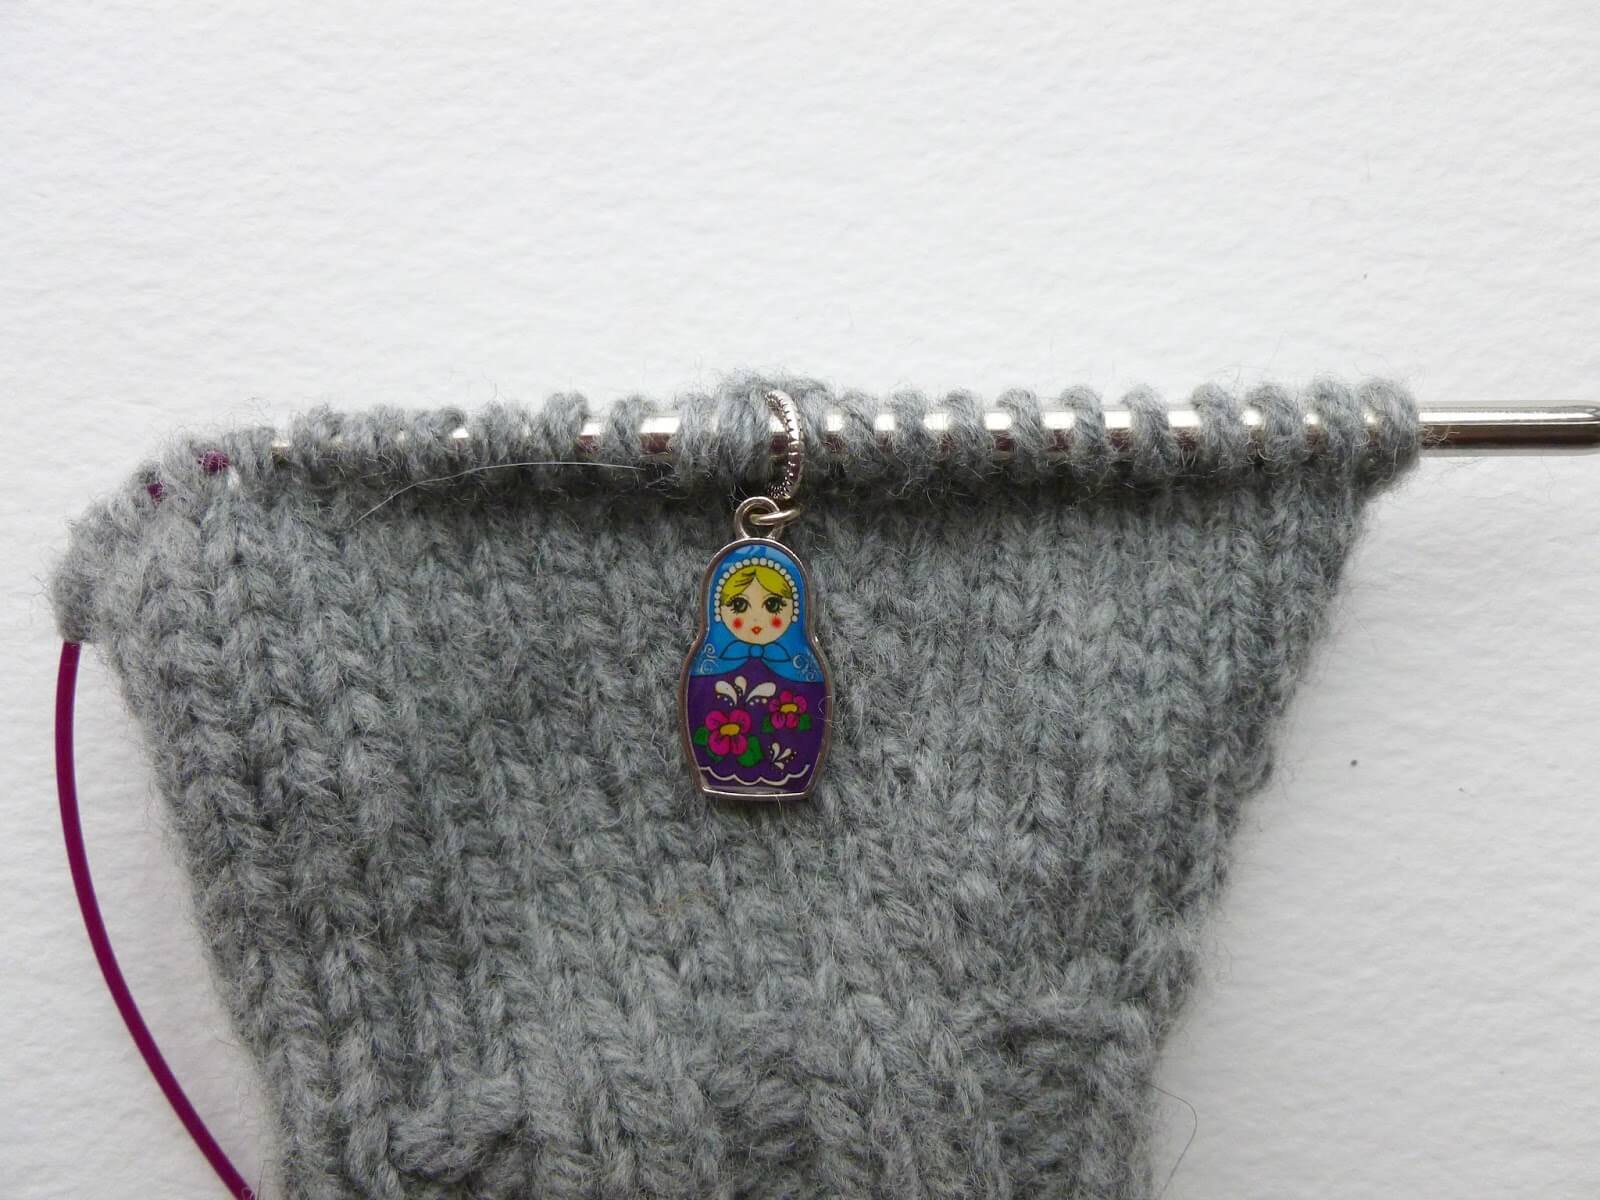
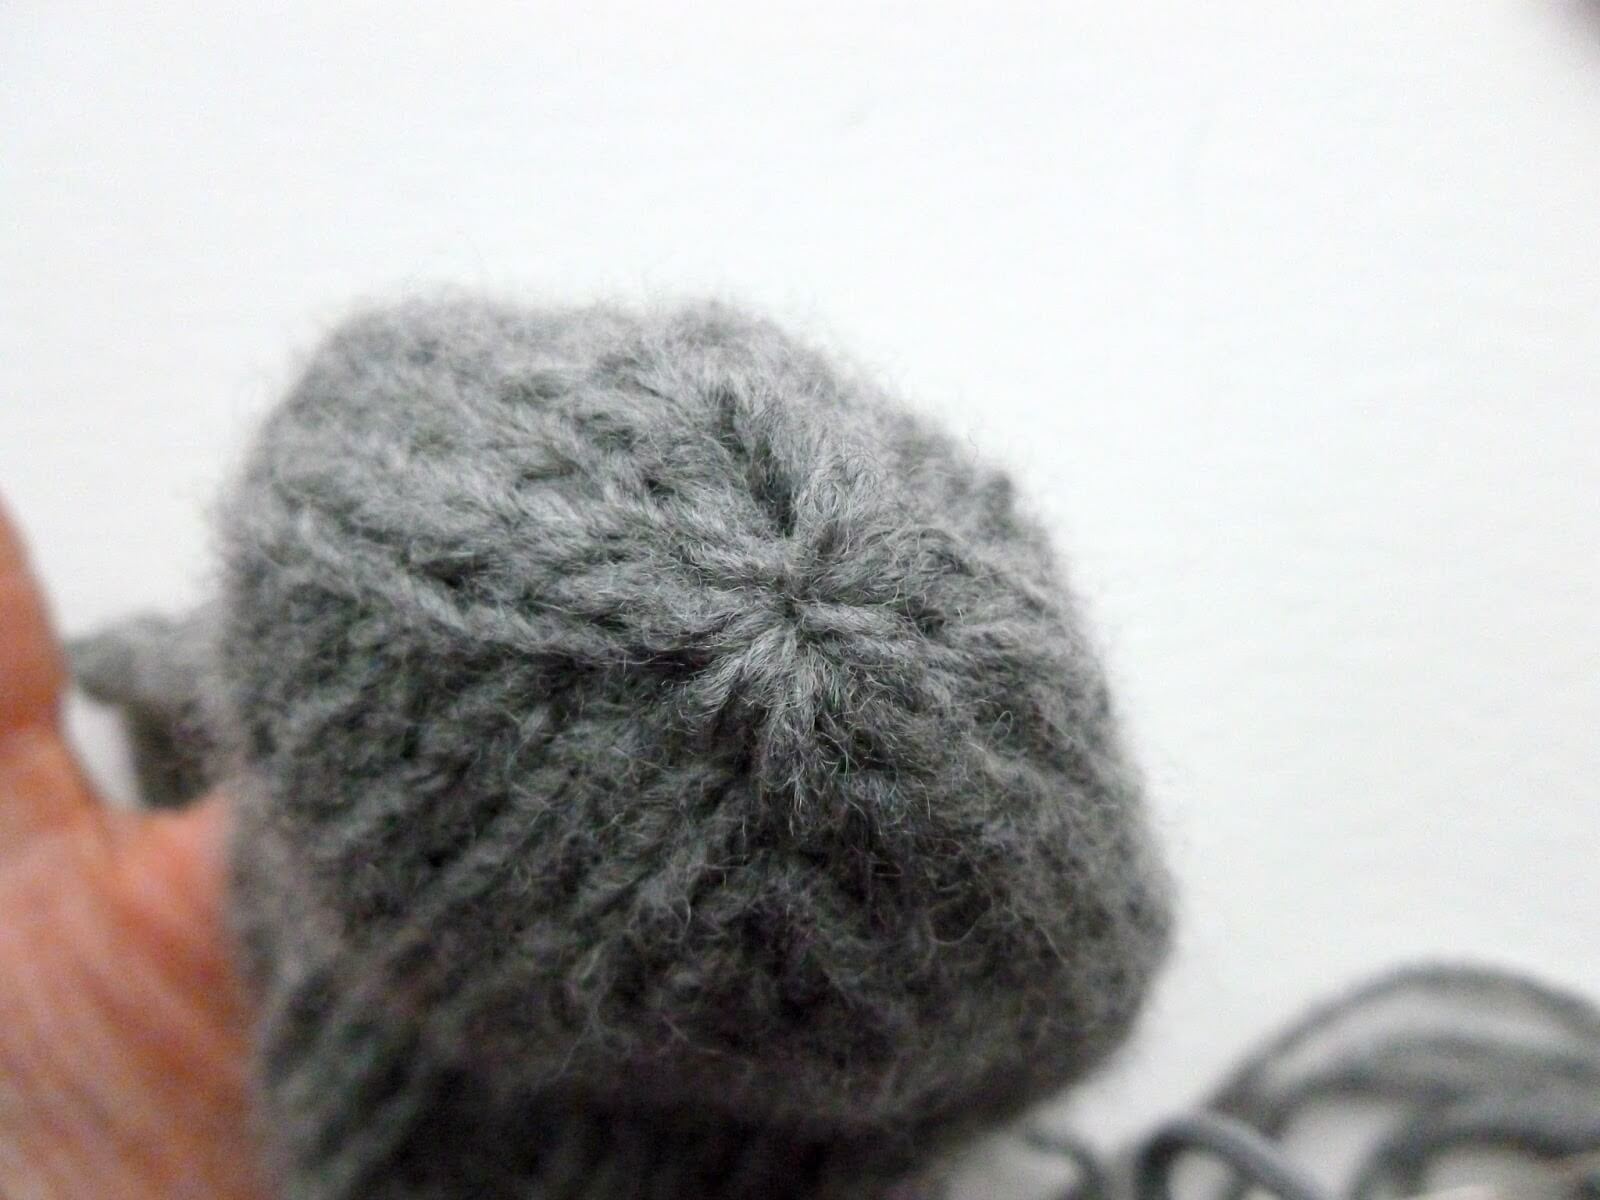
Your thumb section will look like this.
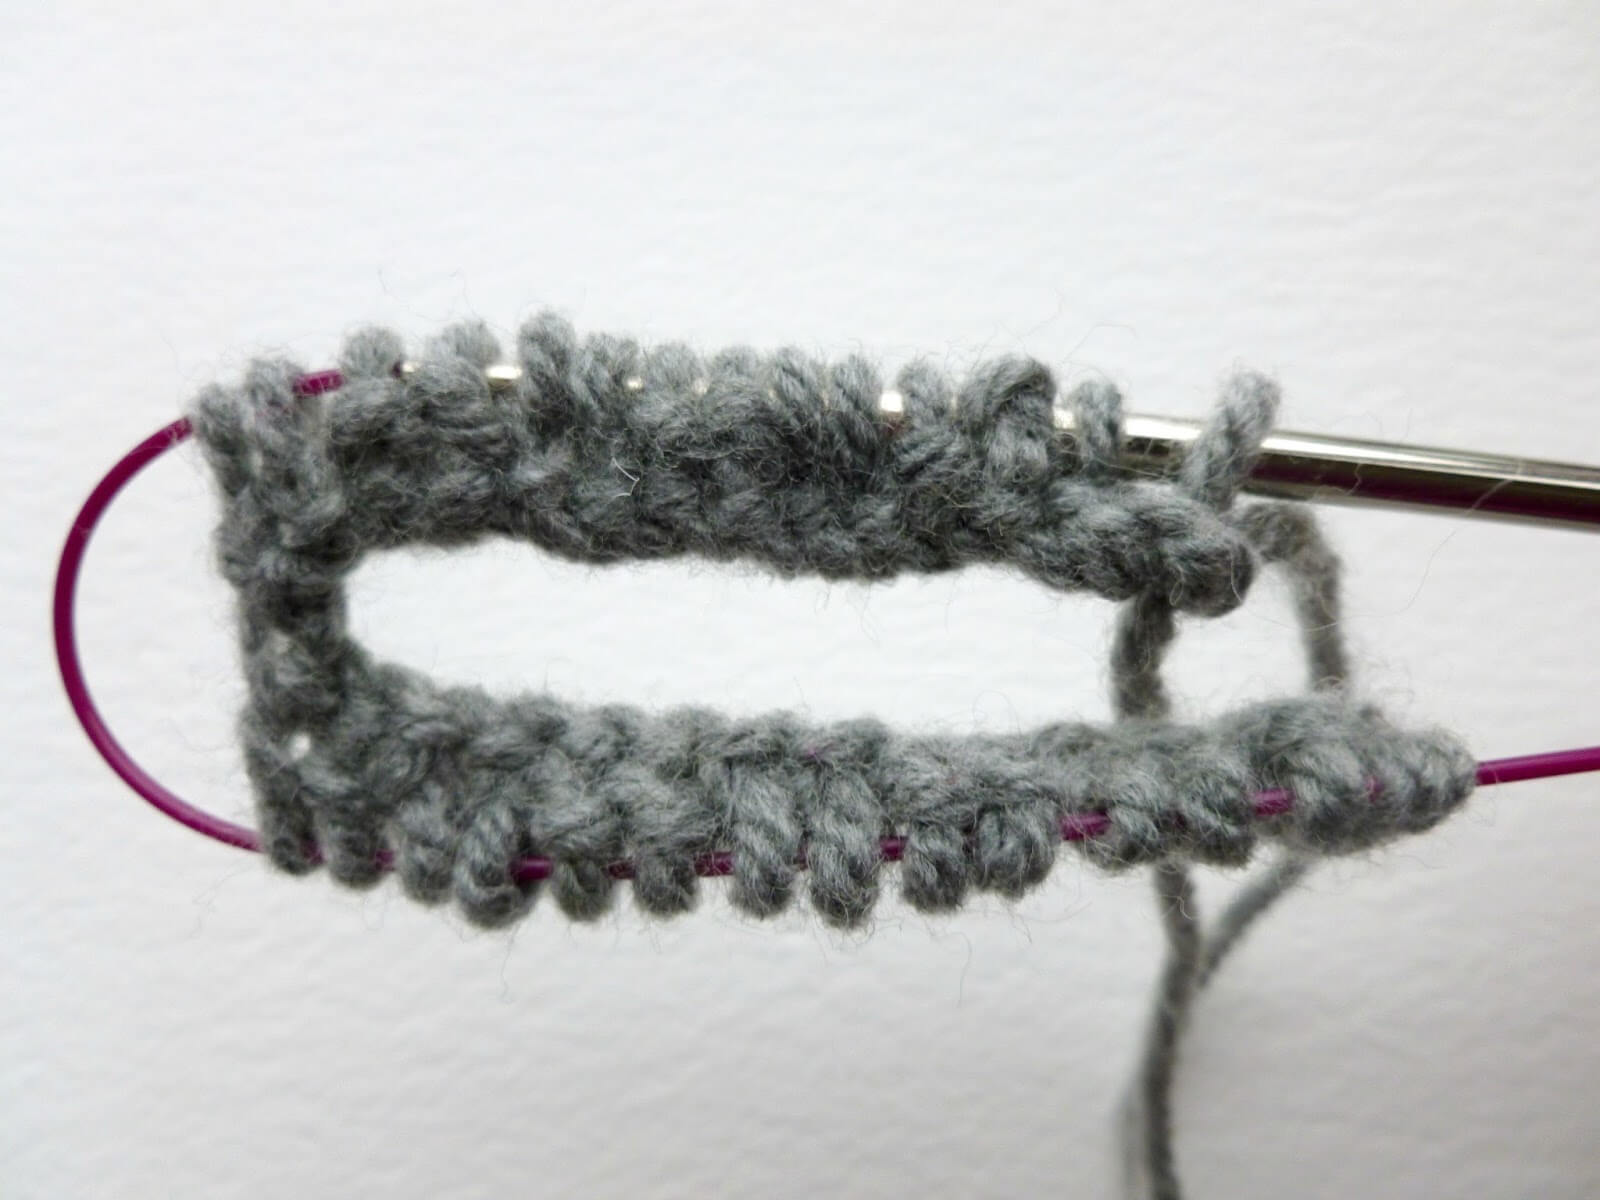
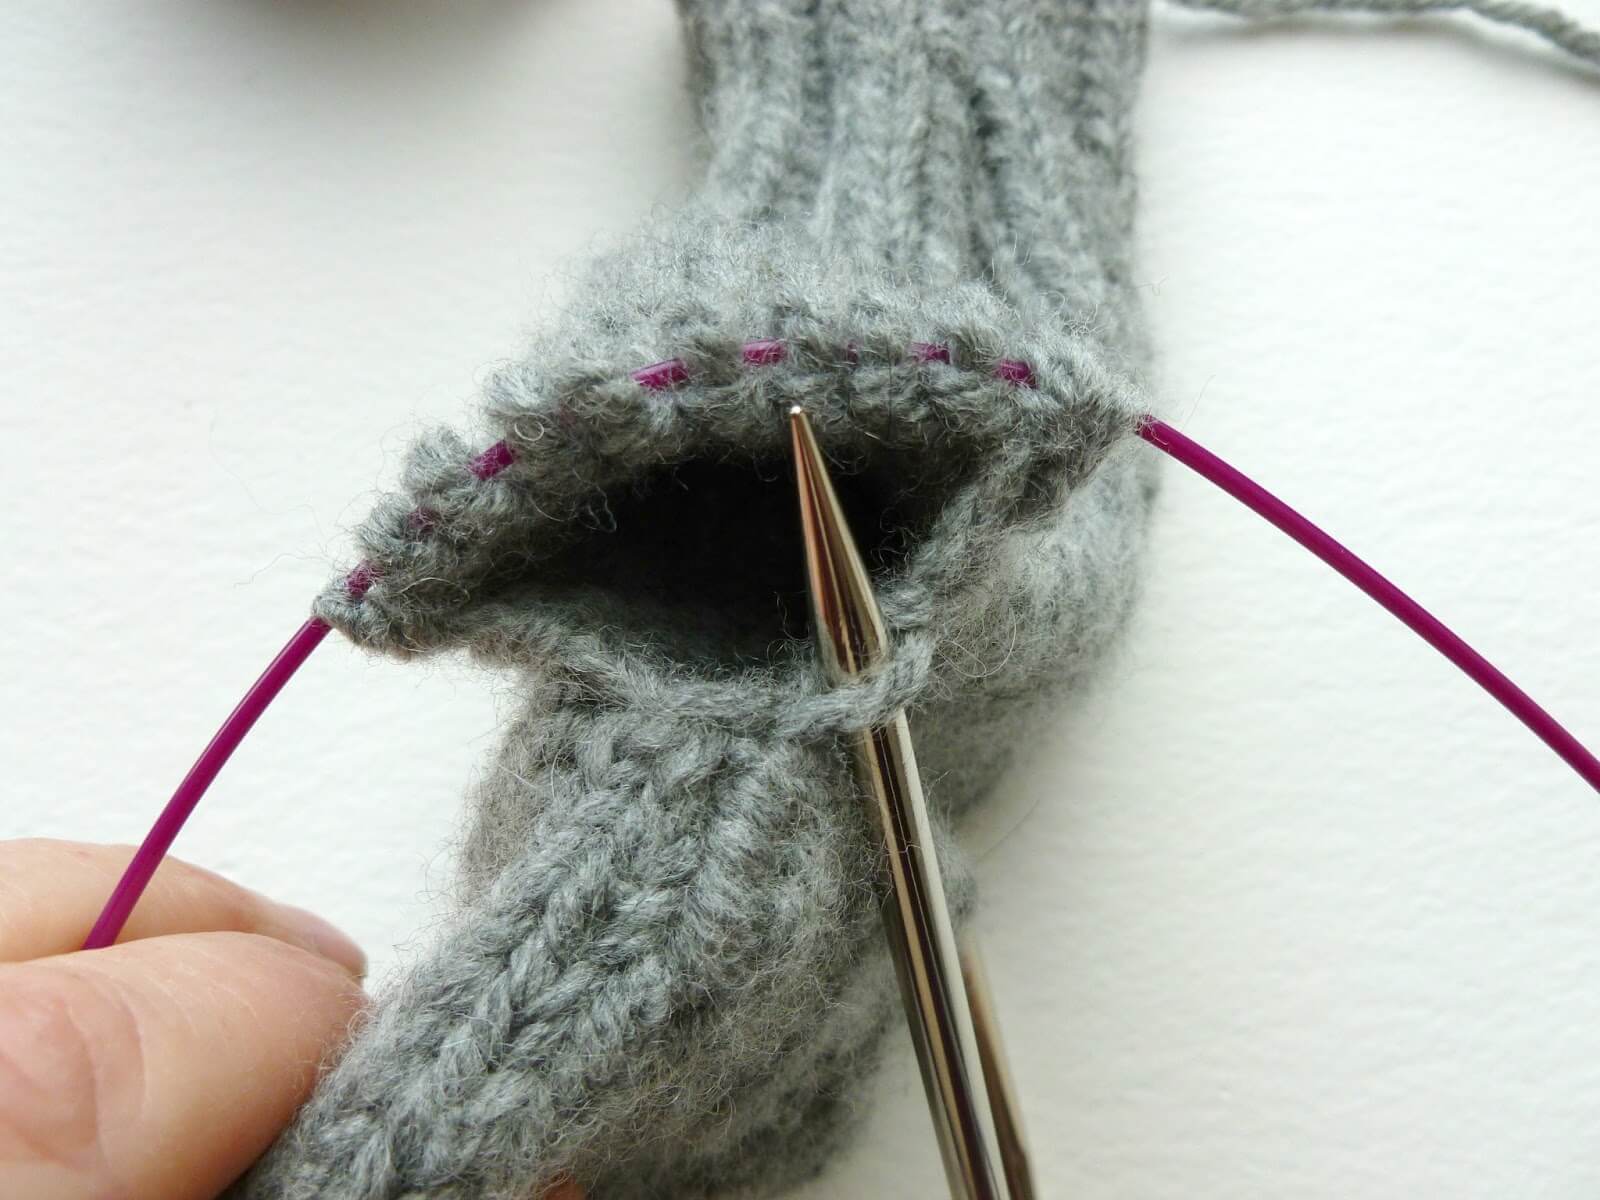
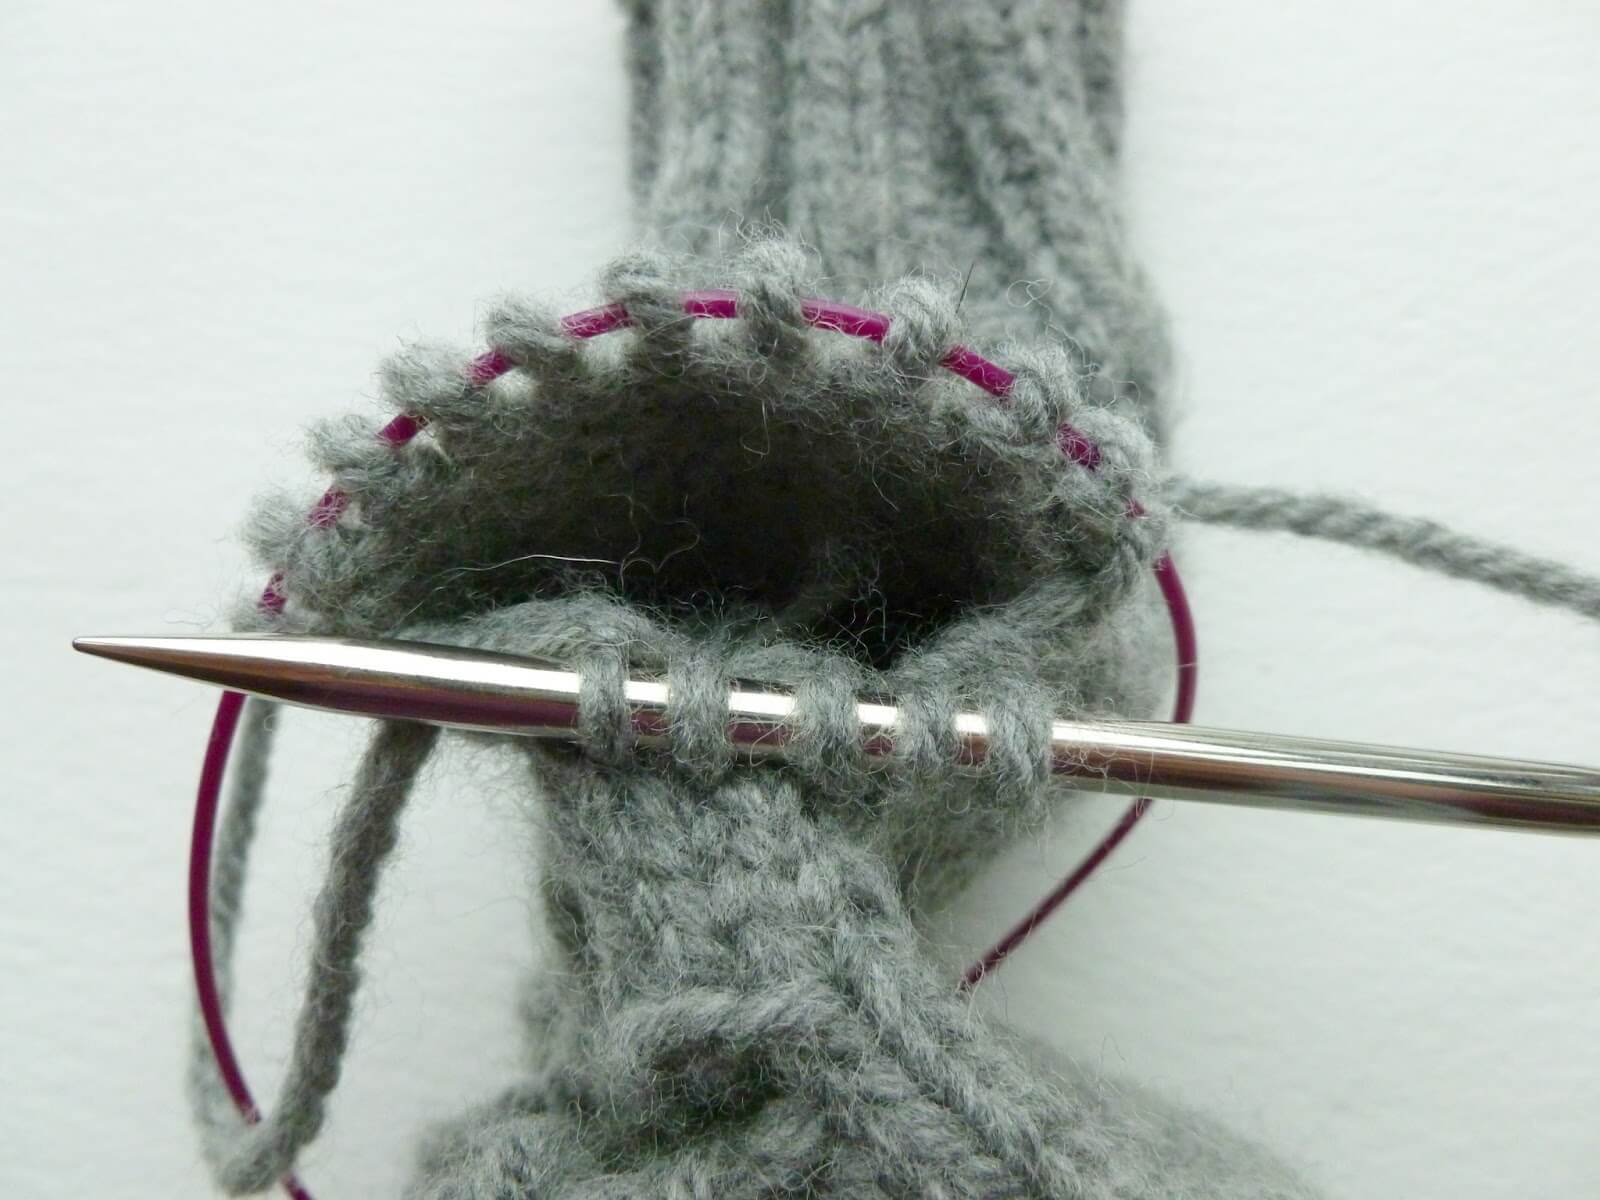
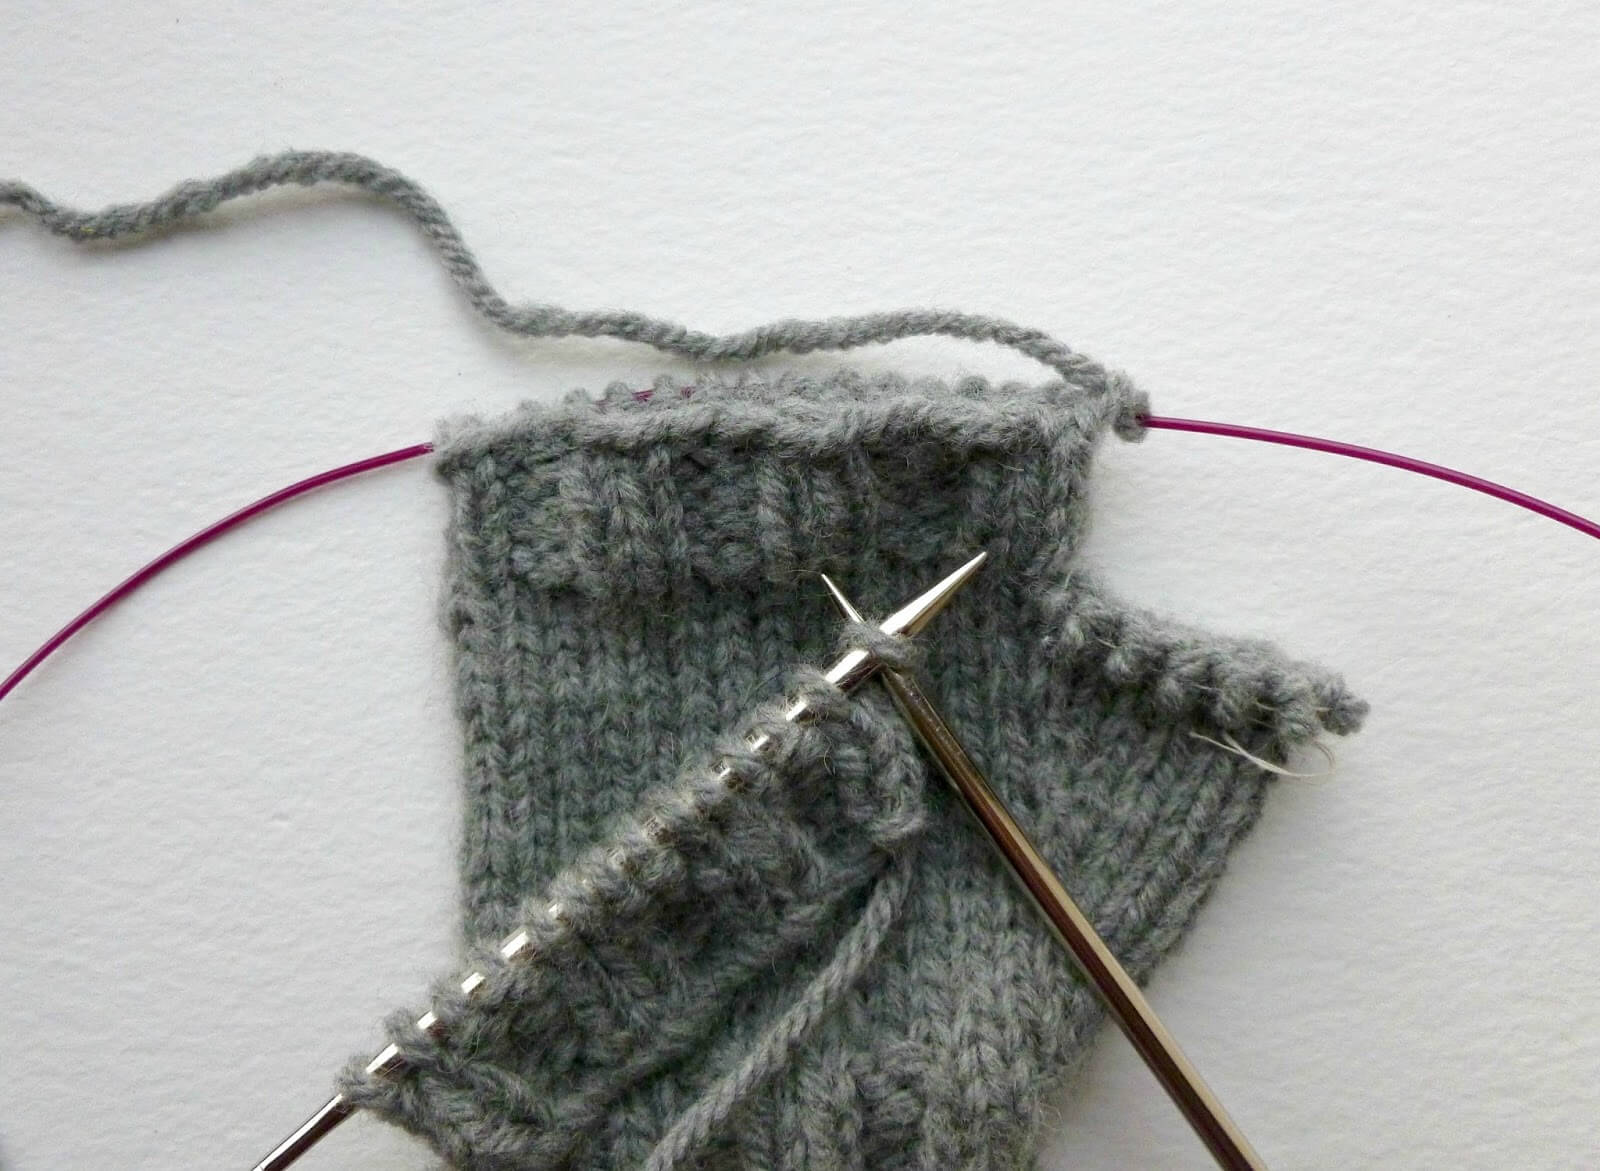
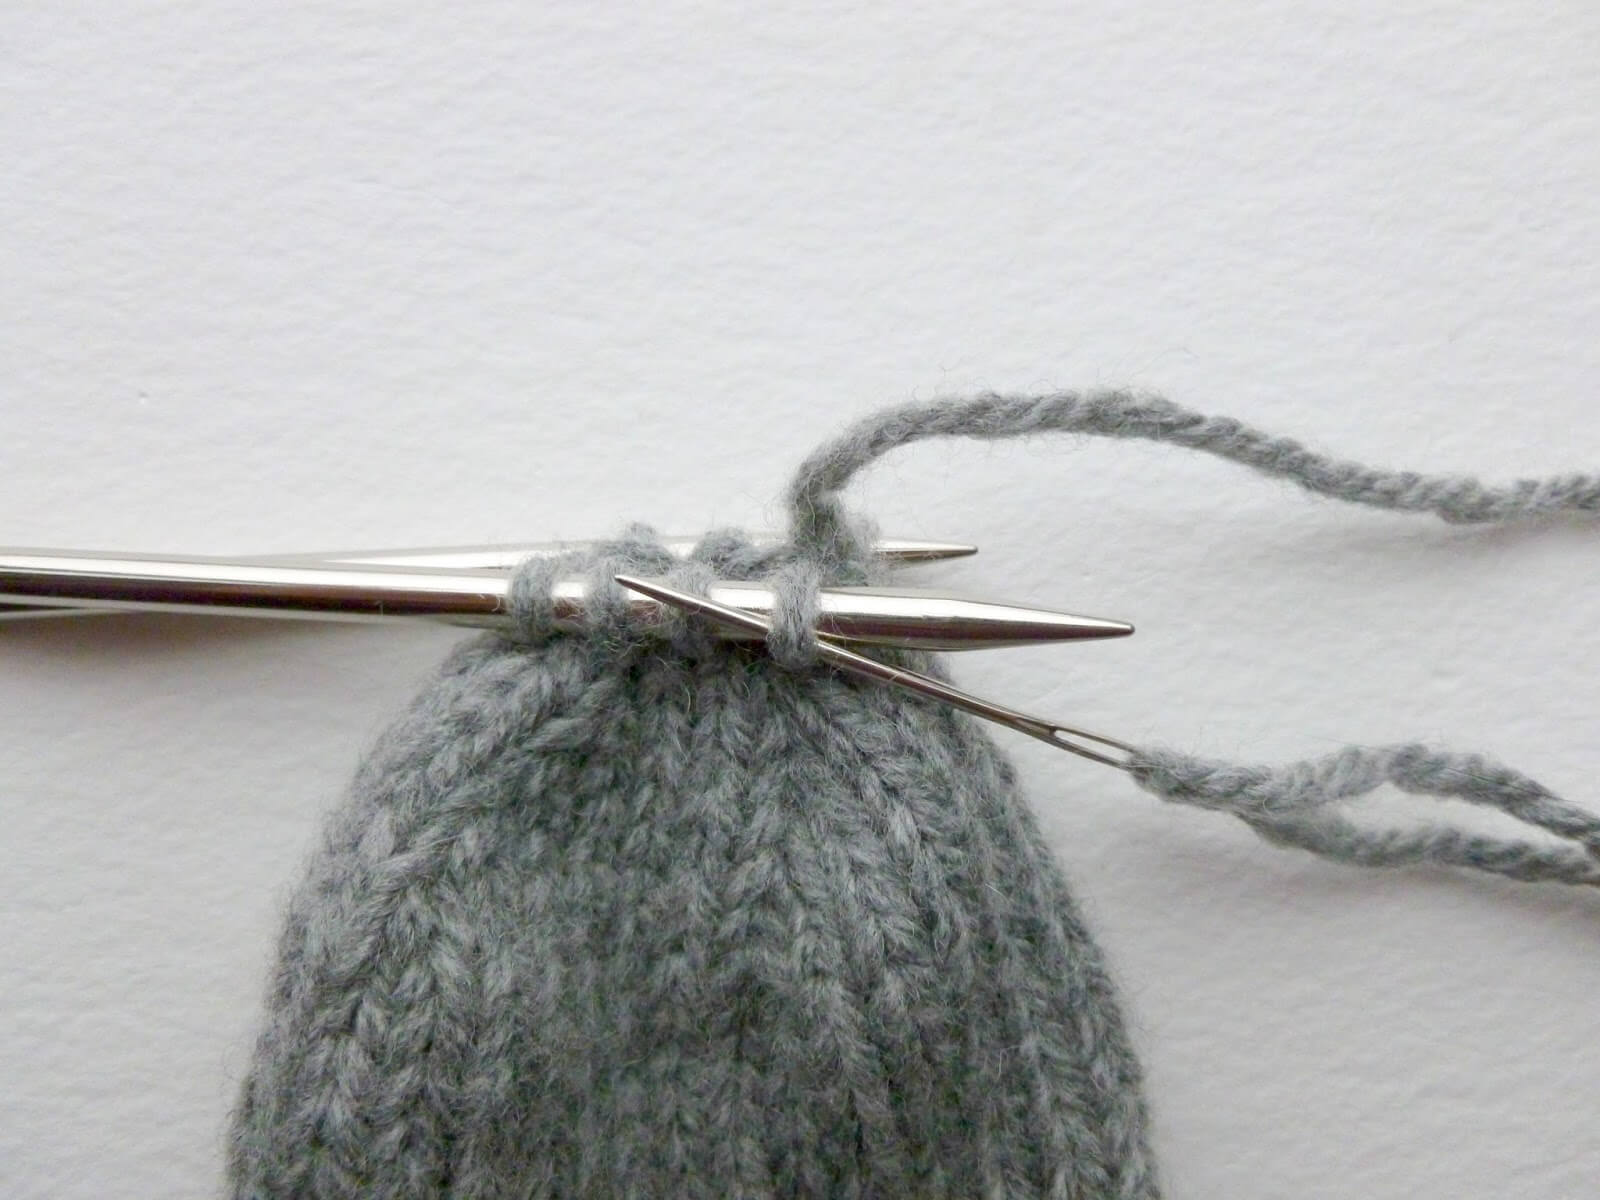
At this point, this is where the instructions change for each hand. When you get to the point in the pattern, you will need to place your thumb stitches on a piece of spare yarn (I use quilting cotton) to keep them safe whilst you continue with the rest of the hand. You can either use a needle to thread your yarn or cotton through the stitches like this:
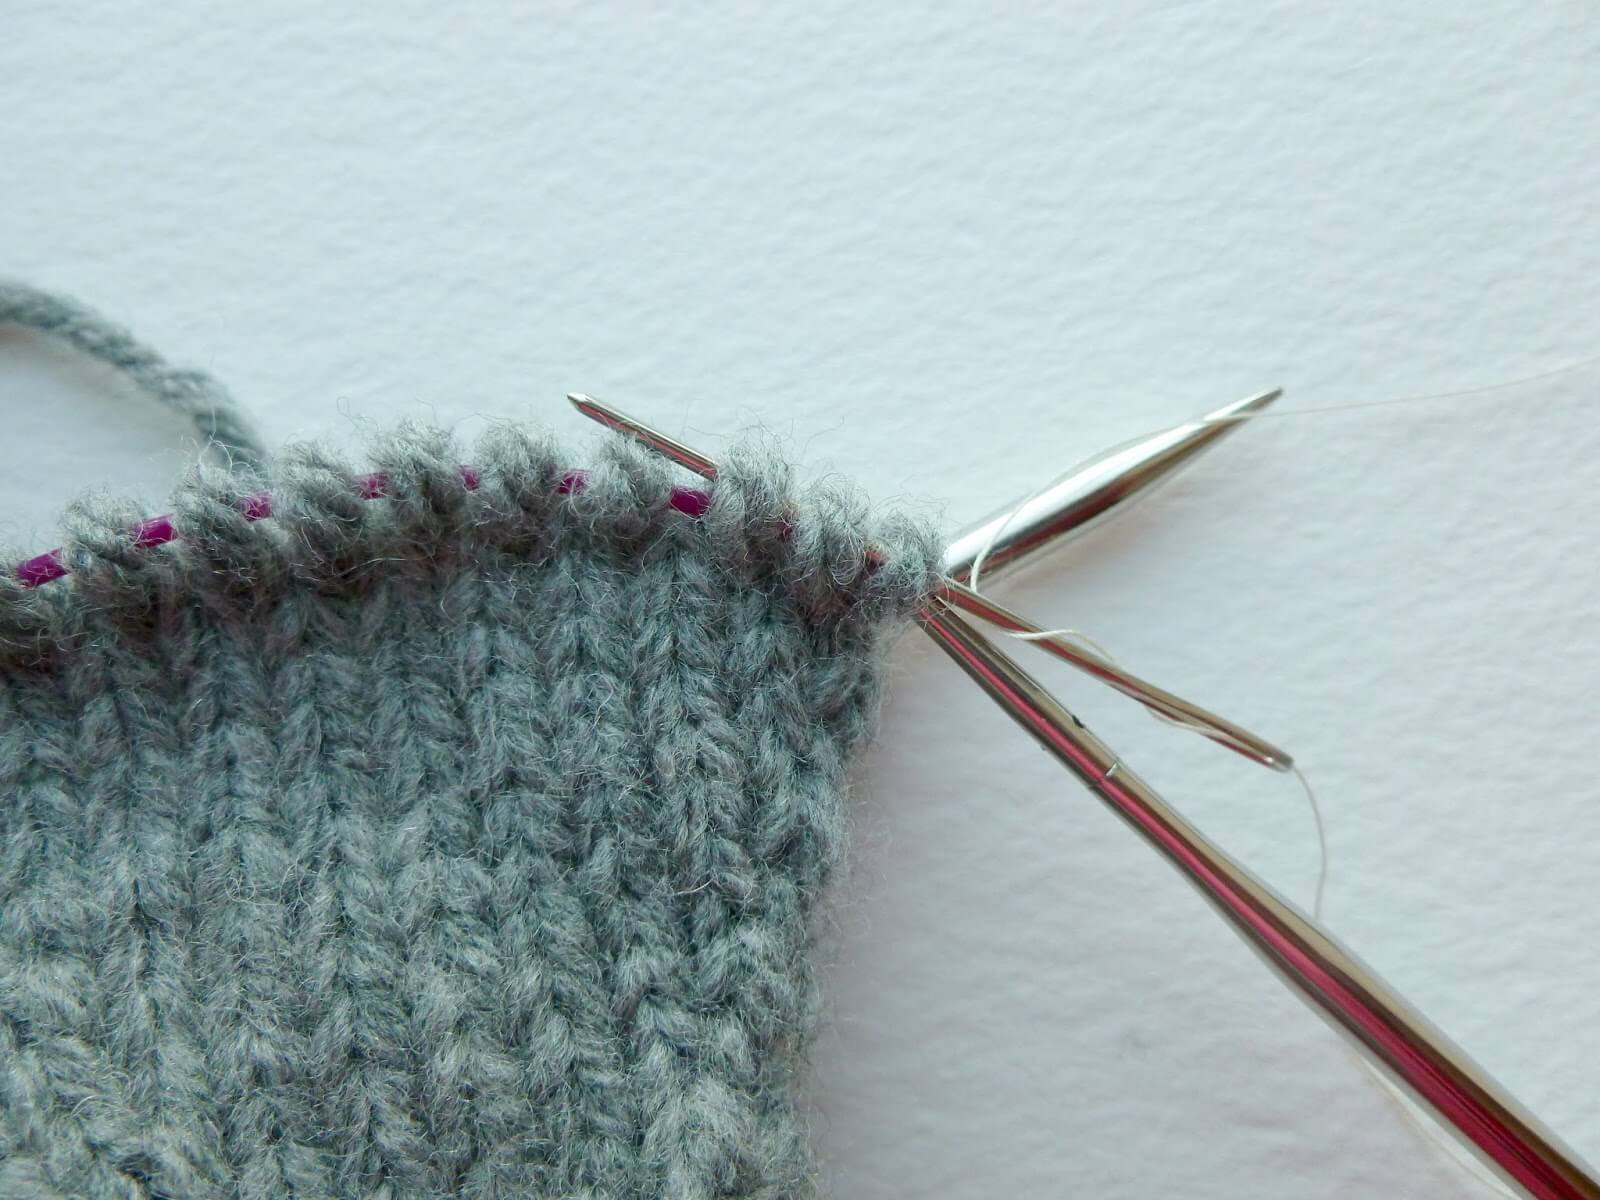
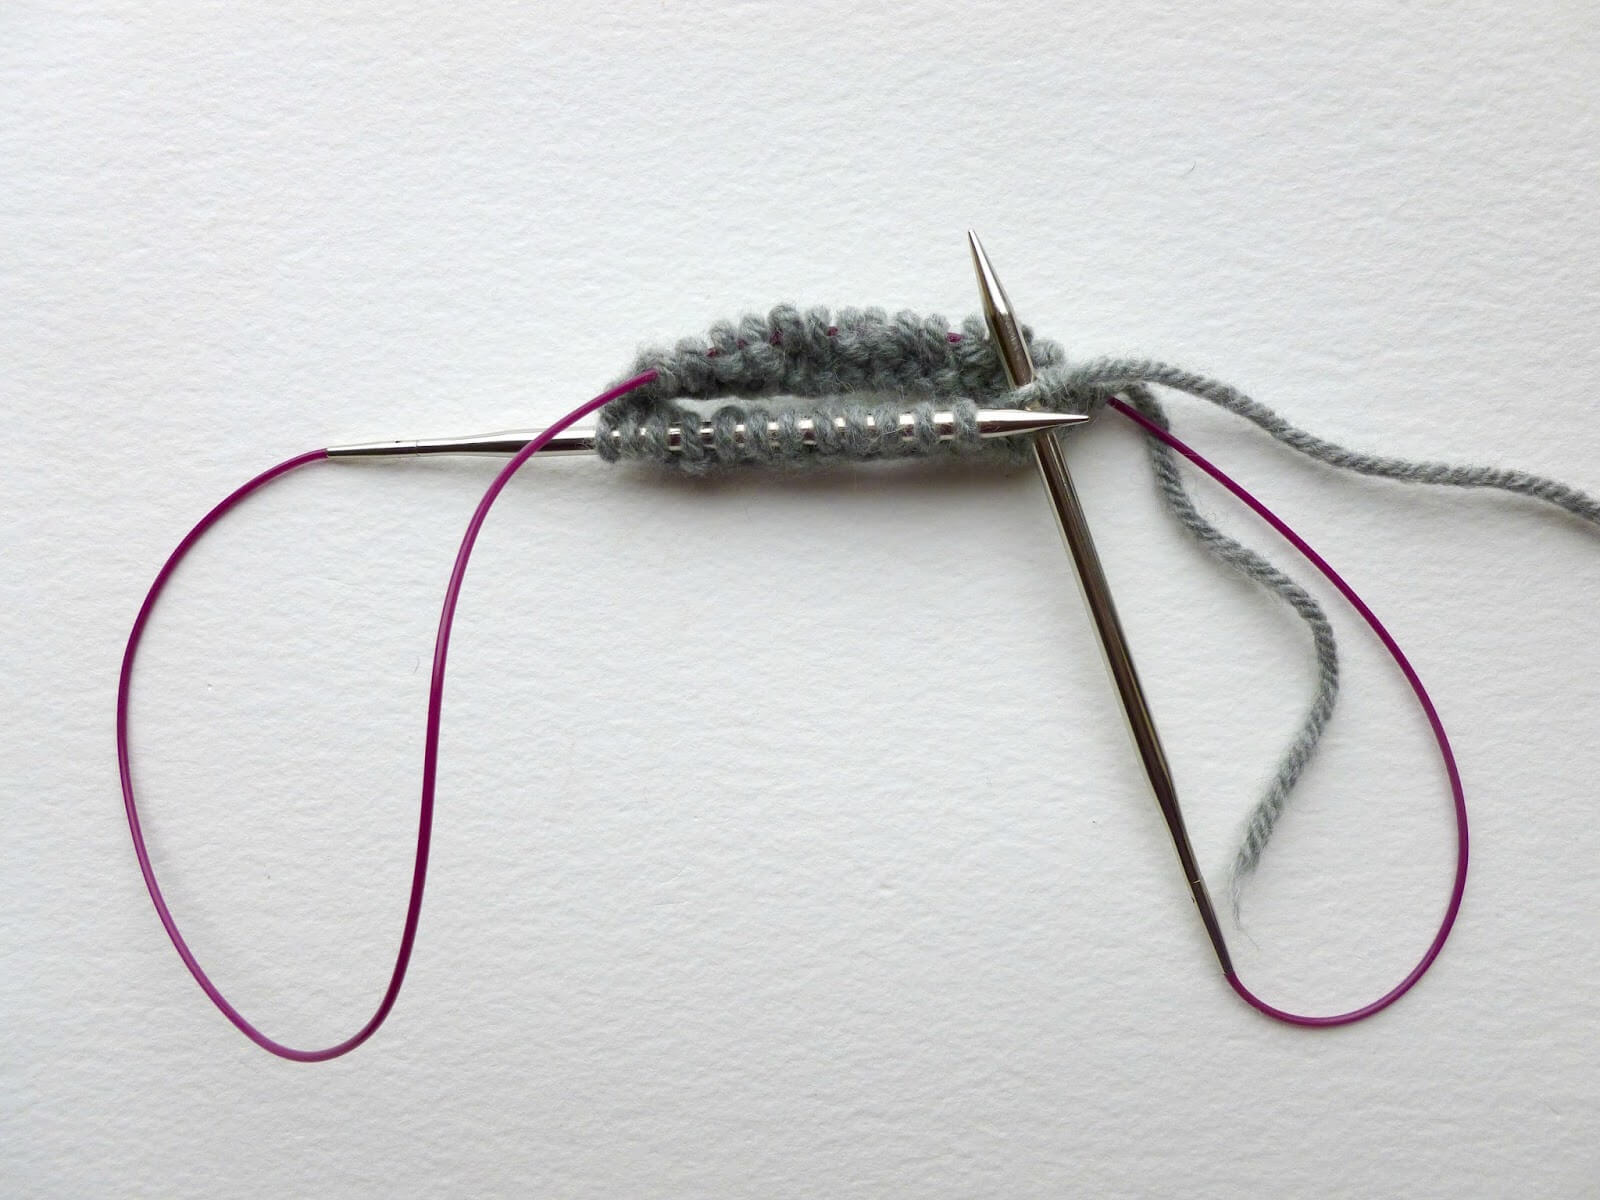
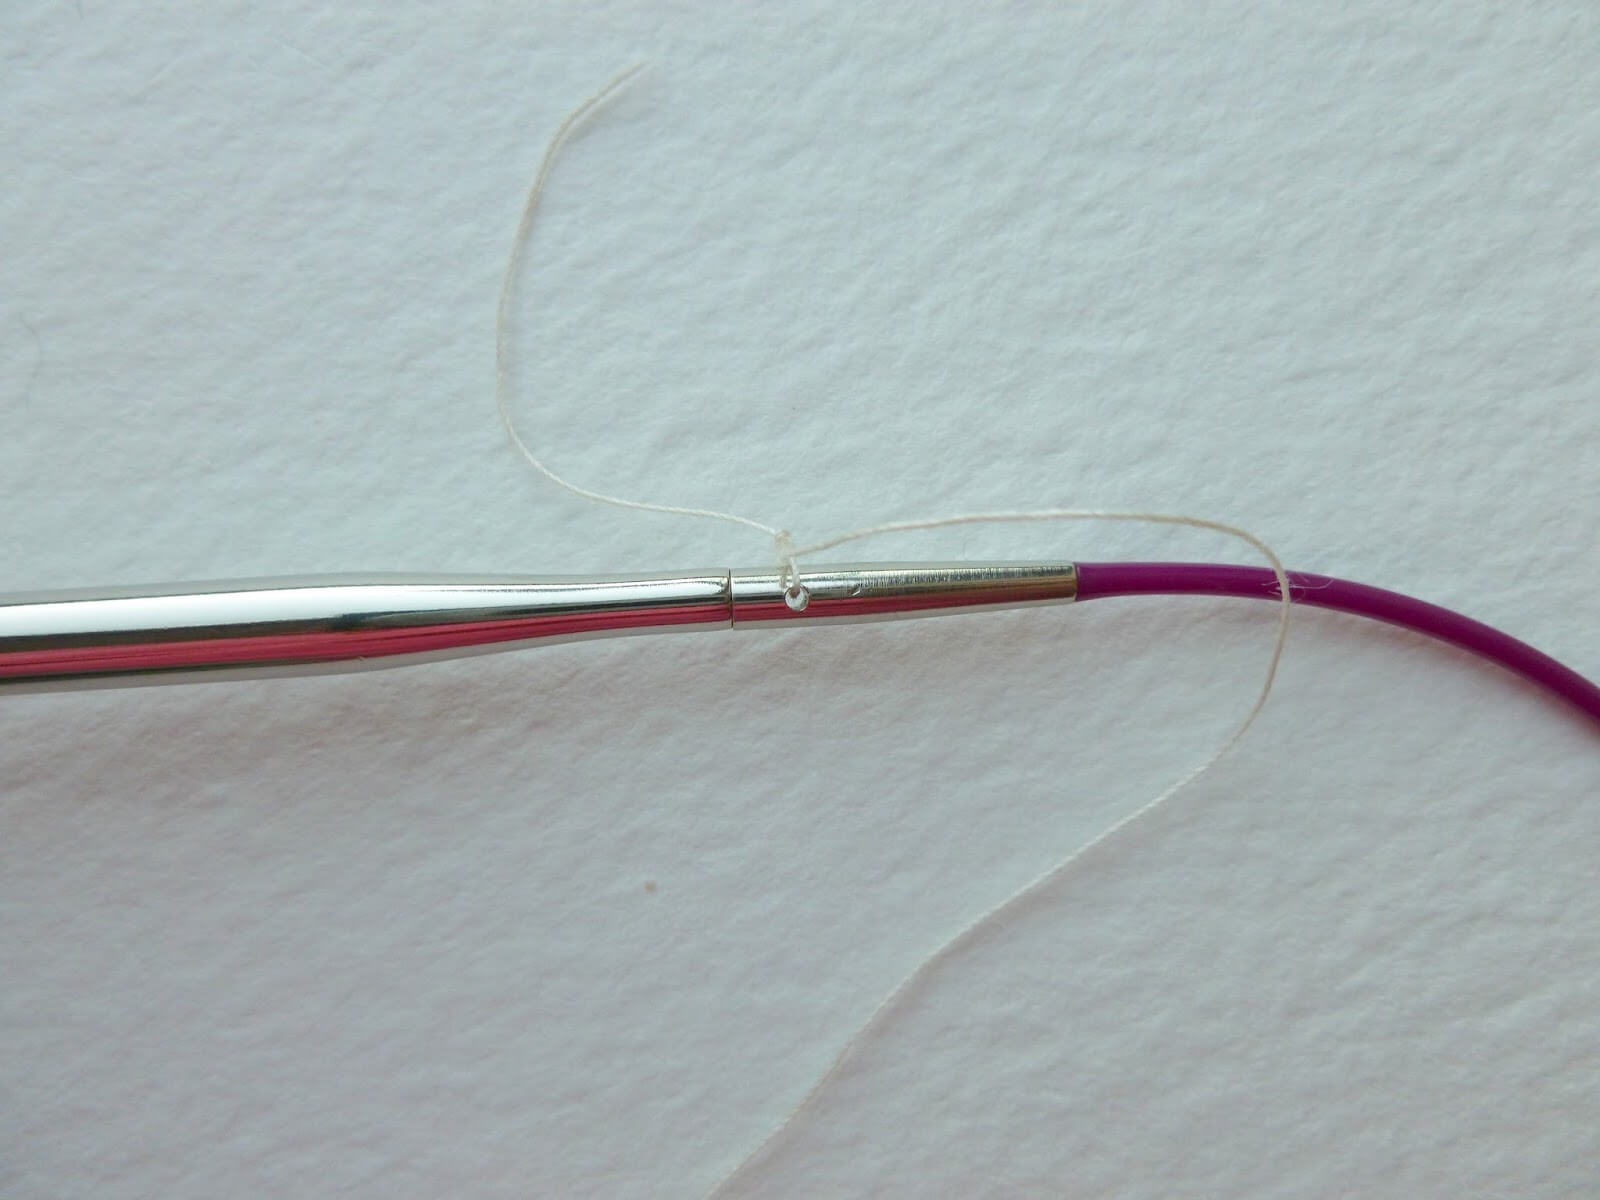
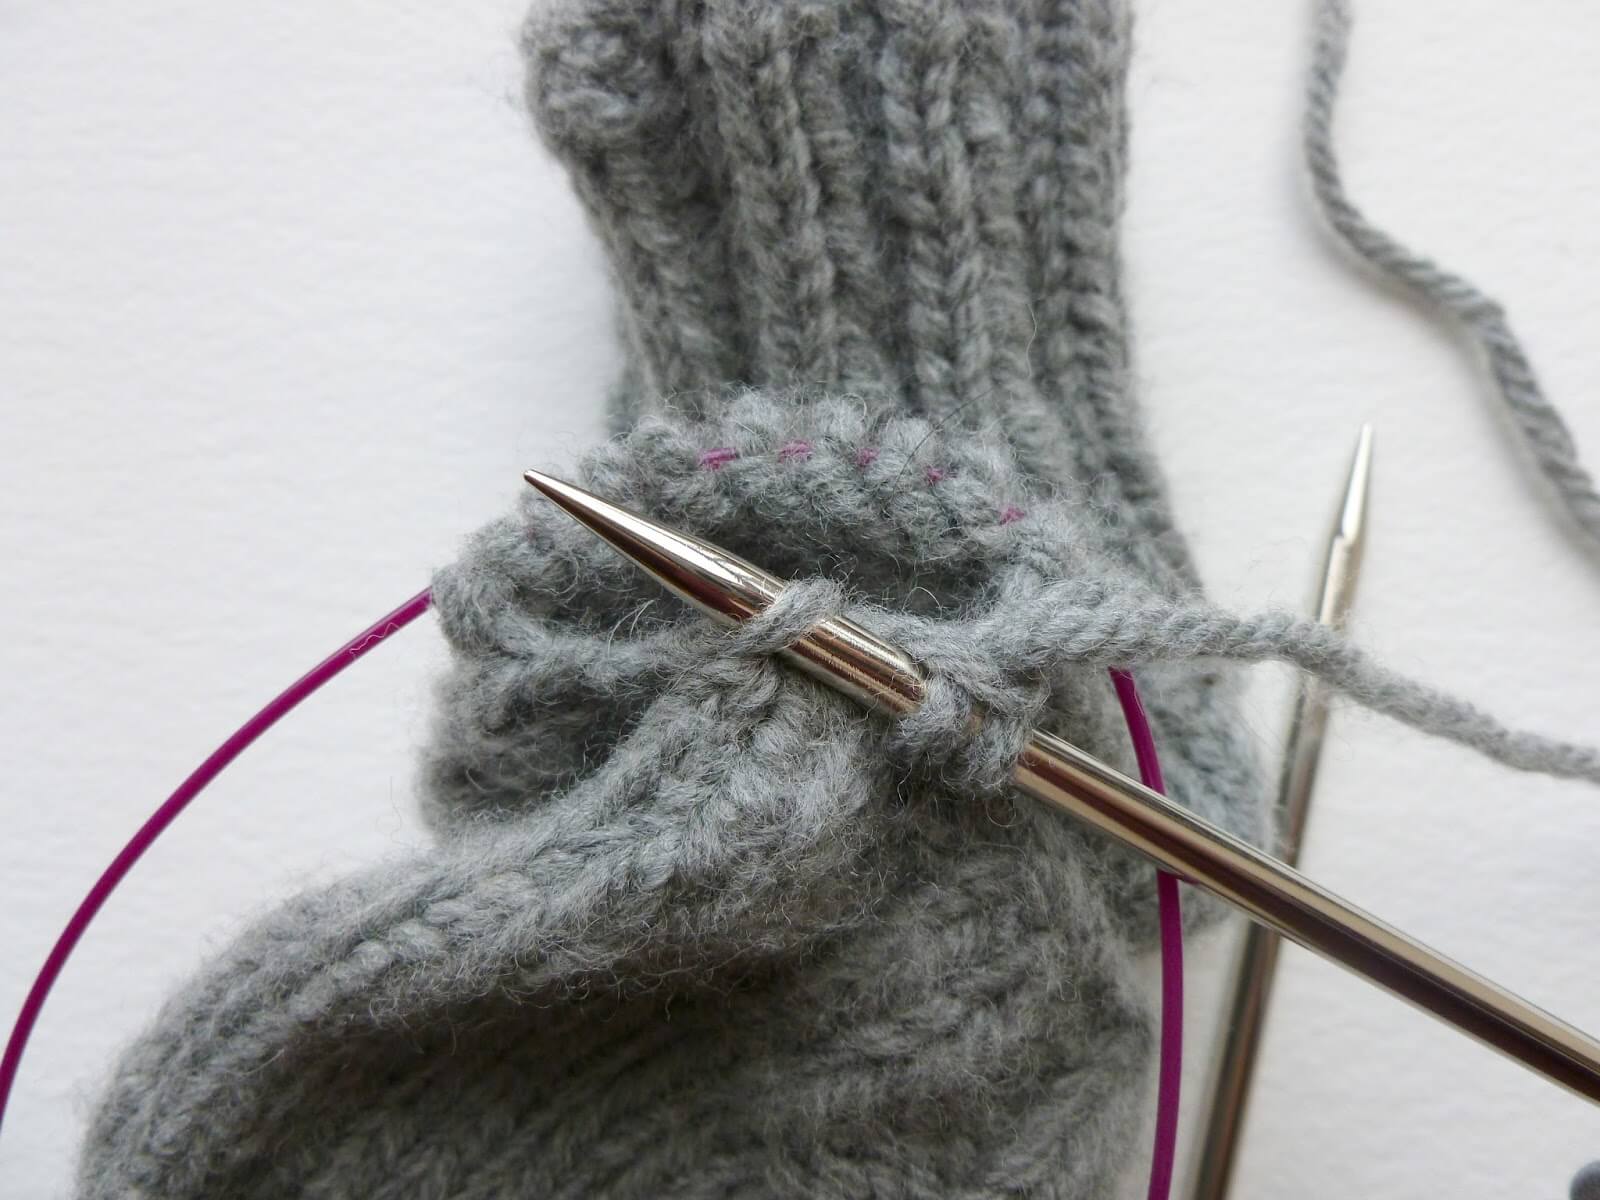
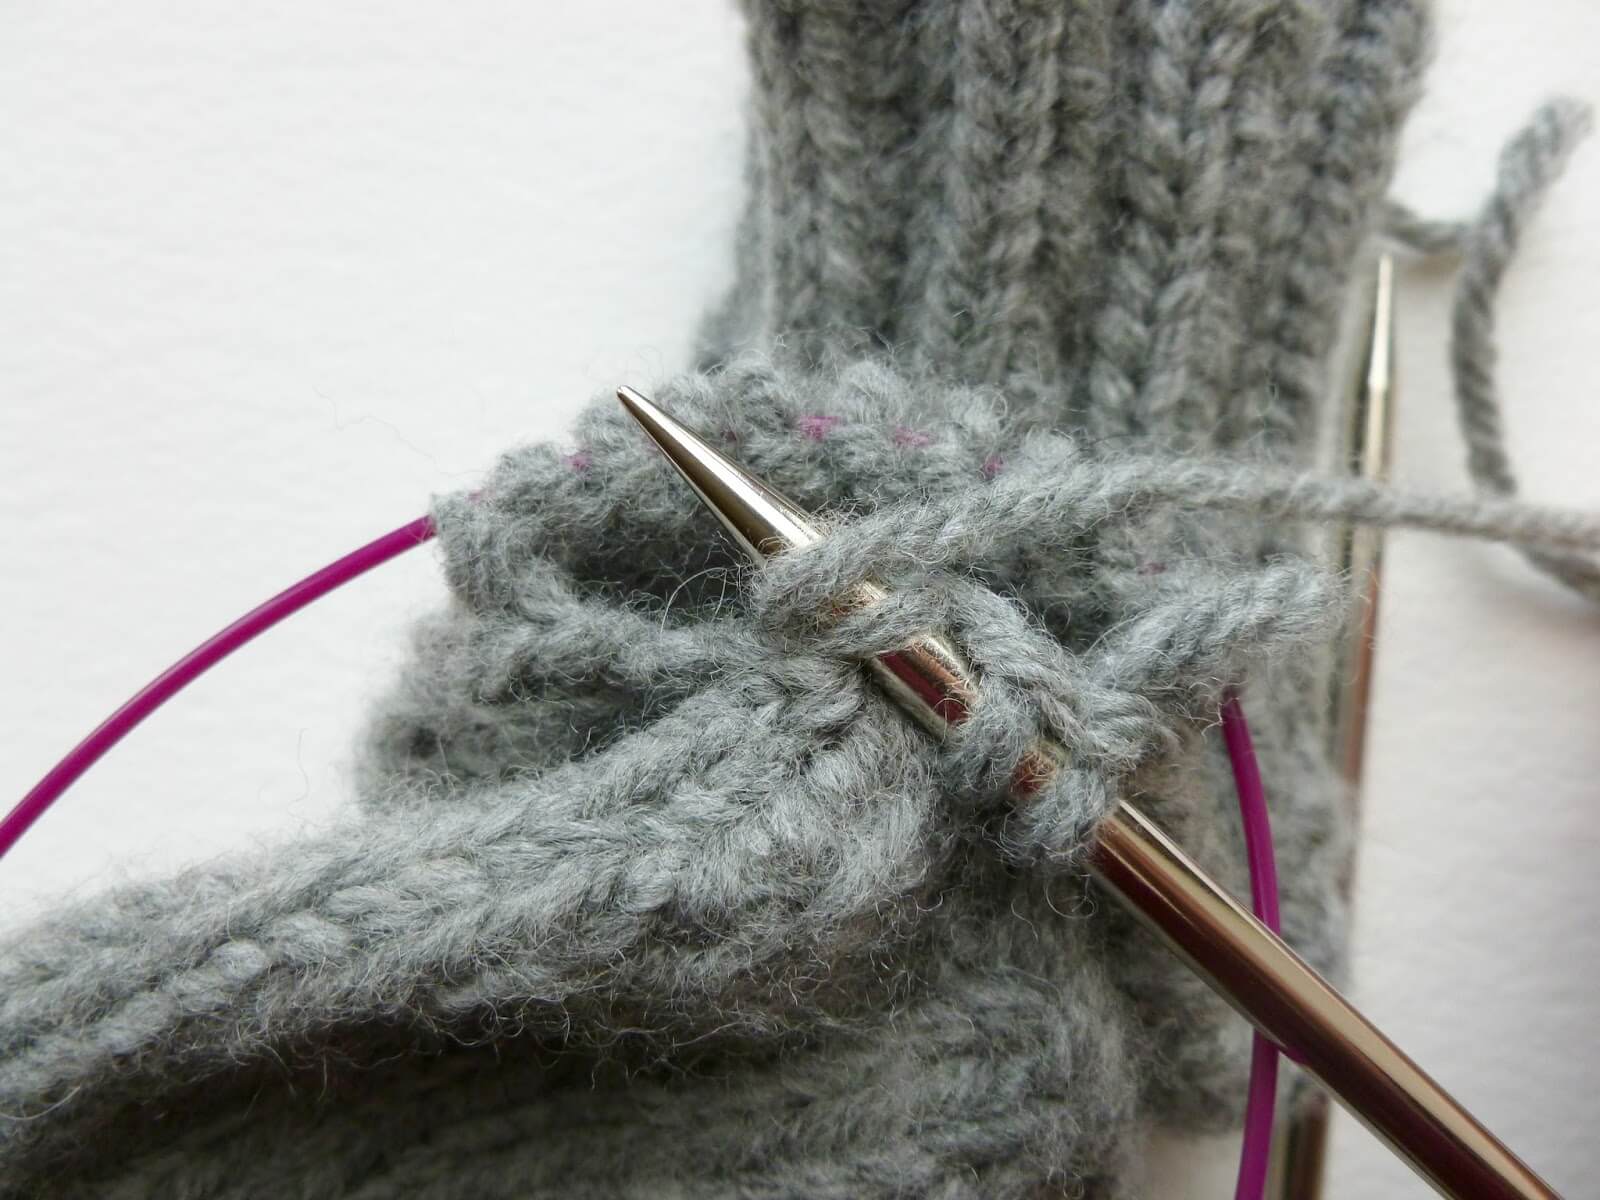
or if you use interchangeable needles with a tightening hole like mine, you can thread your cotton through the tiny hole and it will pull through your stitches on your last knit round:
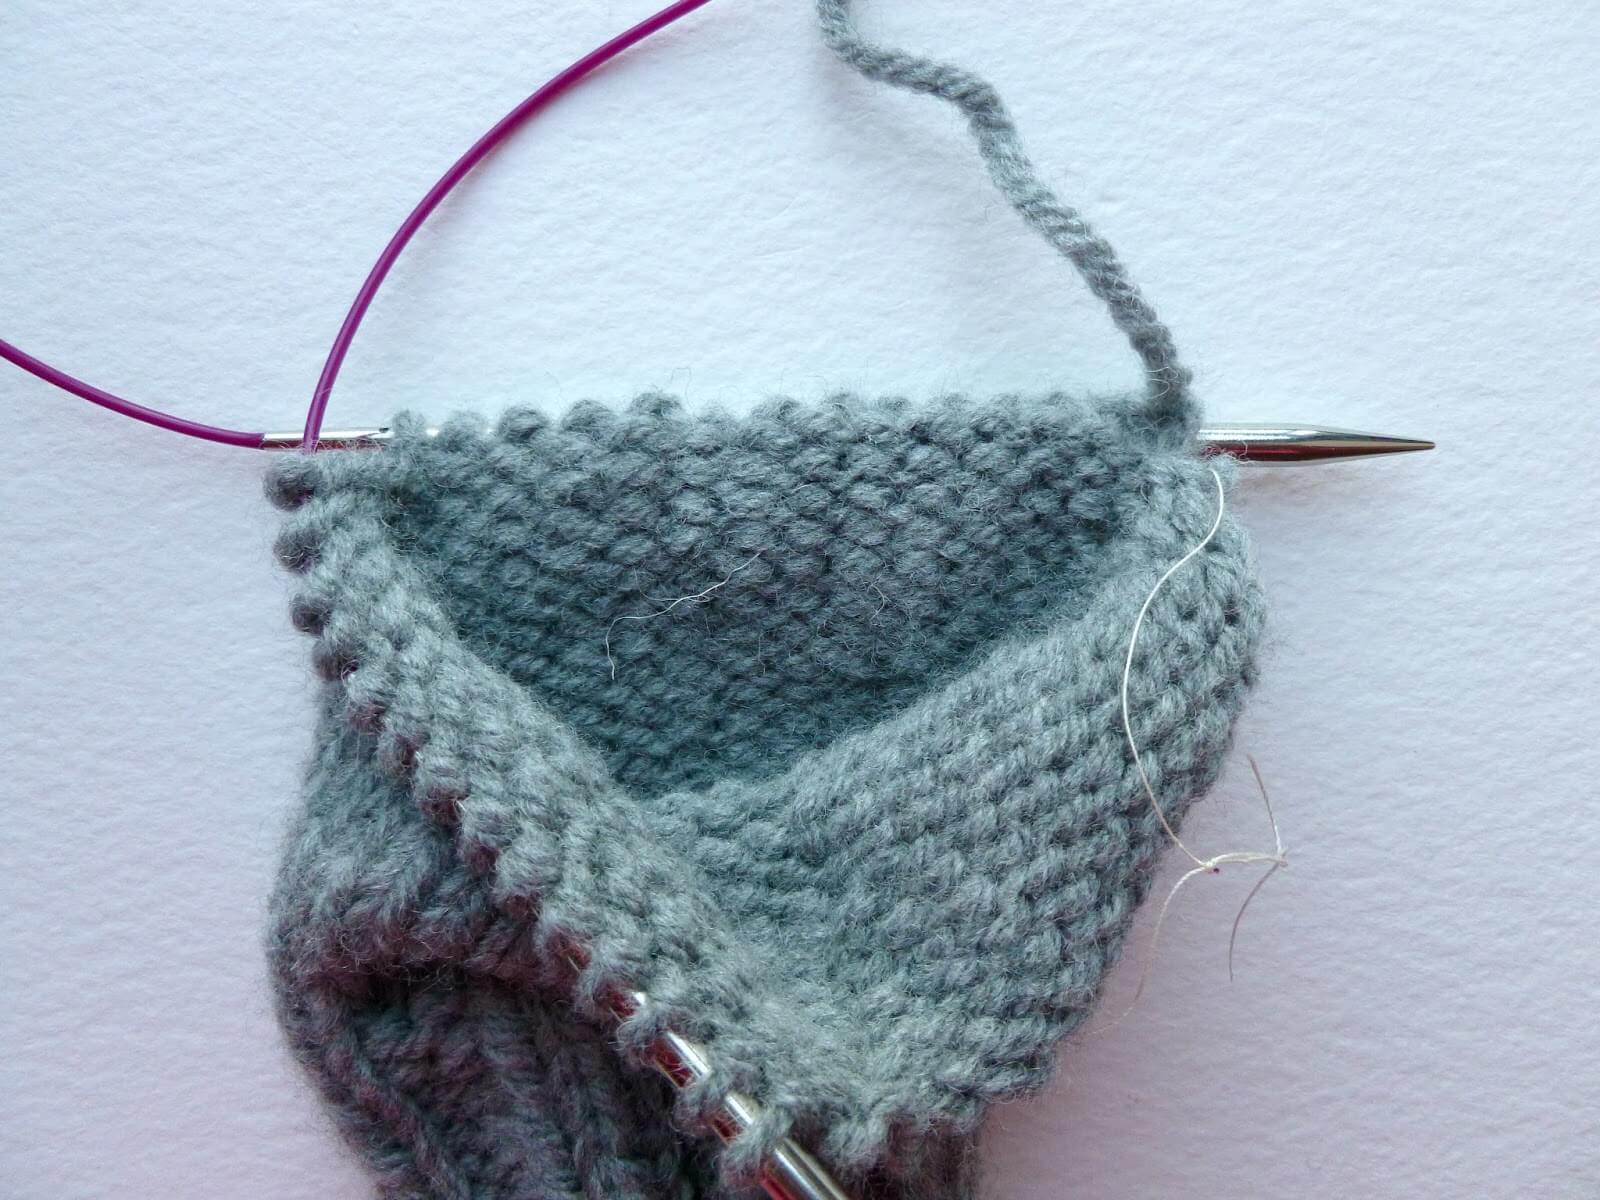
As you can see, your thumb stitches are quite safe whilst your working stitches remain on the needles.
Left hand
Round 1: K2P2 rib ending with K2 for 14 stitches, place thumb stitches on spare yarn, cast on 2 stitches onto right hand needle, K14
If you’re right handed, cast on by putting your right hand needle into your left hand and casting on 2 stitches as you would cast on at the beginning of any project. If you’re left handed, you may do it differently but as long as you end up with two extra stitches on that needle, it’s fine.
Round 2: K2P2 rib for 14 stitches, K16. Repeat this round three times (5 rows of rib).
Note – If you want to make the length of the mitten shorter, work one less round of K2P2 rib across the lower flap.
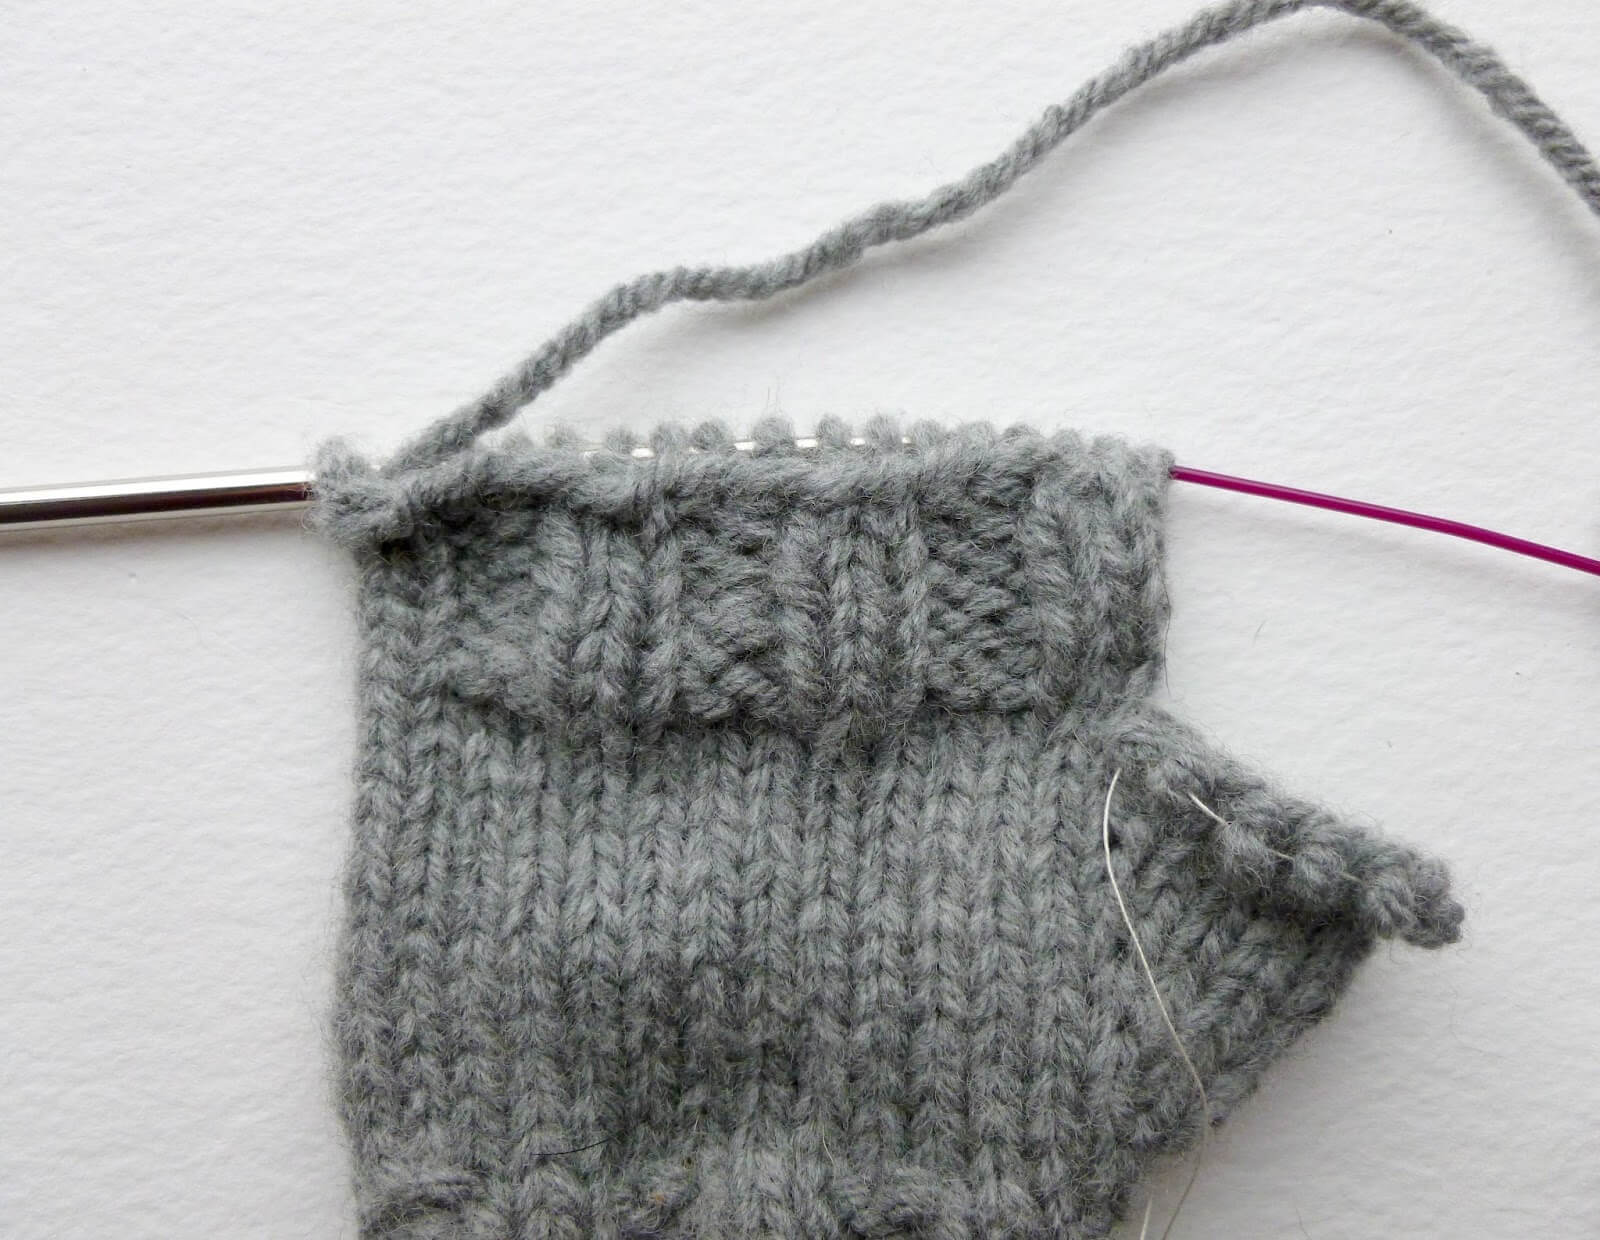
Loosely cast off 14 sts in rib, K15.
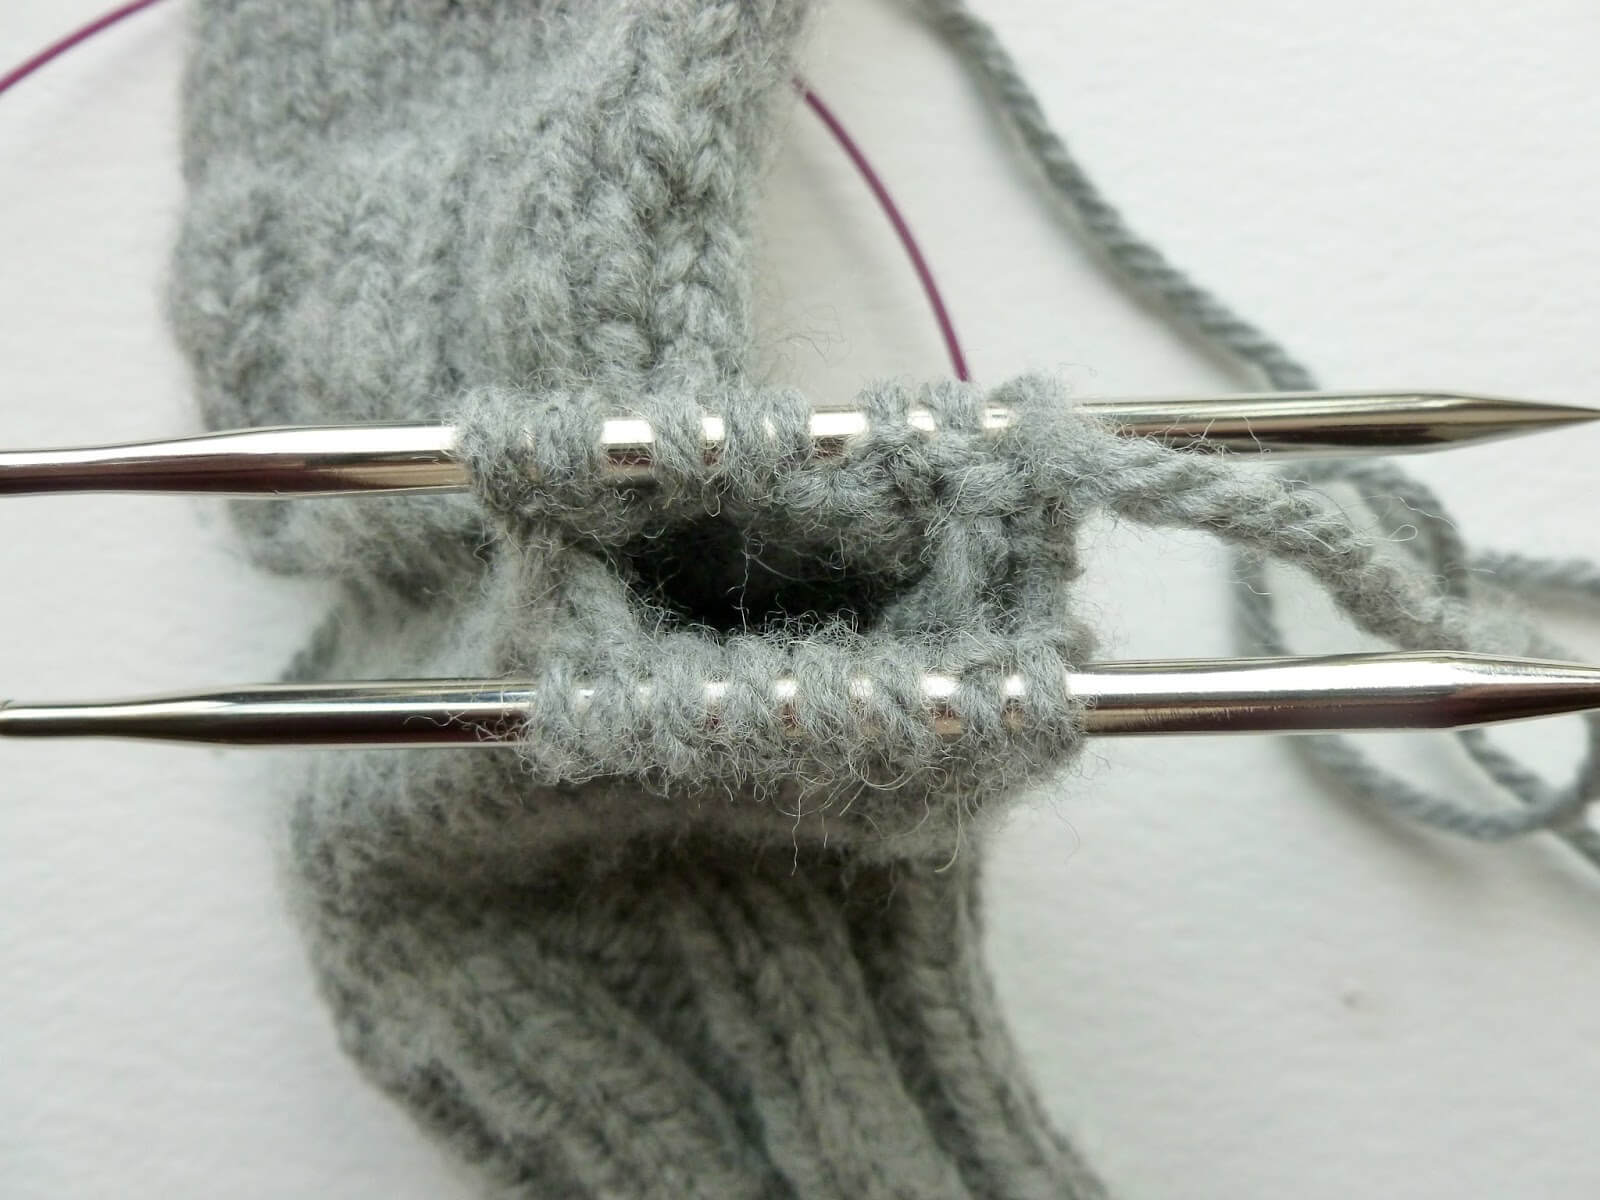
Your mitten will look like this.
Slide the remaining 16 stitches down onto the cable to keep it safe as you are going to create the upper rib flap. Do not break yarn.
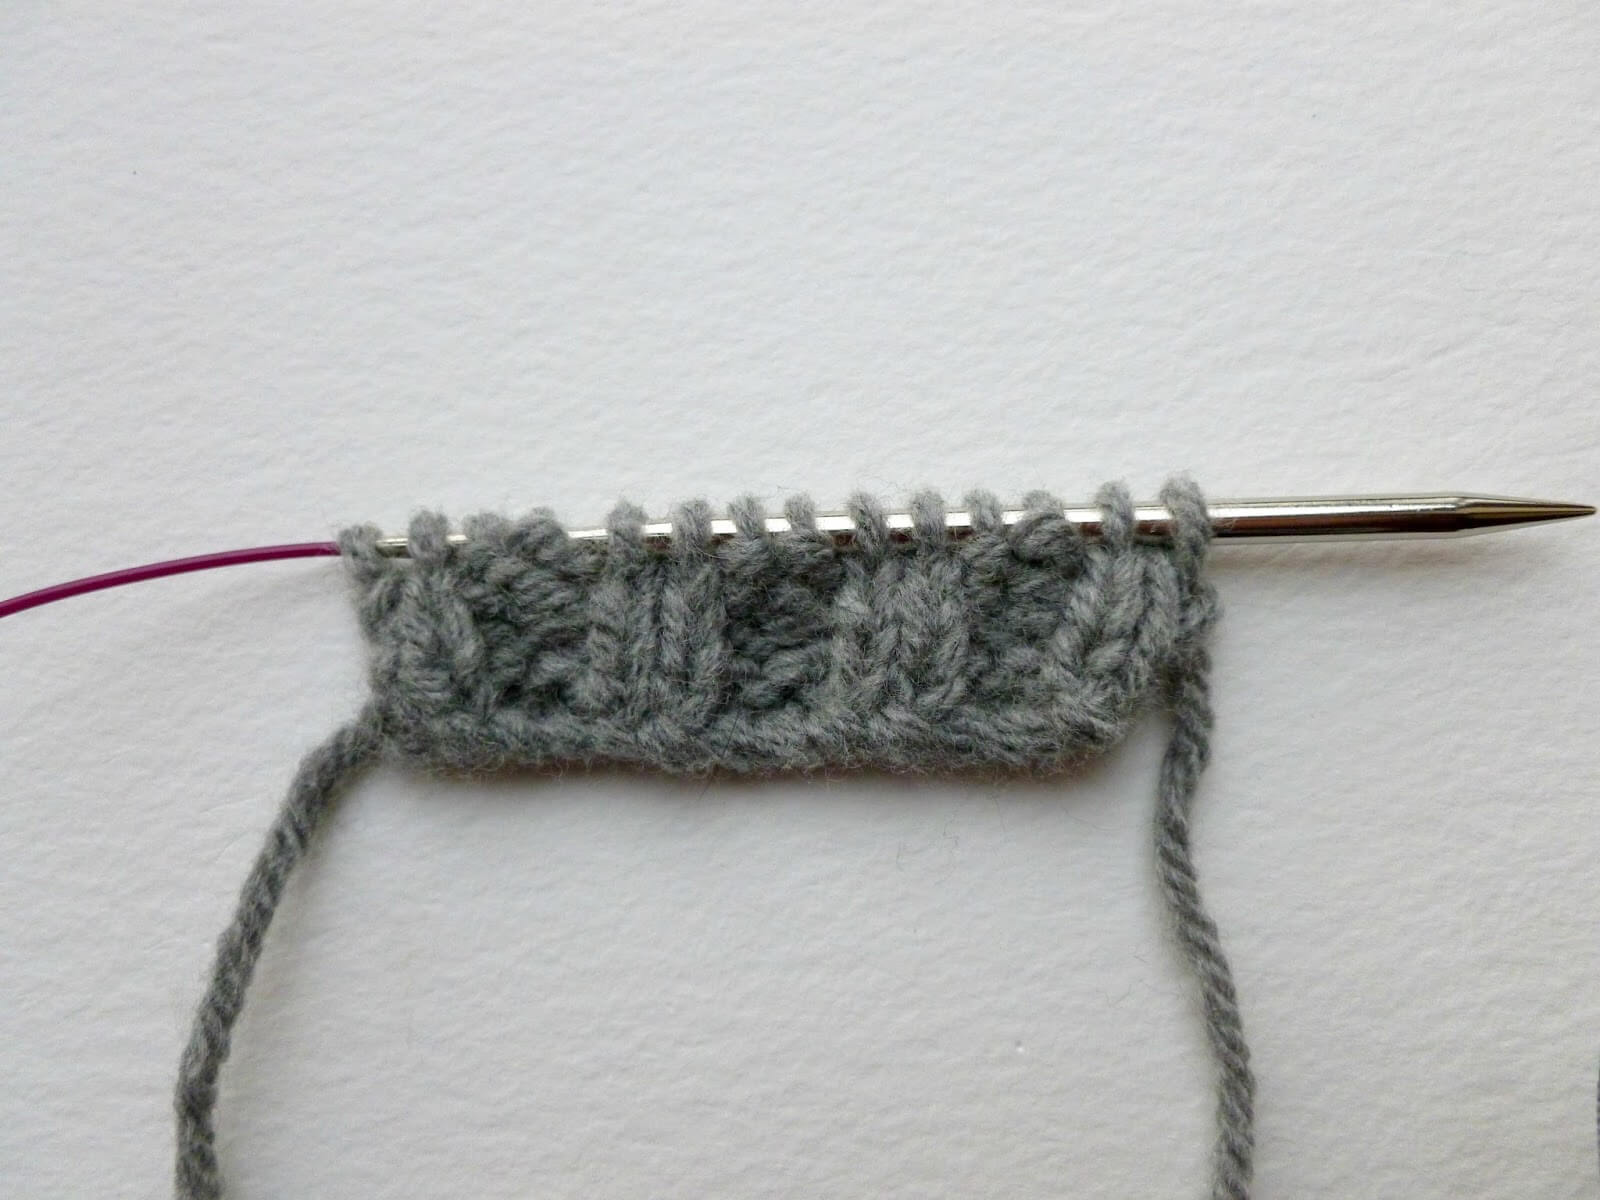
Using yarn from the other end of the ball, cast on 14 stitches and K2P2 rib for 4 rows then break yarn. Note – I don’t use a bigger needle for this cast on as I want it to be quite tight – if you make it too loose your flap will … flap!
Next, you are going to join this flap onto the mitten that you have already knitted. Using the original yarn which is still attached to the mitten on your needle, K2P2 across the new flap then K16 stitches. This will bring you back to the start of your round (your knitting should be in line with your yarn tail).

K2P2 rib for 14 stitches, K16 for 2 rounds. Don’t worry if the join between the mitten and the new flap seems a little loose – you can always fix this when you come to sew your flap later.
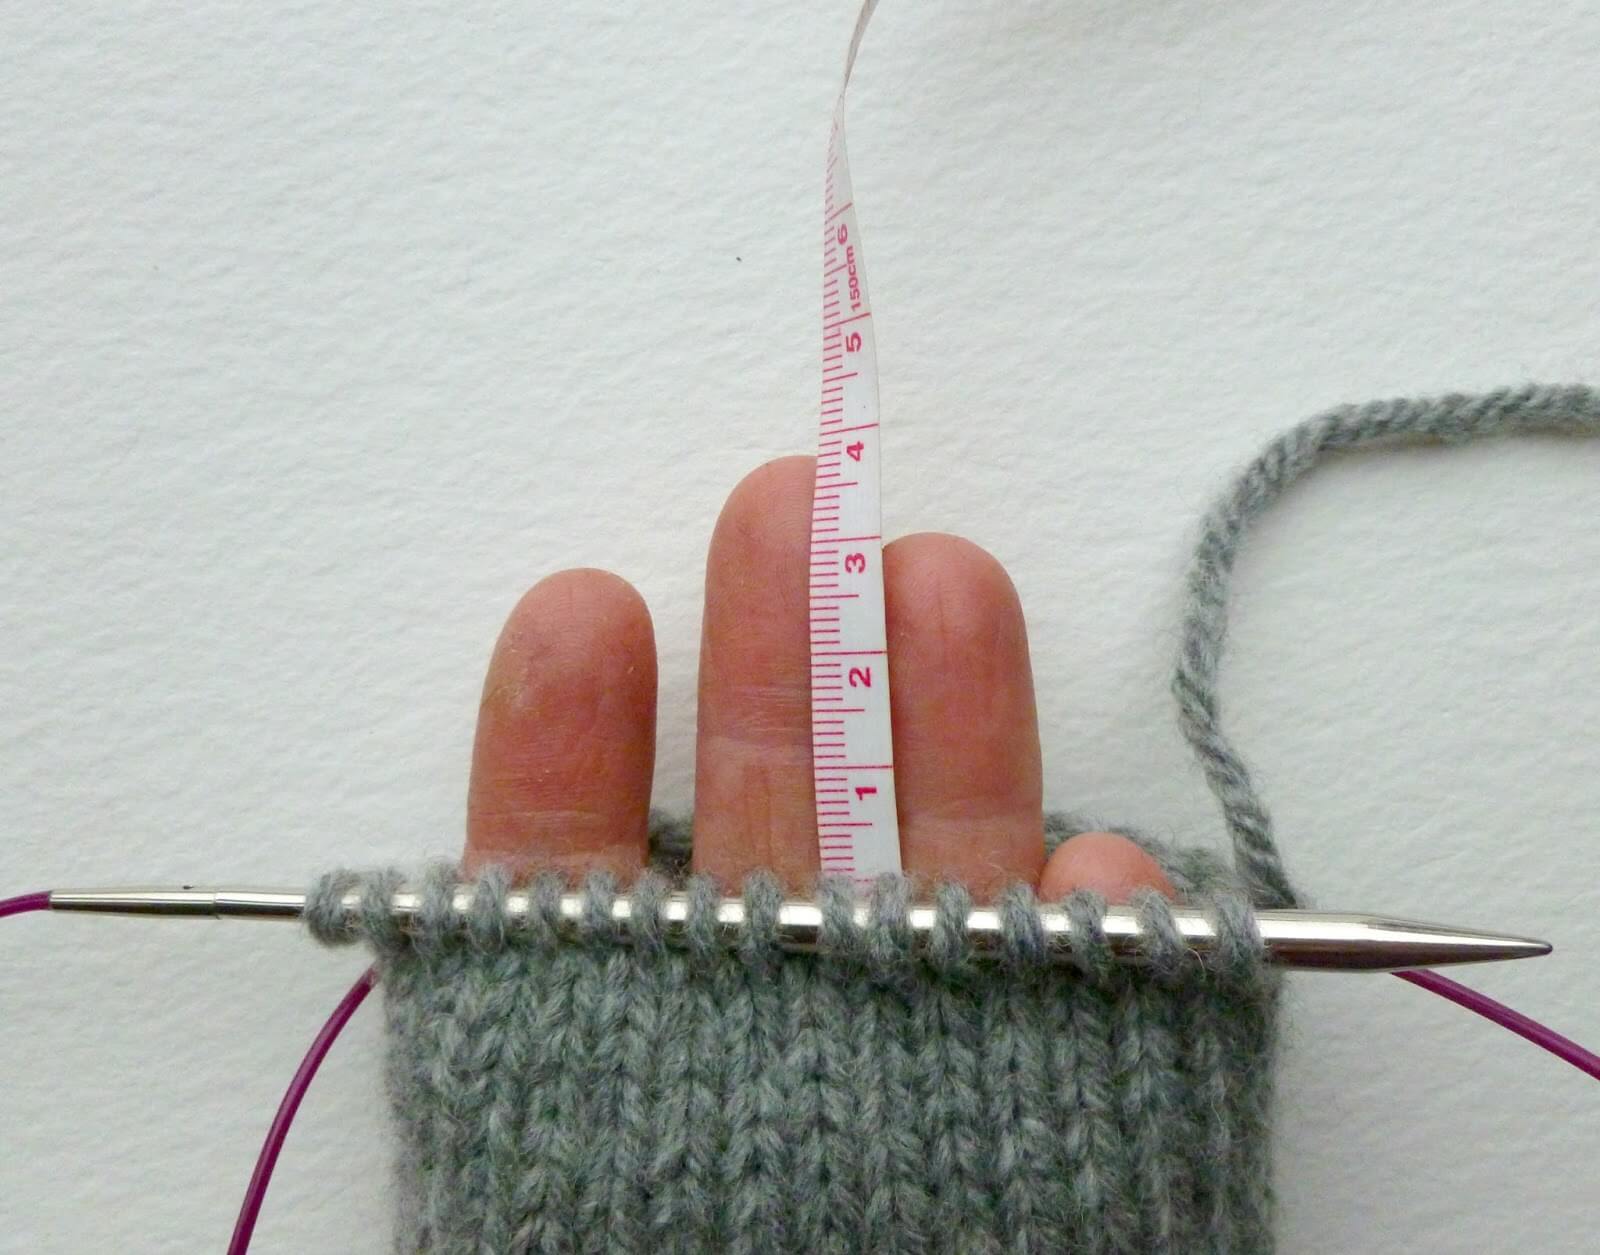
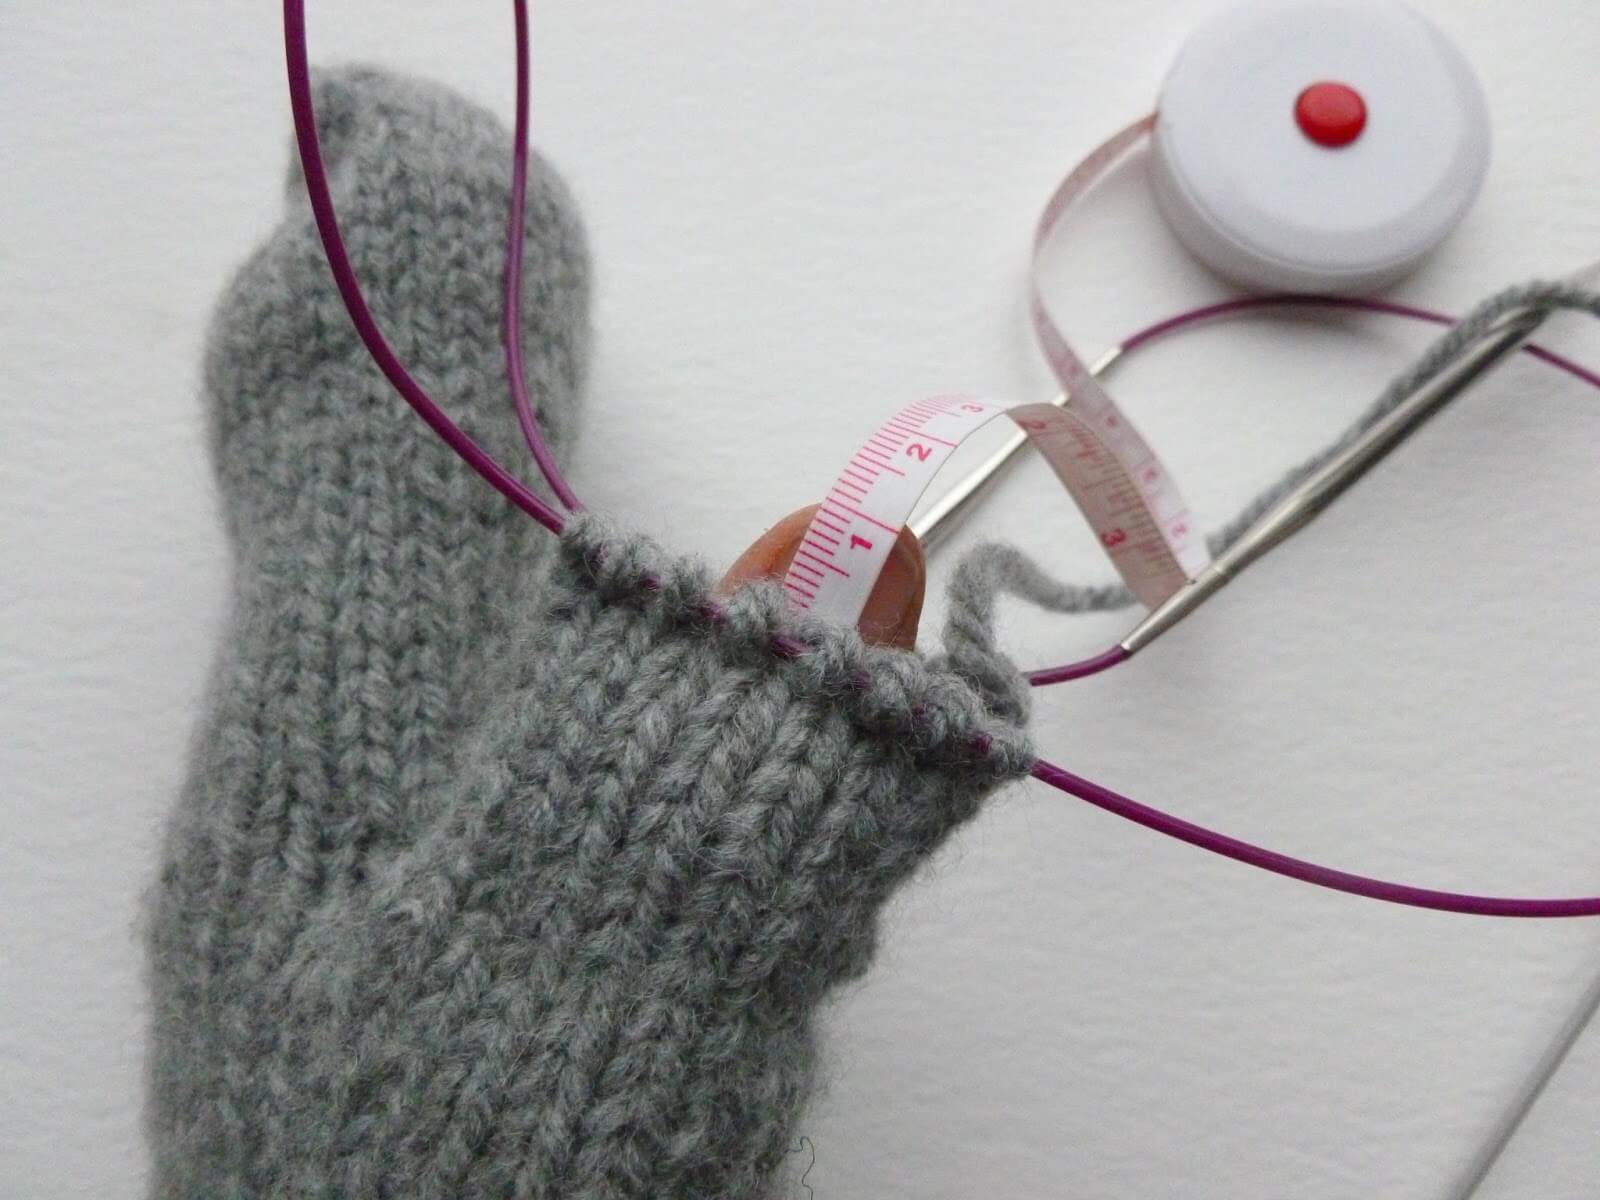
Continue knitting each round until your mitten measures 4cm (1.5″) from desired length.
Decrease for top of mitten (same for both hands)
Round 1: *K5, K2tog*, repeat between * to last 2 sts, K2 (26 sts)
Round 2: Knit
Round 3: *K4, K2tog*, repeat between * to last 2 sts, K2 (22 sts)
Round 4: Knit
Round 5: *K3, K2tog*, repeat between * to last 2 sts, K2 (18 sts)
Round 6: Knit
Round 7: *K2, K2tog*, repeat between * to last 2 sts, K2 (14 sts)
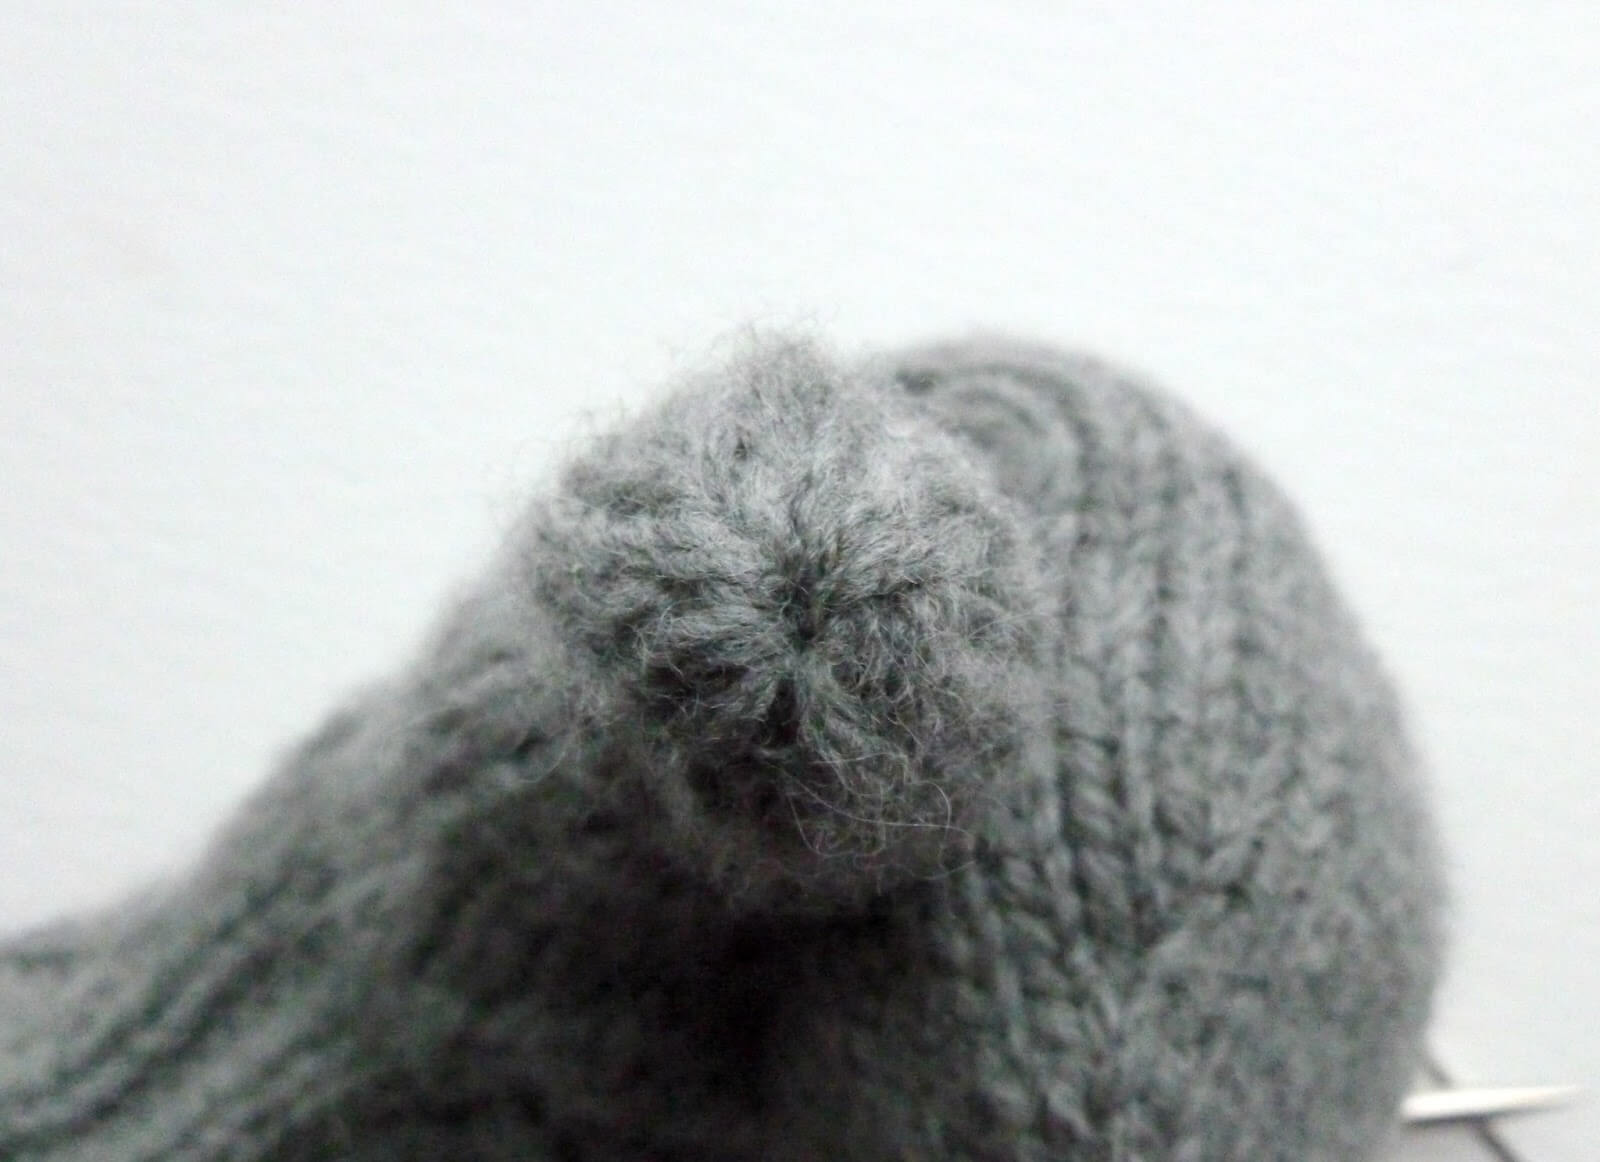
Round 8: *K2tog* (7 sts)
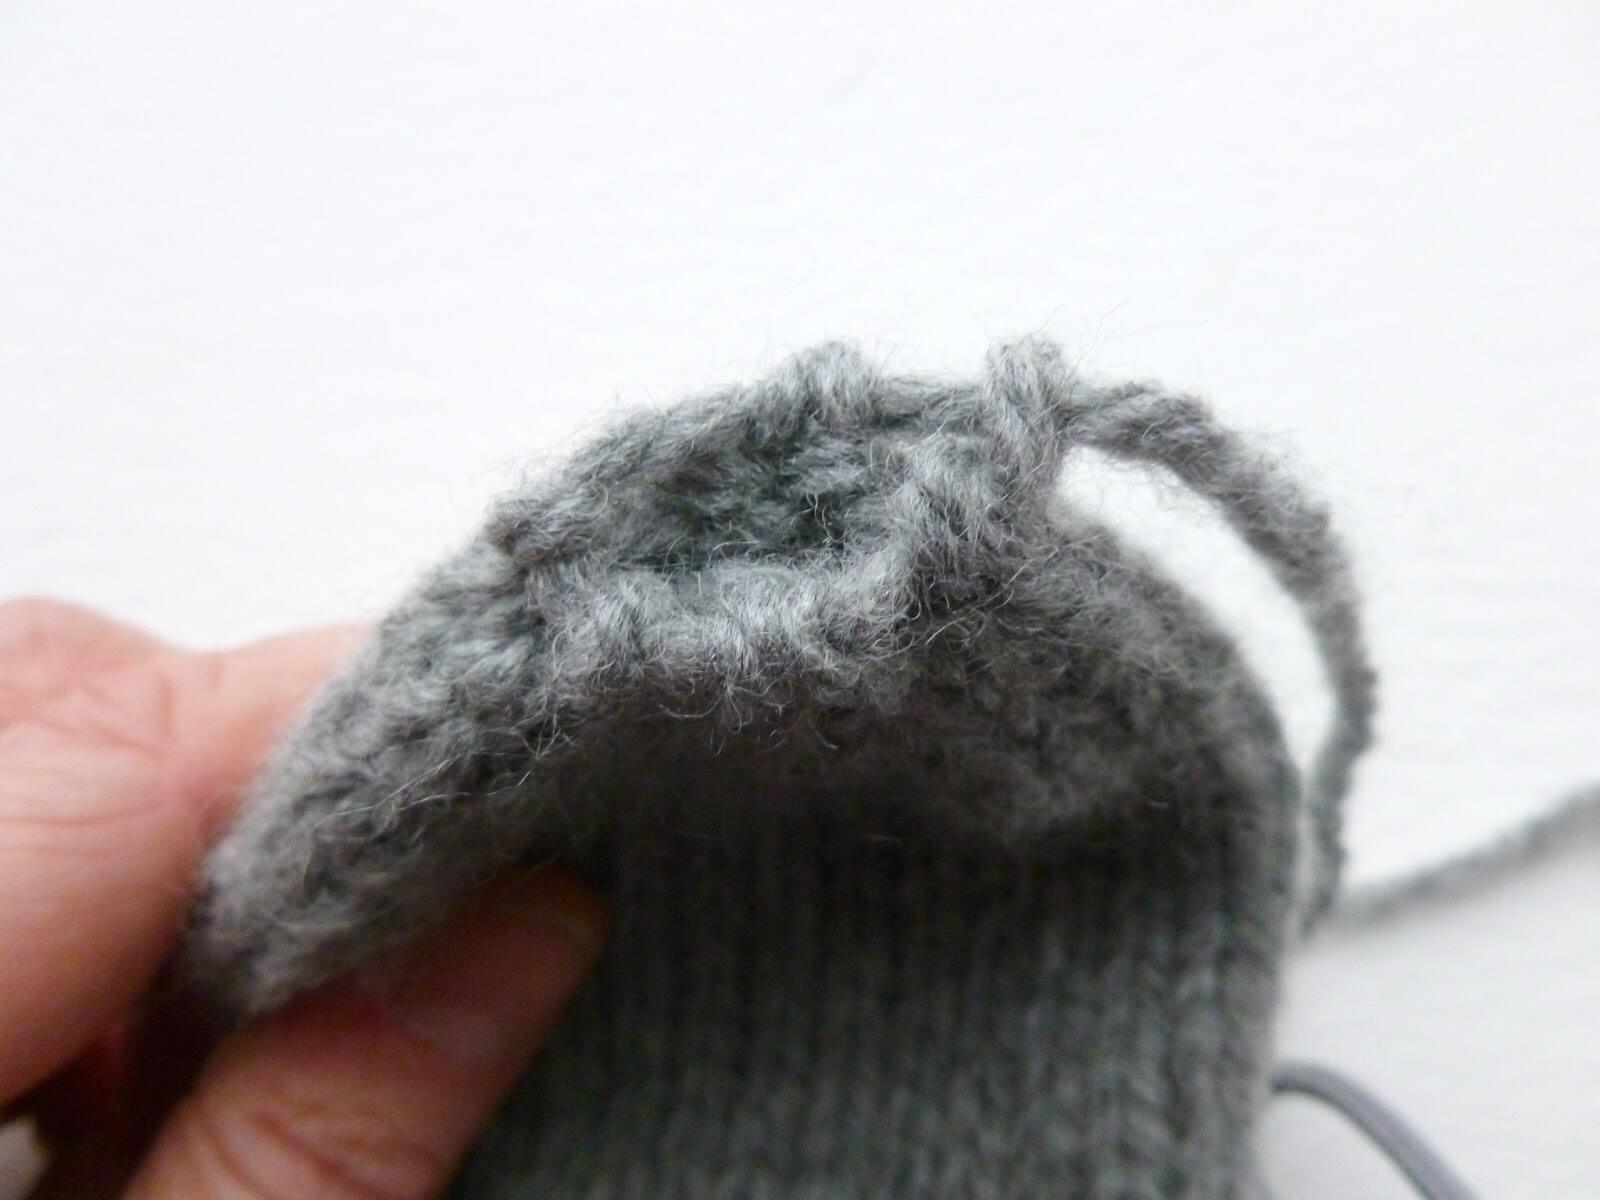
Cut yarn, thread through remaining stitches, pull tightly and weave in securely.

Thumb (same for both hands)
Put the stitches on the spare yarn or thread back onto your needle. You are going to pick up 5 stitches from around the thumb hole to complete the thumb. You should find it quite easy to find the loops to pick up as you can see from this picture.
To pick up a stitch, simply put your needle into the loop where you want to pick up the stitch.
Wrap the yarn around the needle …
and pull it through to create a new stitch.
Once you have picked all 5, your thumb should look like this:
Now divide your stitches so that you have 8 stitches on each needle (16 sts).
Continue to knit each stitch until thumb measures 1cm below the top of your thumb.
Round 1: *K2, K2tog*, repeat between * four times (12 sts)
Round 2: *K1, K2tog*, repeat between * four times (8 sts)
Round 3: K2tog around (4 sts)
Break yarn and pull through remaining 4 sts. Pull tightly and weave in securely.
Right hand
Round 1: Knit 14, place thumb stitches on spare yarn, cast on 2 stitches onto right hand needle, K2P2 rib for 14 stitches to end of round.
If you’re right handed, cast on by putting your right hand needle into your left hand and casting on 2 stitches as you would cast on at the beginning of any project. If you’re left handed, you may do it differently but as long as you end up with two extra stitches on that needle, it’s fine.

Round 2: K16, K2P2 rib for 14 stitches. Repeat this round three times (5 rows of rib).
Note – If you want to make the length of the mitten shorter, work one less round of K2P2 rib across the lower flap.
K16, loosely cast off 14 sts in rib (you will need to use one stitch from front needle to complete this).
Your mitten will look like this.

Knit across 16 stitches and slide the remaining 16 stitches down onto the cable to keep it safe as you are going to create the upper rib flap. Do not break yarn.
Using yarn from the other end of the ball, cast on 14 stitches and K2P2 rib for 4 rows then break yarn as for left hand.

Next, you are going to join this flap onto the mitten that you have already knitted. Using the original yarn which is still attached to the mitten on your needle, K2P2 across the new flap then K16 stitches. This will bring you back to the start of your round (your yarn should be the left above your thumb stitches).
Work 2 rounds of K16, K2P2 rib for 14 stitches. Don’t worry if the join between the mitten and the new flap seems a little loose – you can always fix this when you come to sew your flap later.
Continue knitting each round until your mitten measures 4cm (1 1/2″) from desired length.

Decrease for top of mitten (same for both hands)
Round 1: *K5, K2tog*, repeat between * to last 2 sts, K2 (26 sts)
Round 2: Knit
Round 3: *K4, K2tog*, repeat between * to last 2 sts, K2 (22 sts)
Round 4: Knit
Round 5: *K3, K2tog*, repeat between * to last 2 sts, K2 (18 sts)
Round 6: Knit
Round 7: *K2, K2tog*, repeat between * to last 2 sts, K2 (14 sts)
Round 8: *K2tog* (7 sts)
Cut yarn, thread through remaining stitches, pull tightly and weave in securely.


Thumb (same for both hands)
Put the stitches on the spare yarn or thread back onto your needle. You are going to pick up 5 stitches from around the thumb hole to complete the thumb. You should find it quite easy to find the loops to pick up as you can see from this picture.
To pick up a stitch, simply put your needle into the loop where you want to pick up the stitch.
Wrap the yarn around the needle …
and pull it through to create a new stitch.
Once you have picked all 5, your thumb should look like this:
Now divide your stitches so that you have 8 stitches on each needle (16 sts).
Continue to knit each stitch until thumb measures 1cm below the top of your thumb.

Round 1: *K2, K2tog*, repeat between * four times (12 sts)
Round 2: *K1, K2tog*, repeat between * four times (8 sts)
Round 3: K2tog around (4 sts)
Break yarn and pull through remaining 4 sts. Pull tightly and weave in securely.


Finishing off
Using the tail ends from the upper flap, sew both sides of the flap securely to the body of your mitten, matching the ribbed sections.

Sew in the tail from your cast on and neaten any remaining ends.
And there you have it. One pair of mittens which are far more versatile than other flap-less mittens but will still keep your hands nice and warm. Ta-dah! I’d love to see your mittens, so if you’re on Ravelry please do link to the pattern and share your photos!
This mitten pattern and tutorial is free and will always remain so, but if you have enjoyed using it and would like to buy me a brew, it will be much appreciated! You can find the donation button on the sidebar on the left hand side. Thank you! xx
This pattern copyright © 2016 Winwick Mum
Not to be included in any collection or used for profit without written consent of Winwick Mum.


Love your split mitten pattern Heather. Such a brilliant idea.
Thank you, Bob! 😉 xx
Split mittens were always very useful when I played in a concert band. I did make a pair, but only on straight needles. You may tempt me to give these a go!
These are really easy on circulars, I think they should be a wardrobe staple! 🙂 xx
Your splittens – because that it is what I have decided to call them! – are a great idea!!! I will have to see if I can crochet something similar as I am finding that my fingerless mitts (such as they are) are a bit chilly for my walks, but I need to have my fingers free to use my mp3 when I walk. Thank you for the great inspiration! xx
Splittens! That's a good name! I'm quite sure you can come up with a crocheted version, I really don't see the point in fingerless mitts as it's my fingers that get cold! 🙂 xx
Thank you for your great pattern and tutorial Christine I'll be making some of these for sure.:) xx
Brilliant! I'll look forward to seeing them! xx
Where is the tutorial please ?
This is it! The photo tutorial is in this post 🙂 xx
They are brilliant. I have been pondering knitting myself a pair recently 😉
These are easy to make, so I think you should definitely give it a go! 😉 xx
What a neat design, and such a great tutorial. Lovely clear photographs 🙂
Thank you! xx
I am a dog owner and therefore a pooper scooper and gloves in winter are a real pain. Your splitterns might be just the job! Thanks.
They're brilliant for everything dog-related, Sarah! 🙂 xx
You've really outdone it with this wonderful tutorial, Christine! Such clear instructions for these lovely mittens. I would love to knit myself a pair one day. And, I wish you daughter the very best for her upcoming trip to Peru. It's a very worthwhile cause. My best to you and your family, Pat xx
Thank you, Pat! I'm sure you'd have no problem with the mittens – it's just whether you'd have the weather for them! Yes, we're on countdown for Peru now; once Christmas was over it started to feel as if it's much closer! xx
I have seen mittens with flaps but your version is so much more practical. I am a pooper scooper and definitely need mitts like these. Also useful of course for fiddly bike locks and bike lights! I have some bright read aran weight yarn in mind that has been waiting in my stash for the perfect project. Thanks for taking the time to share the pattern Christine. x
It's just so easy to slide your hand out and then back in again – I don't know how I managed without these mittens! 🙂 xx
Did you use the same cast-on as your socks? Also, this may seem like a strange question, but do you have long, graceful hands? (That sounded better than asking if you have big hands!) I'm tall and have large hands, but mine measure only a little bit larger than yours. Store-bought gloves are always too short for me. Thanks.
Hi Cheryl, yes I did use the same cable cast on but you'll need to use a size larger needles or cast on VERY loosely otherwise it's a bit tight. I do have long fingers – but of course you can make the mitten to any size you like so (just like hand-knitted socks) they will fit you perfectly xx
Wow, what a wonderful idea. I'm a sock knitter and use the magic loop method, so these should be fun to make. Thanks so much for sharing the pattern.
You'll have no trouble with these mittens then, and they knit up much faster than socks! xx
I've nearly finished my first pair of socks following your pattern and had to stop and make blackberry colour mittens, how could I not! Just have my ends to sew in and they're ready to wear. Thank you for sharing the pattern, love the split on the palm.
That was quick! Now you'll have toasty hands and toes! 🙂 xx
You are a very talented knitter and designer, and these mittens are great. I haven't worn mittens since childhood, being a confirmed glove-wearer, and I agree with you about fingerless gloves. I love the colour of your mittens – the blue-grey is soft and wintry.
Cathy x
Thank you, Cathy! I didn't want to wear mittens for a long time once I was "grown up" either – too many memories of uncomfortable yarn through my coat sleeves to stop me losing them! – but you have to take gloves off sometimes too so now I much prefer these mittens 🙂 xx
Thank you so much for this mittens pattern! I live in Minnesota and, you are right, these mittens – no matter the yarn weight – wouldn't be warm enough for a MN winter. I wear leather mittens for that. Your mittens, however, will be perfect for fall and, yes, spring. ( It is a long winter here but the sun shines a lot which helps!)
Everything feels better with a bit of sunshine! Yes, I hadn't thought about the seasons either side of winter, the mittens would be perfect for those days with a bit of "snap" in them xx
Just waiting for a shorter circular needle so I can knit myself some mittens. Have you ever thought of designing a pattern in double knitting? I belong to a group that does a lot of knitting and crocheting of all sorts of garments for various groups from local maternity hospitals to hats for seafarers and knee blankets for the elderly. We have lots of double knitting wool.
There's no reason why you couldn't try these mittens with double knitting yarn, Kat, although you'd need to alter the number of stitches that you cast on and they wouldn't be quite as warm. I have got a double knitting pattern in the pipeline but it's going to be socks. As if you couldn't guess 😉 xx
Hello, I was wondering if there is an error in the pattern. When it tells you how to add the flap for right mitten, it's the same as for left. The stitches don't line up the way the pattern says.
Hi! It's taken me a while to work it out, but I think you're right. You need to knit across the stitches on the right hand before sliding the stitches onto the cable to create the flap. When you look at the photo for joining the flap on the right hand, the yarn is in the right place on the right hand side. Thanks for spotting this – nobody's mentioned it before so I hadn't realised – I've obviously done it when I've created the tutorial as the photo is right but my words don't quite match! I've updated the PDF too now as well xx
Wonderful! I thought I was going crazy. I did make three pairs and they all turned out great. Thank you for correcting the pattern.
Wow! Three pairs! You have been busy! It's no problem, there's nothing worse than getting halfway through a pattern and getting stuck! xx
I'm so glad I found this pattern!! I used the Reflection yarn from Red Heart as I am knitting these for a friend who rides a scooter to work and I think they will make a great safety feature for her. I also agree with the person who called these "splittens", adorable name. BTW, I did try to make another pattern I found, not at all as easy to follow as your pattern is. Thank you for your time, effort and for sharing this pattern with the world! xo
Reflective yarn – what a great idea! Having the split should make them super-practical too; what a good friend you are! I'm so glad you're finding the pattern easy to use xx
Thank you so much for sharing this pattern. It really is simple except that I am unsure as to how to join the extra ribbed flap to the mitten. Help please☺☺ Gail
Hi Gail, if you look at the pictures above, you can see that the mitten stitches on the cable whilst you work the flap, and then once you've done that you just knit across the stitches on the cable and then rejoin your yarn to knit across the flap so that you're back knitting in the round again. You'll probably want to pull your yarn tighter on the first two stitches after you rejoin the two pieces together so that you don't get a ladder, but you should find that easy enough to do 🙂 xx
After printing out 3 different flip top mittens from Ravelry and not being totally satisfied with any of them, I found your pattern – the "flap" was exactly what I was looking for! These knitted up for me in a day and a half . . . just need to do the weaving in yet. I expect them to be great for dog walking!
BTW I have to comment on fingerless gloves. If you think of them as "house gloves" perhaps that will change your impression of them- I wear them all the time indoors throughout the winter and cooler months; I have many pairs in many colors. Mine are the little short ones that stop before even getting to my fingers, BECAUSE I am a piano player and teacher and recently retired church organist. I need warm(ish) hands but I need freedom for the fingers, too! During the winter the sanctuary thermostat is set at 55 degrees fahrenheit during the week when I'd be in to practice- cold for trying to make the fingers move! And I do wear my fingerless gloves outdoors, usually when other people don't see any reason for gloves/mittens at all . . .thanks again for this great pattern – I made mine in Brown Sheep cotton top in a mauve/lavender heather – they even LOOK warm!
I'm so pleased that you're happy with your mittens, Gretchen! I can see why you'd like fingerless gloves too – they do have their uses! 🙂 xx
I'm Lisa V Helsing from Facebook. I had to come off it but just before I did I had asked about making these in Aran wool. I'm so pleased that I tried this pattern because I used magic loop for the first time making a chunky pair. Loved magic loop and made my first Aran pair taat! Solved my problem of things not quite matching. 5 more pairs to make and feeling very pleased with myself. Thank you so much for turning me into a knitter 🙂
Ah, I did think I hadn't seen any photos of socks in trees just lately! 🙂 I'm really glad your mittens have worked out and hope you get your five (five!) pairs done. Always happy to encourage someone to pick up the pointy sticks 🙂 xx
I end up with two right hand mittens by following the Left hand instructions. I am using double points. I don’t know where I am going wrong. Just ripped out the second right hand in frustration.
With the left hand, you start the rib flap at the beginning of the round, putting the thumb stitches on spare yarn, and with the right hand, you work across the palm first, put the thumb stitches on the spare yarn and then start the flap. It doesn’t matter if you start with the left or the right hand so if you’ve ended up with a right hand first, you just need to start the flap on the other side to get the other hand.