
Teeny Tiny Sock brooch and bag charm pattern and tutorial
One of the things that I have really enjoyed about the Sockalong – and which has been an unexpected bonus – is that people who have met each other through the Facebook group in particular are now starting to meet up in real life. How lovely that knitting a pair of socks can bring you new friends!
However, the downside of being a sock knitter is that unless you wear your socks with sandals or see-through boots, it’s much harder to recognise you than, say, someone who knits hats.
So, to solve the problem, it’s been suggested that Sockalongers meeting up should wear something recognisable. I think it’s best to avoid any cliches of red carnations and The Guardian newspaper so my contribution to the discussion is … of course … a tiny sock. A teeny tiny sock that could be worn either as a brooch, attached to a bag as a charm or perhaps even become a keyring. Or for whatever other use you can think of. (I think it’s quite Christmassy so could imagine it as a decoration, although it’s a bit too tiny to put gifts in.) And ta-dah … here it is!
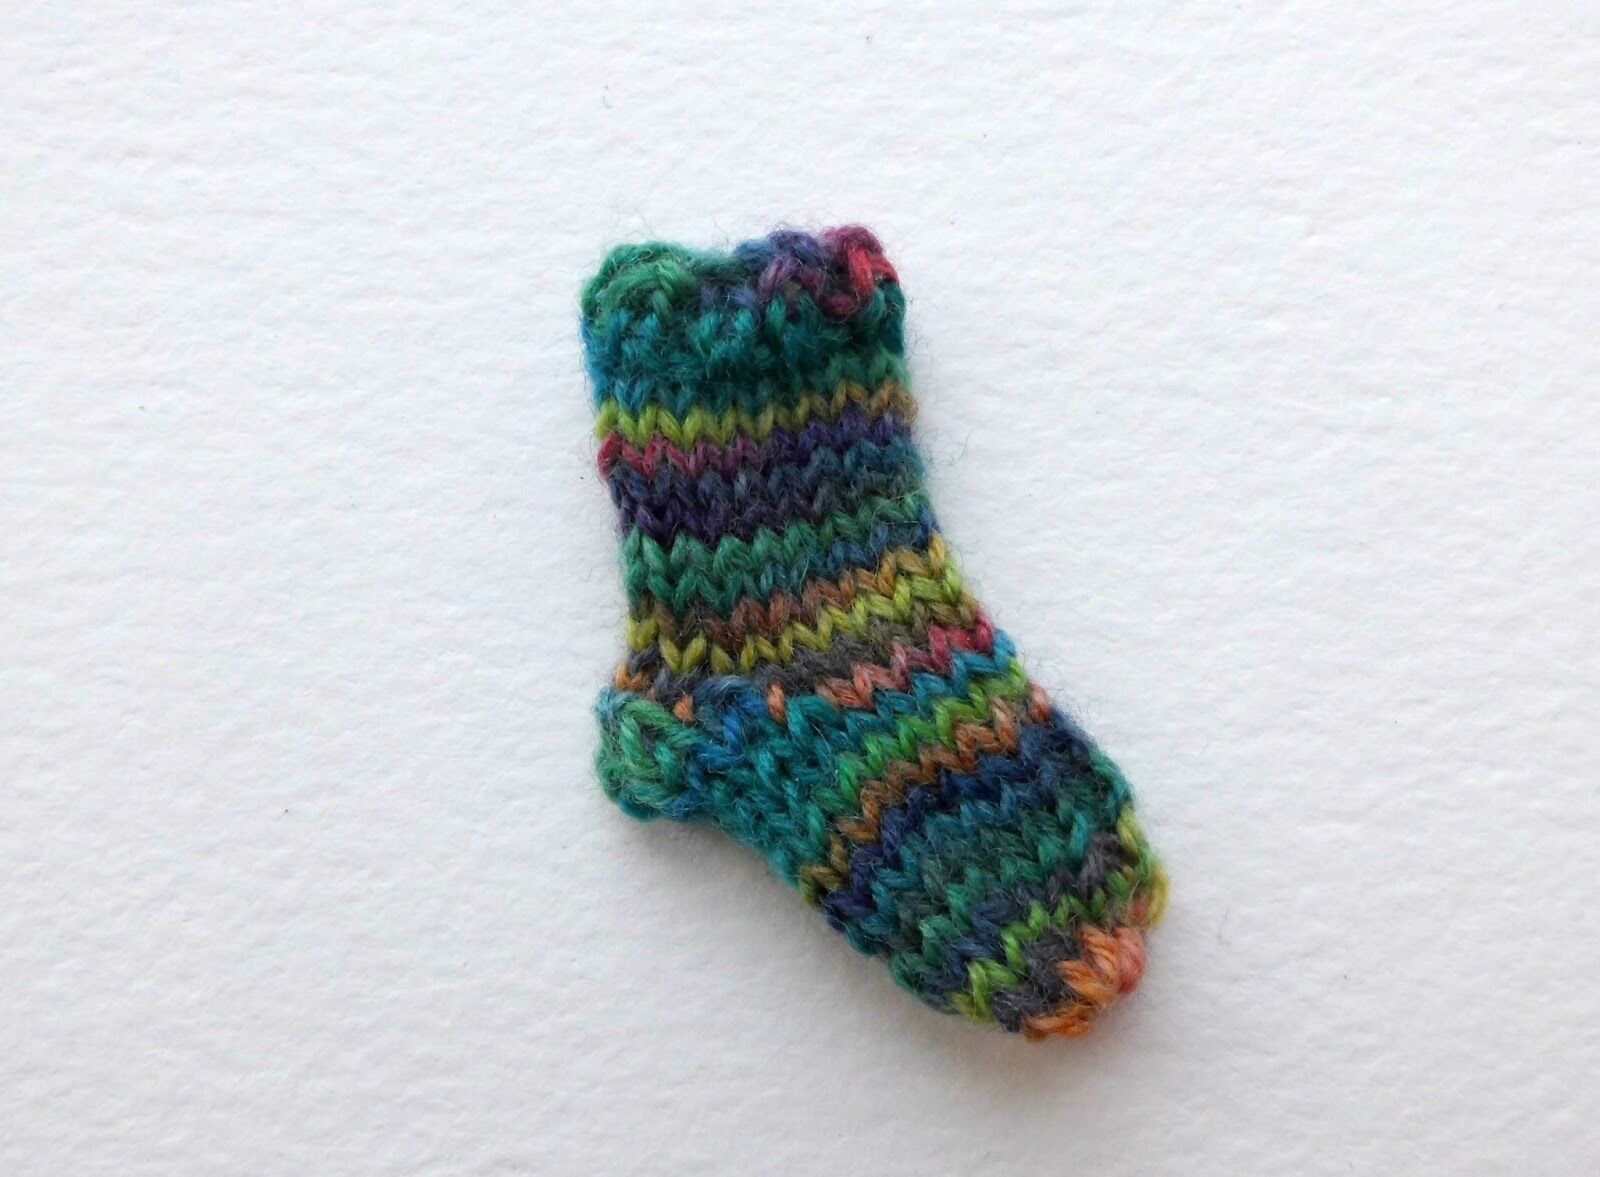
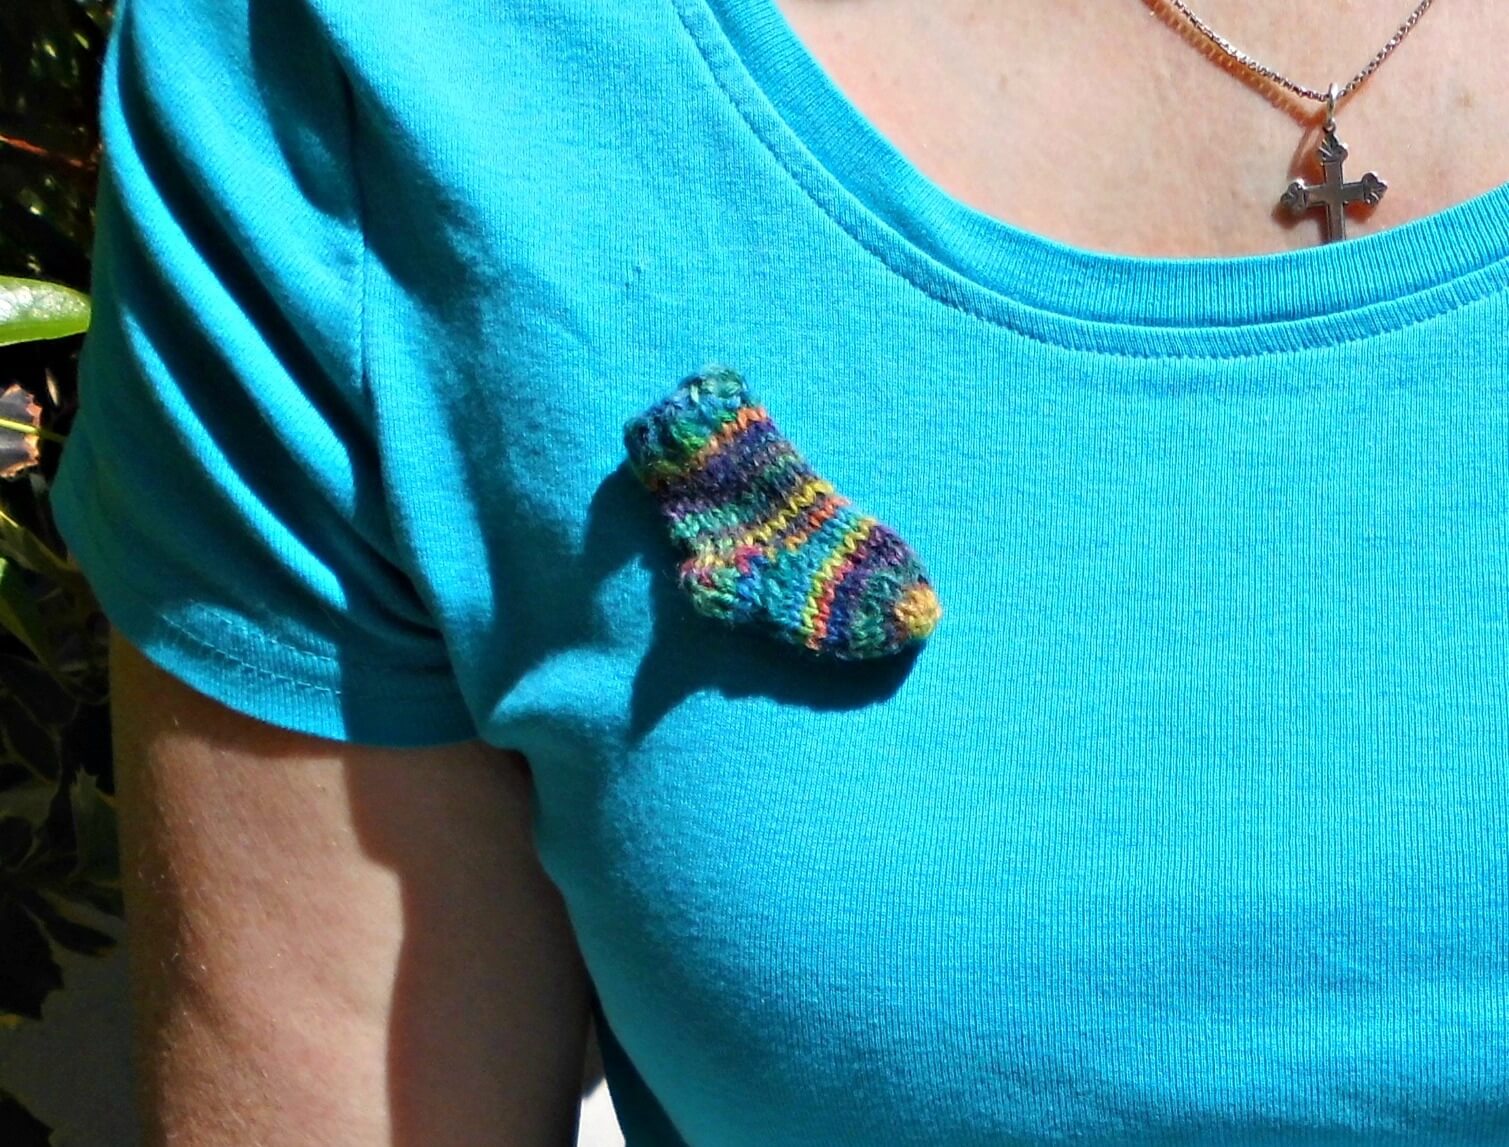
It really is rather teeny tiny, just 6.5 cm from cuff to toe …
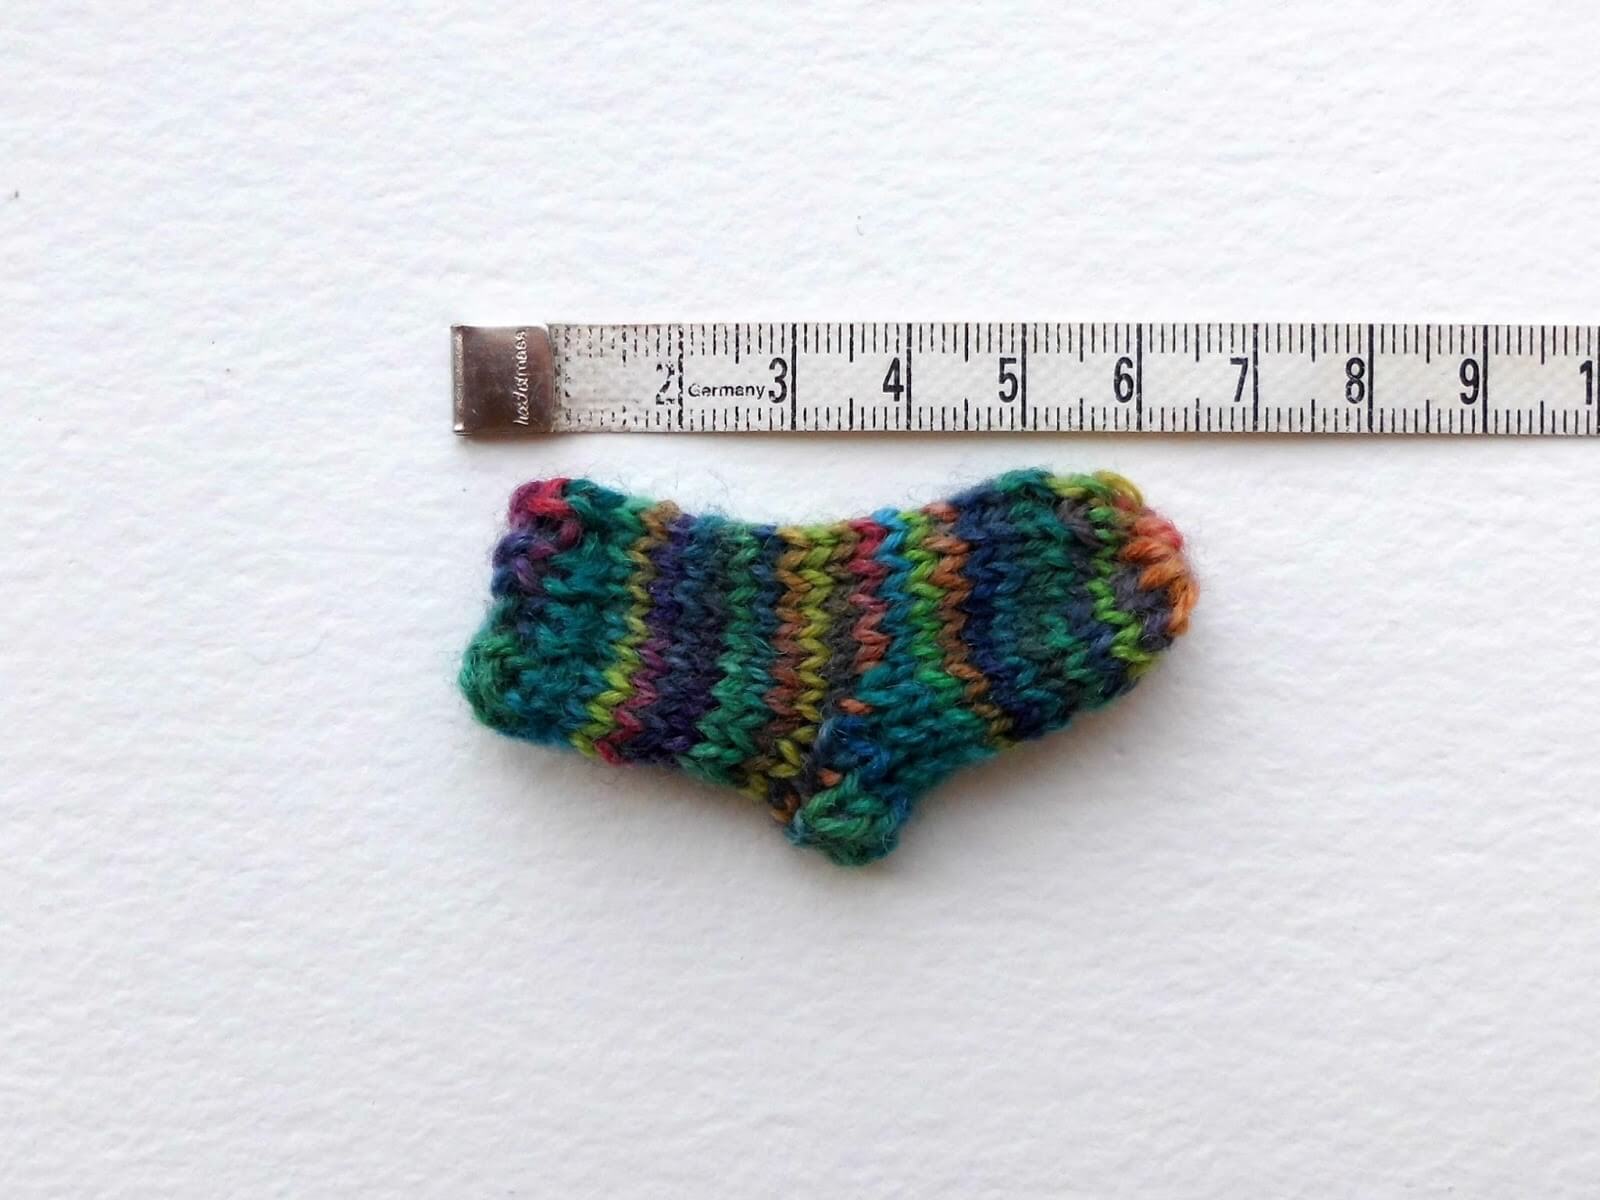
which makes it a great size to wear without looking like you’re … well … wearing a sock!
Oh, I do like this little sock! It’s a bit big for a Barbie and a bit small for the cat (who wouldn’t thank me for trying it on him anyway) but just right what I had in mind. It also wasn’t nearly as fiddly as I expected it be, which I’m sure you will be very relieved about!
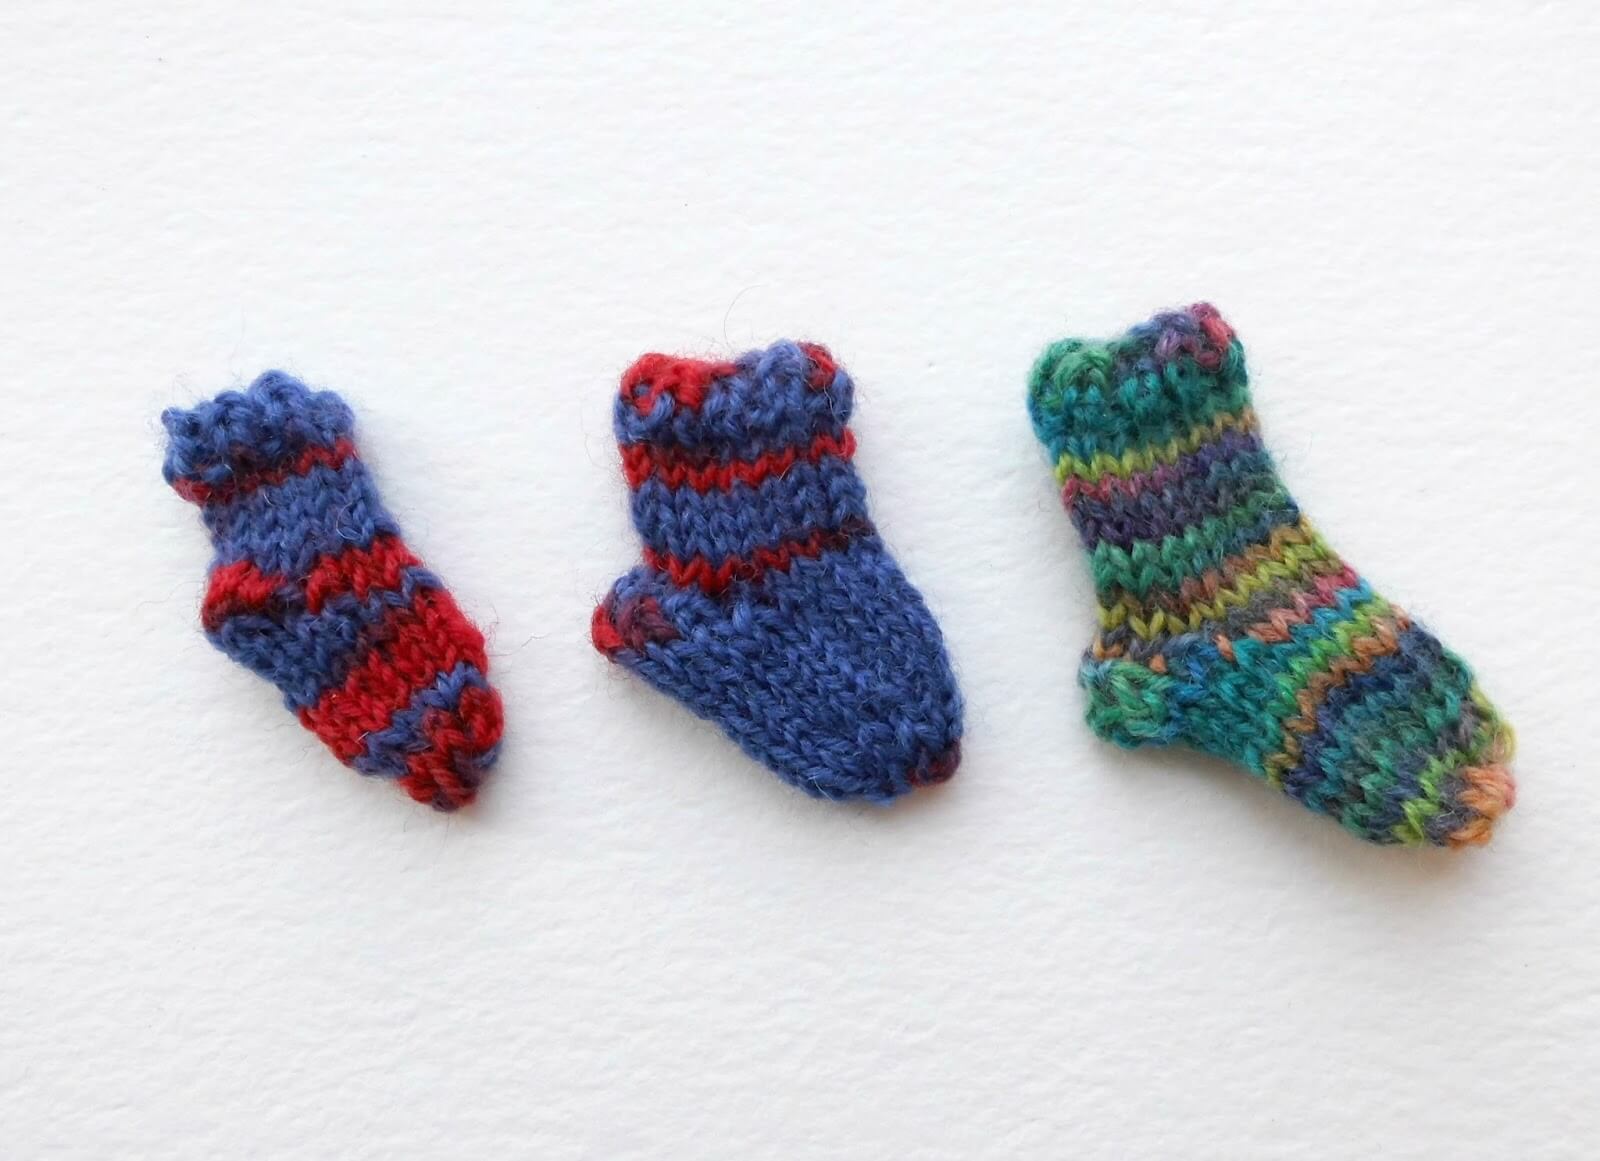
I’ve enjoyed watching how it’s evolved from really too tiny to nearly right to being just how I wanted it to be. It’s taken a few incarnations, as you can see, but I’m really very pleased with it!
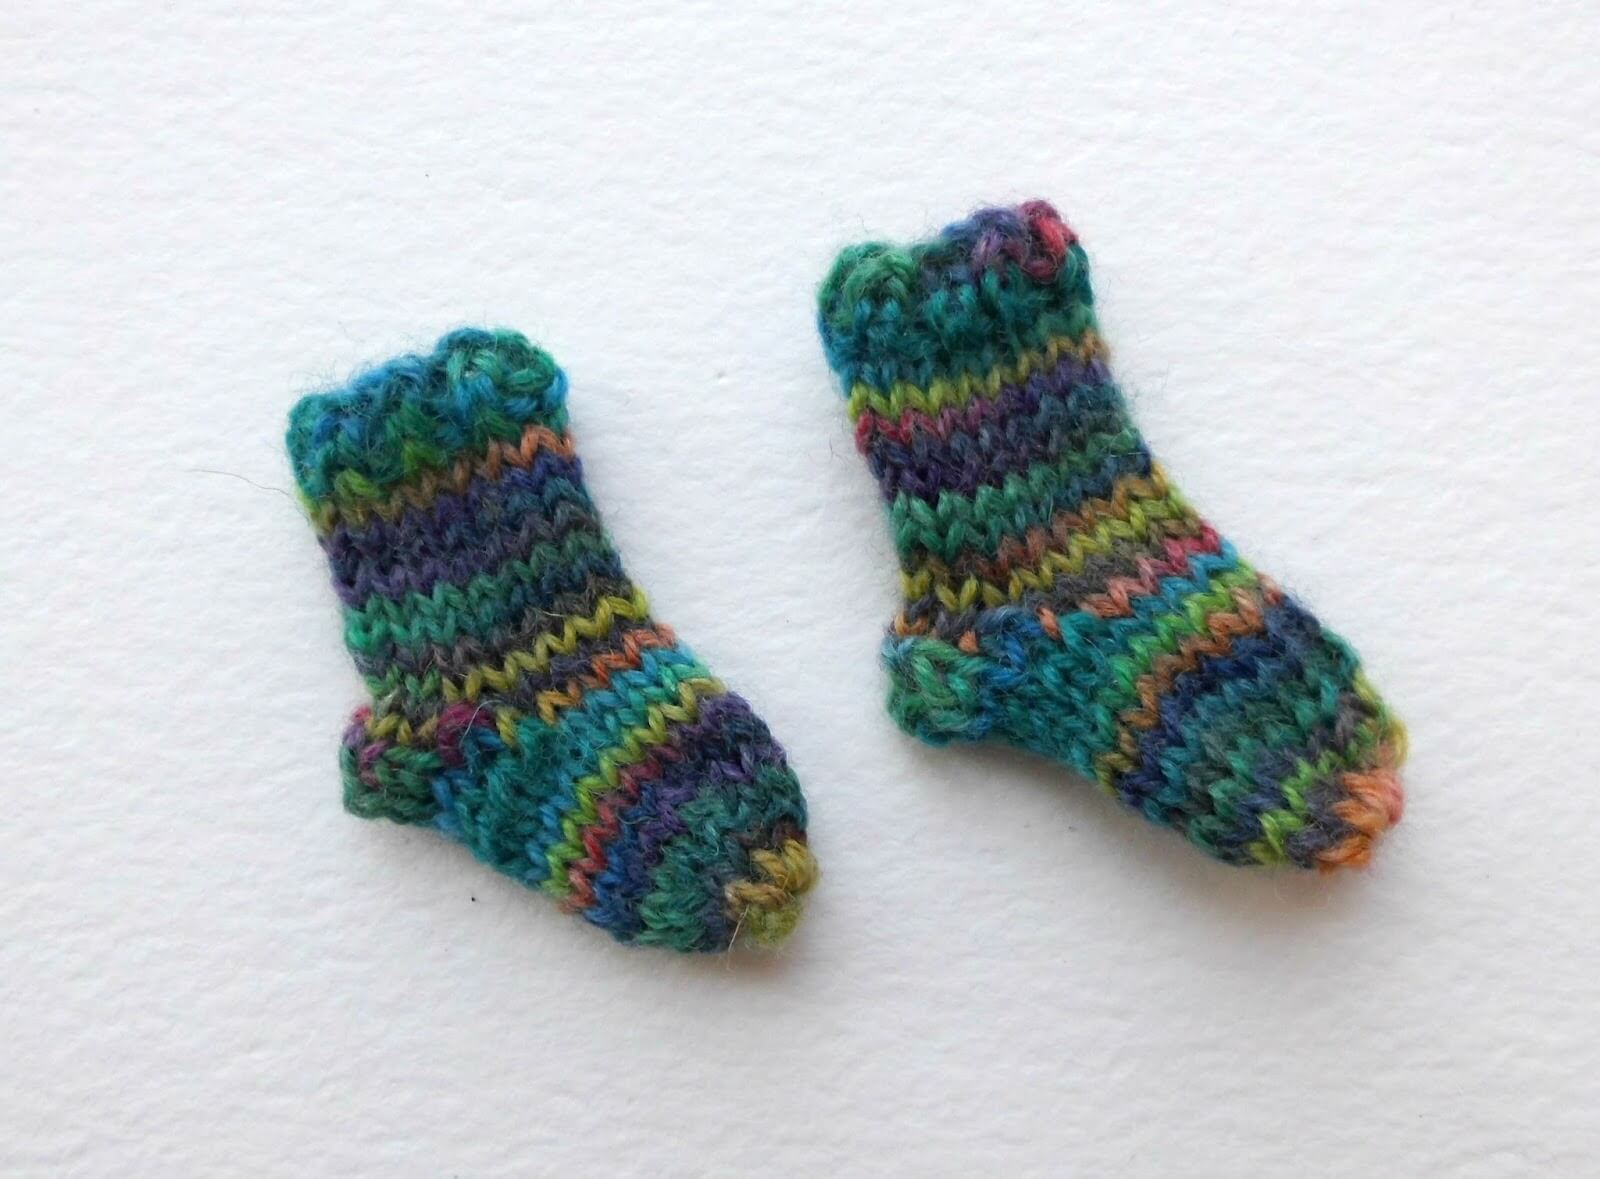
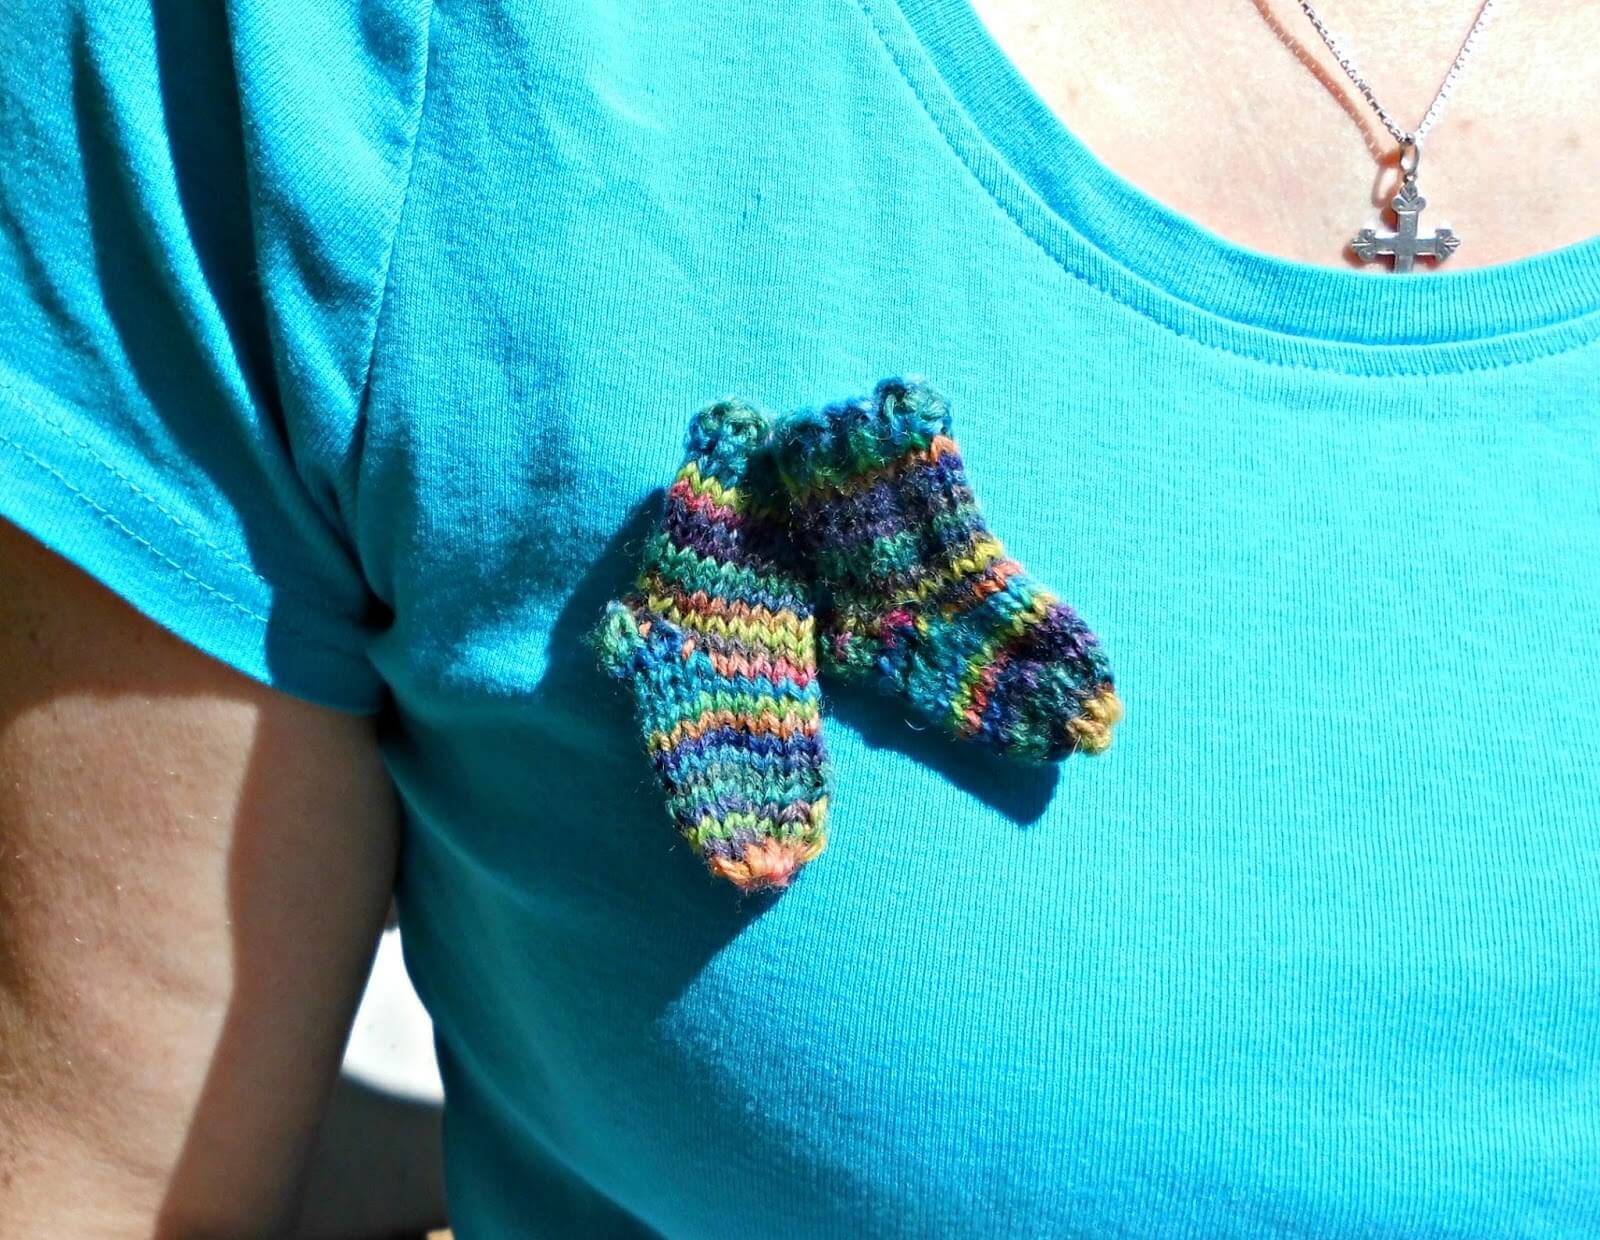
and as you know, socks always come in pairs! The one on the left was knitted with a long circular needle and the one on the right with DPNs; obviously I knit more tightly with a long circular as the pattern is exactly the same!
Now, I’m sure you can think of plenty of better ways to display your teeny tiny socks than hastily pinning them on whilst persuading your daughter to take photos, but just so that you can get an idea of the size of them, you can wear them as single socks …
or as a pair …
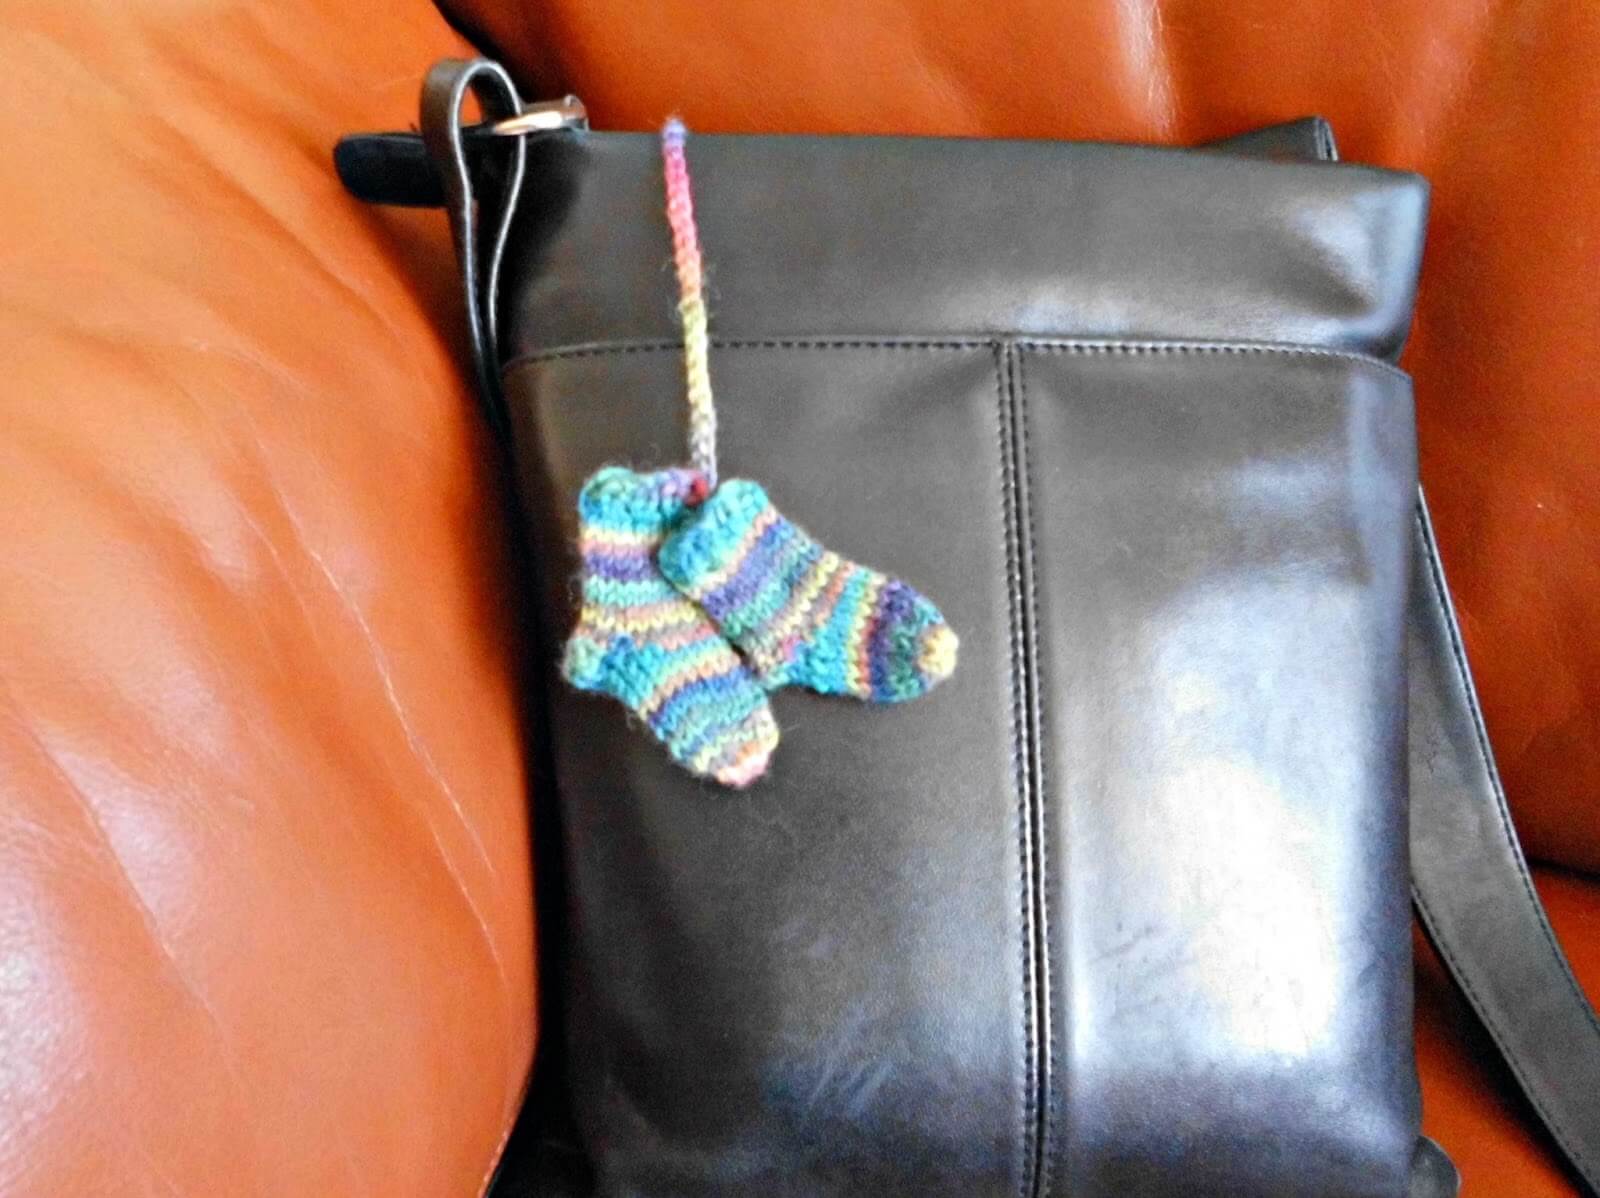
or attach one or more of them to your bag.
It certainly beats having to wave your feet in the air so that everyone can see your hand knits!
At this point, it’s important for me to say that whether you are meeting up with Sockalongers or not, it is in no way obligatory for you to have a teeny tiny sock to belong to the Sockalong, and neither it is obligatory for said sock, should you wish to make one, to be knitted. I have simply suggested that a teeny tiny sock would be a good symbol for Sockalongers to recognise each other, and if you wanted to crochet one, felt one, model one from clay or make one in another way – that’s absolutely fine by me, as is whether you want to wear one or not!
I created this sock as a top-down sock, just like the Sockalong sock, but instead of a heel flap I have used a short row heel so there’s no picking up of stitches or gussets to deal with. I decided that with a sock this small, it would be Beyond Fiddly and life’s just too short for that kind of thing. I used the no wrap, no gap method rather than attempting to wrap and turn – I’ve recently discovered this method of creating short row heels and like it very much. You can read more about it here. The other good thing, as you will have already realised, is that there is no need for a tension swatch and no worrying about whether it’s going to fit perfectly. It will be perfect just as you knit it!
So, would you like the pattern, then? OK, here goes! You can find a PDF of the pattern here.
Teeny Tiny Socks
You will need:
1 set of size 2.5mm DPNs or 1 circular needle (I used my 80cm one)
spare 4ply yarn
safety pin
wool needle
scissors
I made my first sock with DPNs so we’ll start with those first. You only need 4 DPNs to make this sock.
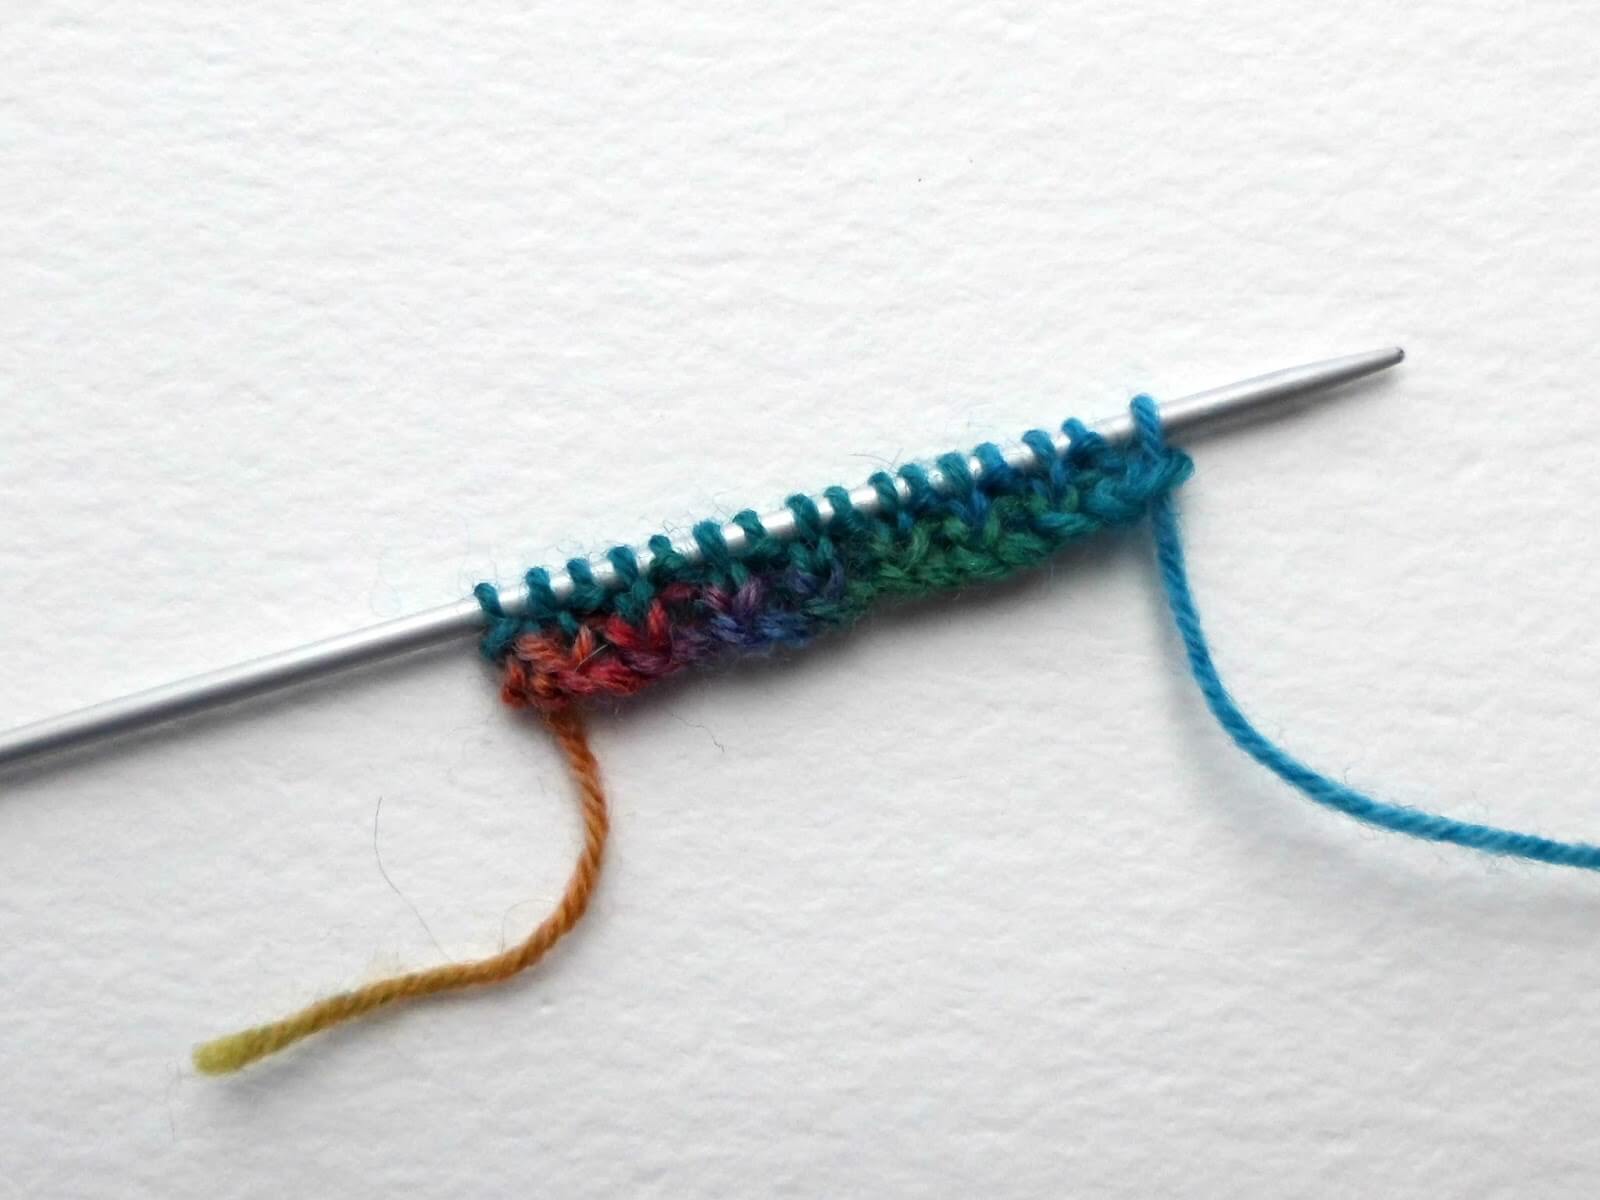
Cast on 16 stitches and knit in K1, P1 rib for two rows. I always cast on and knit my first two rows on straight needles before joining into the round because I think it’s much easier to do it that way. You can get a reminder of how to do this here.
Split your stitches across three of the needles – 5 on needle 1, 5 on needle 2 and 6 on needle 3.
Knit each round for the next 10 rounds, then you’re ready to start the heel. You’re going to work on the next 8 stitches, and you’ll find it’s easiest to slip the other 8 stitches onto a safety pin rather than try to keep the DPN in place.

Heel
Row 1: Sl1 purlwise, K6, leave 1 stitch on needle, turn.
Row 2: Sl1 purlwise, P5, leave 1 stitch on needle, turn.
Row 3: Sl1 purlwise, K4, leave 2 stitches on needle, turn.
Row 4: Sl1 purlwise, P3, leave 2 stitches on needle, turn.
Row 5: Sl1 purlwise, K2, leave 3 stitches on needle, turn.
Row 6: Sl1 purlwise, P1, leave 3 stitches on needle, turn.
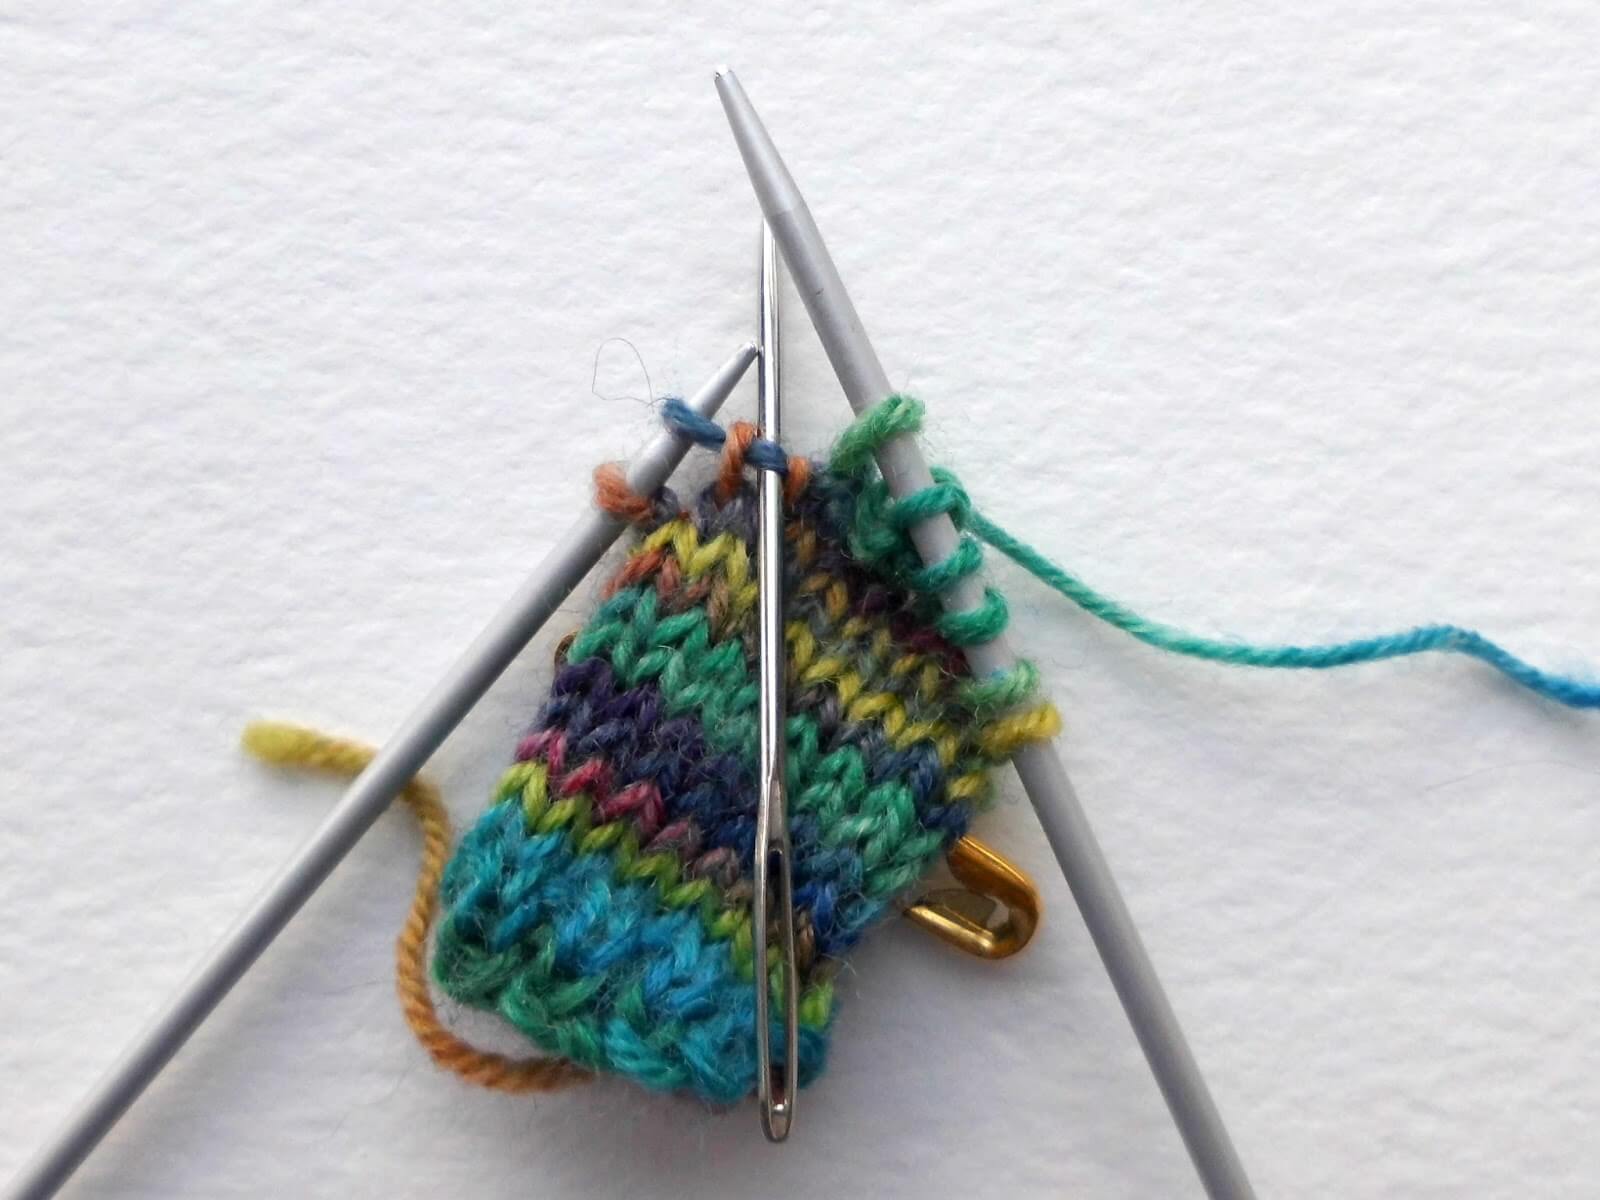
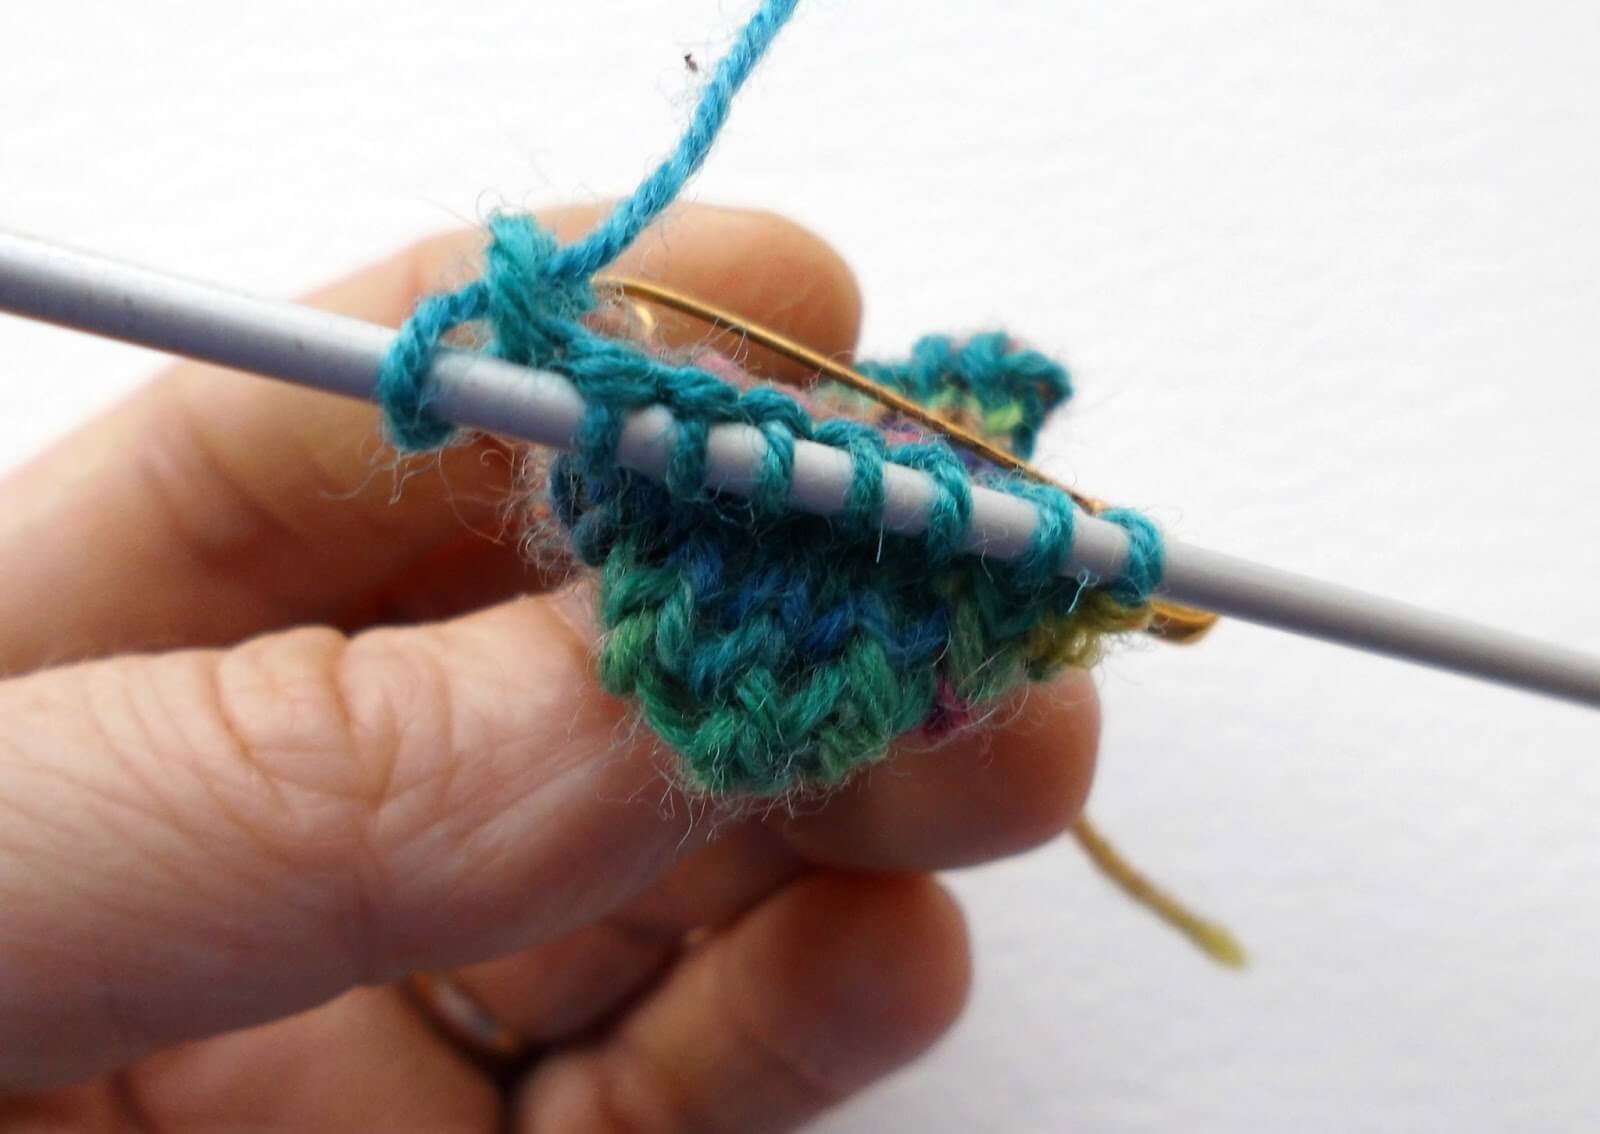
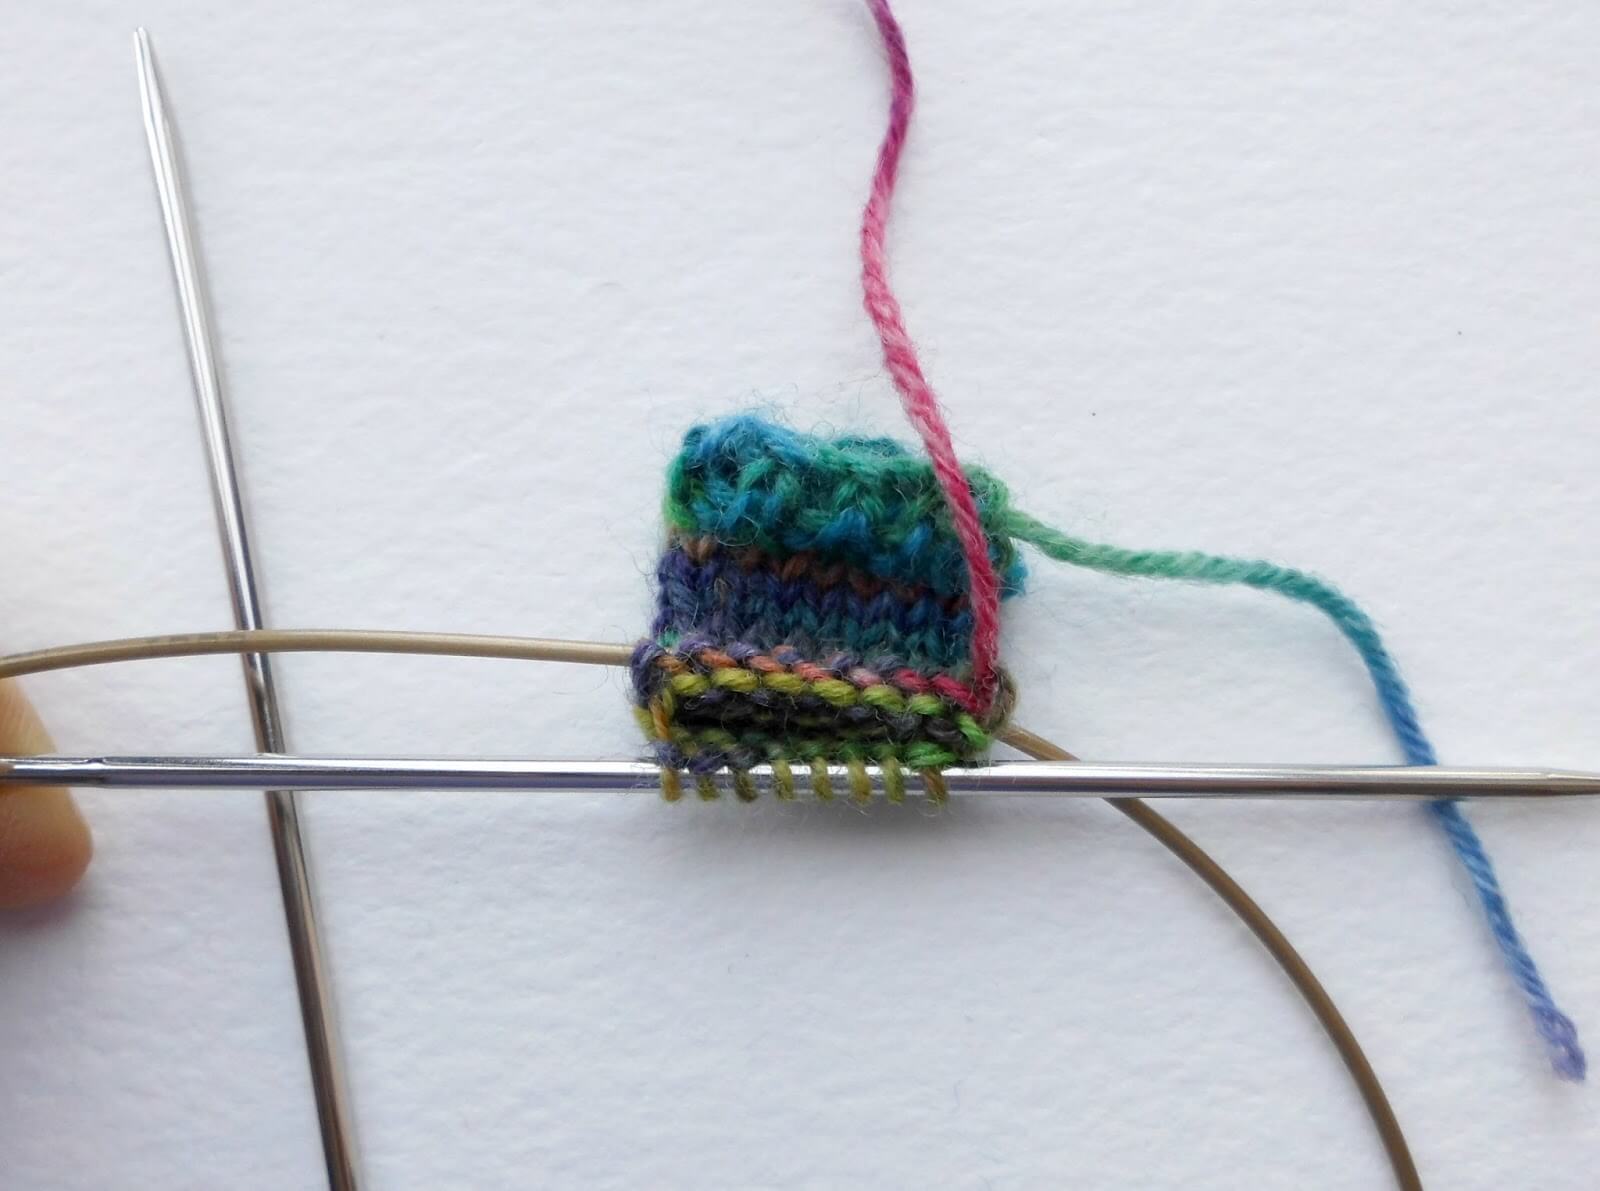
You should have 3 “side” stitches on each needle (circled in this picture) and 2 stitches at the “top” of the heel.

Now we are going to create the rest of the heel. This might look complicated but if you follow the instructions you’ll find that it all works!
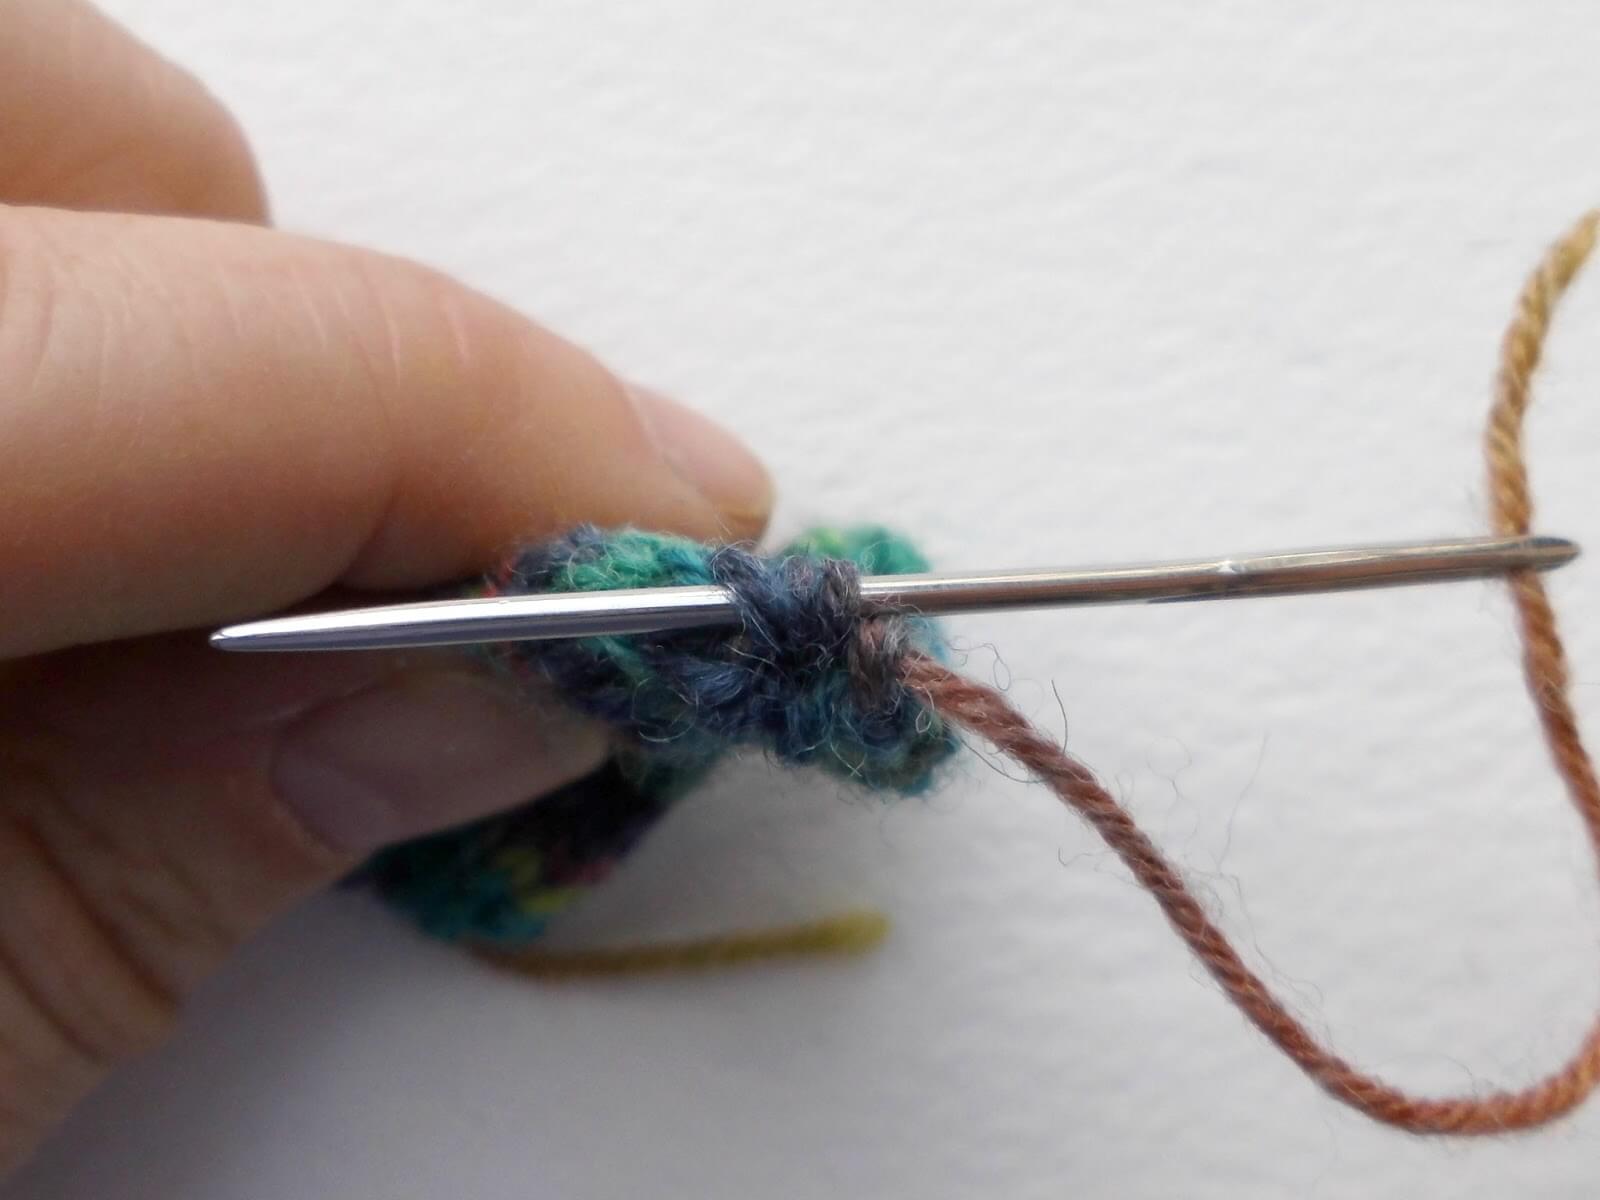
Row 7: Sl1 purlwise, K1, sl1 purlwise, pick up bar between slipped stitch and next stitch on left hand needle (shown by the wool needle) …
place on right hand needle and k2tog through back of stitches, turn.
Row 8: Sl 1 purlwise, P2, sl1 purlwise, pick up bar between slipped stitch and next stitch on left hand needle (shown by the wool needle) …
place on right hand needle and p2tog, turn.

Row 9: Sl 1 purlwise, K3, sl1 purlwise, pick up bar between slipped stitch and next stitch on left hand needle, place on right hand needle and k2tog through back of stitches, turn.
Row 10: Sl 1 purlwise, P4, sl1 purlwise, pick up bar between slipped stitch and next stitch on left hand needle, place on right hand needle and p2tog, turn.
Row 11: Sl1 purlwise, K6, turn. ** this is deliberate, I haven’t missed anything out! **
Row 12: Sl1 purlwise, P7, turn.
Row 13: K8.
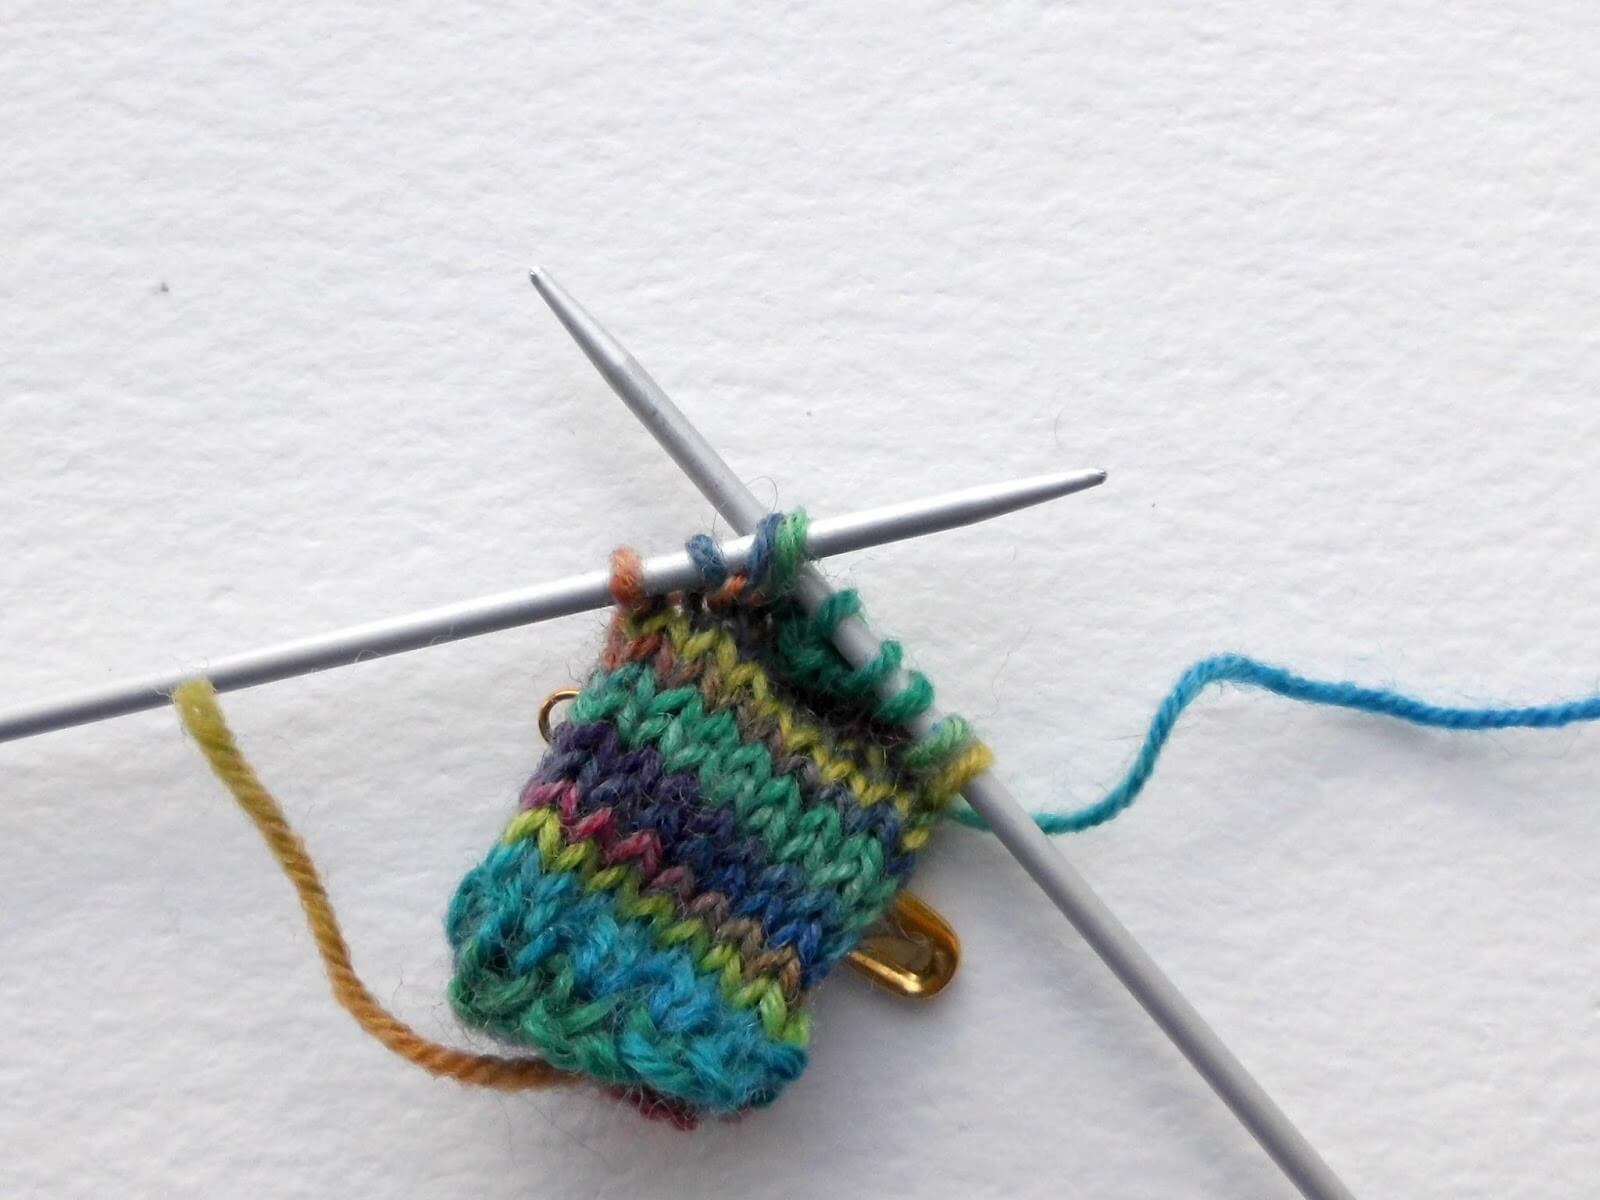
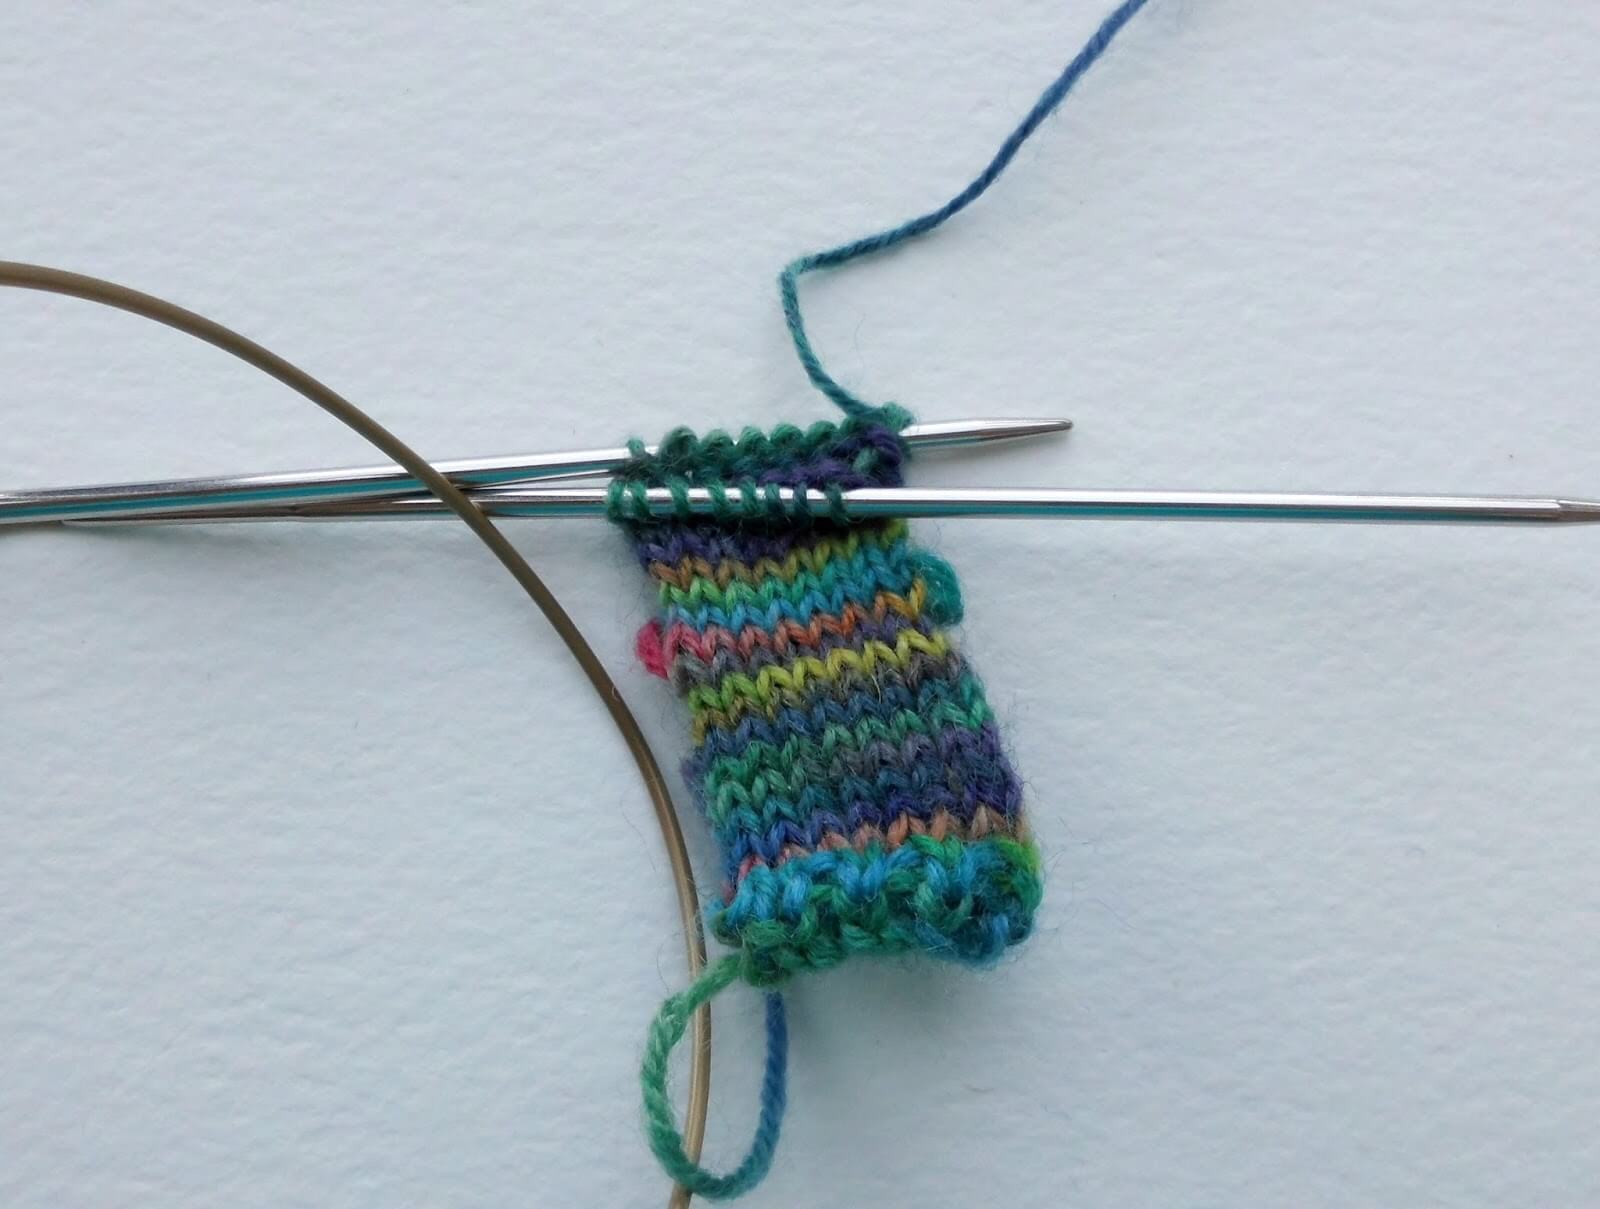
This is what your heel will look like.
Now we’re going to join the rest of the stitches back in to complete the foot.
You have 8 stitches on your needle. Counting from the right, you want to leave 5 of those stitches on that needle, slip the next three off onto a new needle and then add another two from the safety pin and finally slip the rest of the stitches
on the safety pin back onto another DPN. This will give you 5, 5 and 6 stitches split across your needle again. The start of the round will be at the end of the 5 heel stitches.
Knit 8 rounds.
Toes
Your sock will now look like this:
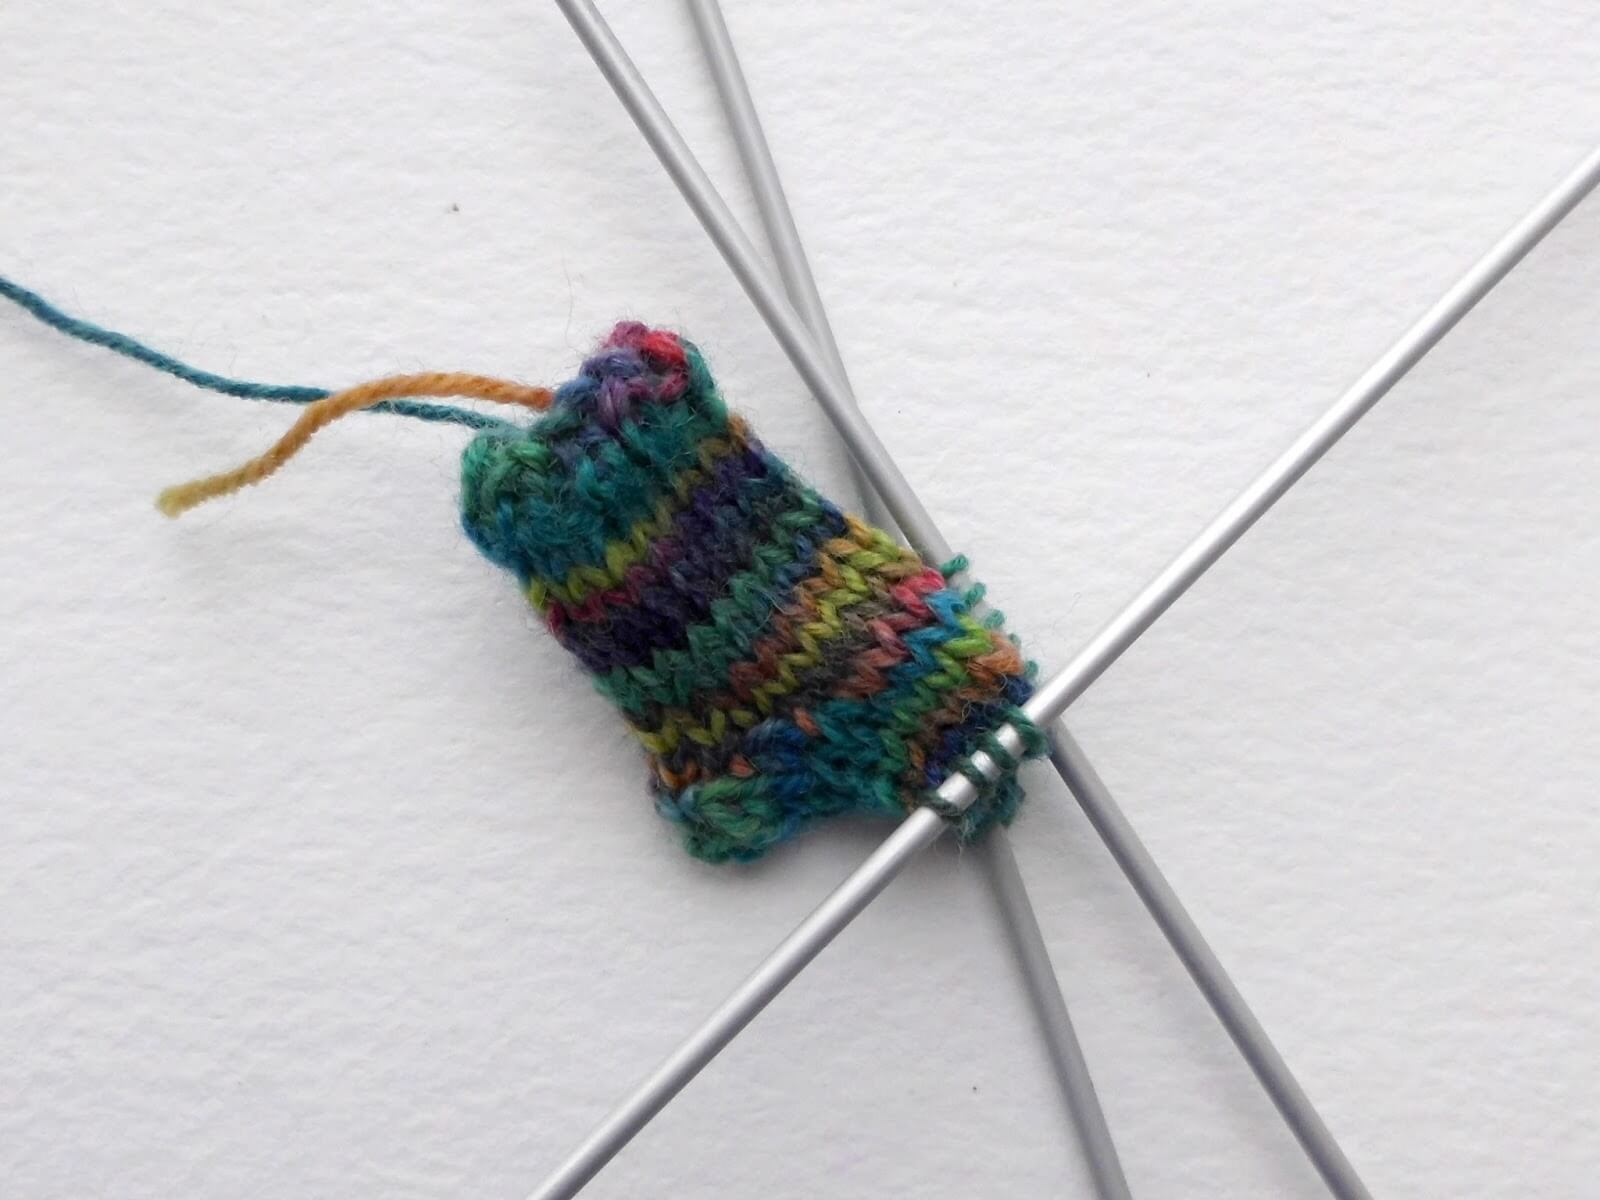
You’re going to start the toe decreases from the next stitch as follows:
Round 1: SSK, K4, K2tog, SSK, K4, K2tog.
Round 2: Knit.
Round 3: SSK, K2, K2tog, SSK, K2, K2tog.
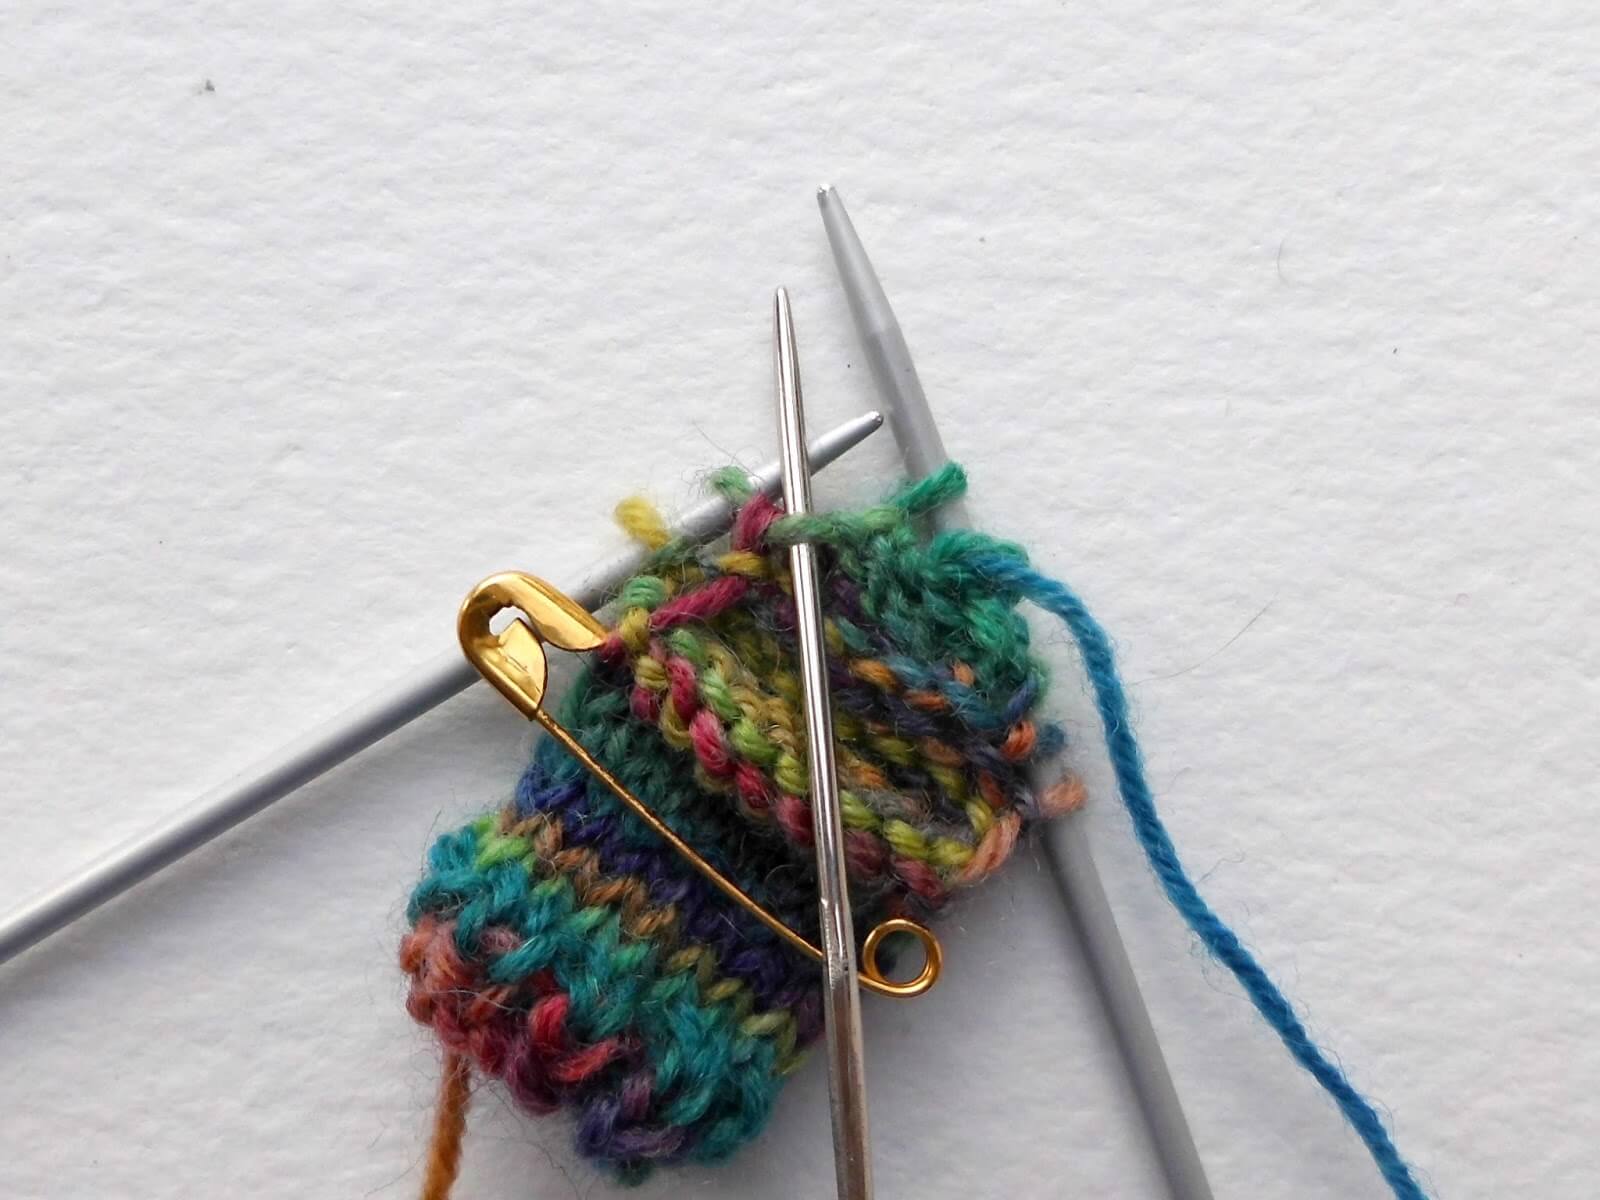
Leave a tail of about 5-10 cm to finish off your toes. Thread the yarn onto the wool needle, then slip the stitches off the needles onto the wool needle …
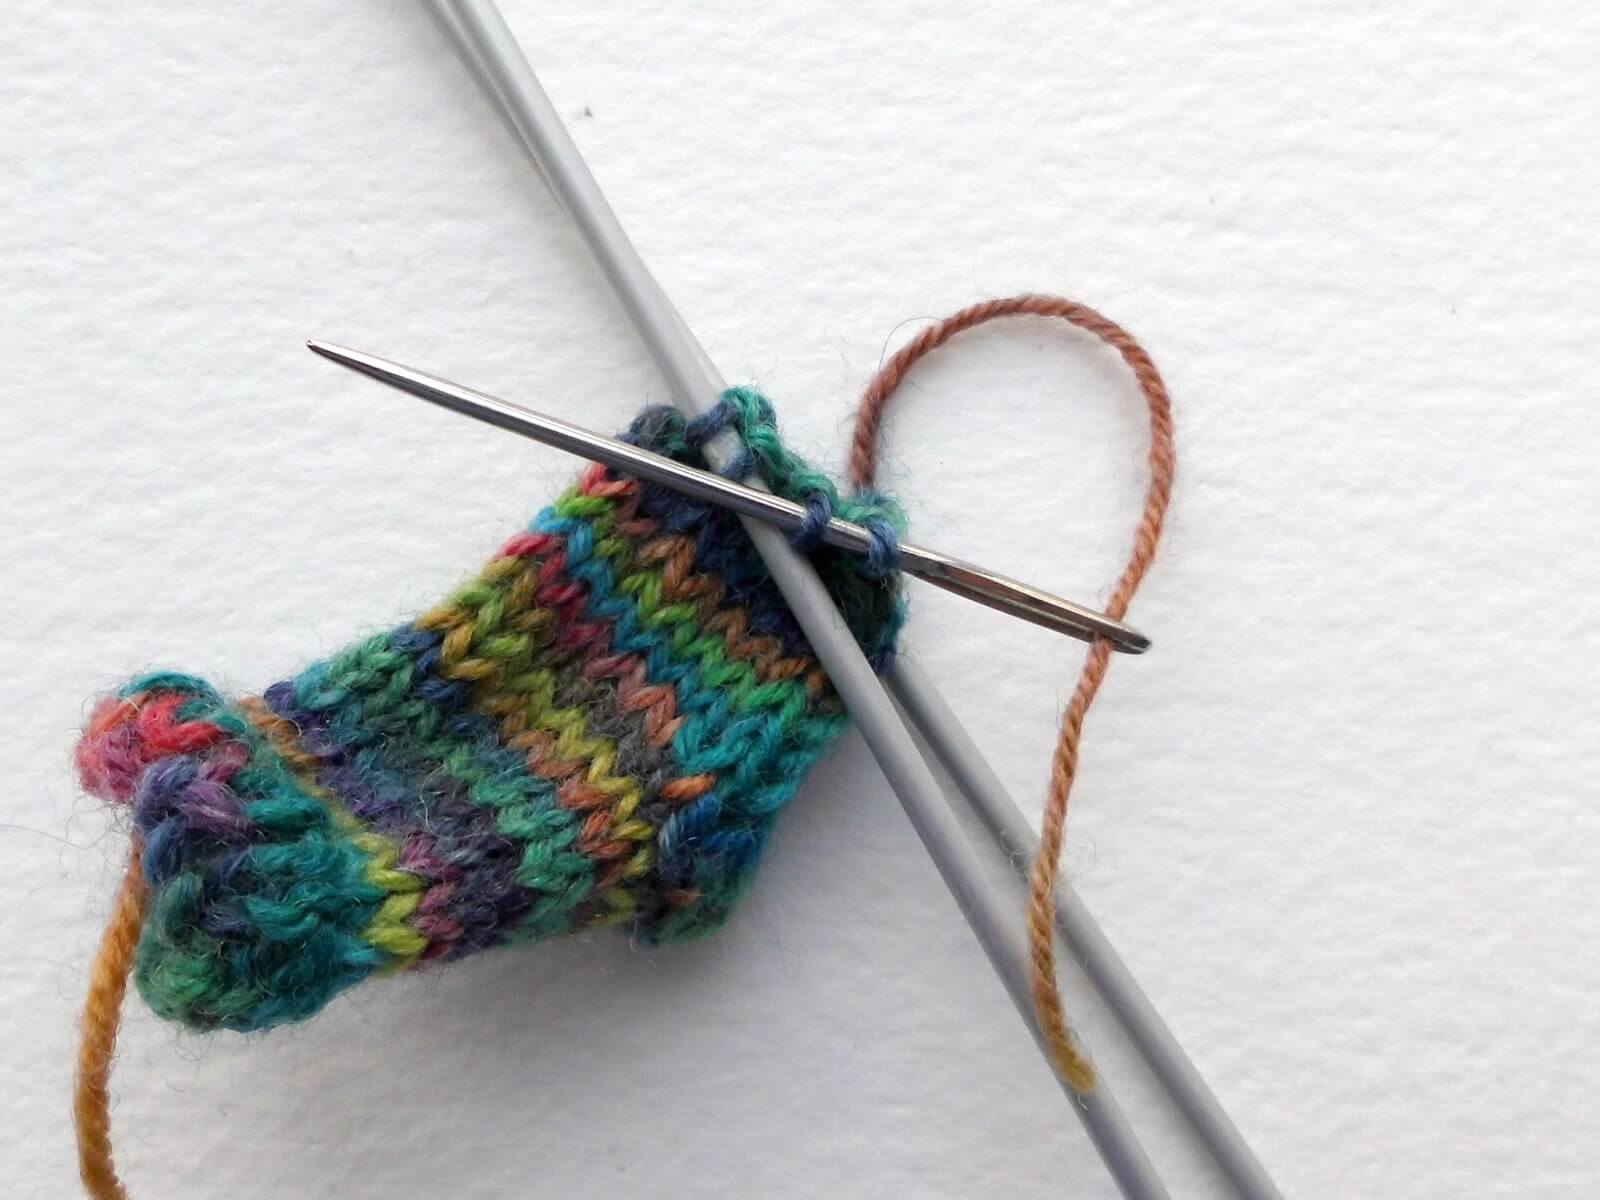
and draw the yarn through stitches, pulling them tight.
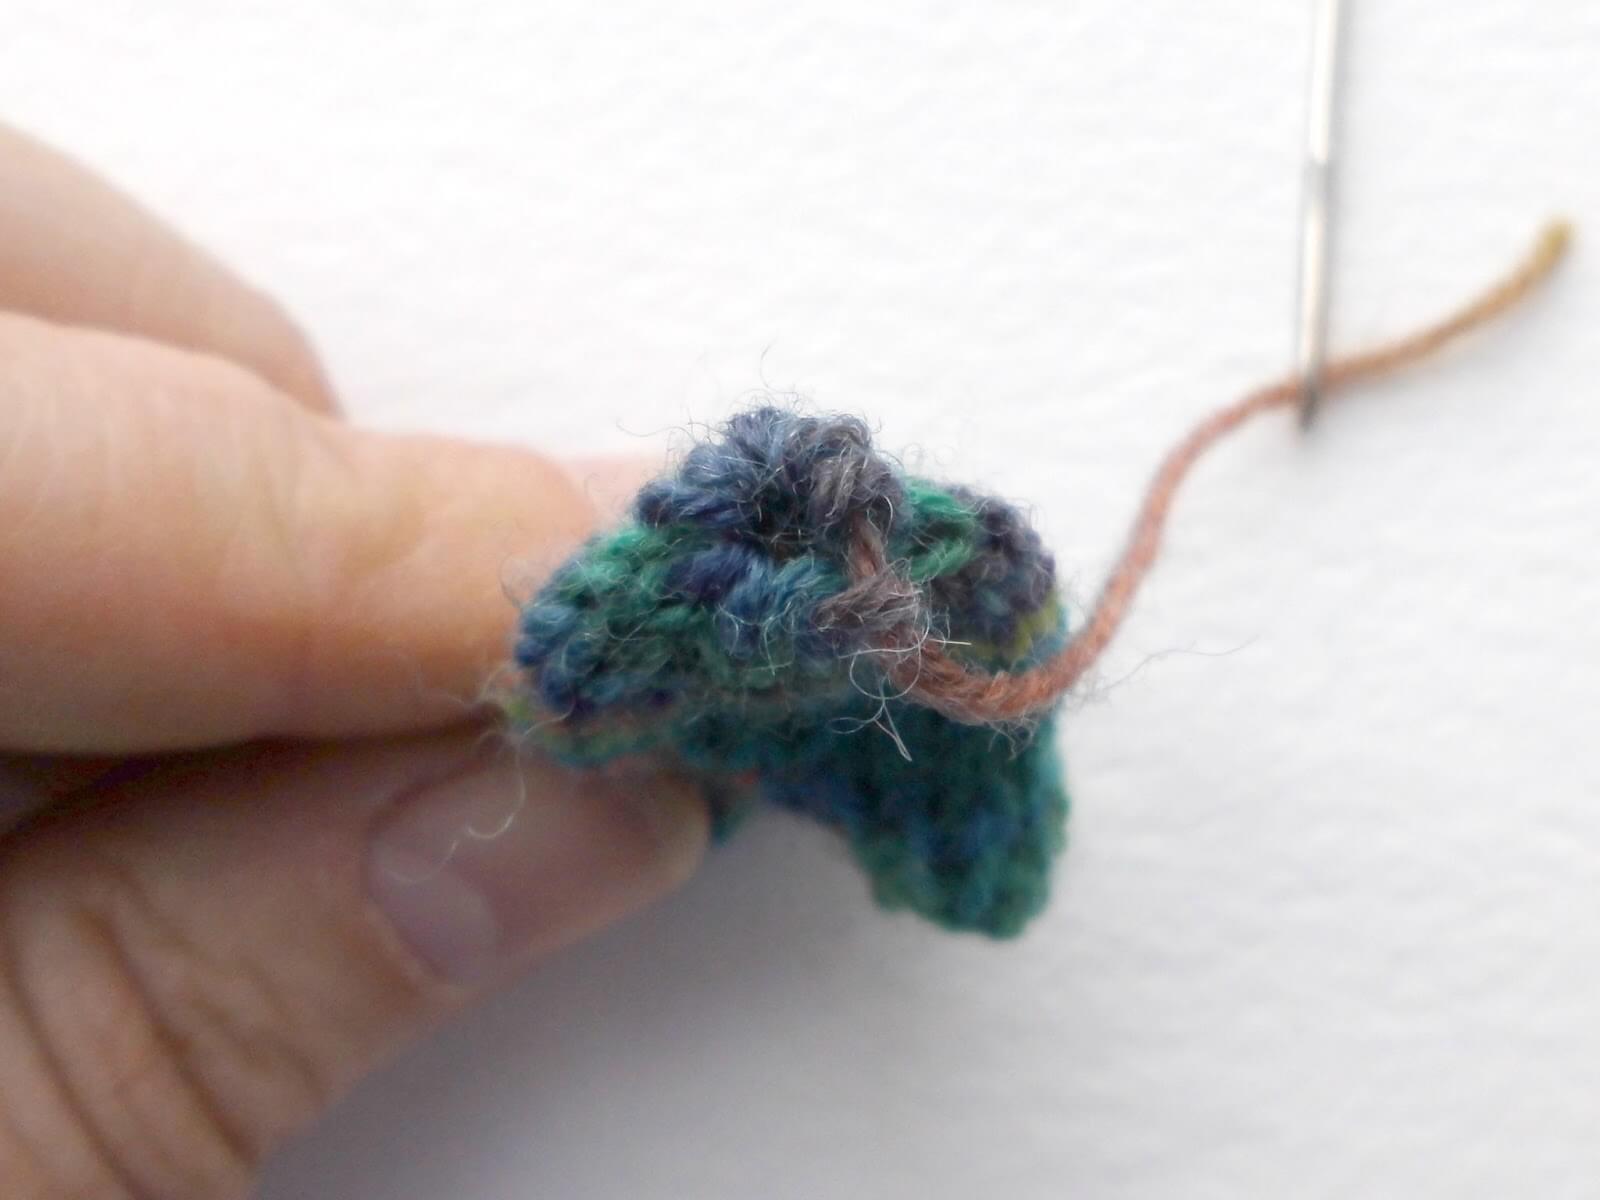
Fasten off your yarn by putting the needle back into one or two stitches first to hold it secure, then weave the end into your sock.
And that’s all there is to it! Easy, eh?
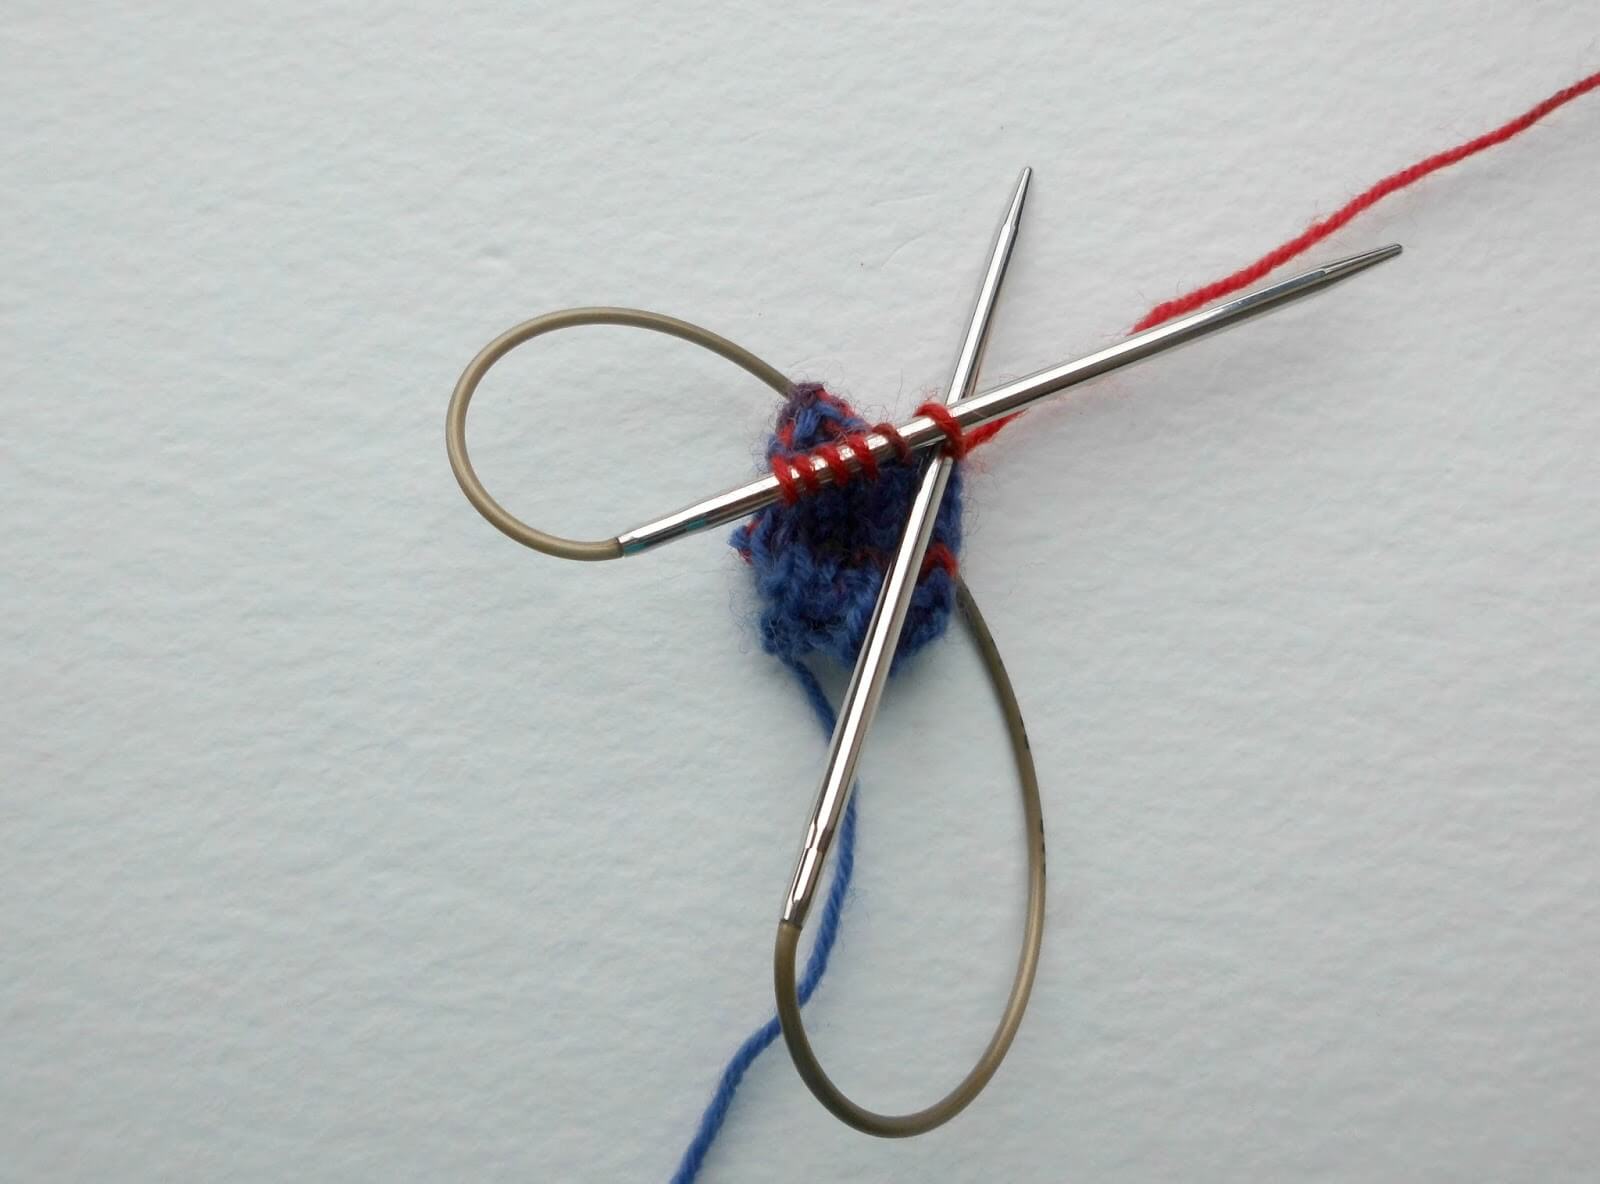
Want to knit with a long circular? No problem!
The loop will be very big but it’s not unmanageable. You can cast on and join into the round as you would do with a normal-sized sock – if you need a reminder you can get one here.
When it comes to the heel, you can just leave your spare stitches safely on the cable.
And when you need to create your toes then your needles are already in the right position.
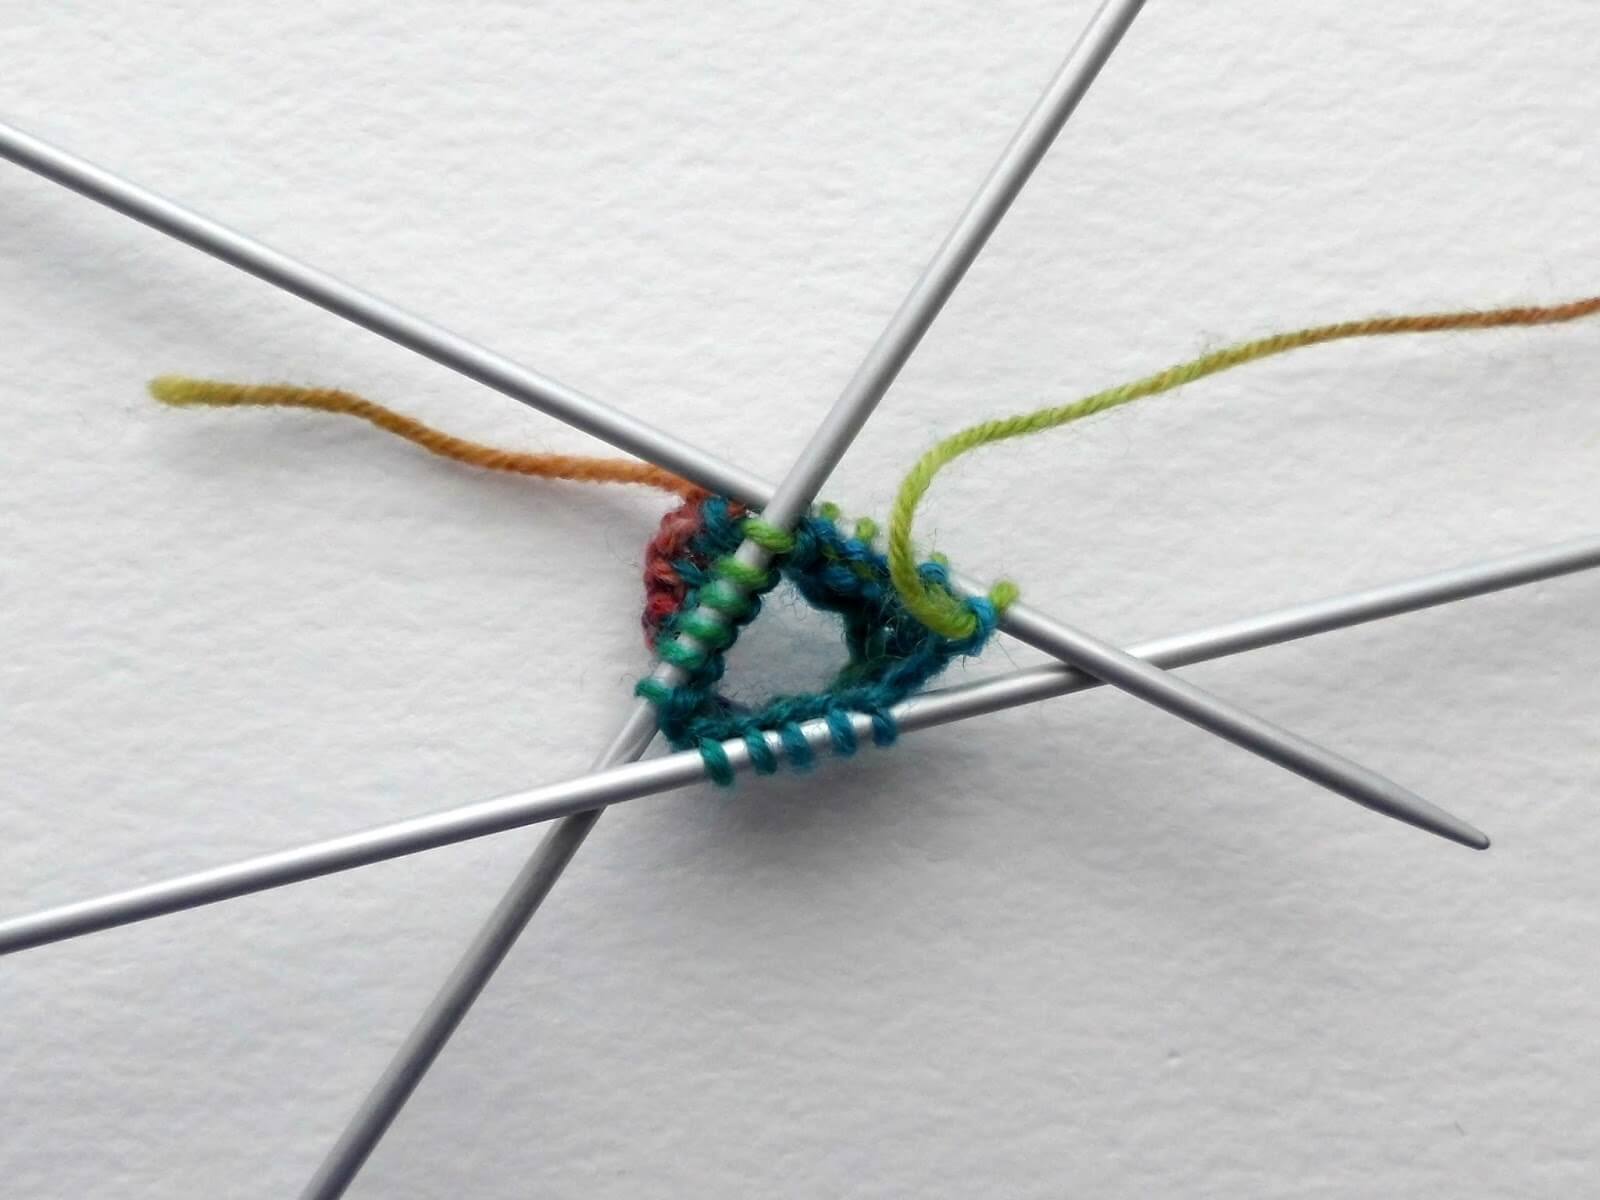
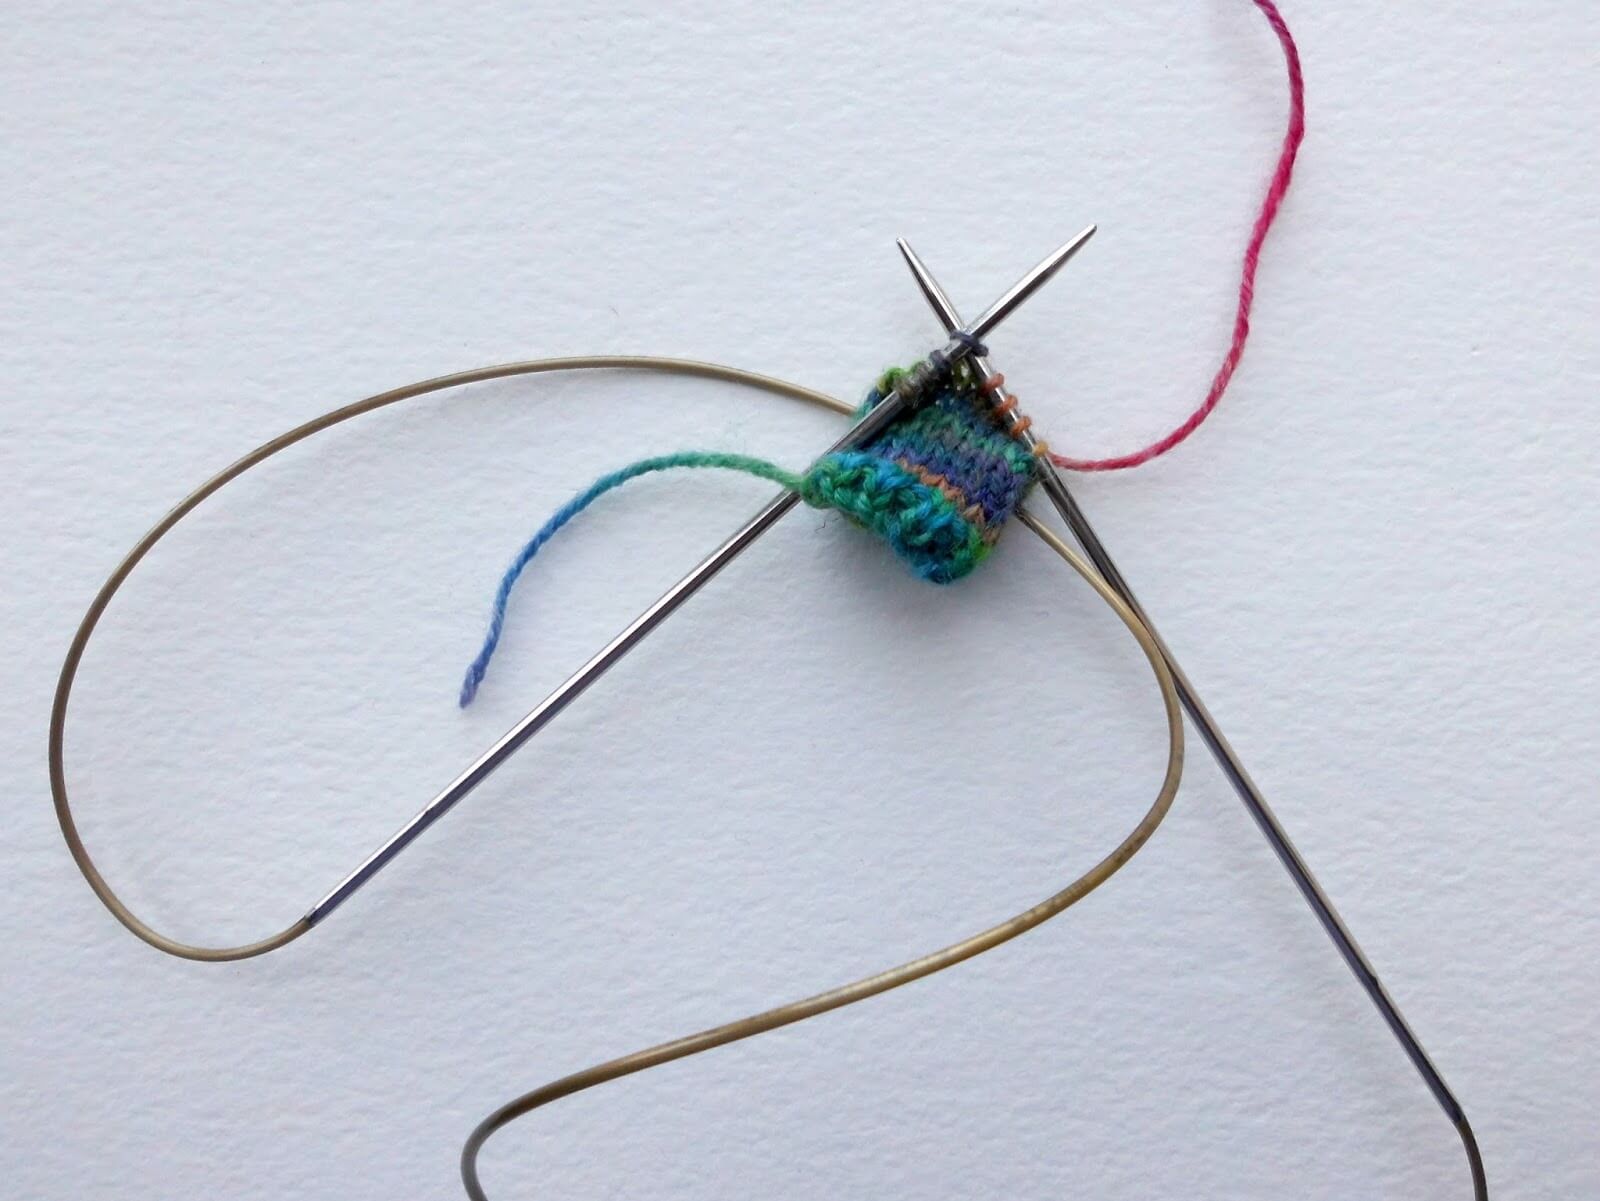
Want to knit with a short circular? Now, that’s not so easy. I did try just so that I could say that I’d done it, and it is possible – just about – but not with anything shorter than a 30cm needle. I didn’t find it very comfortable, I have to say, and soon swapped back to DPNs. You can see here just how small the loops are.
So there you have it – one teeny tiny sock for the wearing of! If you want to add your sock to the Ravelry gallery, the link is here. I love it that people are meeting up and hope to meet some of you up at Yarndale in September. You should recognise me – I’ll be wearing my teeny tiny socks, although not on my feet!
This pattern copyright © 2025 Winwick Mum All rights reserved.
Not to be included in any collection or used for profit without written consent of Winwick Mum.
This sock pattern and tutorial is free and will always remain so, but if you have enjoyed using it and would like to buy me a brew, it will be much appreciated! You can find the donation button on the sidebar on the left hand side. Thank you! xx


Oh that's brilliant. Thank you for taking the time. Will have to make some of these x
You're very welcome, Ann – I've had a lovely time doing this! 🙂 xx
Thanks Christine, I love it, I'll just have to make it and use it as regular brooch. xo
Glad you like it, Liz, thanks! xx
Aww.. they are so cute ! Thank you so much for sharing.
You're welcome, Pragti! xx
They're so cute! I'll have to make a pair of those soon! I have a few WIP's to finish first! 😀 Thanks Christine! 😀
They're so quick to make they'll fit in very nicely around your WIPs, Joan! 😉 xx
They're so cute and dinky. I think they'd look great knit in red and white and dangling from the Christmas tree.
Ooh yes, they would, Jo! Great idea! 🙂 xx
Heehee! I love this! Well done Christine! I think I'll attach mine to my bag 🙂 x
Oh good – I'm hoping to see lots of these little socks around! Won't it be fun spotting them?! xx
I absolutely love this pattern and you are an absolute genius to have worked it out. I have just finished mini sock number one and will be posting a photo on facebook shortly. Thank you so much for sharing this with us and I love, love, love it xx
Ooh, looking forward to seeing the pictures! It's really just a very small version of the sock from the Sockalong (with a changed heel to make it easier) so if you can knit a big sock, you can knit this one – and vice versa! 🙂 xx
adorable, thanks for sharing.
Thanks for visiting, Martine, glad you like it! xx
This is so cute Christine. I've made my 'big' sock with a circular needle but I'm determined to give this one a go with the dpns. Something for this afternoon I think and if successful, I'll wear it with pride at Yarndale xx
If you've knitted a big sock you should manage this one no problem, Sarah, even on DPNs. I'll look forward to seeing it at Yarndale! xx
These little, tiny socks are adorable! What a great idea. I'm going to get out my needles and thread and start knitting. I hope you are having a lovely weekend in your beautiful garden. My best to you, Pat xx
I've been cutting the hedges today, Pat, not as much fun as I'd like it to be – I'd much rather be knitting socks! 🙂 xx
These are really sweet – what a good idea! As you suggest, they'd look great on a Christmas tree (can't believe I'm thinking about Christmas in July!) 🙂
Cathy x
I know that feeling, Cathy, but then all of sudden it really is Christmas and I'm never ready! 🙂 xx
Such a cute little sock I will make a pair for sure, I love the handbag charm idea I will be flashing them with pride for Yarndale. 🙂 x
Ooh, fab – I'm looking forward to meeting lots of people at Yarndale! xx
Oh they look great, Christine, don't they look cute? I'm in agreement with Jo and Cathy, they would make a fab Christmas decoration, wouldn't they, Christmas stocking bunting in red and white! xx
Thanks, Alison! There's a Christmas version on the Ravelry pattern page ( ravelry.com/patterns/library/teeny-tiny-sock) which a member of the Facebook Sockalong group has made – it looks really sweet! I think I might have to make a few of them myself! xx
Thank you! 🙂
Thank you for visiting! xx
Very cute and clever idea! X
Glad you like them – they're a bit of fun! 🙂 xx
These are so cute!
They are very sweet, aren't they – even if I do say so myself! 🙂 xx
Just came across this and wonder if I could utilise it for a tree Xmas stocking???? Our village are all making a decoration for the village Christmas tree and I've been search for a variety of things they can knut, crochet, sew or do with wood. I may give it a whirl and use double knit to get a bigger size.😁
You could certainly give it a go, Sue – do let me know how you get on! xx
These are adorable – and your website is wonderful! I want to knit them while I'm on holiday, though – could you put a pdf up, please? I've tried to copy the pattern into a word document but it won't let me! Thanks 🙂
Hi Emma, I'll add it to my list of things to do, though can't promise it will be done before you go away. Have a great holiday! xx
I am so sorry for the delay in getting back to you – you put us all to shame! My lovely husband managed to cut and paste the pattern into a Word document and I spent some happy hours knitting these dinky socks when we were away. I have now made some red ones for Christmas which will decorate boxes of homemade cookies, and then (hopefully!) go on to be tree decorations using the loops I've added. Thank you again for a fabulous little pattern – they are adorable! xx
Hi Emma, I'm so glad you managed to get yourself a copy of the pattern to use. As you'll have spotted, I still haven't created the PDF but it's definitely on my list! I think your cookies will look fabulous with tiny socks attached and to be able to keep them as tree decorations later is a lovely idea xx
Hi Winwick Mum! I just finished my first Teeny Tiny sock and love it! Thank you so much for sharing this with us. Deborah in Georgia USA
Hi! I'm so glad you found the pattern useful! xx
Hi Winwik Mum,
First, I just want to say thank you for the pattern, I love it! I've just finished my first teeny sock and am in the process of making my second one. I'm going to link the two together and use as my keychain.
Second, unless I'm looking at the pattern incorrectly, I believe there's two typos on the PDF version. The first one is on the heel decrease for rounds 5 and 6. You have to P2 and then P1 respectively when really it should be K2 for round 5 and P1 for round 06. The second one is on the toe decrease. You have SSK, K4, K2tog then K around then the same SSK, K4, K2tog for the last round when it really should be K2. Ok, just wanted to let you know that. 🙄
Once I finish my second sock I will post pics on your FB page.👣
Hi! You're quite right and thanks so much for spotting the typos – that will teach me to create a PDF in a hurry! I've updated it now so it'll be right for anyone in the future 🙂 xx
These are too cute!
Thank you! xx
Hi am enjoying making this sock but am a bit confused how to join the rest of the stitches in once you have completed the heel.When you count the 5 stitches from the right do you have the right or wrong side facing? Heidi
thank you for any help you can give.
Hi Heidi, you should have the right side of your heel facing you so it should look like the picture in the tutorial 🙂 xx
Hi i tried that but then the yarn end starts in middle of dpn not at end of 5 stitches. HELP!!
That should still work out OK – all you're doing at this point is splitting the stitches across 3 needles so that you can work the foot. If the yarn is in the middle of the DPN, simply make sure that you have 5 stitches on the needle with the working yarn on it then knit the next 3 stitches plus 2 from the top of the foot on the next needle and then knit the last 6 stitches onto a new needle so you've got 3 needles with 5, 5 and 6 stitches on them. Does that help?
Thanks for your help
Hi, I don't know why I'm having trouble with the decreases on the heel. My numbers aren't coming out right. I have made lots of socks, but I usually do a short row heel. I have done your Easy Lace socks pattern, but it's been a while. Maybe if I review the heel I will see why. Are we supposed to have extra stitches when we pearl two together the first time? It doesn't look like it in the photos. I can't remember. These are so cute, thank you!
I just went back and watched your videos and figured it out. I finished my first tiny sock and it is adorable. Thank you so much! I will be making more of these for gifts. They are so sweet and dainty.
I'm glad you worked it out! xx
Lovely to meet you at Yarndale today! I've just finished my tiny sock and can't wait to get started on my next pair of socks – they'll feel enormous – in your lovely new yarn of course! x
Ha ha, there's quite a difference between the tiny sock and a "normal"-sized pair – but luckily, the bigger ones are far less fiddly! It was lovely to meet you at Yarndale as well! xx
Hi I love this and am making them for myself . When my granddaughter saw them she asked for some too, when I wondered what she was going to do with them, she answered that they’ll keep her dolls feet really warm. 😅
Oh that is so cute! I hope her dolls have lovely toasty toes! 🙂 xx
I made a pair on 2 mm dpns in red with white tops and turned them into Christmas earrings for my daughter – she loves them! Thank you!
Oh that sounds super-cute! 🙂 xx